2023 SUBARU BRZ battery
[x] Cancel search: batteryPage 181 of 432

Light Control Switch
175
Instruments and Controls3
– CONTINUED –
automatically be turned off after approxi-
mately 20 minutes.
If a door is opened or closed, the battery
saving function will temporarily be
canceled and the lights will automatically
be turned off after approximately 20
minutes.▼ Auto-on/off wiper-linked headlights
While the light control switch is in the
“AUTO” position, the headlights will auto-
matically turn on when the windshield
wipers operate several times. The head-
lights will automatica lly turn off approxi-
mately 1 minute after the wiper stops.
The ON/OFF setting of this function can
be changed by operating the combination
meter display (color TFT) or the center
information display. For details, refer to
"Settings Display" P157 or "Car
settings" P165. Also, the setting can be
changed by a SUBARU dealer. Consult
your SUBARU dealer for details.
▼ Welcome lighting function
The welcome lighting function turns on the
low beam headlight for smooth
approaching to or exiting from the vehicle
at night or in a dark place.
The function is activated while all of the
following conditions are met.
The light control swit ch is in the “AUTO”
position
It is dark enough to turn on the auto on/
off headlights
NOTEIf the engine is turn ed off after turning
off the light swit ch, the welcome
lighting function may not operate (for
Canada models).
▽ When approaching
While the welcome lighting function is acti-
vated, the low beam headlights will auto-
matically illuminate when unlocking the
doors by using the remote keyless entry
system.
The low beam headlights will remain illu-
minated for 30 seconds
*1 and then turn
off. However, if any of the following opera-
tions is done, the low beam headlights will
turn off.
The ignition switch is turned to the “ON”
position.
The doors are locked.
The light control switch is turned to a
position other than “AUTO”. ▽
When exiting
While the welcome lighting function is acti-
vated, the low beam headlights will remain
illuminated even when the push-button
ignition switch is turned to the “OFF”
status.
The low beam headlights will turn off
under any of the following conditions.
30 seconds have passed since the
door is opened and closed.
*1
The light control switch is turned to a
position other than “AUTO”.
The locking procedure is performed
twice. When performing the unlocking
procedure after performing the locking
procedure, perform the locking procedure
twice again.*1: The setting for the period of time in which
the low beam headlights remain on by the
welcome lighting function can be changed
by a SUBARU dealer. Contact your
SUBARU dealer for details. Also, you can
change the setting by operating the combi-
nation meter display (color TFT) or the
center information display. For details, refer
to "Settings Display" P157 or "Car
settings" P165.
BRZ_U.book 175 ページ 2022年3月29日 火曜日 午後3時59分
Page 192 of 432

Mirrors
186It is possible to set the defogger system
for the continuous operation mode by
operating the center information display.
For details, refer to "Car settings" P165.NOTEWhile the defogger system is in the
continuous operation mode, if the bat-
tery voltage drops below the permissi-
ble level, continuous operation of the
defogger system is canceled and the
system stops operating.
3-16. MirrorsAlways check that the inside and outside
mirrors are properly adjusted before you
start driving.■ Inside Mirror1) Normal position
2) Anti-glare positionPush the tab on the mirror for normal use.
To reduce glare from the headlights of the
vehicle behind you, pull the tab to the anti-
glare position.
■ Auto-Dimming Mirror/
Compass with HomeLink
®
(Dealer Option)
1) Display
2) HomeLink
® buttons
3) Switch
During nighttime driving, the auto-
dimming feature senses distracting glare
from vehicle headlights behind you and
automatically dims to eliminate the glare
and help preserve your vision.
▼ To Operate the Auto-Dimming
FeaturePress the “ ” switch to turn the auto-
dimming feature on/off. The auto-dimming
feature is enabled when the switch’s
green LED indicator is on. The auto-
CAUTION
To prevent the battery from being
discharged, do not operate the
defogger system continuously
for any longer than necessary. Do not use sharp instruments or
window cleaner containing abra-
sives to clean the inner surface of
the rear window. They may
damage the conductors printed
on the window.
305310
1
2
2 3
3048671
BRZ_U.book 186 ページ 2022年3月29日 火曜日 午後3時59分
Page 193 of 432
Mirrors
187
Instruments and Controls3
– CONTINUED –
dimming feature will default to on with
each ignition cycle.▼ To Operate the Compass Feature
1. To turn the compass feature on/off,
press and hold the “ ” switch for more
than 3 seconds or until the display turns
on/off. The compass feature will default to
on with each ignition cycle.
2. If the display reads “C”, slowly drive
the vehicle in circles until compass is cali-
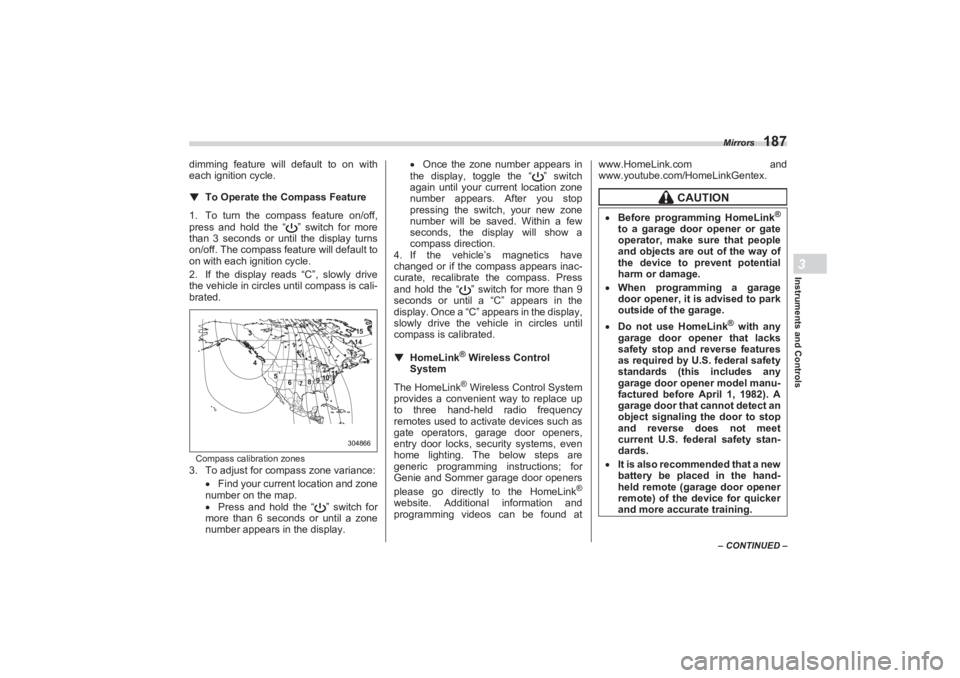
brated.Compass calibration zones3. To adjust for compass zone variance:
Find your current location and zone
number on the map.
Press and hold the “ ” switch for
more than 6 seconds or until a zone
number appears in the display.
Once the zone number appears in
the display, toggle the “ ” switch
again until your current location zone
number appears. After you stop
pressing the switch, your new zone
number will be saved. Within a few
seconds, the disp lay will show a
compass direction.
4. If the vehicle’s magnetics have
changed or if the compass appears inac-
curate, recalibrate the compass. Press
and hold the “ ” switch for more than 9
seconds or until a “C” appears in the
display. Once a “C” a ppears in the display,
slowly drive the vehicle in circles until
compass is calibrated.
▼ HomeLink
® Wireless Control
System
The HomeLink
® Wireless Control System
provides a convenient way to replace up
to three hand-held radio frequency
remotes used to acti vate devices such as
gate operators, garage door openers,
entry door locks, se curity systems, even
home lighting. The below steps are
generic programming instructions; for
Genie and Sommer garage door openers
please go directly to the HomeLink
®
website. Additional information and
programming videos can be found at www.HomeLink.com and
www.youtube.com/HomeLinkGentex.
304866 15
14
13
12
11
10
9
8
7
6
5
4
3
CAUTION
Before programming HomeLink
®
to a garage door opener or gate
operator, make sure that people
and objects are out of the way of
the device to prevent potential
harm or damage.
When programming a garage
door opener, it is advised to park
outside of the garage. Do not use HomeLink
® with any
garage door opener that lacks
safety stop and reverse features
as required by U.S. federal safety
standards (this includes any
garage door opener model manu-
factured before April 1, 1982). A
garage door that cannot detect an
object signaling the door to stop
and reverse does not meet
current U.S. federal safety stan-
dards.
It is also recommended that a new
battery be placed in the hand-
held remote (garage door opener
remote) of the device for quicker
and more accurate training.
BRZ_U.book 187 ページ 2022年3月29日 火曜日 午後3時59分
Page 218 of 432
Interior Light
2126-1. Interior Light■Map Lights▼ Map light switches
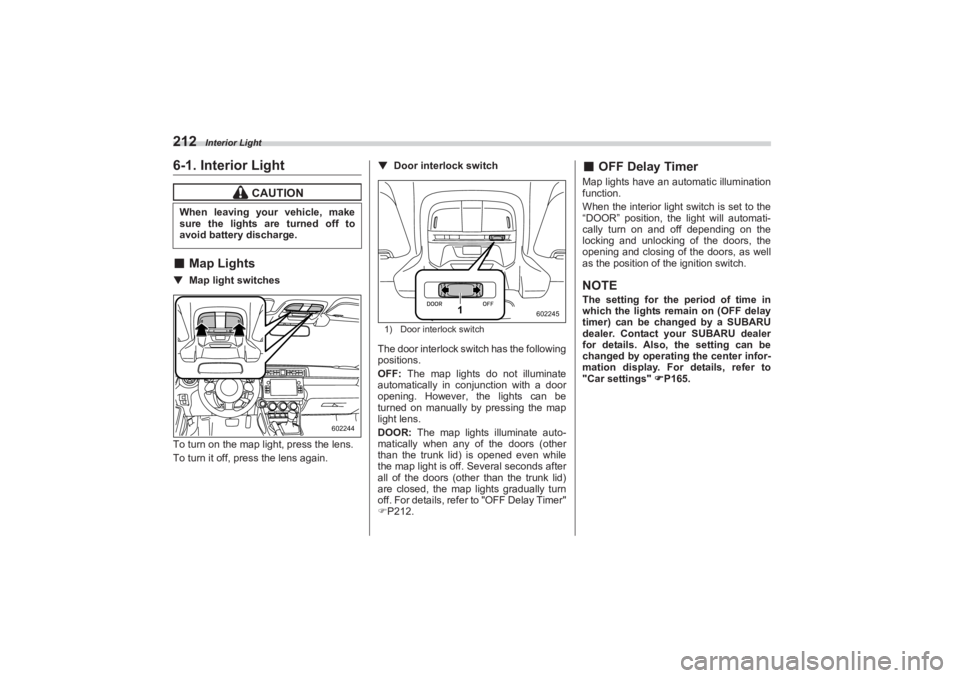
To turn on the map light, press the lens.
To turn it off, press the lens again. ▼
Door interlock switch
1) Door interlock switchThe door interlock switch has the following
positions.
OFF: The map lights do not illuminate
automatically in conjunction with a door
opening. However, the lights can be
turned on manually by pressing the map
light lens.
DOOR: The map lights illuminate auto-
matically when any of the doors (other
than the trunk lid) is opened even while
the map light is off. Several seconds after
all of the doors (other than the trunk lid)
are closed, the map lights gradually turn
off. For details, refer to "OFF Delay Timer"
P212.
■ OFF Delay TimerMap lights have an automatic illumination
function.
When the interior light switch is set to the
“DOOR” position, the light will automati-
cally turn on and off depending on the
locking and unlocking of the doors, the
opening and closing of the doors, as well
as the position of the ignition switch.NOTEThe setting for the period of time in
which the lights remain on (OFF delay
timer) can be changed by a SUBARU
dealer. Contact your SUBARU dealer
for details. Also, the setting can be
changed by operating the center infor-
mation display. For details, refer to
"Car settings" P165.
CAUTION
When leaving your vehicle, make
sure the lights are turned off to
avoid battery discharge.
602244
1
602245
BRZ_U.book 212 ページ 2022年3月29日 火曜日 午後3時59分
Page 219 of 432
Sun Visors
213
Interior Equipment6
– CONTINUED –
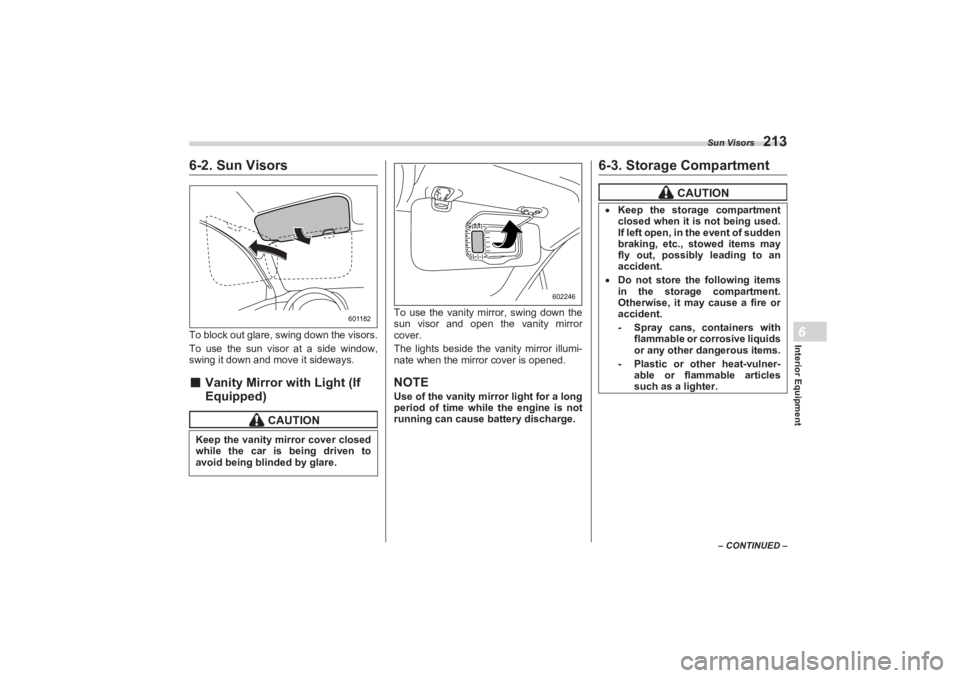
6-2. Sun VisorsTo block out glare, swing down the visors.
To use the sun visor at a side window,
swing it down and move it sideways.■ Vanity Mirror with Light (If
Equipped)
To use the vanity mirror, swing down the
sun visor and open the vanity mirror
cover.
The lights beside the vanity mirror illumi-
nate when the mirror cover is opened.NOTEUse of the vanity mirror light for a long
period of time while the engine is not
running can cause battery discharge.
6-3. Storage Compartment
CAUTION
Keep the vanity mirror cover closed
while the car is being driven to
avoid being blinded by glare.
601182
602246
CAUTION
Keep the storage compartment
closed when it is not being used.
If left open, in the event of sudden
braking, etc., stowed items may
fly out, possibly leading to an
accident. Do not store the following items
in the storage compartment.
Otherwise, it may cause a fire or
accident.
- Spray cans, containers with
flammable or corrosive liquids
or any other dangerous items.- Plastic or other heat-vulner- able or flammable articles
such as a lighter.
BRZ_U.book 213 ページ 2022年3月29日 火曜日 午後3時59分
Page 221 of 432
Bottle Holders
215
Interior Equipment6
– CONTINUED –
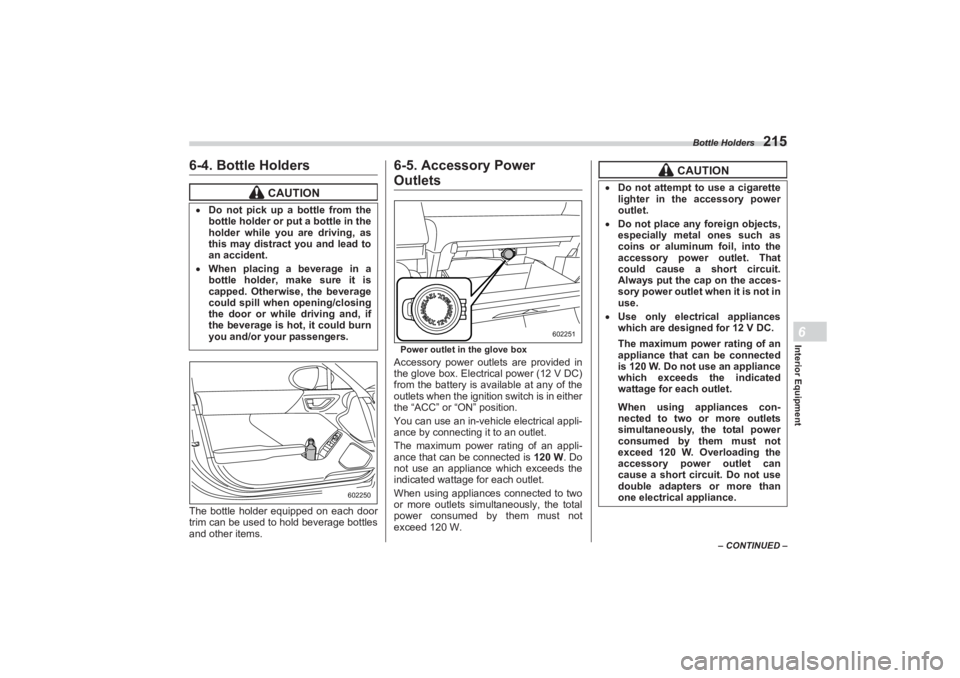
6-4. Bottle HoldersThe bottle holder equipped on each door
trim can be used to hold beverage bottles
and other items.
6-5. Accessory Power OutletsPower outlet in the glove boxAccessory power outlets are provided in
the glove box. Electrical power (12 V DC)
from the battery is available at any of the
outlets when the ignition switch is in either
the “ACC” or “ON” position.
You can use an in-vehicle electrical appli-
ance by connecting it to an outlet.
The maximum power rating of an appli-
ance that can be connected is 120 W. Do
not use an appliance which exceeds the
indicated wattage for each outlet.
When using appliances connected to two
or more outlets simultaneously, the total
power consumed by them must not
exceed 120 W.
CAUTION
Do not pick up a bottle from the
bottle holder or pu t a bottle in the
holder while you are driving, as
this may distract you and lead to
an accident. When placing a beverage in a
bottle holder, make sure it is
capped. Otherwise, the beverage
could spill when opening/closing
the door or while driving and, if
the beverage is hot, it could burn
you and/or your passengers.
602250
602251
CAUTION
Do not attempt to use a cigarette
lighter in the accessory power
outlet. Do not place any foreign objects,
especially metal ones such as
coins or aluminum foil, into the
accessory power outlet. That
could cause a short circuit.
Always put the cap on the acces-
sory power outlet when it is not in
use. Use only electrical appliances
which are designed for 12 V DC.
The maximum power rating of an
appliance that can be connected
is 120 W. Do not use an appliance
which exceeds the indicated
wattage for each outlet.When using appliances con-
nected to two or more outlets
simultaneously, the total power
consumed by them must not
exceed 120 W. Overloading the
accessory power outlet can
cause a short circuit. Do not use
double adapters or more than
one electrical appliance.
BRZ_U.book 215 ページ 2022年3月29日 火曜日 午後3時59分
Page 222 of 432
USB Power Supply
216
6-6. USB Power Supply
NOTEThe rated voltage of each USB
terminal is 5 V/2.1 A (total 4.2 A). For
details about the maximum rated
power, refer to "How to Use the USB
Power Supply" P217. Before
connecting a device, be sure to read
the instruction manual of the device
and check whether or not this specifi-
cation of the output is supported by the
device. If a device that requires power
exceeding the maximum rating is
connected, power supply or charging
may not be possible. Even if charging
could be completed, the time required
for charging may be longer than when
the genuine charger for that device is
used.
Depending on the device, charging
may be possible only when a special
If the plug on your electric appli-
ance is either too loose or too
tight for the accessory power
outlet, this can result in a poor
contact or cause the plug to get
stuck. Only use plugs that fit
properly. Use of an electric appliance in the
accessory power outlet for a long
period of time while the engine is
not running can cause battery
discharge. Before driving your vehicle, make
sure that the plug and the cord on
your electrical appliance will not
interfere with your shifting gears
and operating the accelerator and
brake pedals. If they do, do not
use the electrical appliance while
driving.
CAUTION
The specification of a USB
terminal that can be used is the A-
type. If a different specification of
terminal is connected, power
supply or charging may not be
possible, or the device may
malfunction. There is a risk that a connected
device may malfunction or data
may be damaged. The connection
of a device shall be performed at
your responsibility. To avoid an electric shock or a
malfunction, observe the
following precautions.
- Do not connect a USB hub.- Do not insert any metal or
other foreign object into the
USB terminal.- Do not spill water or other
liquid on the USB terminal.
Be careful not to pull the
connected cable. Doing so could
break the USB terminal and the
connected device.
If a device is connected for a long
time when the engine is not
running, doing so may cause the
risk of a discharged battery. Even
when the engine is running, we
recommend that you do not
connect a device for an unneces-
sarily long time. Do not connect a malfunctioning
device. Doing so may cause the
risk of smoke and fire.
BRZ_U.book 216 ページ 2022年3月29日 火曜日 午後3時59分
Page 233 of 432
State Emission Testing (U.S. Only)
227
Starting and Operating7
– CONTINUED –
▼If the fuel filler lid cannot be opened
If the fuel filler lid cannot be opened due to
a malfunction or a dead battery, it can be
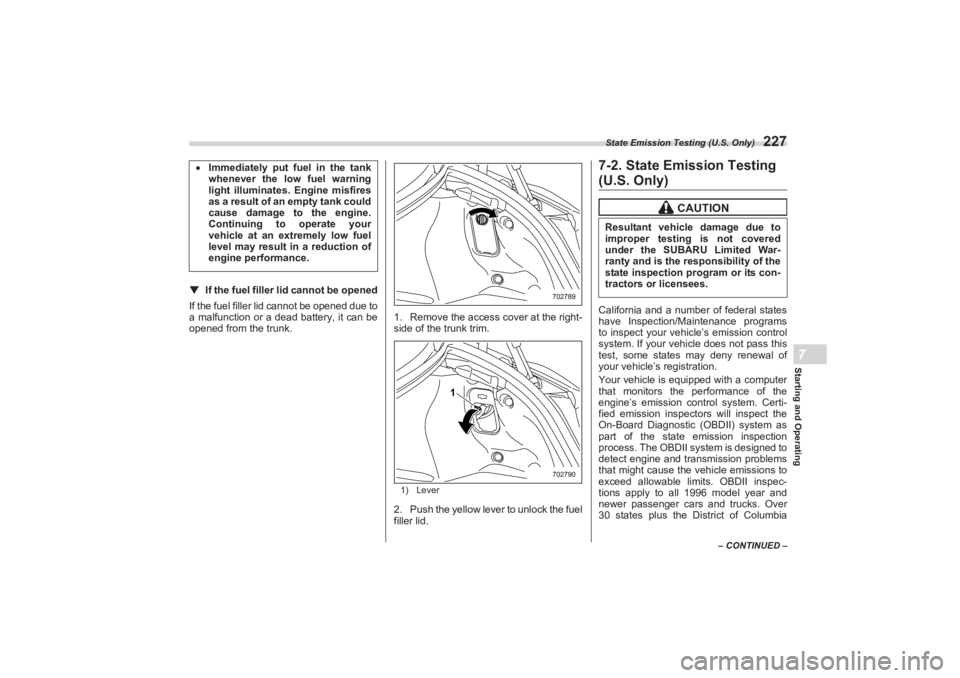
opened from the trunk. 1. Remove the access cover at the right-
side of the trunk trim.
1) Lever2. Push the yellow lever to unlock the fuel
filler lid.
7-2. State Emission Testing (U.S. Only)California and a number of federal states
have Inspection/Maintenance programs
to inspect your vehicle’s emission control
system. If your vehicle does not pass this
test, some states may deny renewal of
your vehicle’s registration.
Your vehicle is equipped with a computer
that monitors the performance of the
engine’s emission control system. Certi-
fied emission inspectors will inspect the
On-Board Diagnostic (OBDII) system as
part of the state emission inspection
process. The OBDII system is designed to
detect engine and transmission problems
that might cause the vehicle emissions to
exceed allowable limits. OBDII inspec-
tions apply to all 1996 model year and
newer passenger cars and trucks. Over
30 states plus the District of Columbia
Immediately put fuel in the tank
whenever the low fuel warning
light illuminates. Engine misfires
as a result of an empty tank could
cause damage to the engine.
Continuing to operate your
vehicle at an extremely low fuel
level may result in a reduction of
engine performance.
702789
1
702790
CAUTION
Resultant vehicle damage due to
improper testing is not covered
under the SUBARU Limited War-
ranty and is the responsibility of the
state inspection program or its con-
tractors or licensees.
BRZ_U.book 227 ページ 2022年3月29日 火曜日 午後3時59分