2023 PEUGEOT LANDTREK oil type
[x] Cancel search: oil typePage 11 of 164
9
Dashboard instruments
1Warning and indicator
lamps
Displayed as symbols, the warning and indicator
lamps inform the driver of the occurrence of a
malfunction (warning lamps) or of the operating
status of a system (operation or deactivation
indicator lamps). Certain lamps light up in two
ways (fixed or flashing) and/or in several colours.
Associated warnings
The illumination of a lamp may be accompanied
by an audible signal and/or a message displayed
in a screen.
Relating the type of alert to the operating status
of the vehicle allows you to determine whether
the situation is normal or whether a fault has
occurred: refer to the description of each lamp
for further information.
When the ignition is switched on
Certain red or orange warning lamps come on
for a few seconds when the ignition is switched
on. These warning lamps should go off as soon
as the engine is started.
For more information on a system or a function,
refer to the corresponding section.
Persistent warning lamp
If a red or orange warning lamp comes on, there
may be fault which needs further investigation.
If a lamp remains lit
The references (1), (2) and (3) in the warning
and indicator lamp description indicate whether
you should contact a qualified professional in
addition to the immediate recommended actions.
(1): You must stop the vehicle.
Stop as soon as it is safe to do so and switch off
the ignition.
(2): Contact a PEUGEOT dealer or a qualified
workshop.
(3): Go to a PEUGEOT dealer or a qualified
workshop.
List of warning and
indicator lamps
Red warning/indicator lamps
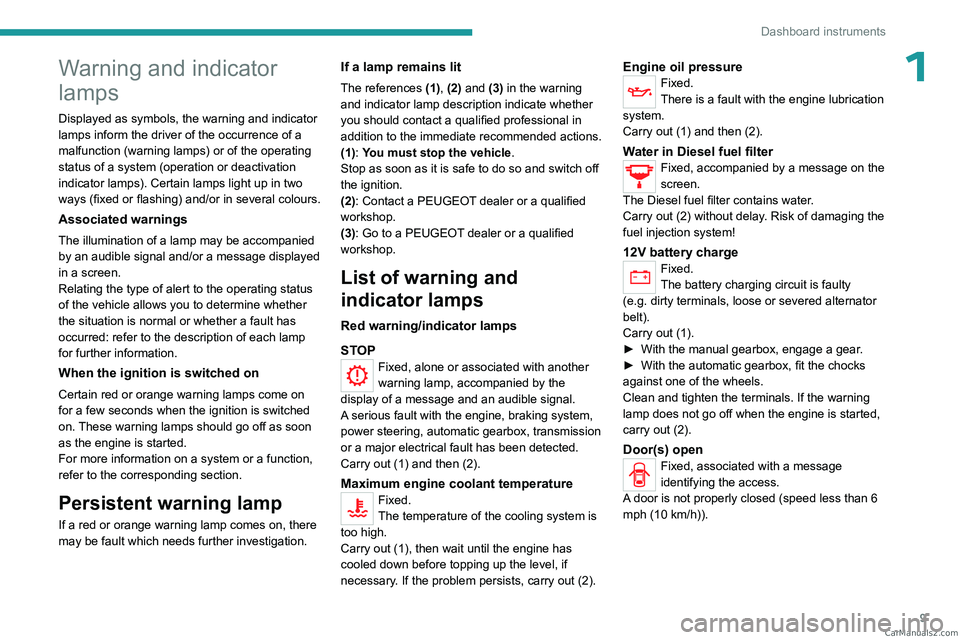
STOP
Fixed, alone or associated with another
warning lamp, accompanied by the
display of a message and an audible signal.
A serious fault with the engine, braking system,
power steering, automatic gearbox, transmission
or a major electrical fault has been detected.
Carry out (1) and then (2).
Maximum engine coolant temperatureFixed.
The temperature of the cooling system is
too high.
Carry out (1), then wait until the engine has
cooled down before topping up the level, if
necessary. If the problem persists, carry out (2).
Engine oil pressureFixed.
There is a fault with the engine lubrication
system.
Carry out (1) and then (2).
Water in Diesel fuel filterFixed, accompanied by a message on the
screen.
The Diesel fuel filter contains water.
Carry out (2) without delay. Risk of damaging the
fuel injection system!
12V battery chargeFixed.
The battery charging circuit is faulty
(e.g.
dirty terminals, loose or severed alternator
belt).
Carry out (1).
►
With the manual gearbox, engage a gear
.
►
With the automatic gearbox, fit the chocks
against one of the wheels.
Clean and tighten the terminals. If the warning
lamp does not go off when the engine is started,
carry out (2).
Door(s) openFixed, associated with a message
identifying the access.
A door is not properly closed (speed less than 6
mph (10 km/h)). CarM an uals 2 .c o m
Page 53 of 164
51
Lighting and visibility
4Fast wiping.
If the ignition has been switched off with
the windscreen wipers active, you must
operate the control stalk again to reactivate
wiping when the ignition is switched on again
(unless the ignition was off for less than
a
minute).
Decreasing or increasing the wiping
frequency
► Rotate the ring to increase/decrease
the wiping frequency (with " INT
" or
"AUTO" wiping position).
Windscreen wash
► Pull the wiper control stalk towards you and
hold.
A
final wiping cycle is performed when
screenwashing ends.
To avoid damaging the wiper blades, do not operate the screenwash if the
screenwash reservoir is empty.
Only operate the screenwash if there is no
risk of the fluid freezing on the windscreen
and hindering visibility. During the winter
period, use "very cold climate" rated products.
Never top up with water.
Changing a wiper blade
To check that the wiper blades have not become rough, gently slide your finger
along the blade.
To maintain the effectiveness of the wipers, it
is advisable to:
–
handle them with care.
–
clean them regularly using soapy water
.
–
clean the windscreen regularly with a
special detergent.
–
avoid using them to hold cardboard on the
windscreen.
–
replace them at the first signs of wear
.
For safety reasons and to avoid
damaging the windscreen or the
windscreen wiper blades, always clean them
if foreign bodies
are present (for example:
sand, dust, oil, bird droppings).
Never use petrol, thinner or another similar
solvent to clean the wiper blades.
Never shake, rotate or bend the wiper arm
and blade.
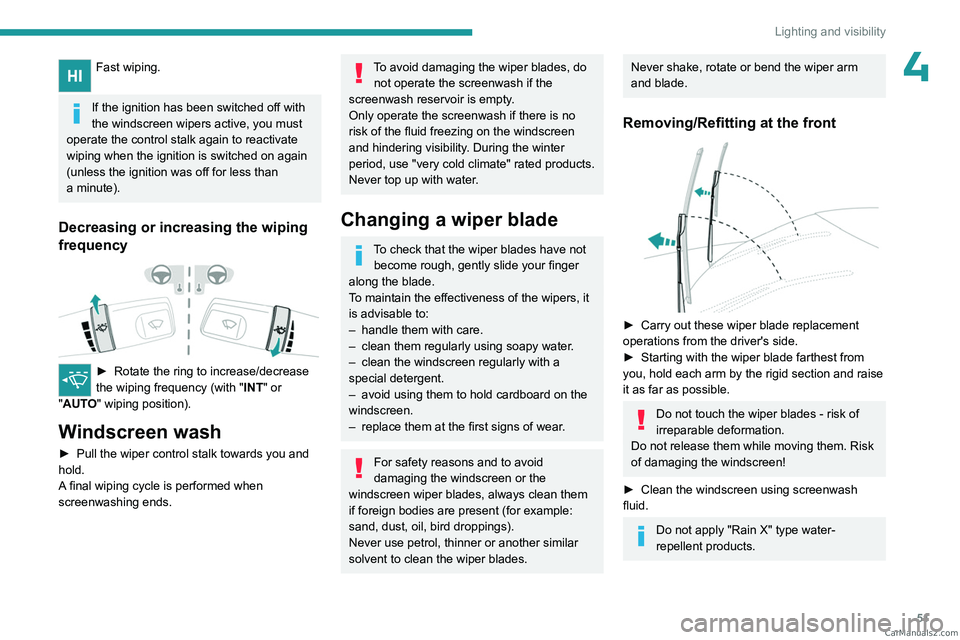
Removing/Refitting at the front
► Carry out these wiper blade replacement
operations from the driver's side.
►
Starting with the wiper blade farthest from
you, hold each arm by the rigid section and raise
it as far as possible.
Do not touch the wiper blades - risk of
irreparable deformation.
Do not release them while moving them. Risk
of damaging the windscreen!
►
Clean the windscreen using screenwash
fluid.
Do not apply "Rain X" type water-
repellent products. CarM an uals 2 .c o m
Page 69 of 164

67
Driving
6Check and clean the vehicle after each off-road
trip.
Important!
Never leave the engine running in a
closed space without sufficient
ventilation. Internal combustion engines emit
toxic exhaust gases such as carbon
monoxide. Danger of poisoning and death!
In very severe wintry conditions
(temperature below -23°C), let the engine
run for 4 minutes before moving off, to ensure
the correct operation and durability of the
mechanical components of your vehicle
(engine and gearbox).
Never drive with the parking brake
applied . Risk of overheating and
damaging the braking system!
Do not park the vehicle or leave the
engine running on a flammable
surface (e.g. dry grass, dead leaves).The
vehicle exhaust system is very hot, even
several minutes after the engine stops. Risk
of fire!
Never drive on surfaces covered with
vegetation (tall grass, accumulated
dead leaves, crops, debris) such as a field,
a country lane overgrown with bushes or a
grassy verge.
This vegetation could come into contact with
the vehicle's exhaust system
or other systems
which are very hot. Risk of fire!
Make sure you do not leave any item in
the passenger compartment which could
act like a magnifying glass under the effect of
the sun's rays and cause a fire - risk of fire or
damage to interior surfaces!
Never leave the vehicle unattended,
with the engine running . If you have to
leave your vehicle with the engine running,
apply the parking brake and put the gearbox
into neutral or position N or P (depending on
the type of gearbox).
Never leave children inside the vehicle
unsupervised.
On flooded roads
We strongly advise against driving on flooded
roads, as this could cause serious damage to the
engine or gearbox, as well as to your vehicle's
electrical systems.
If the vehicle absolutely must drive through a
flooded section of road:
►
Check that the depth of the water does not
exceed 60
cm, taking account of waves that
might be generated by other users.
►
Drive as slowly as possible without stalling. In
all cases, do not exceed 6 mph (10
km/h).
►
Do not stop and do not switch off the engine.
On leaving the flooded road, as soon as safety
conditions allow
, make several light brake
applications to dry the brake discs and pads.
If in doubt about the state of your vehicle,
contact a PEUGEOT dealer or a qualified
workshop.
After driving on a flooded road, you must have the level and condition of the oil in
the front and rear transmission axles checked
by a PEUGEOT dealer or a qualified
workshop.
Towing
Driving with a trailer places greater
demands on the towing vehicle and
particular care must be taken. CarM an uals 2 .c o m
Page 96 of 164
94
Practical information
Recommended fuel
Petrol engines are compatible with minimum 91
RON unleaded fuel.
Diesel engines are compatible with type B0
fuel not containing Fatty Acid Methyl Ester
(biofuel) and B7, B10 and B15* type fuels
conforming to EN590 and EN16734 standards
containing respectively up to 7%, 10% and 15%
of Fatty Acid Methyl Ester.
Depending on the country of sale, the Diesel
fuel must be suited to the ambient temperature
in order to optimise engine performance and
minimise polluting emissions.
Temperature greater than Diesel quality
+5°C (+41°F) N°0
-5°C (+23°F) N°-10
-10°C (+14°F) N°-20
-25°C (-13°F) N°-35
The use of any other type of (bio) fuel
(e.g. vegetable or animal oils, pure or
diluted, domestic fuel) is strictly prohibited
(risk of damage to the engine and fuel
system).
* BlueHDi Diesel o nly.
Diesel at low temperature
At temperatures below 0 °C (+32 °F), the
formation of paraffins in summer-type Diesel
fuels could prevent the engine from operating
correctly
. In these temperature conditions, use
winter-type Diesel fuel and keep the fuel tank
more than 50
% full.
At temperatures below -15
°C (+5 °F) to avoid
problems starting, it is best to park the vehicle
under shelter (heated garage).
Travelling abroad
Certain fuels could damage your vehicle’s
engine.
In certain countries, the use of a particular
fuel may be required (specific octane rating,
specific trade name, etc.) to ensure correct
operation of the engine.
For all additional information, consult a dealer.
Refuelling
Fuel tank capacity: approximately 80 litres.
Reserve level: approximately 11 litres.
Low fuel level
When the low fuel level is reached, this
warning lamp lights up on the instrument
panel. When it first comes on, about 11 litres of
fuel remain.
Until sufficient fuel is added, this warning lamp
appears every time the ignition is switched on,
accompanied by the message and the audible
signal. When driving, this message and audible
signal are repeated with increasing frequency as
the fuel level drops towards 0.
You must refuel as soon as possible to avoid
running out of fuel.
For more information on Running out of fuel
(Diesel), refer to the corresponding section.
A small arrow by the warning lamp indicates which side of the vehicle the
fuel filler flap is located on.
Refuelling
When refuelling, at least 10 litres must be added
in order to be registered by the fuel gauge.
Opening the filler cap may create a noise caused
by an inrush of air. This vacuum is normal,
caused by the sealing of the fuel system.
To refuel in complete safety:
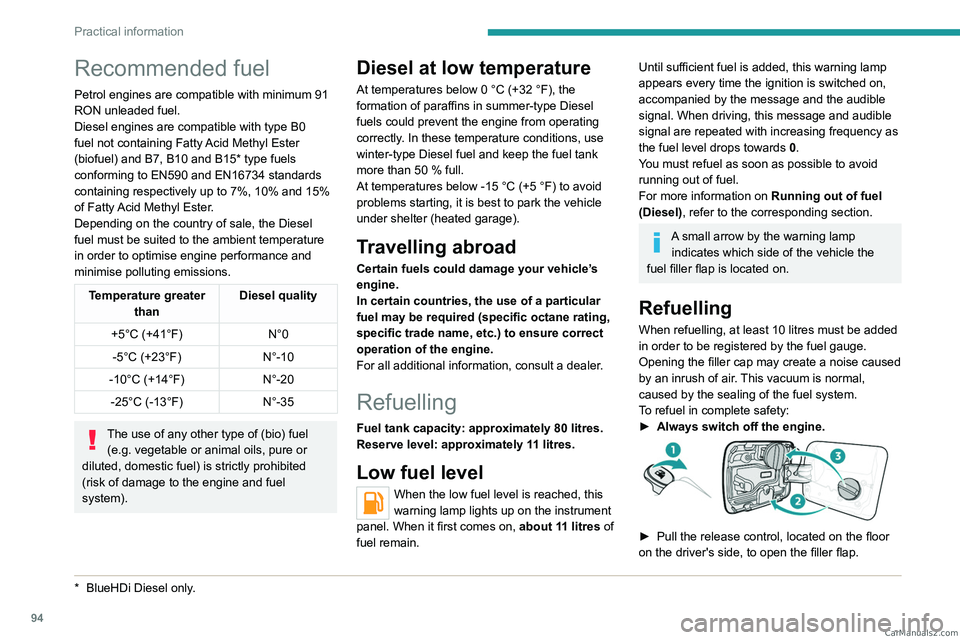
►
Always switch off the engine.
► Pull the release control, located on the floor
on the driver's side, to open the filler flap. CarM an uals 2 .c o m
Page 101 of 164
99
Practical information
7
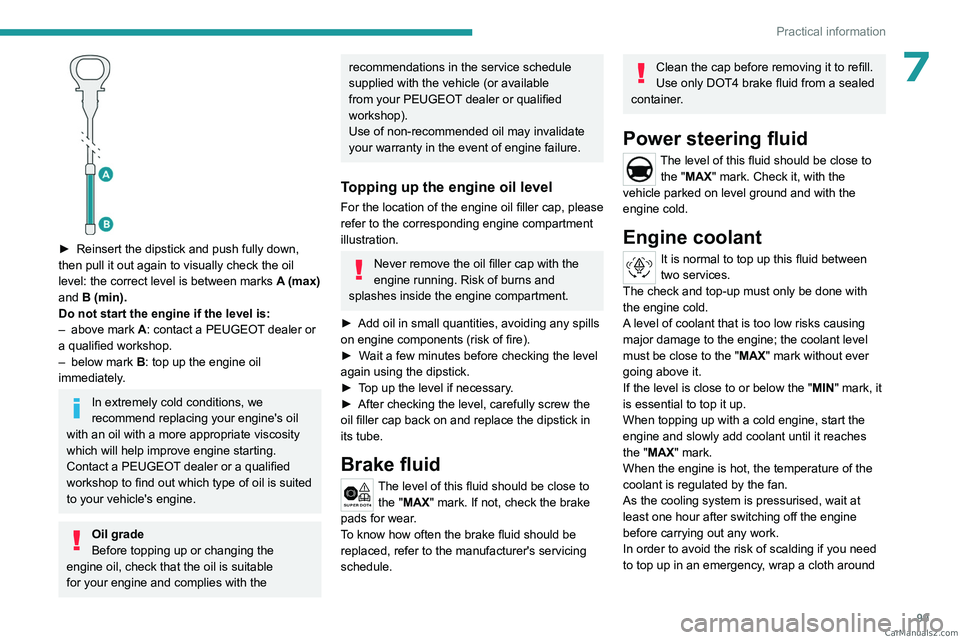
► Reinsert the dipstick and push fully down,
then pull it out again to visually check the oil
level: the correct level is between marks
A
(max)
and
B (min).
Do not start the engine if the level is:
–
above mark
A: contact a PEUGEOT dealer or
a qualified workshop.
–
below mark
B
: top up the engine oil
immediately.
In extremely cold conditions, we
recommend replacing your engine's oil
with an oil with a more appropriate viscosity
which will help improve engine starting.
Contact a PEUGEOT dealer or a qualified
workshop to find out which type of oil is suited
to your vehicle's engine.
Oil grade
Before topping up or changing the
engine oil, check that the oil is suitable
for your engine and complies with the
recommendations in the service schedule
supplied with the vehicle (or available
from your PEUGEOT dealer or qualified
workshop).
Use of non-recommended oil may invalidate
your warranty in the event of engine failure.
Topping up the engine oil level
For the location of the engine oil filler cap, please
refer to the corresponding engine compartment
illustration.
Never remove the oil filler cap with the
engine running. Risk of burns and
splashes inside the engine compartment.
►
Add oil in small quantities, avoiding any spills
on engine components (risk of fire).
►
W
ait a few minutes before checking the level
again using the dipstick.
►
T
op up the level if necessary.
►
After checking the level, carefully screw the
oil filler cap back on
and replace the dipstick in
its tube.
Brake fluid
The level of this fluid should be close to
the "MAX" mark. If not, check the brake
pads for wear.
To know how often the brake fluid should be
replaced, refer to the manufacturer's servicing
schedule.
Clean the cap before removing it to refill.
Use only DOT4 brake fluid from a sealed
container.
Power steering fluid
The level of this fluid should be close to the "MAX" mark. Check it, with the
vehicle parked on level ground and with the
engine cold.
Engine coolant
It is normal to top up this fluid between
two services.
The check and top-up must only be done with
the engine cold.
A level of coolant that is too low risks causing
major damage to the engine; the coolant level
must be close to the "MAX" mark without ever
going above it.
If the level is close to or below the " MIN" mark, it
is essential to top it up.
When topping up with a cold engine, start the
engine and slowly add coolant until it reaches
the "MAX" mark.
When the engine is hot, the temperature of the
coolant is regulated by the fan.
As the cooling system is pressurised, wait at
least one hour after switching off the engine
before carrying out any work.
In order to avoid the risk of scalding if you need
to top up in an emergency, wrap a cloth around CarM an uals 2 .c o m
Page 107 of 164
105
Practical information
7► Turn the blue cap of the AdBlue® tank anti-
clockwise and remove it.
►
With a container of
AdBlue
®: after checking
the expiry date, read the instructions on the
label carefully before pouring the contents of the
container into the vehicle's AdBlue
® tank.
►
With an
AdBlue® pump: insert the nozzle and
fill the tank until the nozzle automatically cuts
out.
In order not to overfill the AdBlue® tank:
–
Add between 10 and 13 litres using
AdBlue® containers.
–
Stop after the nozzle’ s first automatic cut-
out, if you are refilling at a service station.
The system only registers AdBlue
®
intermediate top-ups of 5
litres or more.
If the AdBlue® tank is completely empty
– which is confirmed by the message
“Top up AdBlue: Starting impossible ” – it is
essential to add at least 10
litres.
Top-up detection may not be instantaneous
after addition. It may take a few minutes of
driving before the top-up detection is effective.
Maintenance
For more information on the Engine
compartment, in particular the location of the
components under the bonnet, refer to the
corresponding section.
For the maintenance of your vehicle, you can
also contact a PEUGEOT dealer or a qualified
workshop.
Vehicle maintenance must always be
carried out with the engine switched off
and the ignition off.
Take care when working under the bonnet, as
certain areas of the engine may be extremely
hot (risk of burns) and the cooling fan could
start at any time (even with the ignition off).
Wait at least one hour after switching off the
engine before working on the vehicle - risk of
burns!
Take care with objects or clothing that could
be caught in the blades of the cooling fan -
risk of strangulation!
Always wear gloves, protective glasses and
suitable clothing to avoid direct contact with
liquids against the skin or eyes.
In the event of contact with the skin, wash
the affected area thoroughly with soap and
running water.
In the event of contact with the eyes,
immediately rinse the eyes with large
amounts of water or with an eye wash
solution for at least 15 minutes. Seek medical
attention if you feel a persistent burning
sensation or irritation.
Never go underneath the vehicle raised
using a jack; always use an axle
stand-type support.
When working on the vehicle's electrical
system, take care not to cause a short circuit -
risk of burns and fire.
Flammable products and all sources of heat
(sparks, for example) must be kept away from
the battery, the fuel tank and all components
of the fuel system.
Never run the engine in a closed space
without sufficient ventilation; always use a
ventilation system such as an exhaust gas
extractor, for example.
Never leave liquids (oil, coolant) unattended.
Keep these liquids out of the reach of children
and animals.
The liquids and components replaced must have the same characteristics and
comply with the manufacturer's
recommendations.
General checks
Check the following components to ensure
proper operation and longevity of the vehicle.
For more information on the components
to be
checked, refer to the Checking levels, Checks
and Advice on care
sections. CarM an uals 2 .c o m
Page 112 of 164
11 0
Practical information
BlueHDi Diesel engine
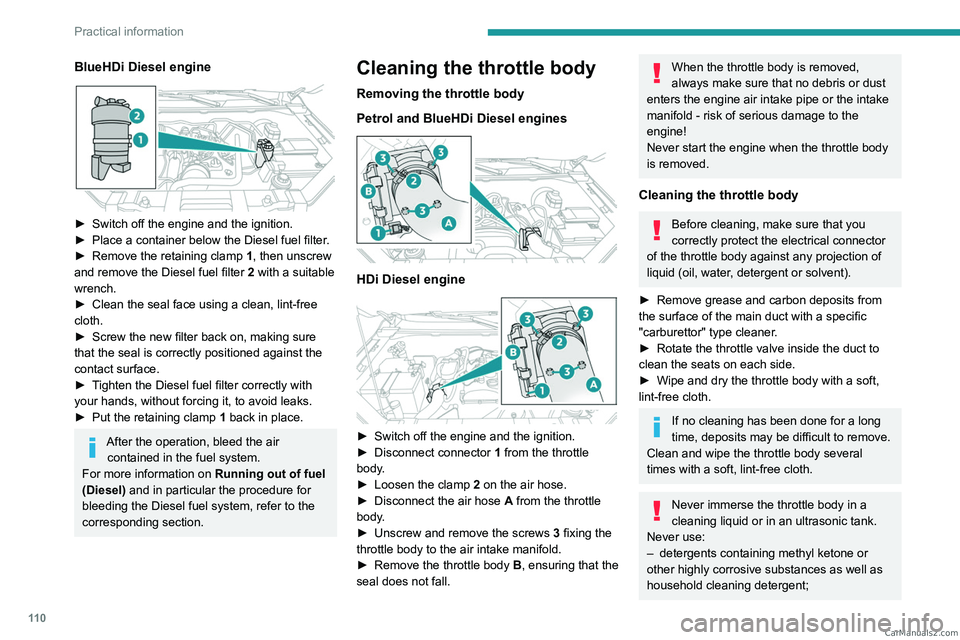
► Switch off the engine and the ignition.
► Place a container below the Diesel fuel filter .
►
Remove the retaining clamp 1
, then unscrew
and remove the Diesel fuel filter 2 with a suitable
wrench.
►
Clean the seal face using a clean, lint-free
cloth.
►
Screw the new filter back on, making sure
that the seal is correctly positioned against the
contact surface.
►
T
ighten the Diesel fuel filter correctly with
your hands, without forcing it, to avoid leaks.
►
Put the retaining clamp 1
back in place.
After the operation, bleed the air contained in the fuel system.
For more information on Running out of fuel
(Diesel) and in particular the procedure for
bleeding the Diesel fuel system, refer to the
corresponding section.
Cleaning the throttle body
Removing the throttle body
Petrol and BlueHDi Diesel engines
HDi Diesel engine
► Switch off the engine and the ignition.
► Disconnect connector 1
from the throttle
body.
►
Loosen the clamp 2
on the air hose.
►
Disconnect the air hose A
from the throttle
body.
►
Unscrew and remove the screws 3
fixing the
throttle body to the air intake manifold.
►
Remove the throttle body B
, ensuring that the
seal does not fall.
When the throttle body is removed,
always make sure that no debris or dust
enters the engine air intake pipe or the intake
manifold - risk of serious damage to the
engine!
Never start the engine when the throttle body
is removed.
Cleaning the throttle body
Before cleaning, make sure that you
correctly protect the electrical connector
of the throttle body against any projection of
liquid (oil, water, detergent or solvent).
►
Remove grease and carbon deposits from
the surface of the main duct with a specific
"carburettor" type cleaner
.
►
Rotate the throttle valve inside the duct to
clean the seats on each side.
►
Wipe and dry the throttle body with a soft,
lint-free cloth.
If no cleaning has been done for a long
time, deposits may be difficult to remove.
Clean and wipe the throttle body several
times with a soft, lint-free cloth.
Never immerse the throttle body in a
cleaning liquid or in an ultrasonic tank.
Never use:
–
detergents containing methyl ketone or
other highly corrosive substances as well as
household cleaning detergent; CarM an uals 2 .c o m
Page 113 of 164

111
Practical information
7– cleaning products directly on the throttle
bearings as well as on the body's connector;
–
hard, sharp or abrasive tools to remove
difficult deposits. Use a soft cloth with a
suitable detergent.
Refitting the throttle body
Before refitting the throttle body, check
the condition of the seal. If it is damaged,
replace it with a new one.
►
Install the seal on the intake manifold and fit
the throttle body
B, making sure that the seal
does not fall.
For reassembly, carry out the operations in the
reverse order to those for removal. Tighten the
screws to the correct tightening torque.
Free-wheeling
In certain situations, you must allow the vehicle
to free-wheel (while being towed, on a rolling
road, in an automatic car wash, or being
transported by rail or sea freight, etc.).
The procedure differs depending on the type of
gearbox and transmission.
Do not leave the vehicle unattended
while coasting.
/
To release them
► With the vehicle stationary and the engine
running, depress the brake pedal and release
the parking brake.
►
With a manual gearbox, move the gear lever
into neutral.
►
With an automatic gearbox, select position N
.
►
For 4-wheel drive vehicles (4x4), put the
transmission selector in 2H
mode.
►
Switch the ignition off.
Advice on care and maintenance
General recommendations
Observe the following recommendations to avoid
damaging the vehicle.
Exterior
Never use a high-pressure jet wash in
the engine compartment - risk of
damaging the electrical components!
Do not wash the vehicle in bright sunshine or
extremely cold conditions.
When washing the vehicle in an
automatic roller-brush car wash, be sure
to lock the doors and, depending on version,
move the electronic key away.
When using a pressure washer, keep the jet
nozzle at a minimum distance of 30 cm from
the vehicle (particularly when cleaning areas
containing chipped paint, sensors or seals).
Promptly clean up any stains containing
chemicals liable to damage the vehicle's
paintwork (including tree resin, bird
droppings, insect secretions, pollen and tar).
Depending on the environment, clean the
vehicle frequently to remove salty deposits
(in coastal areas), soot (in industrial areas)
and mud/salts (in wet or cold areas). These
substances can be highly corrosive.
Contact a PEUGEOT dealer or a qualified
workshop for advice on removing stubborn
stains requiring special products (such as tar
or insect removers).
Apply silicone oil to the door and window
seals every year and regularly lubricate the
door hinges and the locks.
To avoid damaging the seals when the vehicle
is parked for a long time, apply silicone-based
lubricant to the door seals and wax on the
bodywork in contact with the seals.
Preferably, have paint touch-ups performed
by a PEUGEOT dealer or a qualified
workshop.
Interior
When washing the vehicle, never use a
water hose or high-pressure jet to clean
the interior.
Liquids carried in cups or other open
containers can spill, presenting a risk of CarM an uals 2 .c o m