2023 PEUGEOT EXPERT lock
[x] Cancel search: lockPage 78 of 348
76
Ease of use and comfort
Liquids carried in an open vessel (a cup
or mug) could be spilt, presenting a risk.
Be careful.
Never use the table in this position while the
vehicle is being driven.
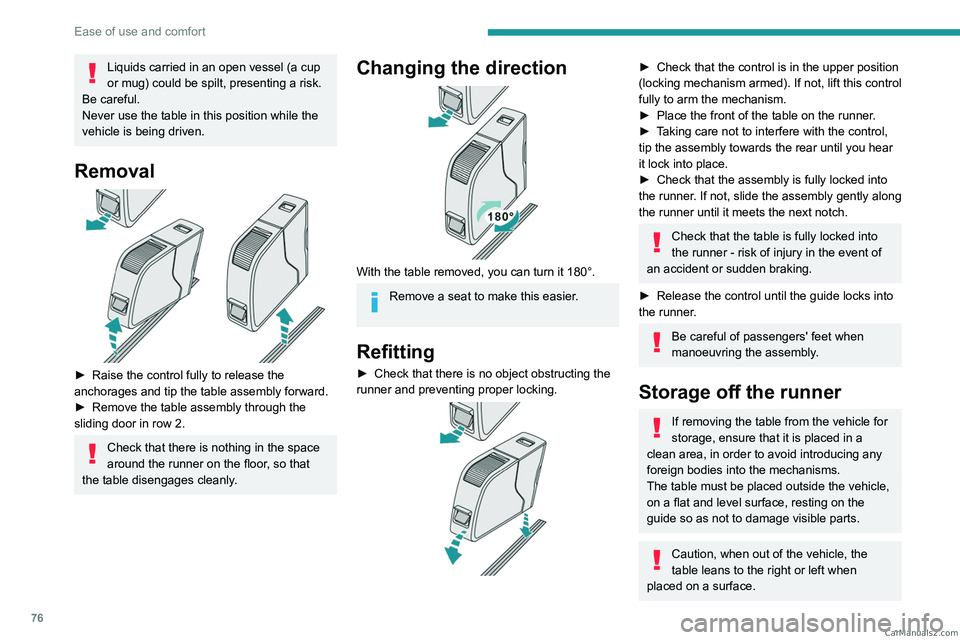
Removal
► Raise the control fully to release the
anchorages and tip the table assembly forward.
►
Remove the table assembly through the
sliding door in row 2.
Check that there is nothing in the space
around the runner on the floor, so that
the table disengages cleanly.
Changing the direction
With the table removed, you can turn it 180°.
Remove a seat to make this easier.
Refitting
► Check that there is no object obstructing the
runner and preventing proper locking.
► Check that the control is in the upper position
(locking mechanism armed). If not, lift this control
fully to arm the mechanism.
►
Place the front of the table on the runner
.
►
T
aking care not to interfere with the control,
tip the assembly towards the rear until you hear
it lock into place.
►
Check that the assembly is fully locked into
the runner
. If not, slide the assembly gently along
the runner until it meets the next notch.
Check that the table is fully locked into
the runner - risk of injury in the event of
an accident or sudden braking.
►
Release the control until the guide locks into
the runner
.
Be careful of passengers' feet when
manoeuvring the assembly.
Storage off the runner
If removing the table from the vehicle for
storage, ensure that it is placed in a
clean area, in order to avoid introducing any
foreign bodies into the mechanisms.
The table must be placed outside the vehicle,
on a flat and level surface, resting on the
guide so as not to damage visible parts.
Caution, when out of the vehicle, the
table leans to the right or left when
placed on a surface. CarM an uals 2 .c o m
Page 85 of 348

83
Ease of use and comfort
3Additional heating/ventilation system
Only available for Diesel vehicles.
Heating
This is an additional and separate system which
heats the passenger compartment and improves
defrosting performance.
This indicator lamp is lit while the system is programmed or set in operation
remotely via the remote control.
It flashes during the whole duration of the
heating and goes off at the end of the heating
cycle or when stopped using the remote control.
Ventilation
This system allows ventilation of the passenger
compartment with exterior air to improve the
temperature experienced on entering the vehicle
in summer.
Programming
With a 3D Connected Navigation, use the remote
control to start/stop the additional heating.
With a Bluetooth
® audio system or a Audio
System with Touch Screen, use the remote
control to start/stop the additional heating and/or
adjust the pre-heating times.
With Bluetooth® audio system
► Press the MENU button to access the
main menu.
►
Select "
Pre-heat. / Pre-ventil.".
►
Select "
Activation" and, if necessary, for
programming, “Parameters".
►
Select "
Heating" to heat the engine and
passenger compartment or " Ventilation" to
ventilate the passenger compartment.
► Select:
• the first clock to set/save the time at which
the pre-heating temperature will be reached,
•
the second clock to set/save a second time
at which the pre-heating temperature will be
reached,
Using these two clocks and depending
on the season you can, for example,
select one or the other start time.
A message on the screen confirms your
choice.
With Audio System with Touch
Screen
Press Connect-App to display the main
page.
Then press "Programmable heating/ ventilation ".
►
Select the "
Status" tab to activate/deactivate
the system.
►
Select the "
Other settings" tab to choose
the "Heating" mode, to heat the engine and
passenger compartment, or " Ventilation" to
ventilate the passenger compartment.
►
Then set/save the time at which the
preheating temperature will be reached for each
selection.
Press this button to save.
With 3D Connected Navigation
In the Applications > Car Apps menu:
► Select Temperature conditioning .
►
Press the
Status tab to activate/deactivate
the system. CarM an uals 2 .c o m
Page 88 of 348
86
Ease of use and comfort
► Select the time of entry into the vehicle and
the desired days. Press OK.
►
Press
ON to activate this programme.
The temperature pre-conditioning sequence
begins approximately 45 minutes before the
programmed time when the vehicle is connected
(20 minutes when it is not connected) and is
maintained for 10 minutes after.
You can set multiple programmes. Each one is saved in the system.
To optimise the driving range, we recommend
starting a programme while the vehicle is
connected.
The fan noise that occurs during temperature pre-conditioning is perfectly
normal.
Operating conditions
– The function is only activated when the
ignition is switched off and the
vehicle
locked.
–
When the vehicle is not connected, the
function is only activated if the battery charge
level is greater than 30%.
–
When the vehicle is not connected and a
recurring programme is active (e.g. from Monday
to Friday), if two temperature pre-conditioning
sequences are run without the vehicle being
used, the programme will be deactivated.
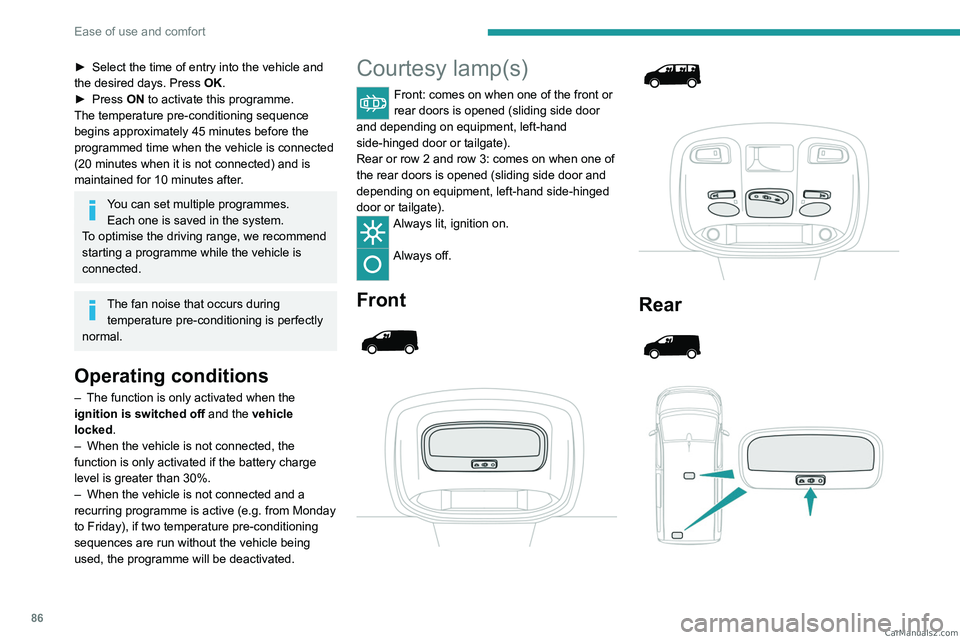
Courtesy lamp(s)
Front: comes on when one of the front or
rear doors is opened (sliding side door
and depending on equipment, left-hand
side-hinged door or tailgate).
Rear or row 2 and row 3: comes on when one of
the rear doors is opened (sliding side door and
depending on equipment, left-hand side-hinged
door or tailgate).
Always lit, ignition on.
Always off.
Front
Rear
CarM an uals 2 .c o m
Page 89 of 348
87
Ease of use and comfort
3
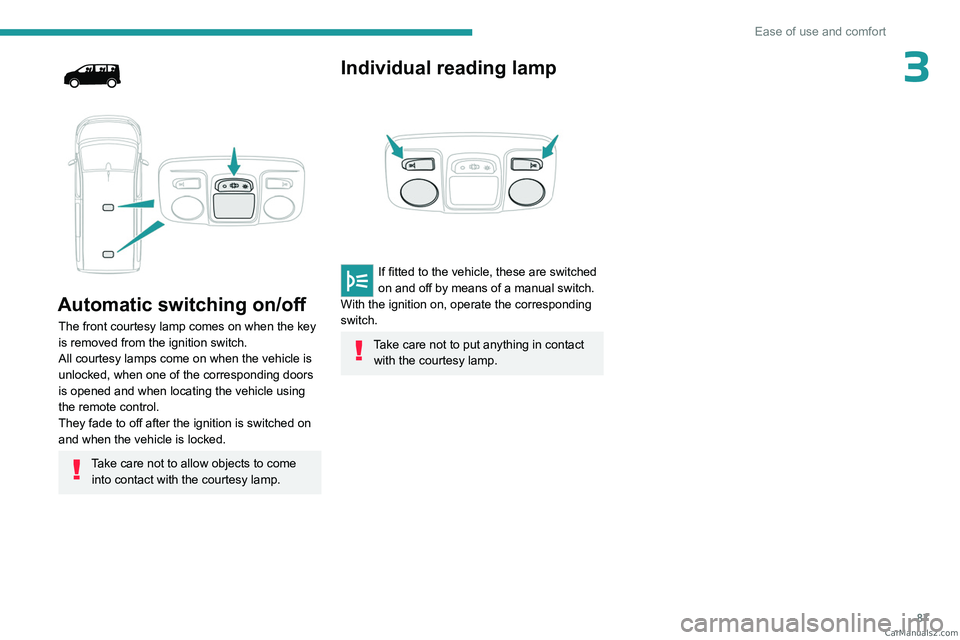
Automatic switching on/off
The front courtesy lamp comes on when the key
is removed from the ignition switch.
All courtesy lamps come on when the vehicle is
unlocked, when one of the corresponding doors
is opened and when locating the vehicle using
the remote control.
They fade to off after the ignition is switched on
and when the vehicle is locked.
Take care not to allow objects to come into contact with the courtesy lamp.
Individual reading lamp
If fitted to the vehicle, these are switched
on and off by means of a manual switch.
With the ignition on, operate the corresponding
switch.
Take care not to put anything in contact with the courtesy lamp. CarM an uals 2 .c o m
Page 92 of 348

90
Lighting and visibility
on if rain is detected, at the same time as the
automatic rain sensitive wipers.
As soon as the brightness returns to a sufficient
level or after the windscreen wipers are switched
off, the lamps are switched off automatically.
Malfunction
In the event of a malfunction of the rain/sunshine
sensor, the vehicle’s lamps come on and this
warning lamp is displayed on the instrument
panel, accompanied by an audible signal and/or
the display of a message.
Have it checked by a PEUGEOT dealer or a
qualified workshop.
Do not cover the rain/sunshine sensor
located at the top centre of the
windscreen behind the interior rear view
mirror; the associated functions would no
longer be controlled.
In fog or snow, the rain/sunshine sensor
may detect sufficient light. For this
reason, the lighting will not come on
automatically.
The inner surface of the windscreen may become misted up and affect the proper
operation of the rain/sunshine sensor.
In humid and cold weather, demist the
windscreen regularly.
Guide-me-home and
welcome lighting
Guide-me-home lighting
Manual
► With the ignition off, pull the lighting control
stalk toward you ("headlamp flash") to activate/
deactivate the function.
Manual guide-me-home lighting goes off
automatically after a period of time.
Automatic
With the "Automatic illumination of lamps"
function activated (lighting control stalk in the
"AUTO" position) and when the light is poor, the
dipped beam headlamps come on automatically
when the ignition is switched off.
With the ring in the "AUTO" position and when
the light is poor, the dipped beam headlamps
come on automatically when the ignition is
switched off.
With audio system or touch screen
The activation, deactivation and duration of guide-me-home lighting
are set in the vehicle configuration menu.
Exterior welcome lighting
The remote operation of the lighting makes your
approach to the vehicle easier in poor light. It
is activated when the lighting control is in the
"AUTO" position and the level of light detected
by the sunshine sensor is low.
Switching on
Press this button on the remote control or
on one of the front door handles with the
"Keyless Entry and Start" system.
The dipped beam headlamps and sidelamps
come on; your vehicle is also unlocked.
Switching off
The exterior welcome lighting switches off
automatically after a set time, when the ignition
is switched on or on locking the vehicle.
Programming
With audio system or touch screen
The activation, deactivation and duration of the welcome lighting
can be set via the vehicle configuration menu. CarM an uals 2 .c o m
Page 102 of 348
100
Safety
Horn
► Press the central part of the steering wheel.
Pedestrian horn (Electric)
This system alerts pedestrians that the vehicle is approaching.
The pedestrian horn operates once the vehicle
is moving and at speeds of up to 19 mph
(30
km/h), in forward or reverse gear.
This function cannot be deactivated.
Electronic stability control
(ESC)
The electronic stability control programme includes the following systems:
–
Anti-lock braking system (ABS) and Electronic
brake force distribution (EBFD).
–
Emergency braking assistance (EBA).
– Anti-slip regulation (ASR).
– Dynamic stability control (DSC).
–
Intelligent traction control.
–
T
railer stability assist (TSA).
Anti-lock braking system (ABS)/Electronic brake force
distribution (EBFD)
These systems enhance the vehicle’s stability
and handling during braking, and enable greater
control while cornering, particularly on poor or
slippery road surfaces.
ABS prevents wheel locking in the event of
emergency braking.
Electronic brake force distribution (EBFD)
manages overall braking pressure on each
individual wheel.
►
When braking in an emergency
, depress
the pedal very firmly and maintain this
pressure.
Normal operation of the ABS may make
itself felt by slight vibrations of the brake
pedal.
The fixed illumination of this warning lamp signals that there is a fault with the ABS.
The vehicle retains conventional braking. Drive
carefully at a moderate speed.
Have it checked by a PEUGEOT dealer or a
qualified workshop.
This warning lamp, when lit together with the STOP and ABS warning lamps,
accompanied by a message and an audible
signal, indicates an EBFD malfunction.
You must stop the vehicle.
Stop as soon as it is safe to do so and switch off
the ignition.
Contact a PEUGEOT dealer or a qualified
workshop.
When changing wheels (tyres and rims),
ensure that these are approved for your
vehicle.
After an impact
Have it checked by a PEUGEOT dealer
or a qualified workshop.
Emergency braking
assistance (EBA)
In an emergency, this system enables you
to reach the optimum braking pressure more
quickly and therefore reduce the stopping
distance.
It is triggered in relation to the speed at which
the brake pedal is pressed. This is felt by a
reduction in the resistance of the pedal and an
increase in braking efficiency. CarM an uals 2 .c o m
Page 105 of 348

103
Safety
5An indicator lamp associated with each mode
comes on, accompanied by the display of a
message to confirm your choice.
Operating modes
Standard (ESC)
This mode is calibrated for a low level of wheel spin, based on the different levels
of grip normally encountered on the road.
Whenever the ignition is switched off, the
system automatically resets to this mode.
Snow
This mode adapts its strategy to the conditions of grip encountered for each of
the two front wheels on moving off.
(mode active up to 50 mph (80
km/h))
All terrain (mud, damp grass, etc.)
This mode, when moving off, allows considerable spin on the wheel with the
least grip to optimise clearing of the mud and to
regain grip. At the same time, the wheel with the
most grip is controlled in such a way as to
transmit as much torque as possible.
When moving, the system optimises wheel spin
to respond to the driver's requirements as fully
as possible.
(mode active up to 31 mph (50
km/h))
Sand
This mode allows little spin on the two driving wheels at the same time to allow
the vehicle to move forward and limit the risks of
getting stuck in the sand.
(mode active up to 75 mph (120
km/h))
Do not use the other modes on sand as
the vehicle may become stuck.
Deactivation
You can deactivate the ASR and DSC systems by turning the knob to the "OFF"
position.
The ASR and DSC systems will no longer act on the operation of the engine
or of the brakes in the event of a change of
trajectory.
These systems are reactivated automatically
from 31 mph (50
km/h) and whenever the
ignition is switched on.
Recommendations
The vehicle is designed principally
to drive on tarmac roads, but it may
occassionally drive on other less passable
terrain.
However, it does not permit off-road driving:
–
Driving on terrain that can damage the
underbody or tear off elements (e.g.
fuel
pipe, fuel cooler) by obstacles or stones in
particular.
–
Driving on terrain with steep gradients and
poor grip.
–
Crossing a waterway
.
Seat belts
Inertia reel
The seat belts are equipped with an inertia
reel which allows the strap length to adjust
automatically to the shape of the user. The seat
belt returns to its storage automatically when it
is not used.
The inertia reels are fitted with a device which
automatically locks the strap in the event of a
collision, emergency braking or if the vehicle rolls CarM an uals 2 .c o m
Page 112 of 348
11 0
Safety
Make sure that the seat belt is correctly
positioned and tightened.
For child seats with a support leg, ensure that
the support leg is in firm and steady contact
with the floor.
An incorrectly installed child seat in a vehicle compromises the child's safety in
the event of an accident.
Ensure that there is no seat belt or seat belt
buckle under the child seat, as this could
destabilise it.
Remember to fasten the seat belts or the
child seat harness keeping the slack relative
to the child's body to a minimum, even for
short journeys.
When installing a child seat using the seat
belt, ensure that the seat belt is tightened
correctly on the child seat and that it secures
the child seat firmly on the vehicle seat. If
the passenger seat is adjustable, move it
forwards if necessary.
Remove the head restraint before
installing a child seat with a backrest on a
passenger seat.
Ensure that the head restraint is stored or
attached securely to prevent it from being
thrown around the vehicle in the event of
sharp braking. Refit the head restraint once
the child seat has been removed.
Installing a booster seat
The chest part of the seat belt must be
positioned on the child's shoulder without
touching the neck.
Ensure that the lap part of the seat belt
passes correctly over the child's thighs.
Use a booster seat with a backrest, equipped
with a belt guide at shoulder level.
Additional protections
To prevent accidental opening of the
doors and rear windows, use the "Child lock".
Take care not to open the rear windows by
more than one third.
To protect young children from the sun's rays,
fit side blinds on the rear windows.
As a safety measure, do not leave:
–
A
child alone and unsupervised inside a
vehicle.
–
A
child or an animal in a vehicle which is
exposed to the sun, with the windows closed.
–
The keys within reach of children inside the
vehicle.
Child seat at the rear
Row 2
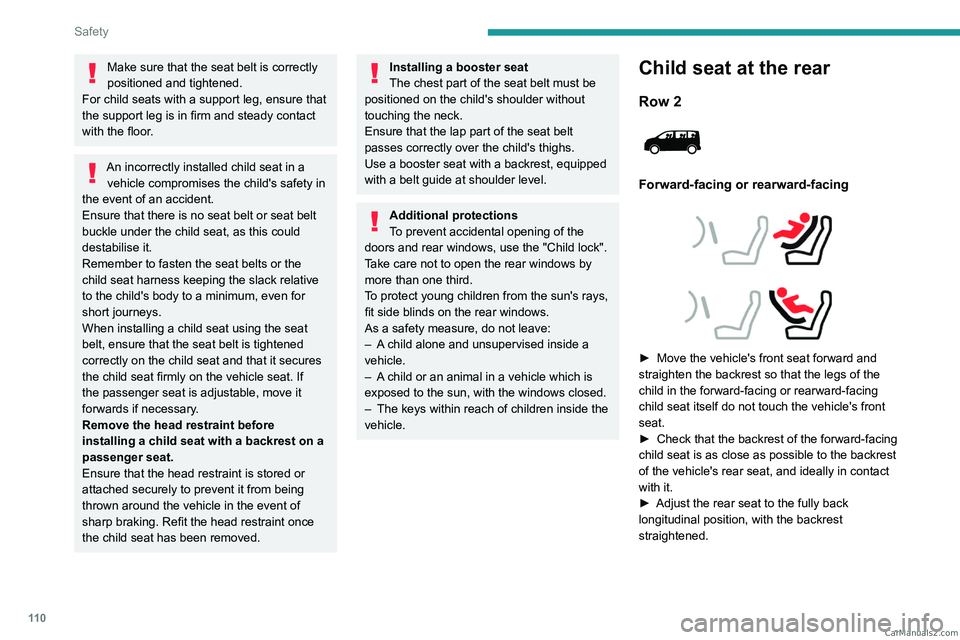
Forward-facing or rearward-facing
► Move the vehicle's front seat forward and
straighten the backrest so that the legs of the
child in the forward-facing or rearward-facing
child seat itself do not touch the vehicle's front
seat.
►
Check that the backrest of the forward-facing
child seat is as close as possible to the backrest
of the vehicle's rear seat, and ideally in contact
with it.
►
Adjust the rear seat to the fully back
longitudinal position, with the backrest
straightened. CarM an uals 2 .c o m