2023 PEUGEOT 508 ECU
[x] Cancel search: ECUPage 16 of 244

14
Dashboard instruments
SCR emissions control system (BlueHDi)Fixed when the ignition is switched
on, accompanied by an audible
signal and a message.
A malfunction of the SCR emissions control
system has been detected.
This alert disappears once the exhaust
emissions return to normal levels.
Flashing AdBlue® warning lamp on
switching on the ignition, with the
Engine self-diagnostics warning lamp on fixed,
accompanied by an audible signal and a
message indicating the driving range.
Depending on the message displayed, it is
possible to drive for up to 685 miles (1,100
km)
before the engine immobiliser is triggered.
Carry out (3) without delay, to avoid starting
being prevented.
Flashing AdBlue® warning lamp on
switching on the ignition, with the
Engine self-diagnostics warning lamp on fixed,
accompanied by an audible signal and a
message indicating that starting is prevented.
The engine immobiliser prevents the engine from
restarting (the permitted driving limit has been
exceeded after confirmation of a malfunction of
the emissions control system).
To start the engine, carry out (2).
Automatic functions deactivated (electric
parking brake)
Fixed.
The "automatic application" (on switching
off the engine) and "automatic release" (on
acceleration) functions are deactivated.
If automatic application/release is no longer
possible:
►
Start the engine.
►
Use the control to apply the electric parking
brake.
►
T
ake your foot fully off the brake pedal.
►
Hold the control pressed in the release
direction for between 10 and 15
seconds.
►
Release the control.
►
Depress and hold the brake pedal.
►
Pull the control in the application direction for
2
seconds.
►
Release the control and the brake pedal.
Malfunction (with electric parking brake)Fixed, accompanied by the
message "Parking brake fault".
The vehicle cannot be immobilised with the
engine running.
If manual application and release commands are
not working, the electric parking brake control is
faulty.
The automatic functions must be used at all
times and are automatically reactivated in the
event of a fault with the control.
Carry out (2).
Fixed, accompanied by the
message "Parking brake
fault".
The electric parking brake is faulty: manual and
automatic functions may not be working.
When stationary, to immobilise the vehicle:
►
Pull the electric parking brake control and
hold it for approximately 7 to 15
seconds, until
the indicator lamp lights up on the instrument
panel.
If this procedure does not work, secure the
vehicle:
►
Park on a level surface.
►
Select mode
P on the automatic gearbox,
then place the supplied chock against one of the
wheels.
Then carry out (2).
BrakingFixed.
A minor fault with the braking system has
been detected.
Drive carefully.
Carry out (3).
Collision Risk Alert/Active Safety BrakeFlashing.
The system activates and brakes the
vehicle momentarily to reduce the speed of
collision with the vehicle in front.
For more information, refer to the Driving
section.
Page 32 of 244
30
Access
Central locking
Manual
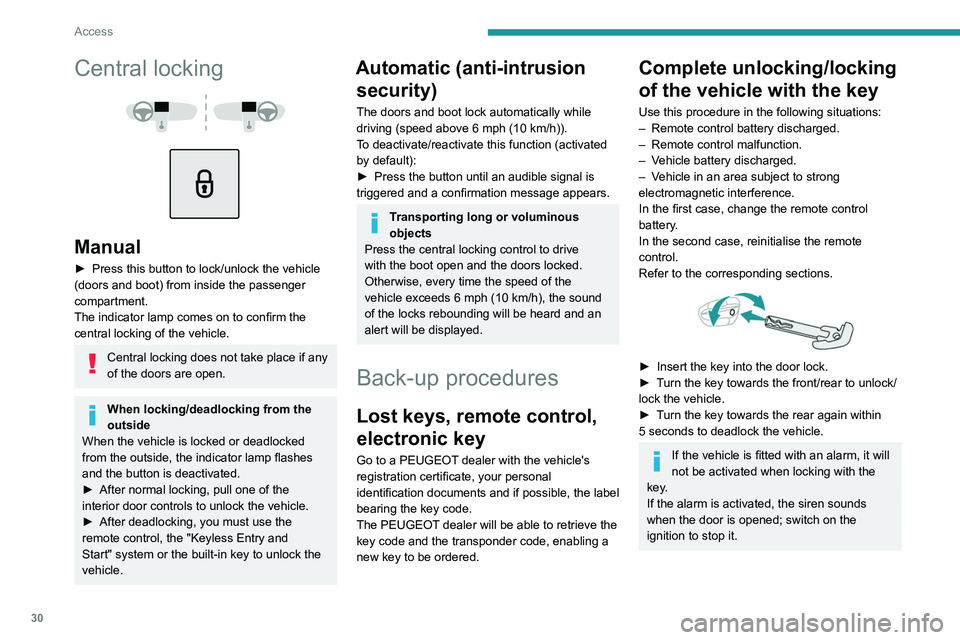
► Press this button to lock/unlock the vehicle
(doors and boot) from inside the passenger
compartment.
The indicator lamp comes on to confirm the
central locking of the vehicle.
Central locking does not take place if any
of the doors are open.
When locking/deadlocking from the
outside
When the vehicle is locked or deadlocked
from the outside, the indicator lamp flashes
and the button is deactivated.
►
After normal locking, pull one of the
interior door controls to unlock the vehicle.
►
After deadlocking, you must use the
remote control, the "Keyless Entry and
Start" system or the built-in key to unlock the
vehicle.
Automatic (anti-intrusion security)
The doors and boot lock automatically while
driving (speed above 6 mph (10
km/h)).
To deactivate/reactivate this function (activated
by default):
►
Press the button until an audible signal is
triggered and a confirmation message appears.
Transporting long or voluminous
objects
Press the central locking control to drive
with the boot open and the doors locked.
Otherwise, every time the speed of the
vehicle exceeds 6 mph (10 km/h), the sound
of the locks rebounding will be heard and an
alert will be displayed.
Back-up procedures
Lost keys, remote control,
electronic key
Go to a PEUGEOT dealer with the vehicle's
registration certificate, your personal
identification documents and if possible, the label
bearing the key code.
The PEUGEOT dealer will be able to retrieve the
key code and the transponder code, enabling a
new key to be ordered.
Complete unlocking/locking
of the vehicle with the key
Use this procedure in the following situations:
– Remote control battery discharged.
–
Remote control malfunction.
–
V
ehicle battery discharged.
–
V
ehicle in an area subject to strong
electromagnetic interference.
In the first case, change the remote control
battery.
In the second case, reinitialise
the remote
control.
Refer to the corresponding sections.
► Insert the key into the door lock.
► T urn the key towards the front/rear to unlock/
lock the vehicle.
►
T
urn the key towards the rear again within
5
seconds to deadlock the vehicle.
If the vehicle is fitted with an alarm, it will
not be activated when locking with the
key.
If the alarm is activated, the siren sounds
when the door is opened; switch on the
ignition to stop it.
Page 36 of 244
34
Access
Reactivating the interior volumetric
and anti-tilt monitoring
► Deactivate the exterior perimeter monitoring
by unlocking the vehicle using the remote control
or the Keyless Entry and Start system.
The indicator lamp in the button goes off.
►
Reactivate all monitoring by locking the
vehicle using the remote control or the Keyless
Entry and Start system.
The red indicator lamp in the button once again
flashes every second.
Triggering of the alarm
This is indicated by sounding of the siren
and flashing of the direction indicators for 30
seconds.
Depending on the country of sale, certain
monitoring functions remain active until the alarm
has been triggered eleven times consecutively.
When the vehicle is unlocked using the remote
control or the Keyless Entry and Start system,
rapid flashing of the red indicator lamp in the
button informs you that the alarm was triggered
during your absence. When the ignition is
switched on, this flashing stops.
Failure of the remote control
To deactivate the monitoring functions:
► Unlock the vehicle using the key in the front
left-hand door lock.
►
Open the door; the alarm is triggered. ►
Switch on the ignition; this stops the alarm.
The indicator lamp in the button goes off.
Locking the vehicle without
activating the alarm
► Lock the vehicle using the key (built-in the
remote control) in the front left-hand door lock.
Automatic activation
(Depending on version)
The system is activated automatically 2 minutes
after the last door or the boot is closed.
►
T
o avoid triggering the alarm on entering the
vehicle, first press the unlocking button on the
remote control or unlock the vehicle using the
"Keyless Entry and Start" system.
Malfunction
When the ignition is switched on, the fixed
lighting of the red indicator lamp in the button
indicates a system malfunction.
Have it checked by a PEUGEOT dealer or a
qualified workshop.
Doors
Your vehicle has doors with frameless windows. A window micro-descent system is activated
when the door is opened and closed, as soon as
an action is performed on the interior or exterior
door handle.
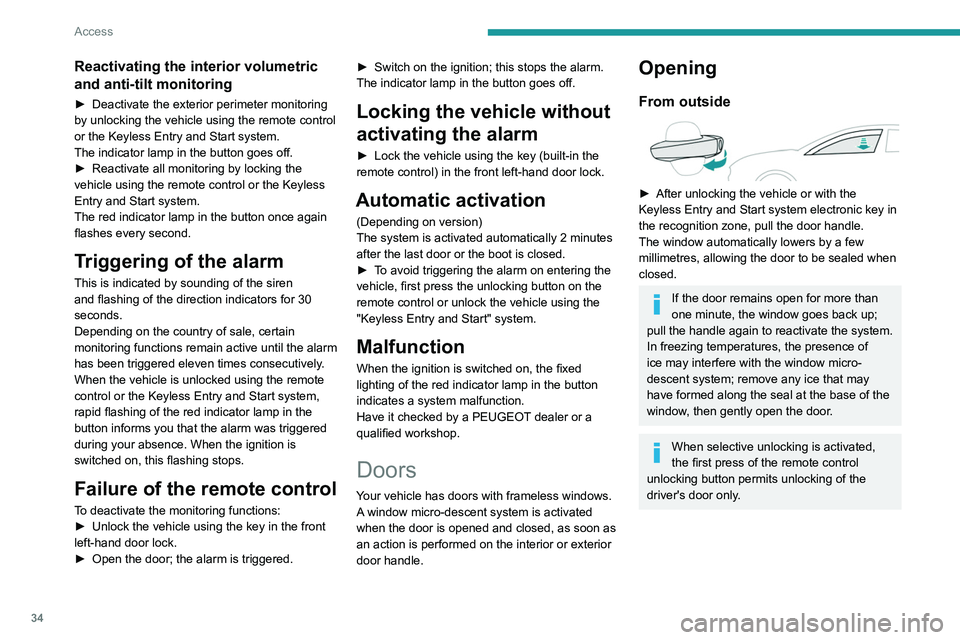
Opening
From outside
► After unlocking the vehicle or with the
Keyless Entry and Start system electronic key in
the recognition zone, pull the door handle.
The window automatically lowers by a few
millimetres, allowing the door to be sealed when
closed.
If the door remains open for more than
one minute, the window goes back up;
pull the handle again to reactivate the system.
In freezing temperatures, the presence of
ice may interfere with the window micro-
descent system; remove any ice that may
have formed along the seal at the base of the
window, then gently open the door.
When selective unlocking is activated,
the first press of the remote control
unlocking button permits unlocking of the
driver's door only.
Page 39 of 244
37
Access
2Bicycle carrier/Towing device
The motorised tailgate is not designed to support
a bicycle carrier.
When installing a bicycle carrier on the towing
device with connection of the cable to the trailer
socket, the motorised operation of the tailgate
will be automatically deactivated.
If using a towing device or bicycle carrier
not recommended by PEUGEOT, it is
essential to deactivate the motorised
operation of the tailgate.
Motorised operation
The motorised operation of the tailgate is configured in the Settings
> Vehicle
touch screen application.
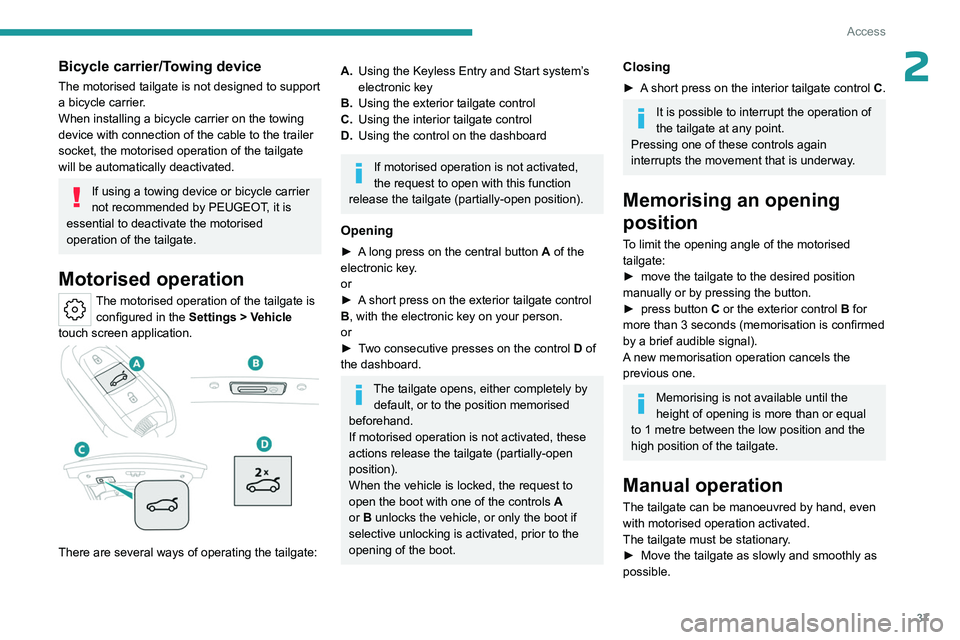
There are several ways of operating the tailgate:
A. Using the Keyless Entry and Start system’s
electronic key
B. Using the exterior tailgate control
C. Using the interior tailgate control
D. Using the control on the dashboard
If motorised operation is not activated,
the request to open with this function
release the tailgate (partially-open position).
Opening
► A long press on the central button A of the
electronic key.
or
►
A
short press on the exterior tailgate control
B, with the electronic key on your person.
or
►
T
wo consecutive presses on the control D of
the dashboard.
The tailgate opens, either completely by default, or to the position memorised
beforehand.
If motorised operation is not activated, these
actions release the tailgate (partially-open
position).
When the vehicle is locked, the request to
open the boot with one of the controls A
or B unlocks the vehicle, or only the boot if
selective unlocking is activated, prior to the
opening of the boot.
Closing
► A short press on the interior tailgate control C.
It is possible to interrupt the operation of
the tailgate at any point.
Pressing one of these controls again
interrupts the movement that is underway.
Memorising an opening
position
To limit the opening angle of the motorised
tailgate:
►
move the tailgate to the desired position
manually or by pressing the button.
►
press button
C or the exterior control B for
more than 3 seconds (memorisation is confirmed
by a brief audible signal).
A new memorisation operation cancels the
previous one.
Memorising is not available until the
height of opening is more than or equal
to 1 metre between the low position and the
high position of the tailgate.
Manual operation
The tailgate can be manoeuvred by hand, even
with motorised operation activated.
The tailgate must be stationary.
►
Move the tailgate as slowly and smoothly as
possible.
Page 46 of 244
44
Ease of use and comfort
Front seats
Before moving the seat backwards,
ensure that there is no person or object
that might prevent the full travel of the seat.
There is a risk of trapping or pinching
passengers if present in the rear seats or of
jamming the seat if large objects are placed
on the floor behind the seat.
Front head restraints
Adjusting the height
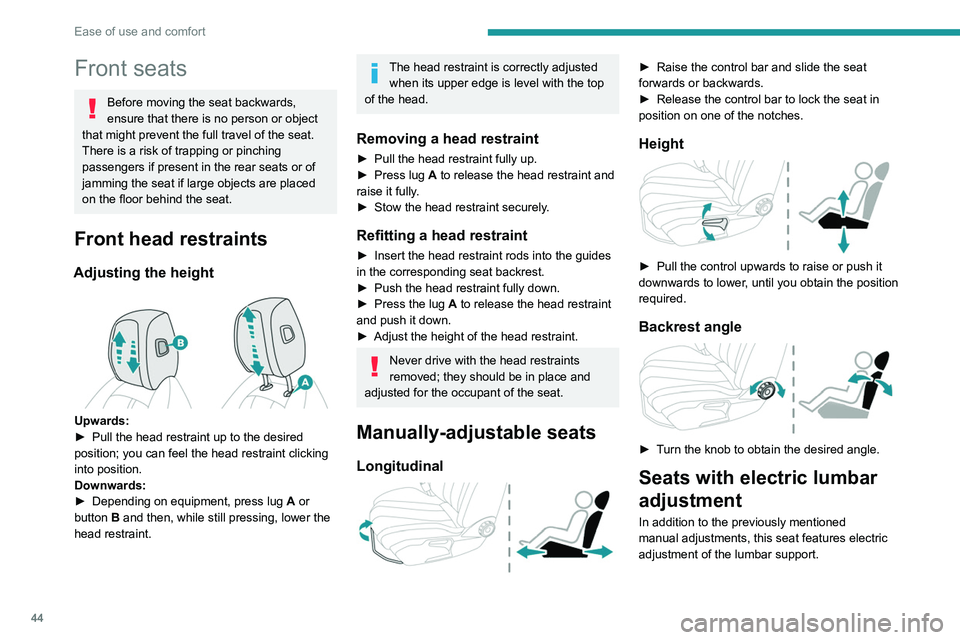
Upwards:
► Pull the head restraint up to the desired
position; you can feel the head restraint clicking
into position.
Downwards:
►
Depending on equipment, press lug A
or
button B and then, while still pressing, lower the
head restraint.
The head restraint is correctly adjusted when its upper edge is level with the top
of the head.
Removing a head restraint
► Pull the head restraint fully up.
► Press lug A to release the head restraint and
raise it fully.
►
Stow the head restraint securely
.
Refitting a head restraint
► Insert the head restraint rods into the guides
in the corresponding seat backrest.
►
Push the head restraint fully down.
►
Press the lug
A to release the head restraint
and push it down.
►
Adjust the height of the head restraint.
Never drive with the head restraints
removed; they should be in place and
adjusted for the occupant of the seat.
Manually-adjustable seats
Longitudinal
► Raise the control bar and slide the seat
forwards or backwards.
►
Release the control bar to lock the seat in
position on one of the notches.
Height
► Pull the control upwards to raise or push it
downwards to lower , until you obtain the position
required.
Backrest angle
► Turn the knob to obtain the desired angle.
Seats with electric lumbar
adjustment
In addition to the previously mentioned
manual adjustments, this seat features electric
adjustment of the lumbar support.
Page 58 of 244
56
Ease of use and comfort
Operating conditions
– The function is only activated when the
ignition is switched off and the
vehicle
locked.
–
When the vehicle is not connected, the
function is only activated if the battery charge
level is greater than 20%.
–
When the vehicle is not connected and a
recurring programme is active (e.g. from Monday
to Friday), if two temperature pre-conditioning
sequences are run without the vehicle being
used, the programme will be deactivated.
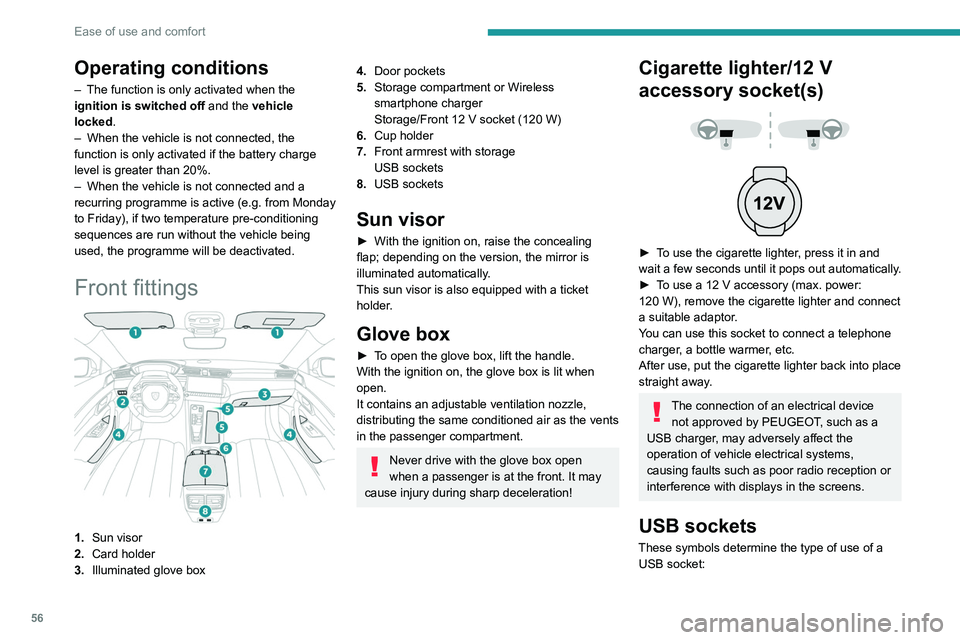
Front fittings
1. Sun visor
2. Card holder
3. Illuminated glove box
4.Door pockets
5. Storage compartment or Wireless
smartphone charger
Storage/Front 12
V socket (120 W)
6. Cup holder
7. Front armrest with storage
USB sockets
8. USB sockets
Sun visor
► With the ignition on, raise the concealing
flap; depending on the version, the mirror is
illuminated automatically
.
This sun visor is also equipped with a ticket
holder.
Glove box
► To open the glove box, lift the handle.
With the ignition on, the glove box is lit when
open.
It contains an adjustable ventilation nozzle,
distributing the same conditioned air as the vents
in the passenger compartment.
Never drive with the glove box open
when a passenger is at the front. It may
cause injury during sharp deceleration!
Cigarette lighter/12 V
accessory socket(s)
► To use the cigarette lighter, press it in and
wait a few seconds until it pops out automatically.
►
T
o use a 12 V accessory (max. power:
120
W), remove the cigarette lighter and connect
a suitable adaptor.
You can use this socket to connect a telephone
charger, a bottle warmer, etc.
After use, put the cigarette lighter back into place
straight away.
The connection of an electrical device not approved by PEUGEOT, such as a
USB charger, may adversely affect the
operation of vehicle electrical systems,
causing faults such as poor radio reception or
interference with displays in the screens.
USB sockets
These symbols determine the type of use of a USB socket:
Page 61 of 244
59
Ease of use and comfort
3Closing
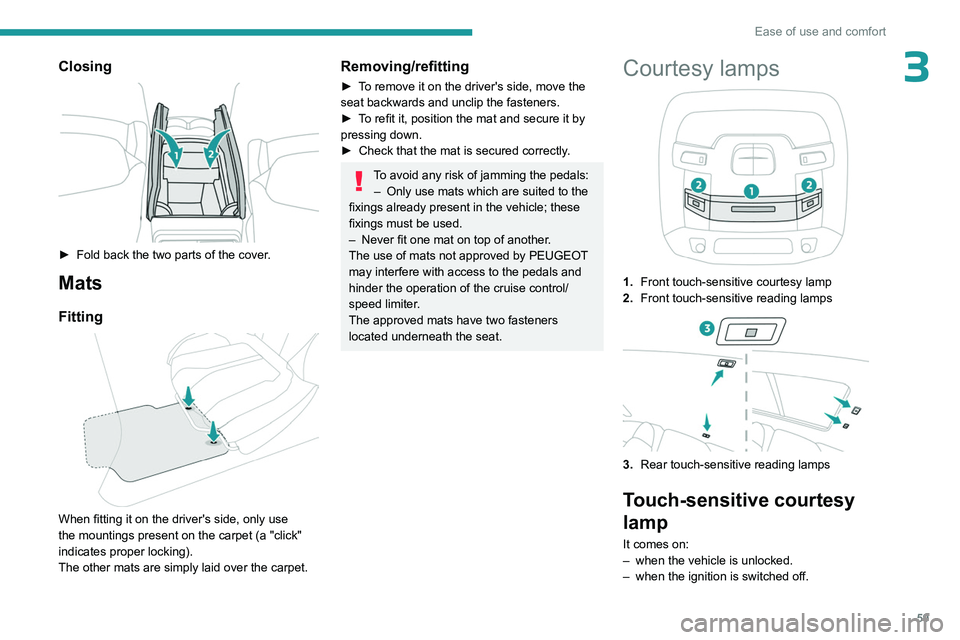
► Fold back the two parts of the cover.
Mats
Fitting
When fitting it on the driver's side, only use
the mountings present on the carpet (a "click"
indicates proper locking).
The other mats are simply laid over the carpet.
Removing/refitting
► To remove it on the driver's side, move the
seat backwards and unclip the fasteners.
►
T
o refit it, position the mat and secure it by
pressing down.
►
Check that the mat is secured correctly
.
To avoid any risk of jamming the pedals:– Only use mats which are suited to the
fixings already present in the vehicle; these
fixings must be used.
–
Never fit one mat on top of another
.
The use of mats not approved by PEUGEOT
may interfere with access to the pedals and
hinder the operation of the cruise control/
speed limiter.
The approved mats have two fasteners
located underneath the seat.
Courtesy lamps
1. Front touch-sensitive courtesy lamp
2. Front touch-sensitive reading lamps
3.Rear touch-sensitive reading lamps
Touch-sensitive courtesy
lamp
It comes on:
–
when the vehicle is unlocked.
–
when the ignition is switched off.
Page 63 of 244
61
Ease of use and comfort
3
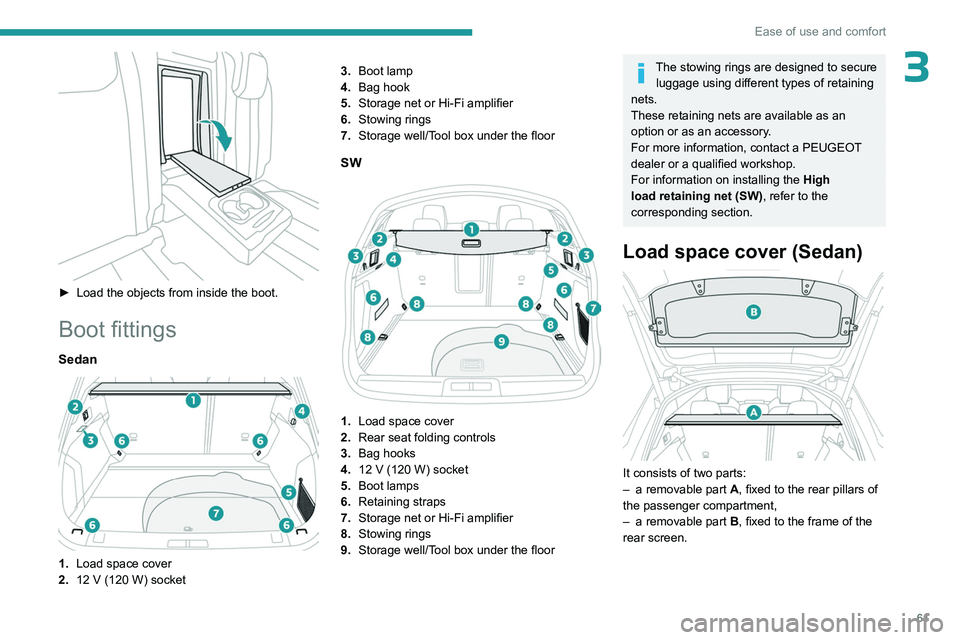
► Load the objects from inside the boot.
Boot fittings
Sedan
1.Load space cover
2. 12
V (120 W) socket 3.
Boot lamp
4. Bag hook
5. Storage net or Hi-Fi amplifier
6. Stowing rings
7. Storage well/Tool box under the floor
SW
1.Load space cover
2. Rear seat folding controls
3. Bag hooks
4. 12
V (120 W) socket
5. Boot lamps
6. Retaining straps
7. Storage net or Hi-Fi amplifier
8. Stowing rings
9. Storage well/Tool box under the floor
The stowing rings are designed to secure
luggage using different types of retaining
nets.
These retaining nets are available as an
option or as an accessory.
For more information, contact a PEUGEOT
dealer or a qualified workshop.
For information on installing the
High
load retaining net (SW) , refer to the
corresponding section.
Load space cover (Sedan)
It consists of two parts:
– a removable part A, fixed to the rear pillars of
the passenger compartment,
–
a removable part B
, fixed to the frame of the
rear screen.