Page 145 of 558
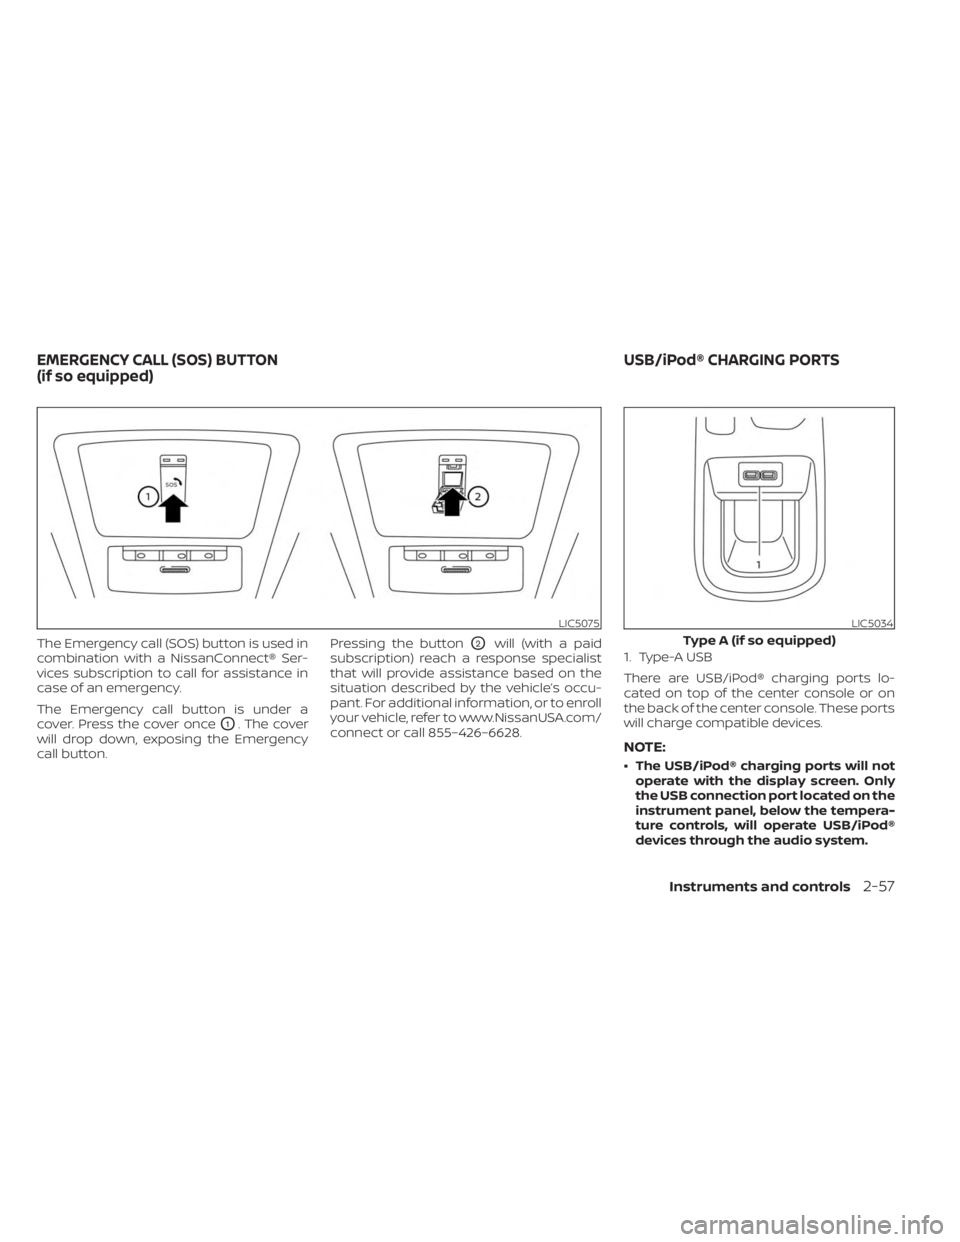
The Emergency call (SOS) button is used in
combination with a NissanConnect® Ser-
vices subscription to call for assistance in
case of an emergency.
The Emergency call button is under a
cover. Press the cover once
O1. The cover
will drop down, exposing the Emergency
call button. Pressing the button
O2will (with a paid
subscription) reach a response specialist
that will provide assistance based on the
situation described by the vehicle’s occu-
pant. For additional information, or to enroll
your vehicle, refer to www.NissanUSA.com/
connect or call 855–426–6628. 1. Type-A USB
There are USB/iPod® charging ports lo-
cated on top of the center console or on
the back of the center console. These ports
will charge compatible devices.
NOTE:
• The USB/iPod® charging ports will not
operate with the display screen. Only
the USB connection port located on the
instrument panel, below the tempera-
ture controls, will operate USB/iPod®
devices through the audio system.
LIC5075LIC5034
Type A (if so equipped)
EMERGENCY CALL (SOS) BUTTON
(if so equipped) USB/iPod® CHARGING PORTS
Instruments and controls2-57
Page 147 of 558
NOTE:
If “Alert Only ” setting is selected, the
message alert will still be shown in the
vehicle information display but the horn
will not sound.
WARNING
• If the driver selects “Disable Alert”, no
audible alert will be provided regard-
less of rear door open/close status.
• There may be times when there is an
object or passenger in the rear
seat(s) but the audible alert does not
sound. For example, if rear seat pas-
sengers enter or exit the vehicle dur-
ing a trip.
• The system does not directly detect
objects or passengers in the rear
seat(s). Instead, it can detect when a
rear door is opened and closed, indi-
cating that there may be something
in the rear seat(s).
NOTE:
There may be times when the horn
sounds but there are no objects or pas-
sengers in the rear seat(s).
For additional information, see “Rear Door
Alert is activated” (P. 2-32).
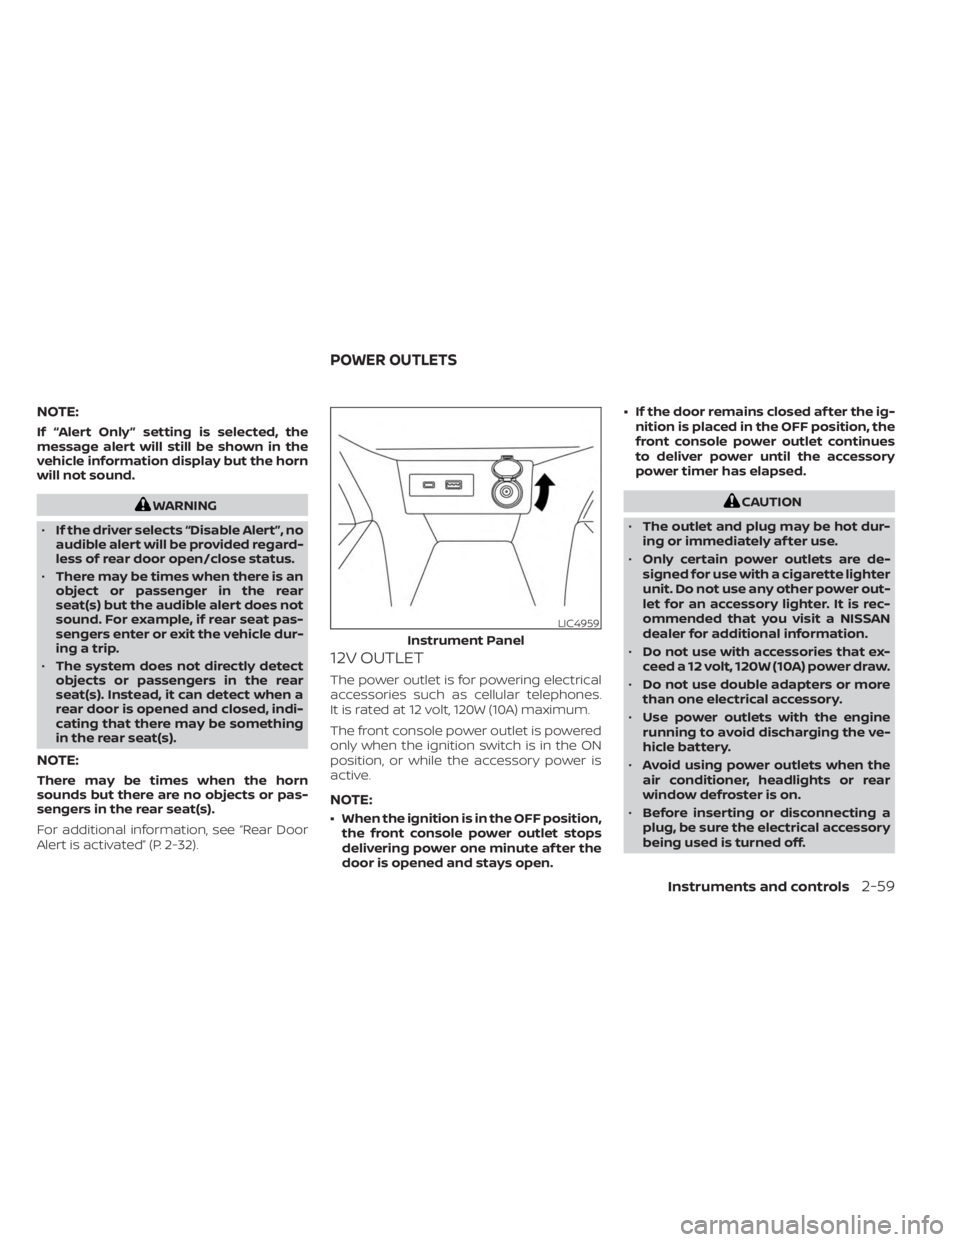
12V OUTLET
The power outlet is for powering electrical
accessories such as cellular telephones.
It is rated at 12 volt, 120W (10A) maximum.
The front console power outlet is powered
only when the ignition switch is in the ON
position, or while the accessory power is
active.
NOTE:
• When the ignition is in the OFF position,
the front console power outlet stops
delivering power one minute af ter the
door is opened and stays open. • If the door remains closed af ter the ig-
nition is placed in the OFF position, the
front console power outlet continues
to deliver power until the accessory
power timer has elapsed.
CAUTION
• The outlet and plug may be hot dur-
ing or immediately af ter use.
• Only certain power outlets are de-
signed for use with a cigarette lighter
unit. Do not use any other power out-
let for an accessory lighter. It is rec-
ommended that you visit a NISSAN
dealer for additional information.
• Do not use with accessories that ex-
ceed a 12 volt, 120W (10A) power draw.
• Do not use double adapters or more
than one electrical accessory.
• Use power outlets with the engine
running to avoid discharging the ve-
hicle battery.
• Avoid using power outlets when the
air conditioner, headlights or rear
window defroster is on.
• Before inserting or disconnecting a
plug, be sure the electrical accessory
being used is turned off.
LIC4959
Instrument Panel
POWER OUTLETS
Instruments and controls2-59
Page 148 of 558
•Push the plug in as far as it will go. If
good contact is not made, the plug
may overheat or the internal tem-
perature fuse may open.
• When not in use, be sure to close the
cap. Do not allow water or any other
liquid to contact the outlet.
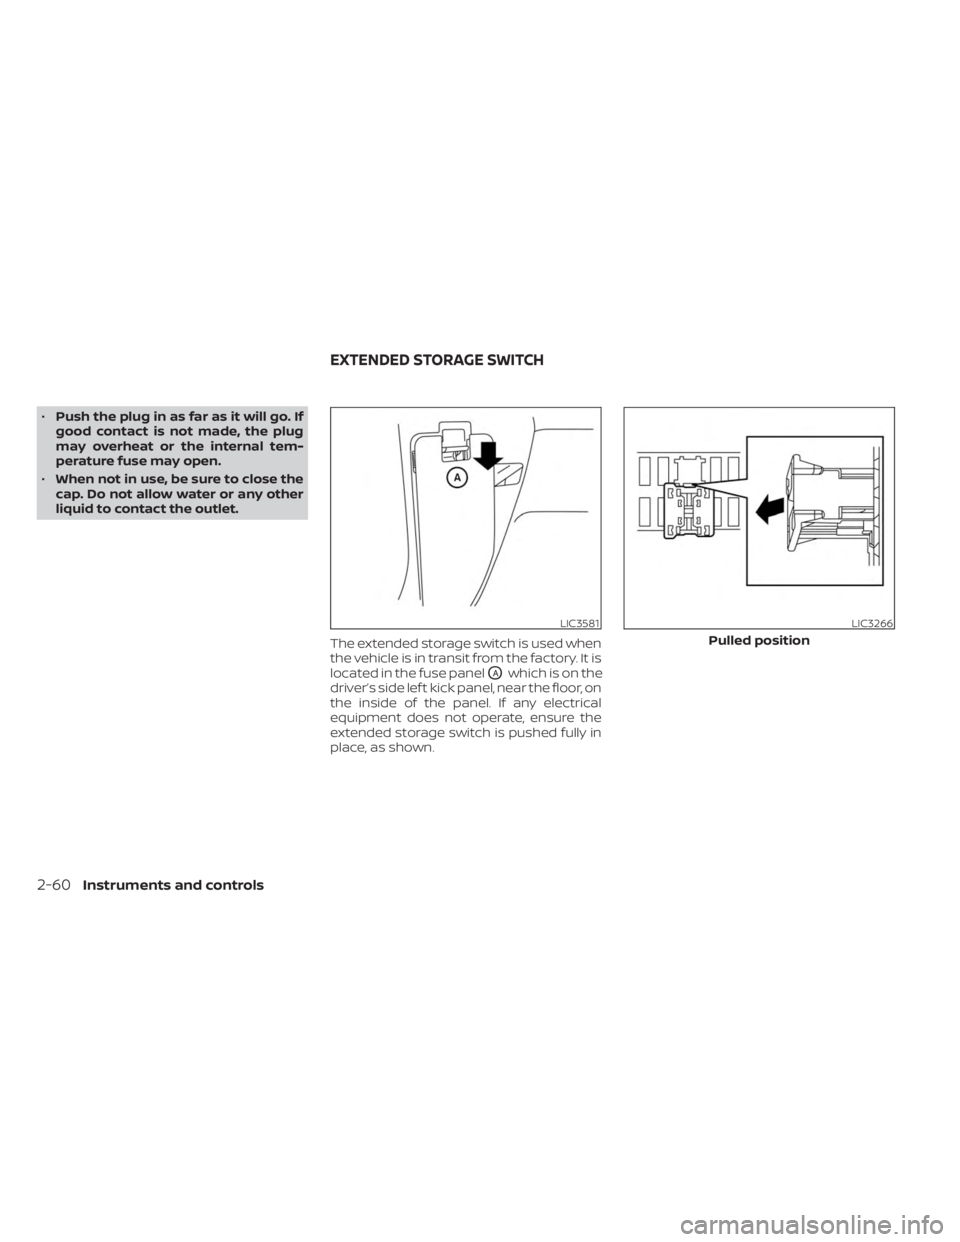
The extended storage switch is used when
the vehicle is in transit from the factory. It is
located in the fuse panel
OAwhich is on the
driver’s side lef t kick panel, near the floor, on
the inside of the panel. If any electrical
equipment does not operate, ensure the
extended storage switch is pushed fully in
place, as shown.
LIC3581LIC3266
Pulled position
EXTENDED STORAGE SWITCH
2-60Instruments and controls
Page 151 of 558
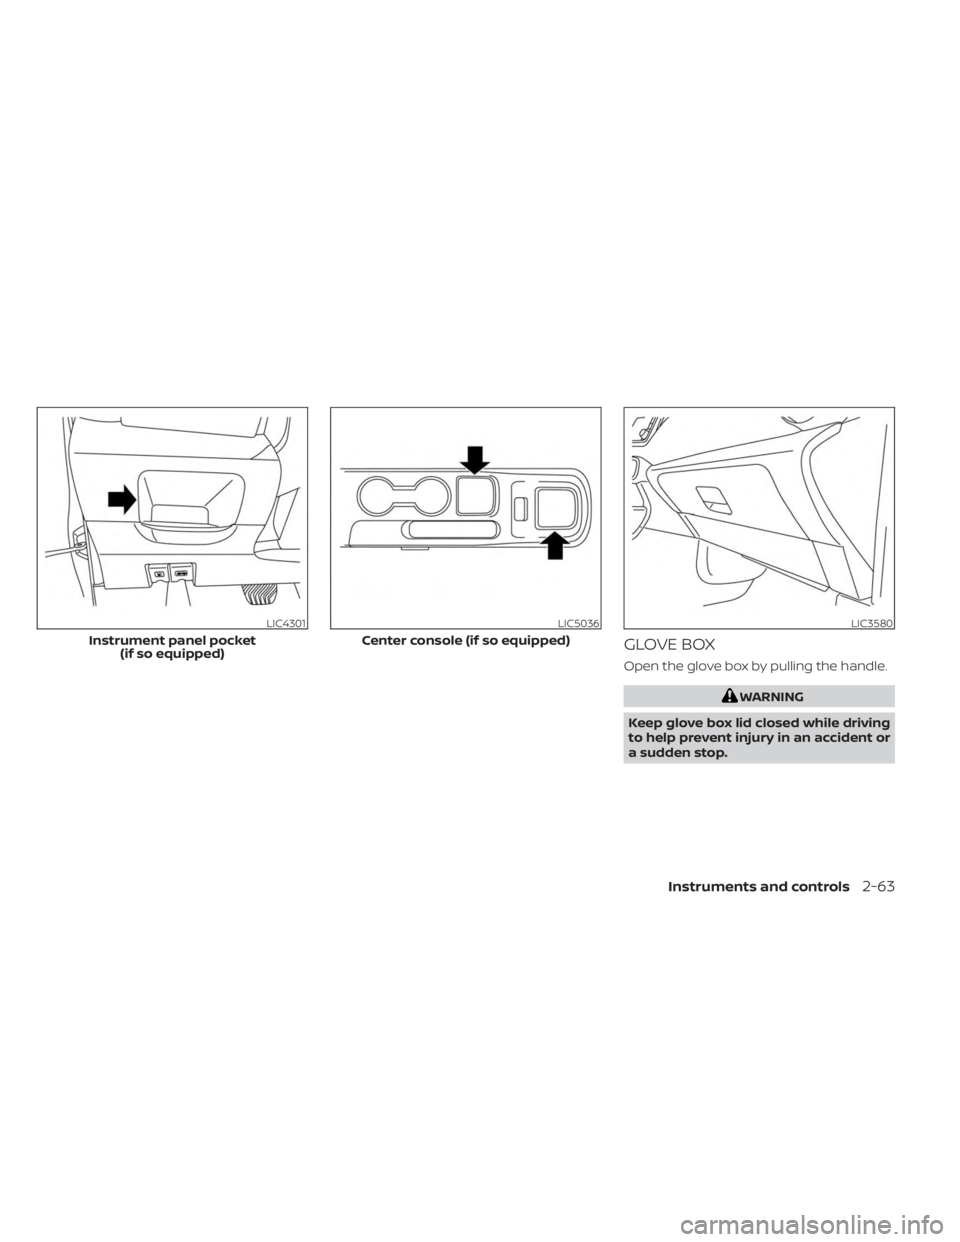
GLOVE BOX
Open the glove box by pulling the handle.
WARNING
Keep glove box lid closed while driving
to help prevent injury in an accident or
a sudden stop.
LIC4301
Instrument panel pocket (if so equipped)
LIC5036
Center console (if so equipped)
LIC3580
Instruments and controls2-63
Page 159 of 558
WARNING
• Please locate max load label on
crossbar end support.
• Do not load more than 100 lbs. (45kg).
• Be careful that your vehicle does not
exceed the Gross Vehicle Weight Rat-
ing (GVWR) or its Gross Axle Weight
Rating (GAWR Front and Rear). The
GVWR and GAWR are located on the
Safety Compliance Certification La-
bel. For more information regarding
GVWR and GAWR, see “Dimensions
and weights” (P. 10-9).
• Always evenly distribute the luggage
and appropriate crossbar attach-
ment on the crossbar.POWER WINDOWS
WARNING
• Make sure that all passengers have
their hands, etc., inside the vehicle
while it is in motion and before clos-
ing the windows. Use the window
lock switch to prevent unexpected
use of the power windows.
• To help avoid risk of injury or death
through unintended operation of the
vehicle and/or its systems, including
entrapment in windows or inadver-
tent door lock activation, do not
leave children, people who require
the assistance of others or pets unat-
tended in your vehicle. Additionally,
the temperature inside a closed ve-
hicle on a warm day can quickly be-
come high enough to cause a signifi-
cant risk of injury or death to people
and pets.
The power windows operate when the ig-
nition switch is placed in the ON position or
for a period of time af ter the ignition switch
is placed in the OFF position. If the driver's
or passenger's door is opened during this
period of time, the power to the windows is
canceled.
Driver's side power window
switch
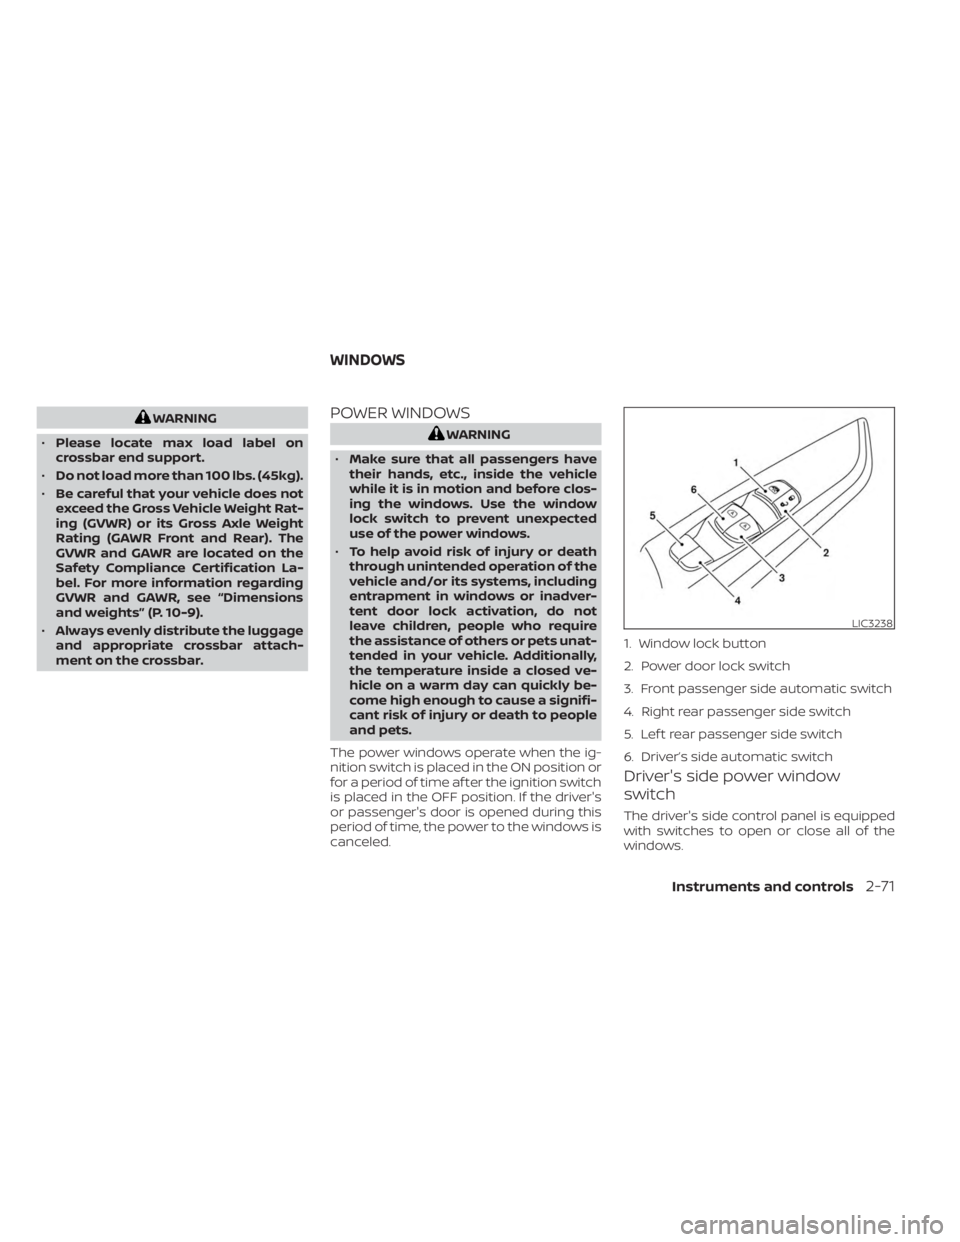
The driver's side control panel is equipped
with switches to open or close all of the
windows.
LIC3238
1. Window lock button
2. Power door lock switch
3. Front passenger side automatic switch
4. Right rear passenger side switch
5. Lef t rear passenger side switch
6. Driver’s side automatic switch
WINDOWS
Instruments and controls2-71
Page 174 of 558
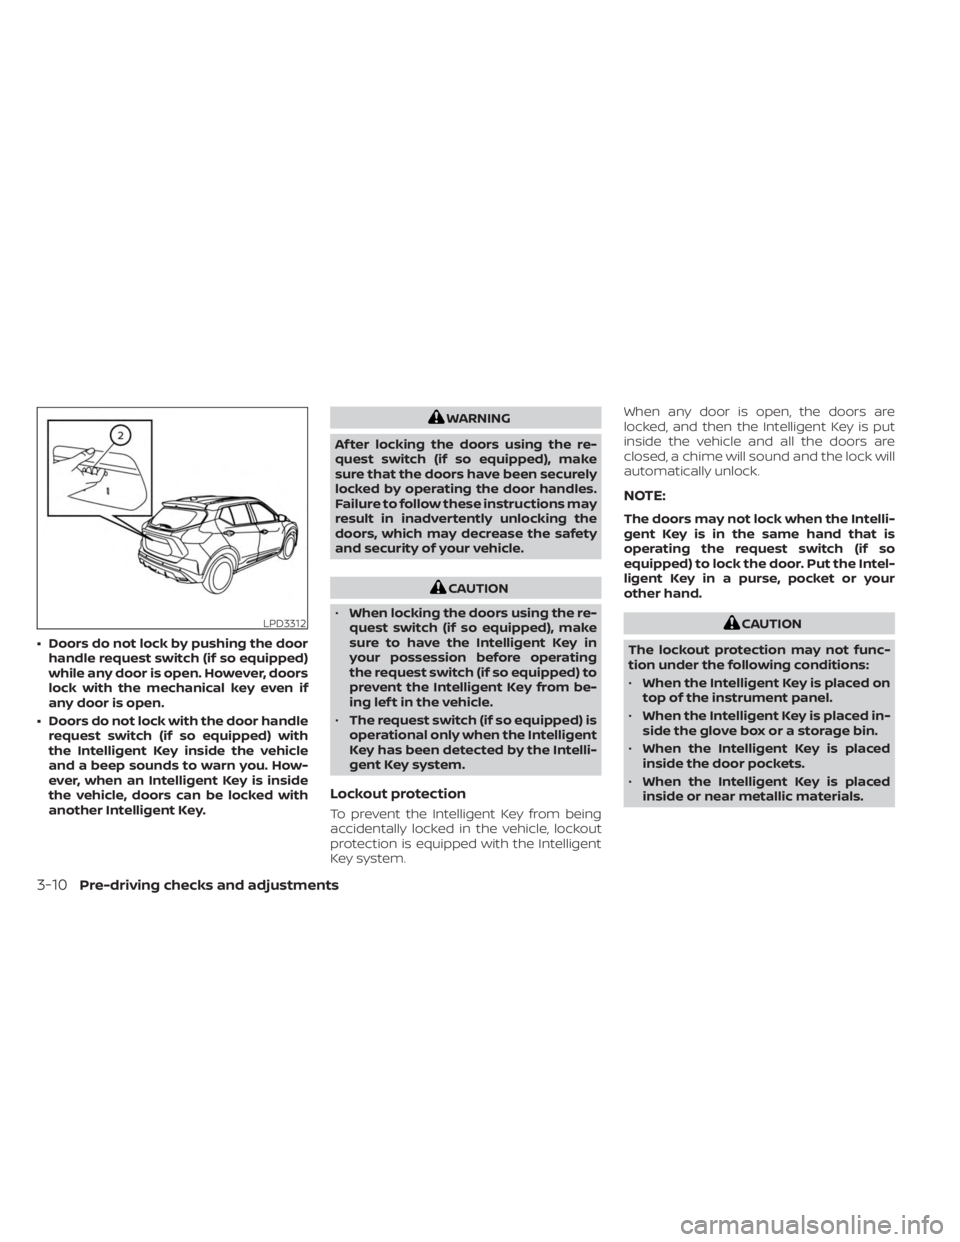
• Doors do not lock by pushing the doorhandle request switch (if so equipped)
while any door is open. However, doors
lock with the mechanical key even if
any door is open.
• Doors do not lock with the door handle request switch (if so equipped) with
the Intelligent Key inside the vehicle
and a beep sounds to warn you. How-
ever, when an Intelligent Key is inside
the vehicle, doors can be locked with
another Intelligent Key.
WARNING
Af ter locking the doors using the re-
quest switch (if so equipped), make
sure that the doors have been securely
locked by operating the door handles.
Failure to follow these instructions may
result in inadvertently unlocking the
doors, which may decrease the safety
and security of your vehicle.
CAUTION
• When locking the doors using the re-
quest switch (if so equipped), make
sure to have the Intelligent Key in
your possession before operating
the request switch (if so equipped) to
prevent the Intelligent Key from be-
ing lef t in the vehicle.
• The request switch (if so equipped) is
operational only when the Intelligent
Key has been detected by the Intelli-
gent Key system.
Lockout protection
To prevent the Intelligent Key from being
accidentally locked in the vehicle, lockout
protection is equipped with the Intelligent
Key system. When any door is open, the doors are
locked, and then the Intelligent Key is put
inside the vehicle and all the doors are
closed, a chime will sound and the lock will
automatically unlock.
NOTE:
The doors may not lock when the Intelli-
gent Key is in the same hand that is
operating the request switch (if so
equipped) to lock the door. Put the Intel-
ligent Key in a purse, pocket or your
other hand.
CAUTION
The lockout protection may not func-
tion under the following conditions:
• When the Intelligent Key is placed on
top of the instrument panel.
• When the Intelligent Key is placed in-
side the glove box or a storage bin.
• When the Intelligent Key is placed
inside the door pockets.
• When the Intelligent Key is placed
inside or near metallic materials.LPD3312
3-10Pre-driving checks and adjustments
Page 179 of 558
Intelligent Key button operation
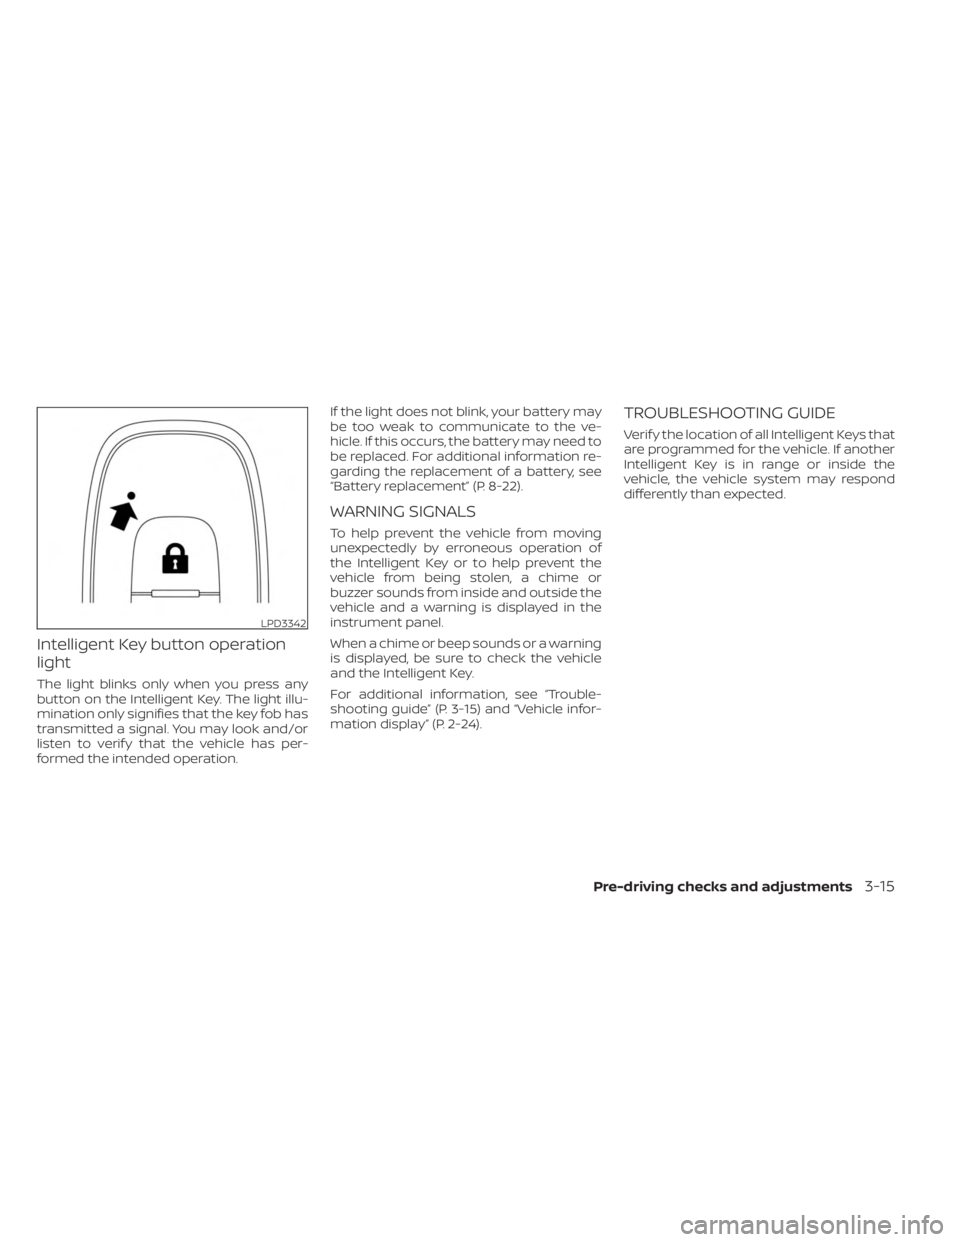
light
The light blinks only when you press any
button on the Intelligent Key. The light illu-
mination only signifies that the key fob has
transmitted a signal. You may look and/or
listen to verif y that the vehicle has per-
formed the intended operation.If the light does not blink, your battery may
be too weak to communicate to the ve-
hicle. If this occurs, the battery may need to
be replaced. For additional information re-
garding the replacement of a battery, see
“Battery replacement” (P. 8-22).
WARNING SIGNALS
To help prevent the vehicle from moving
unexpectedly by erroneous operation of
the Intelligent Key or to help prevent the
vehicle from being stolen, a chime or
buzzer sounds from inside and outside the
vehicle and a warning is displayed in the
instrument panel.
When a chime or beep sounds or a warning
is displayed, be sure to check the vehicle
and the Intelligent Key.
For additional information, see “Trouble-
shooting guide” (P. 3-15) and “Vehicle infor-
mation display” (P. 2-24).
TROUBLESHOOTING GUIDE
Verif y the location of all Intelligent Keys that
are programmed for the vehicle. If another
Intelligent Key is in range or inside the
vehicle, the vehicle system may respond
differently than expected.
LPD3342
Pre-driving checks and adjustments3-15
Page 185 of 558
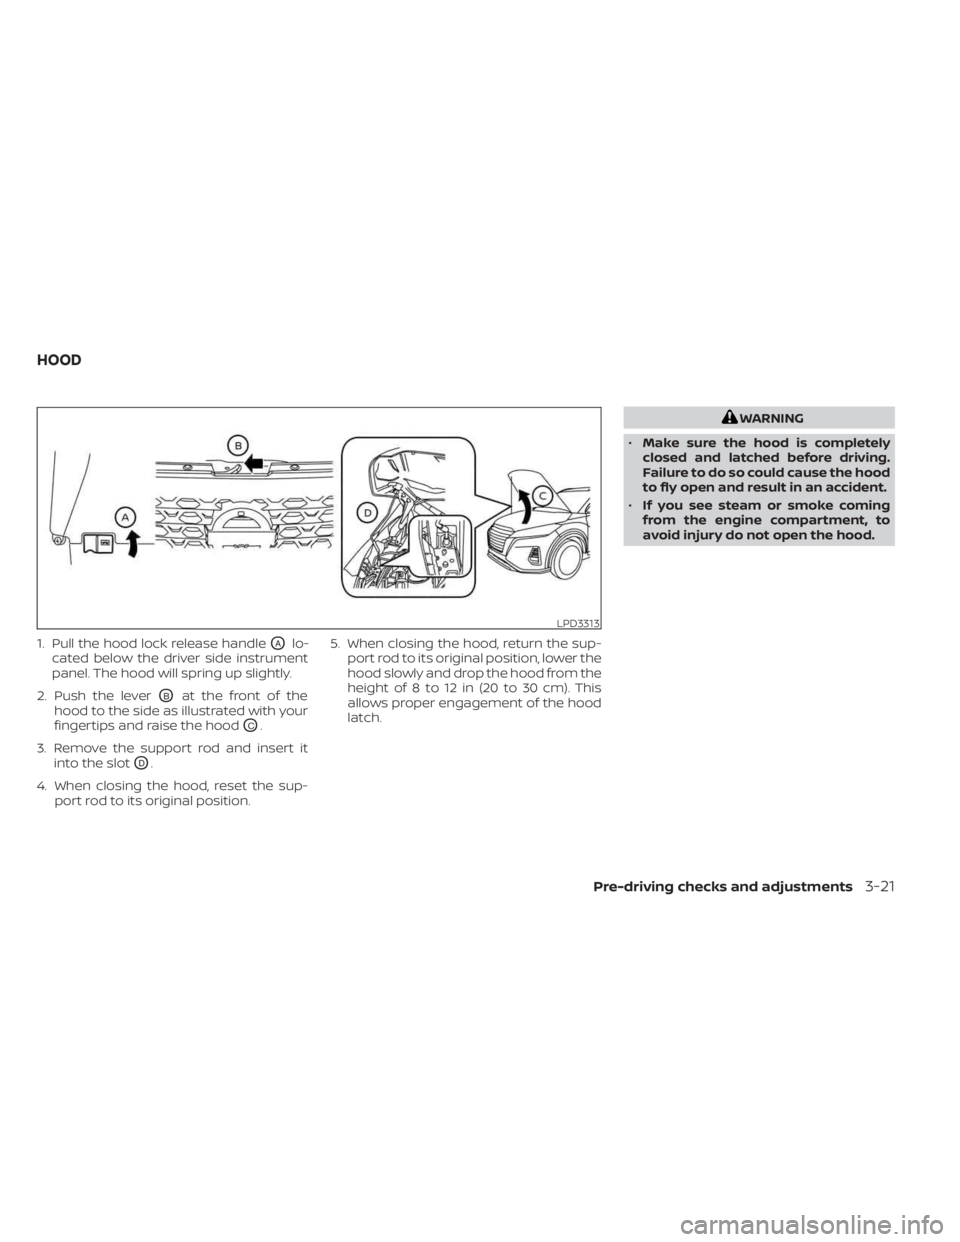
1. Pull the hood lock release handleOAlo-
cated below the driver side instrument
panel. The hood will spring up slightly.
2. Push the lever
OBat the front of the
hood to the side as illustrated with your
fingertips and raise the hood
OC.
3. Remove the support rod and insert it into the slot
OD.
4. When closing the hood, reset the sup- port rod to its original position. 5. When closing the hood, return the sup-
port rod to its original position, lower the
hood slowly and drop the hood from the
height of 8 to 12 in (20 to 30 cm). This
allows proper engagement of the hood
latch.
WARNING
• Make sure the hood is completely
closed and latched before driving.
Failure to do so could cause the hood
to fly open and result in an accident.
• If you see steam or smoke coming
from the engine compartment, to
avoid injury do not open the hood.
LPD3313
HOOD
Pre-driving checks and adjustments3-21