Page 94 of 558
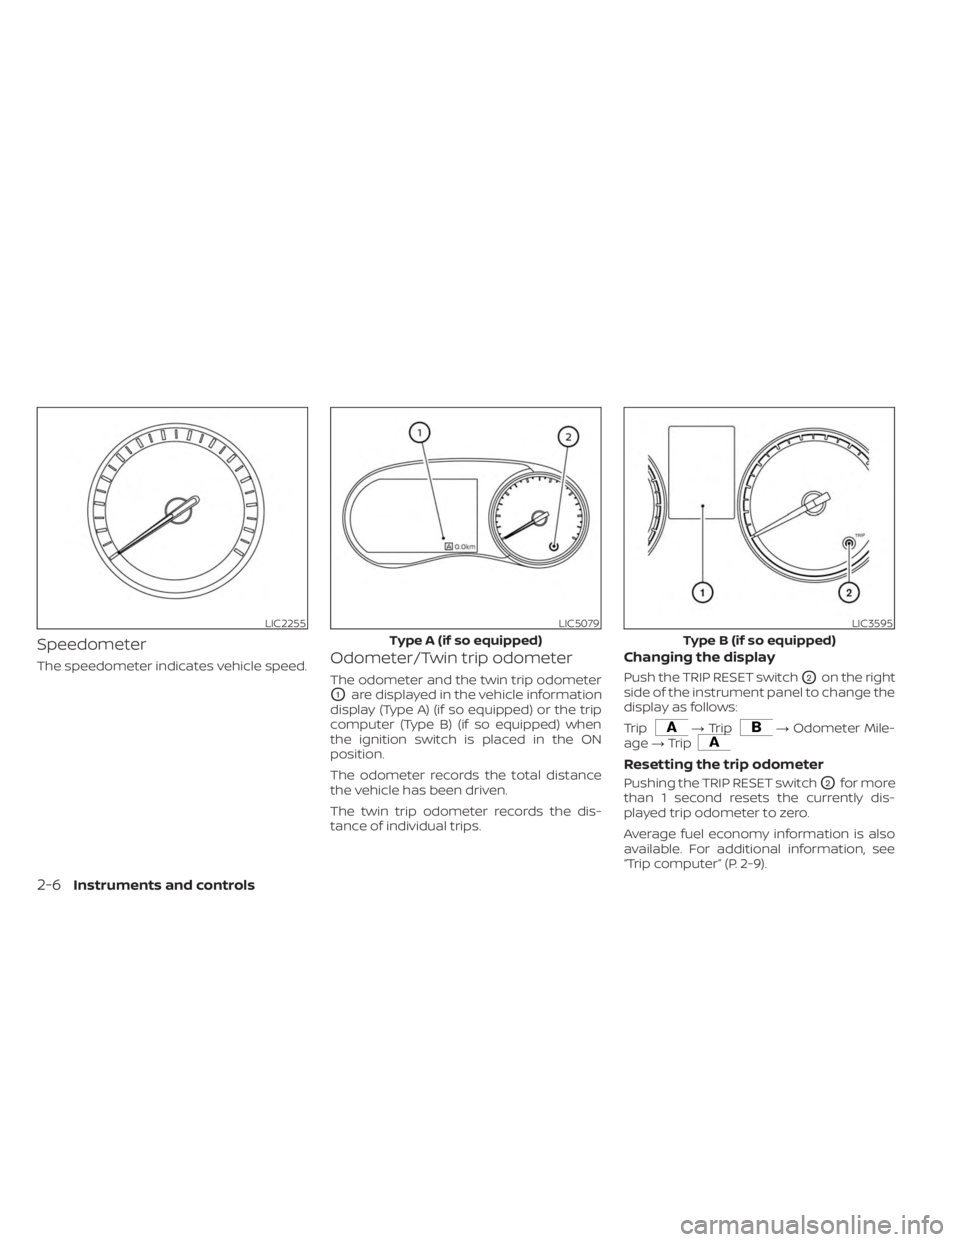
Speedometer
The speedometer indicates vehicle speed.Odometer/Twin trip odometer
The odometer and the twin trip odometer
O1are displayed in the vehicle information
display (Type A) (if so equipped) or the trip
computer (Type B) (if so equipped) when
the ignition switch is placed in the ON
position.
The odometer records the total distance
the vehicle has been driven.
The twin trip odometer records the dis-
tance of individual trips.
Changing the display
Push the TRIP RESET switchO2on the right
side of the instrument panel to change the
display as follows:
Trip
→ Trip→ Odometer Mile-
age →Trip
Resetting the trip odometer
Pushing the TRIP RESET switchO2for more
than 1 second resets the currently dis-
played trip odometer to zero.
Average fuel economy information is also
available. For additional information, see
“Trip computer” (P. 2-9).
LIC2255LIC5079
Type A (if so equipped)
LIC3595
Type B (if so equipped)
2-6Instruments and controls
Page 97 of 558
TRIP COMPUTER (if so equipped)
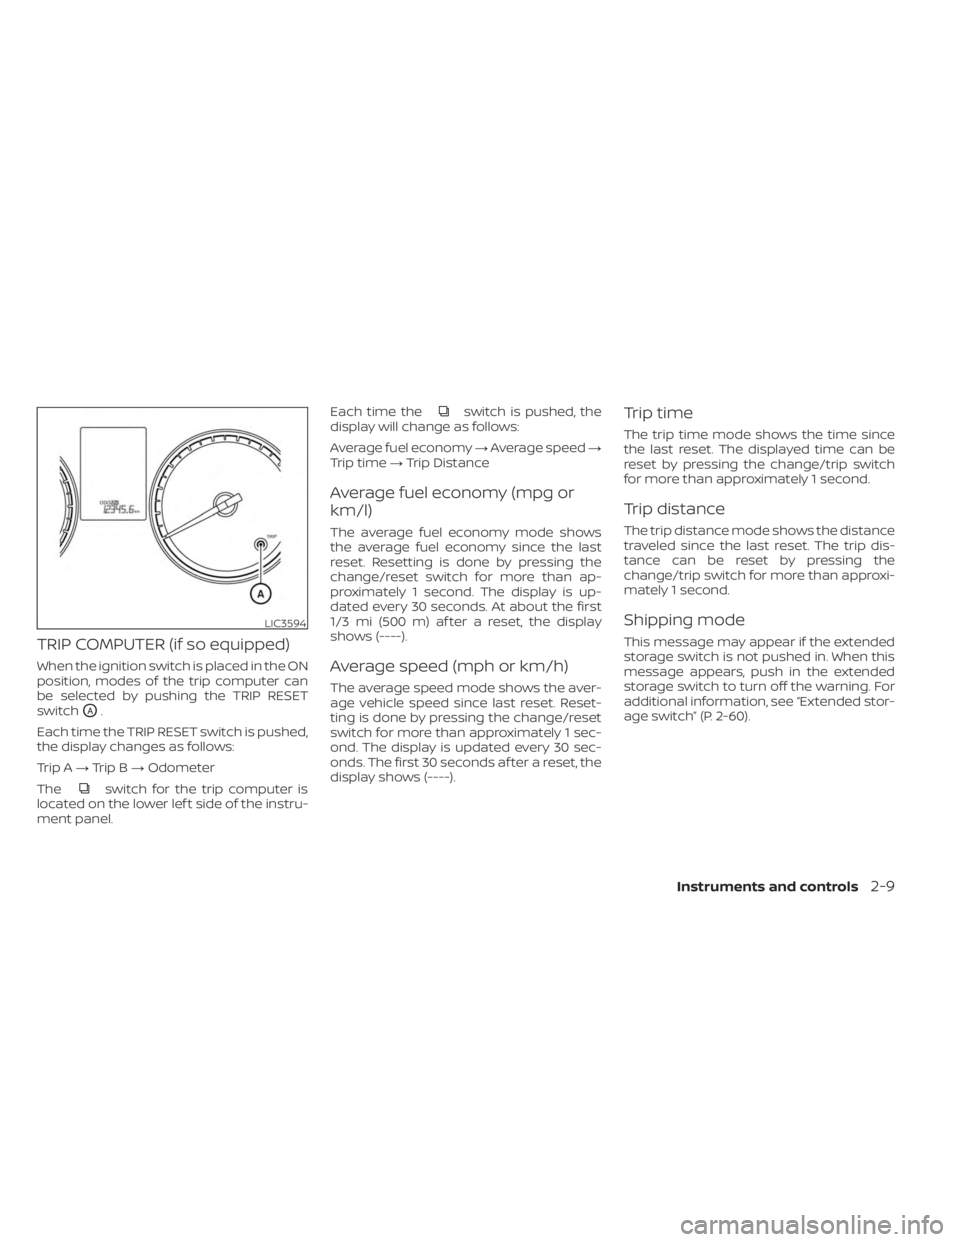
When the ignition switch is placed in the ON
position, modes of the trip computer can
be selected by pushing the TRIP RESET
switch
OA.
Each time the TRIP RESET switch is pushed,
the display changes as follows:
Trip A →Trip B →Odometer
The
switch for the trip computer is
located on the lower lef t side of the instru-
ment panel. Each time the
switch is pushed, the
display will change as follows:
Average fuel economy →Average speed →
Trip time →Trip Distance
Average fuel economy (mpg or
km/l)
The average fuel economy mode shows
the average fuel economy since the last
reset. Resetting is done by pressing the
change/reset switch for more than ap-
proximately 1 second. The display is up-
dated every 30 seconds. At about the first
1/3 mi (500 m) af ter a reset, the display
shows (----).
Average speed (mph or km/h)
The average speed mode shows the aver-
age vehicle speed since last reset. Reset-
ting is done by pressing the change/reset
switch for more than approximately 1 sec-
ond. The display is updated every 30 sec-
onds. The first 30 seconds af ter a reset, the
display shows (----).
Trip time
The trip time mode shows the time since
the last reset. The displayed time can be
reset by pressing the change/trip switch
for more than approximately 1 second.
Trip distance
The trip distance mode shows the distance
traveled since the last reset. The trip dis-
tance can be reset by pressing the
change/trip switch for more than approxi-
mately 1 second.
Shipping mode
This message may appear if the extended
storage switch is not pushed in. When this
message appears, push in the extended
storage switch to turn off the warning. For
additional information, see “Extended stor-
age switch” (P. 2-60).
LIC3594
Instruments and controls2-9
Page 112 of 558
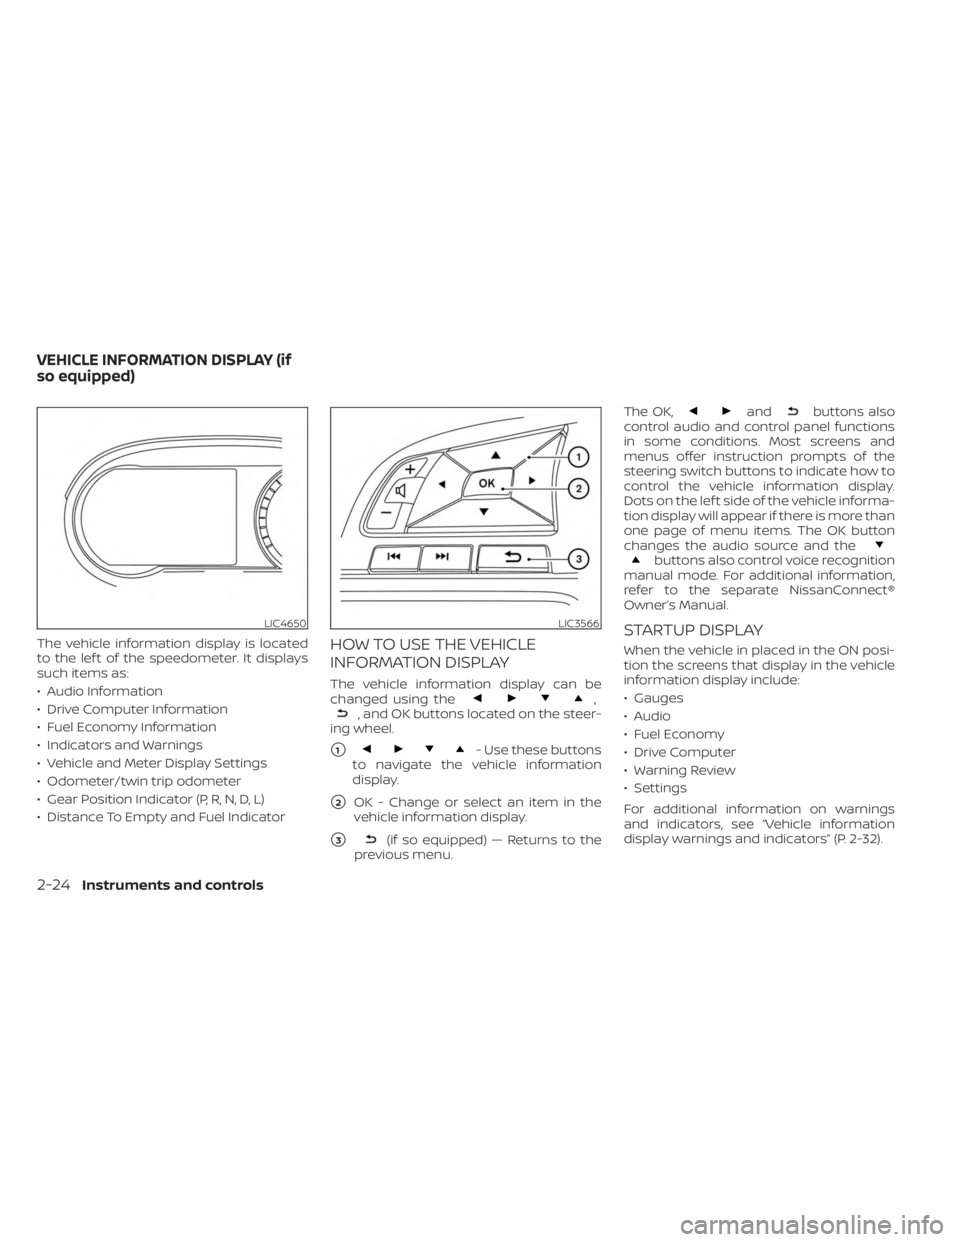
The vehicle information display is located
to the lef t of the speedometer. It displays
such items as:
• Audio Information
• Drive Computer Information
• Fuel Economy Information
• Indicators and Warnings
• Vehicle and Meter Display Settings
• Odometer/twin trip odometer
• Gear Position Indicator (P, R, N, D, L)
• Distance To Empty and Fuel IndicatorHOW TO USE THE VEHICLE
INFORMATION DISPLAY
The vehicle information display can be
changed using the,, and OK buttons located on the steer-
ing wheel.
�1- Use these buttons
to navigate the vehicle information
display.
�2OK - Change or select an item in the
vehicle information display.
�3(if so equipped) — Returns to the
previous menu. The OK,
andbuttons also
control audio and control panel functions
in some conditions. Most screens and
menus offer instruction prompts of the
steering switch buttons to indicate how to
control the vehicle information display.
Dots on the lef t side of the vehicle informa-
tion display will appear if there is more than
one page of menu items. The OK button
changes the audio source and the
buttons also control voice recognition
manual mode. For additional information,
refer to the separate NissanConnect®
Owner’s Manual.
STARTUP DISPLAY
When the vehicle in placed in the ON posi-
tion the screens that display in the vehicle
information display include:
• Gauges
• Audio
• Fuel Economy
• Drive Computer
• Warning Review
• Settings
For additional information on warnings
and indicators, see “Vehicle information
display warnings and indicators” (P. 2-32).
LIC4650LIC3566
VEHICLE INFORMATION DISPLAY (if
so equipped)
2-24Instruments and controls
Page 121 of 558
WARNING
Selecting “Dismiss Message” during a
stop within a trip temporarily dis-
misses the message for that stop with-
out turning the system off. Alerts can
be provided for other stops during the
trip. Selecting “Disable Alert” turns off
the Rear Door Alert system for the re-
mainder of a trip and no audible alert
will be provided.
NOTE:
This system is disabled until a driver en-
ables it using the vehicle information
display. For additional information, see
“How to use the vehicle information dis-
play ” (P. 2-24).
For additional information, see “Rear Door
Alert” (P. 2-58).
Check Back Seat For All Articles
When the system is enabled, this message
appears when the vehicle comes to a com-
plete stop, the vehicle is transitioned from
the D (Drive) position to P (Park) position,
and the driver exits the vehicle. This mes-
sage alerts the driver, af ter a period of time,
to check for items in the rear seat af ter the
audible alert has been provided.
NOTE:
This system is disabled until a driver en-
ables it using the vehicle information
display. For additional information, see
“How to use the vehicle information dis-
play ” (P. 2-24).
For additional information, see “Rear Door
Alert” (P. 2-58).
Door/lif tgate Open
This warning appears when a door or the
lif tgate has been opened.
Headlight System Error: See Owner’s
Manual
This warning appears when there is an er-
ror with the system. For additional informa-
tion, see “Headlight and turn signal switch”
(P. 2-44).
High Coolant Temp: See
Owner’s Manual
This warning appears when the tempera-
ture of the engine coolant is too high. Stop
the vehicle in a safe location as soon as
possible. Avoid quick starting or abrupt ac-
celeration. When the warning turns off, the
vehicle can be driven. If the warning appears again soon af ter it
turns off, have the vehicle checked. It is rec-
ommended that you visit a NISSAN dealer
for this service.
Illumination indicator
This indicator shows the illumination ad-
justment of the instrument panel. For addi-
tional information, see “Instrument bright-
ness control” (P. 2-50).
Low Fuel
This warning appears when the fuel level in
the fuel tank is getting low. Refuel as soon
as it is convenient, preferably before the
fuel gauge reaches 0 (Empty).
There will be
a small reserve of fuel in the tank when
the fuel gauge needle reaches 0 (Empty).
Low Outside Temperature
This warning appears if the outside tem-
perature is below 37°F (3°C). The tempera-
ture can be changed to display in Celsius or
Fahrenheit. For additional information, see
“Settings” (P. 2-25).
Instruments and controls2-33
Page 132 of 558
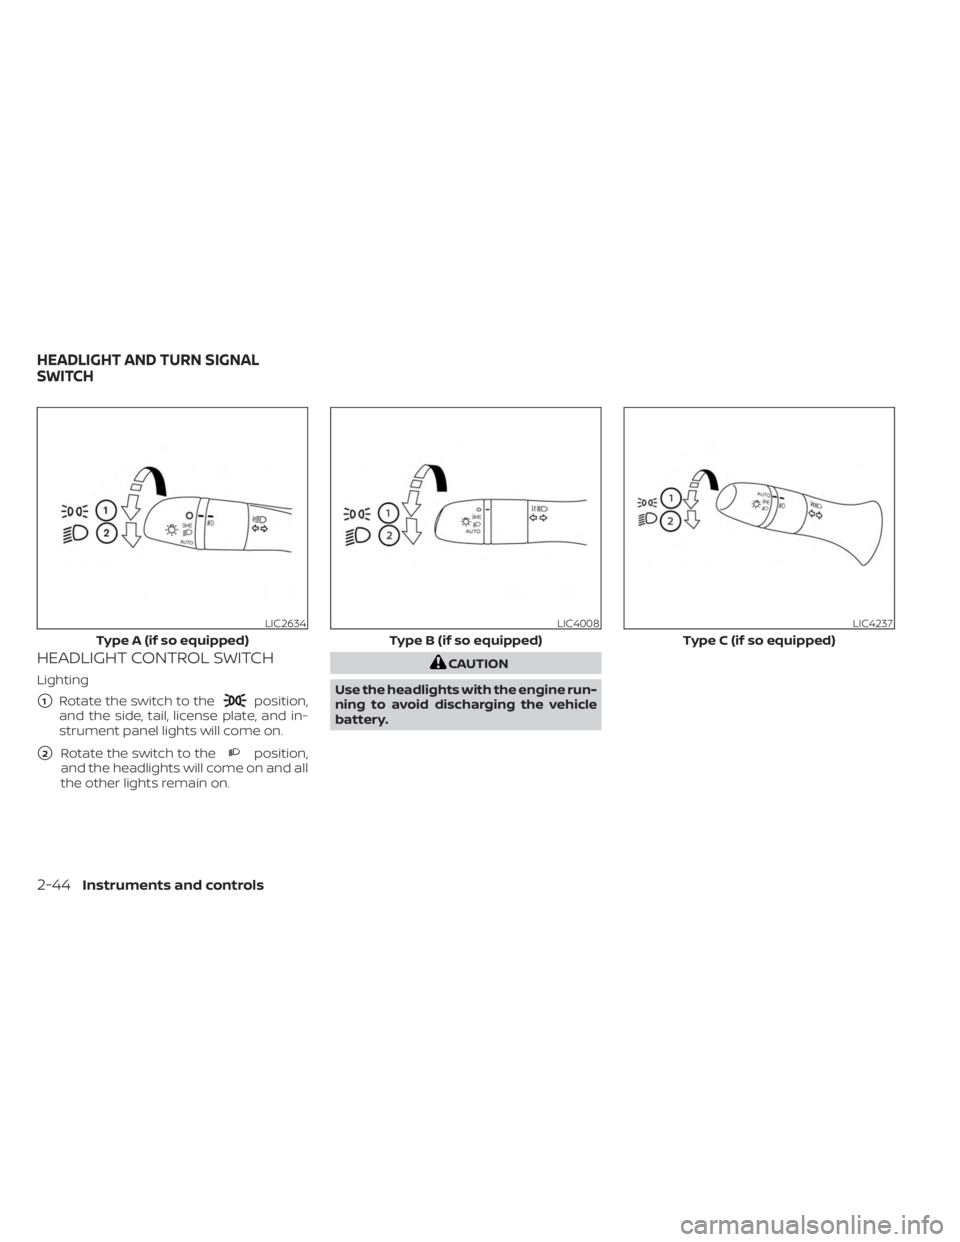
HEADLIGHT CONTROL SWITCH
Lighting
�1Rotate the switch to theposition,
and the side, tail, license plate, and in-
strument panel lights will come on.
�2Rotate the switch to theposition,
and the headlights will come on and all
the other lights remain on.
CAUTION
Use the headlights with the engine run-
ning to avoid discharging the vehicle
battery.
LIC2634
Type A (if so equipped)
LIC4008
Type B (if so equipped)
LIC4237
Type C (if so equipped)
HEADLIGHT AND TURN SIGNAL
SWITCH
2-44Instruments and controls
Page 133 of 558
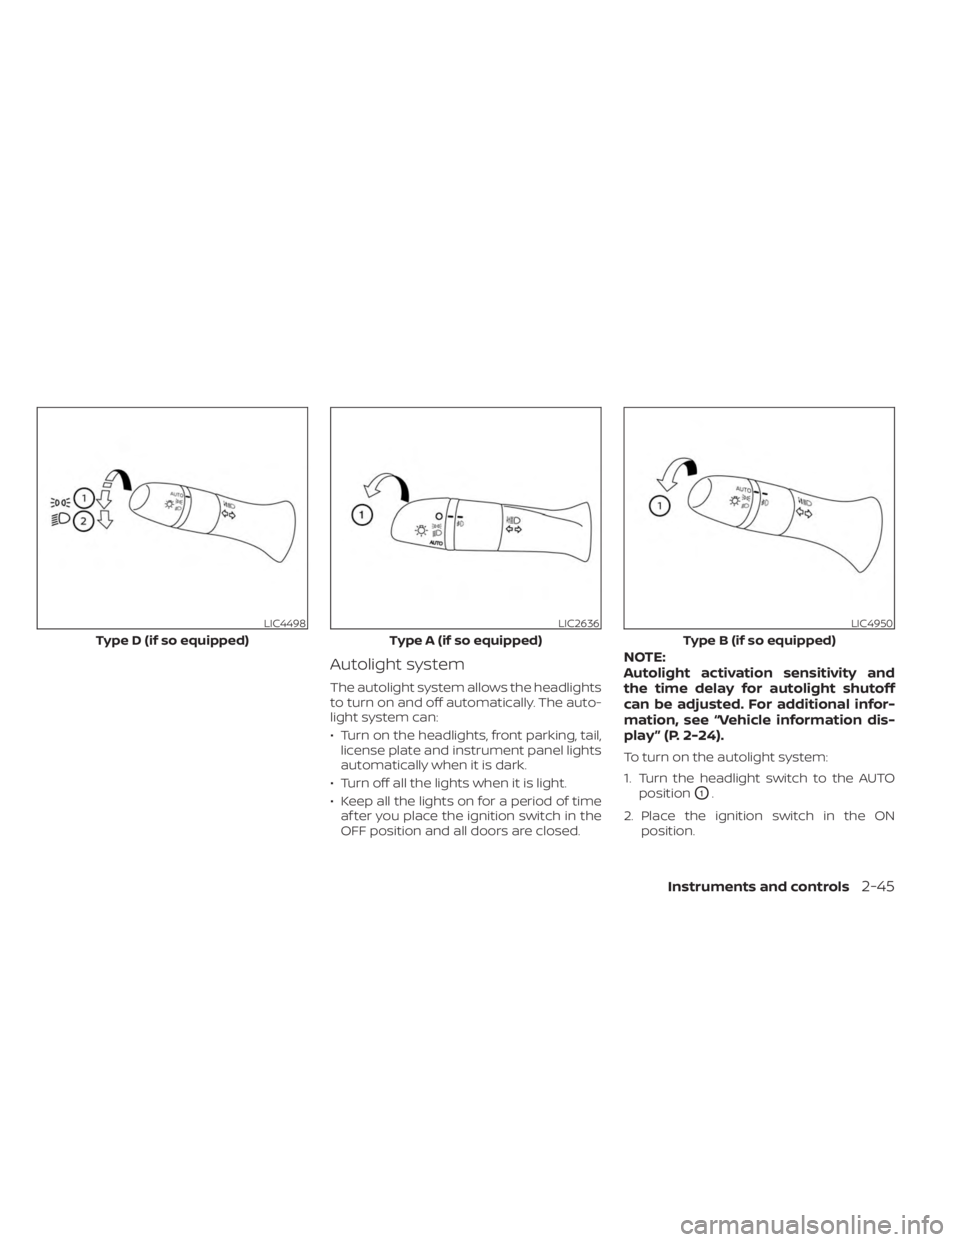
Autolight system
The autolight system allows the headlights
to turn on and off automatically. The auto-
light system can:
• Turn on the headlights, front parking, tail,license plate and instrument panel lights
automatically when it is dark.
• Turn off all the lights when it is light.
• Keep all the lights on for a period of time af ter you place the ignition switch in the
OFF position and all doors are closed.
NOTE:
Autolight activation sensitivity and
the time delay for autolight shutoff
can be adjusted. For additional infor-
mation, see “Vehicle information dis-
play ” (P. 2-24).
To turn on the autolight system:
1. Turn the headlight switch to the AUTO position
O1.
2. Place the ignition switch in the ON position.
LIC4498
Type D (if so equipped)
LIC2636
Type A (if so equipped)
LIC4950
Type B (if so equipped)
Instruments and controls2-45
Page 134 of 558
3. The autolight system automaticallyturns the headlights on and off.
Initially, if the ignition switch is placed in the
OFF position and a door is opened and lef t
open, the headlights remain on for a period
of time. If another door is opened while the
headlights are on, then the timer is reset.
To turn the autolight system off, turn the
switch to the OFF (if so equipped),
,orposition.
The headlights will turn on automatically at
twilight or in rainy weather (when the wind-
shield wiper is operated continuously).
If the ignition switch is placed in the OFF
position and one of the doors is opened
and this condition is continued, the head-
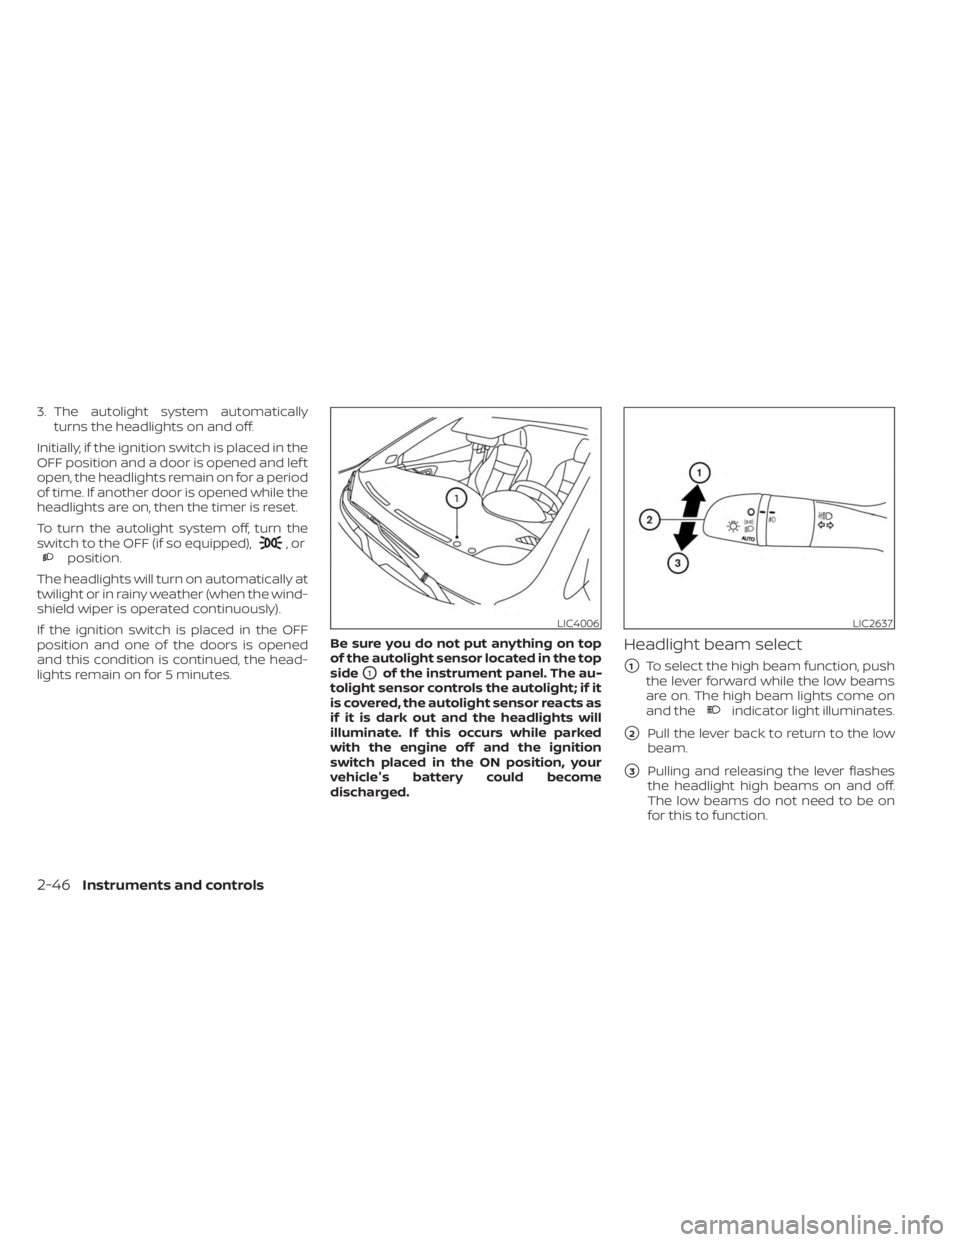
lights remain on for 5 minutes. Be sure you do not put anything on top
of the autolight sensor located in the top
side
O1of the instrument panel. The au-
tolight sensor controls the autolight; if it
is covered, the autolight sensor reacts as
if it is dark out and the headlights will
illuminate. If this occurs while parked
with the engine off and the ignition
switch placed in the ON position, your
vehicle's battery could become
discharged.
Headlight beam select
�1To select the high beam function, push
the lever forward while the low beams
are on. The high beam lights come on
and the
indicator light illuminates.
�2Pull the lever back to return to the low
beam.
�3Pulling and releasing the lever flashes
the headlight high beams on and off.
The low beams do not need to be on
for this to function.
LIC4006LIC2637
2-46Instruments and controls
Page 138 of 558
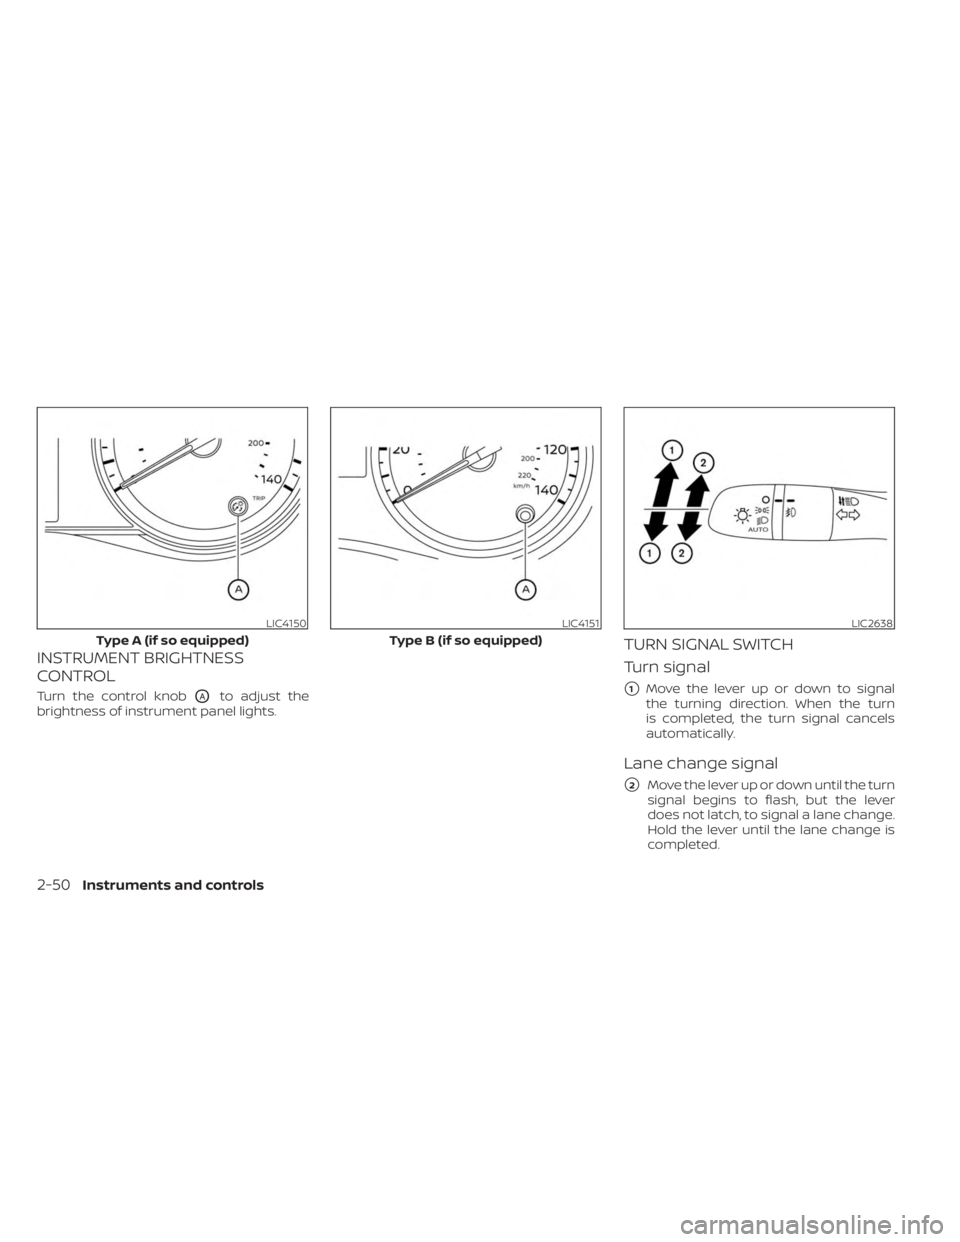
INSTRUMENT BRIGHTNESS
CONTROL
Turn the control knobOAto adjust the
brightness of instrument panel lights.
TURN SIGNAL SWITCH
Turn signal
�1Move the lever up or down to signal
the turning direction. When the turn
is completed, the turn signal cancels
automatically.
Lane change signal
�2Move the lever up or down until the turn
signal begins to flash, but the lever
does not latch, to signal a lane change.
Hold the lever until the lane change is
completed.
LIC4150
Type A (if so equipped)
LIC4151
Type B (if so equipped)
LIC2638
2-50Instruments and controls