2023 NISSAN ARMADA ECU
[x] Cancel search: ECUPage 69 of 604
seat belt.
1. If necessary, raise or remove the headrestraint or headrest to position the
top tether strap over the top of the
seatback. If the head restraint or
headrest is removed, store it in a
secure place. Be sure to reinstall the
head restraint or headrest when the
child restraint is removed. See “Head
restraints/headrests” (P.1-15) for head
restraint or headrest adjustment, re-
moval and installation information.
2. Secure the tether strap to the tether anchor point on the back of each
seatback (2nd row seat) or right side
seatback (3rd row seat) behind the
child restraint.
3. Tighten the tether strap according to the manufacturer’s instructions to
remove any slack. Make sure the head
restraint or headrest does not contact
the top tether strap.
If you have any questions when instal-
ling a top tether strap on the rear seat,
it is recommended you visit a NISSAN
dealer for this service.BOOSTER SEATS
Precautions on booster seats
WARNING
If a booster seat and seat belt are not
used properly, the risk of a child
being injured in a sudden stop or
collision greatly increases:
. Make sure the shoulder portion of
the belt is away from the child’s
face and neck and the lap portion
of the belt does not cross the
stomach.
. Make sure the shoulder belt is not
behind the child or under the
child’s arm.
. A booster seat must only be
installed in a seating position that
has a lap/shoulder belt.
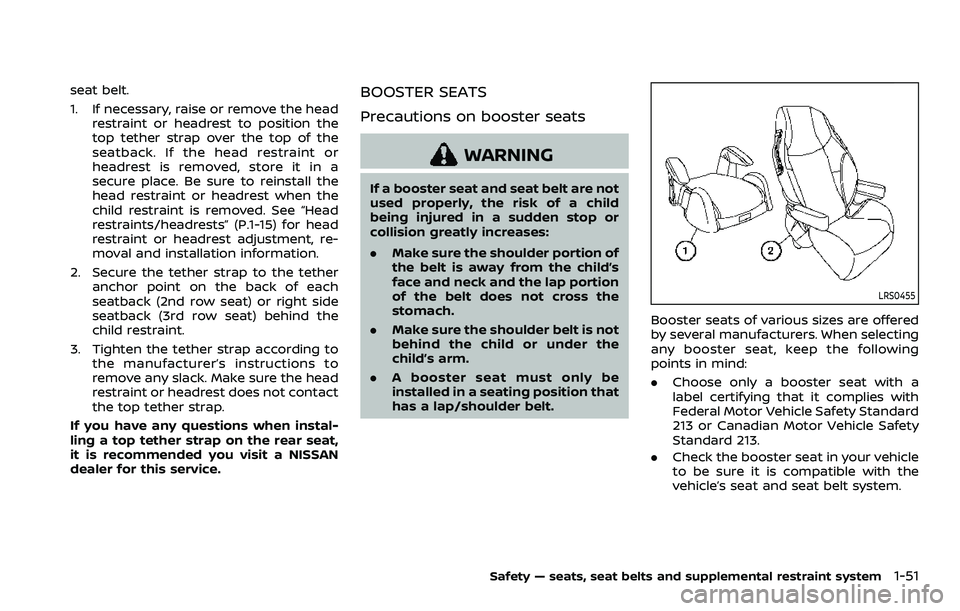
LRS0455
Booster seats of various sizes are offered
by several manufacturers. When selecting
any booster seat, keep the following
points in mind:
.Choose only a booster seat with a
label certifying that it complies with
Federal Motor Vehicle Safety Standard
213 or Canadian Motor Vehicle Safety
Standard 213.
. Check the booster seat in your vehicle
to be sure it is compatible with the
vehicle’s seat and seat belt system.
Safety — seats, seat belts and supplemental restraint system1-51
Page 71 of 604
with the seat belts.
Refer to all Warnings and Cautions in the
“Child safety”, “Child restraints” and “Boos-
ter seats” sections earlier in this section
before installing a child restraint.
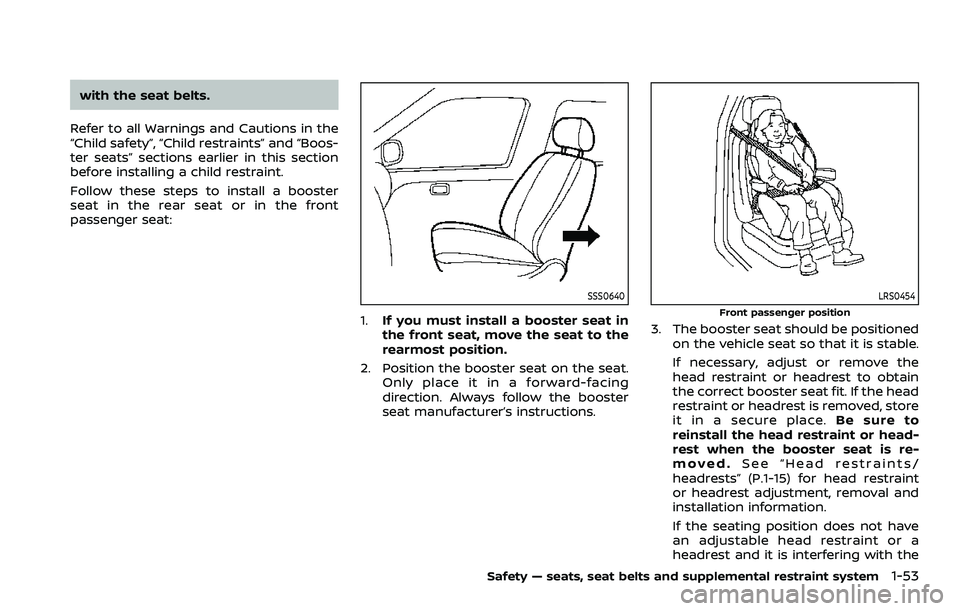
Follow these steps to install a booster
seat in the rear seat or in the front
passenger seat:
SSS0640
1. If you must install a booster seat in
the front seat, move the seat to the
rearmost position.
2. Position the booster seat on the seat. Only place it in a forward-facing
direction. Always follow the booster
seat manufacturer’s instructions.
LRS0454
Front passenger position
3. The booster seat should be positioned
on the vehicle seat so that it is stable.
If necessary, adjust or remove the
head restraint or headrest to obtain
the correct booster seat fit. If the head
restraint or headrest is removed, store
it in a secure place. Be sure to
reinstall the head restraint or head-
rest when the booster seat is re-
moved. See “Head restraints/
headrests” (P.1-15) for head restraint
or headrest adjustment, removal and
installation information.
If the seating position does not have
an adjustable head restraint or a
headrest and it is interfering with the
Safety — seats, seat belts and supplemental restraint system1-53
Page 83 of 604

children be properly restrained in a rear
seat. NISSAN also recommends that ap-
propriate child restraints and booster
seats be properly installed in a rear seat.
If this is not possible, the occupant
classification sensors are designed to
operate as described above to turn the
front passenger air bag and front pas-
senger knee air bag OFF for specified
child restraints. Failing to properly secure
child restrains and to use the ALR mode
may allow the restraint to tip or move in
an accident or sudden stop. This can also
result in the passenger air bag and front
passenger knee air bag inflating in a
crash instead of being OFF. (See “Child
restraints” (P.1-32) for proper use and
installation.)
If the front passenger seat is not occu-
pied, the passenger air bag and front
passenger knee air bag are designed not
to inflate in a crash. However, heavy
objects placed on the seat could result
in air bag inflation, because of the object
being detected by the occupant classifi-
cation sensors. Other conditions could
also result in air bag inflation, such as if a
child is standing on the seat, or if two
children are on the seat, contrary to the
instructions in this manual. Always be
sure that you and all vehicle occupants
are seated and restrained properly.Using the front passenger air bag status
light, you can monitor when the front
passenger air bag and front passenger
knee air bag are automatically turned
OFF with the seat occupied. The light will
not illuminate when the front passenger
seat is unoccupied.
If an adult occupant is in the seat but the
front passenger air bag status light is
illuminated (indicating that the front pas-
senger air bag and front passenger knee
air bag are OFF), it could be that the
person is a small adult, or is not sitting on
the seat properly.
If a child restraint must be used in the
front seat, the front passenger air bag
status light may or may not be illumi-
nated, depending on the size of the child
and the type of child restraint being used.
If the front passenger air bag status light
is not illuminated (indicating that the air
bag might inflate in a crash), it could be
that the child restraint or seat belt is not
being used properly. Make sure that the
child restraint is installed properly, the
seat belt is used properly and the occu-
pant is positioned properly. If the front
passenger air bag status light is still not
illuminated, reposition the occupant or
child restraint in a rear seat.
If the front passenger air bag status light
will not illuminate even though you be-lieve that the child restraint, the seat belts
and the occupant are properly positioned,
the system may be sensing an unoccu-
pied seat (in which case the air bag is
OFF). Your NISSAN dealer can check that
the system is OFF by using a special tool.
However, until you have confirmed with
your dealer that your air bag is working
properly, reposition the occupant or child
restraint in a rear seat.
The NISSAN Advanced Air Bag System
and front passenger air bag status light
will take a few seconds to register a
change in the front passenger seat sta-
tus. However, if the seat becomes unoc-
cupied, the front passenger air bag status
light will remain off.
If a malfunction occurs in the front
passenger air bag system, the supple-
mental air bag warning light
, located
in the meter and gauges area will blink.
Have the system checked. It is recom-
mended you visit a NISSAN dealer for this
service.
Normal operation:
In order for the occupant classification
sensor system to classify the front pas-
senger based on weight, please follow the
precautions and steps outlined below:
Safety — seats, seat belts and supplemental restraint system1-65
Page 95 of 604

2 Instruments and controls
Cockpit ........................................................................\
.......................... 2-4
Instrument panel ........................................................................\
.. 2-5
Meters and gauges ..................................................................... 2-6Speedometer and odometer ........................................ 2-7
Tachometer ........................................................................\
........ 2-8
Engine coolant temperature gauge ....................... 2-8
Fuel gauge ........................................................................\
........... 2-9
Engine oil pressure gauge .............................................. 2-9
Voltmeter ........................................................................\
........... 2-10
Meter illumination and needle sweep ................ 2-10
Warning lights, indicator lights and
audible reminders ..................................................................... 2-11 Checking lights ..................................................................... 2-12
Warning/indicator lights (red) ................................... 2-12
Warning/indicator lights (yellow) ........................... 2-15
Warning/indicator lights (other) ............................. 2-19
Audible reminders .............................................................. 2-20
Vehicle information display ............................................... 2-20 How to use the vehicle
information display ........................................................... 2-21
Startup display ...................................................................... 2-22
Settings ........................................................................\
............... 2-22
Operational indicators .................................................... 2-30
Trip computer ........................................................................\
2-37
Clock and outside air temperature ...................... 2-39 Security systems ....................................................................... 2-39
Vehicle Security System .............................................. 2-39
NISSAN Vehicle Immobilizer System ................. 2-41
Wiper and washer switch ................................................... 2-42 Windshield wiper and washer operation ...... 2-43
Rain-sensing auto wiper system (if
so equipped) ........................................................................\
. 2-44
Rear window wiper and
washer operation ............................................................. 2-45
Rear window and outside mirror
defroster switch ........................................................................\
. 2-45
Windshield deicer switch (if so equipped) ............. 2-46
Headlight and turn signal switch ................................ 2-46
Headlight switch ............................................................... 2-47
Instrument brightness control .............................. 2-53
Turn signal switch ........................................................... 2-53
Fog light switch (if so equipped) ......................... 2-54
Heated steering wheel (if so equipped) .................. 2-54
Horn ........................................................................\
............................. 2-55
Heated seats (if so equipped) ......................................... 2-55
Front (if so equipped) .................................................... 2-56
Rear (if so equipped) ...................................................... 2-57
Climate controlled seats (if so equipped) ............. 2-57
Warning systems switch (if so equipped) ............. 2-58
SNOW mode switch ................................................................ 2-59
Page 105 of 604
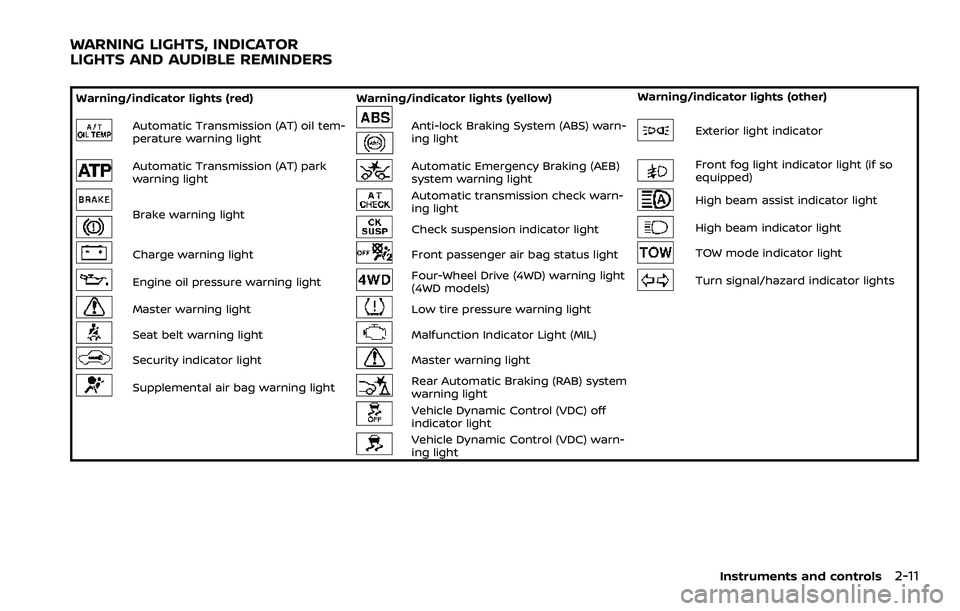
Warning/indicator lights (red)Warning/indicator lights (yellow) Warning/indicator lights (other)
Automatic Transmission (AT) oil tem-
perature warning lightAnti-lock Braking System (ABS) warn-
ing lightExterior light indicator
Automatic Transmission (AT) park
warning lightAutomatic Emergency Braking (AEB)
system warning lightFront fog light indicator light (if so
equipped)
Brake warning light
Automatic transmission check warn-
ing lightHigh beam assist indicator light
Check suspension indicator lightHigh beam indicator light
Charge warning lightFront passenger air bag status lightTOW mode indicator light
Engine oil pressure warning lightFour-Wheel Drive (4WD) warning light
(4WD models)Turn signal/hazard indicator lights
Master warning lightLow tire pressure warning light
Seat belt warning lightMalfunction Indicator Light (MIL)
Security indicator lightMaster warning light
Supplemental air bag warning lightRear Automatic Braking (RAB) system
warning light
Vehicle Dynamic Control (VDC) off
indicator light
Vehicle Dynamic Control (VDC) warn-
ing light
Instruments and controls2-11
WARNING LIGHTS, INDICATOR
LIGHTS AND AUDIBLE REMINDERS
Page 106 of 604

2-12Instruments and controls
CHECKING LIGHTS
With all doors closed, apply the parking
brake, fasten the seat belts and place the
ignition switch in the ON position without
starting the engine. The following lights (if
so equipped) will come on:
or,,,,,
The following lights (if so equipped) will
come on briefly and then go off:
,or,,,,,,
If any light does not come on or operates
in a way other than described, it may
indicate a burned-out bulb and/or a
system malfunction. It is recommended
you have the system checked by a
NISSAN dealer.
Some indicators and warnings are also
displayed on the vehicle information dis-
play between the speedometer and tach-
ometer. (See “Vehicle information display”
(P.2-20).)
WARNING/INDICATOR LIGHTS (red)
Automatic Transmission (AT)
oil temperature warning light
This light illuminates when the Automatic
Transmission (AT) oil temperature is too
high. If the light illuminates while driving,
reduce the vehicle speed as soon as
safely possible until the light turns off.
CAUTION
Continued vehicle operation when
the AT oil temperature warning light
is on may damage the AT.
Automatic Transmission (AT)
park warning light (4WD models)
This light indicates that the Automatic
Transmission (AT) parking function is not
engaged. If the transfer control is not
secured in any driving position while the
AT shift lever is in the “P” (Park) position,
the transmission will disengage and the
wheels will not lock.
If the AT park warning light illuminates
with the shift lever in the P (Park)
position, shift the Four-Wheel Drive
(4WD) shift switch to the AUTO, 4H or 4L position again with the shift lever in
the N (Neutral) position.
(See “NISSAN all-
mode 4WD®” (P.5-124).)
orBrake warning light
This light functions for both the parking
brake and the foot brake systems.
Parking brake indicator:
When the ignition switch is in the ON
position, the light comes on when the
parking brake is applied.
Low brake fluid warning light:
When the ignition switch is in the ON
position, the light warns of a low brake
fluid level. If the light comes on while the
engine is running with the parking brake
not applied, stop the vehicle and perform
the following:
1. Check the brake fluid level. If brake fluid is low, add fluid and have the
system checked. It is recommended
you have this service performed by a
NISSAN dealer. (See “Brake fluid” (P.8-
9).)
2. If the brake fluid level is correct, have the warning system checked. It is
recommended you have this service
performed by a NISSAN dealer.
Page 108 of 604
2-14Instruments and controls
Master warning light
When the ignition switch is in the ON
position, the master warning light illumi-
nates when a warning message appears
in the vehicle information display.
See “Vehicle information display” (P.2-20).
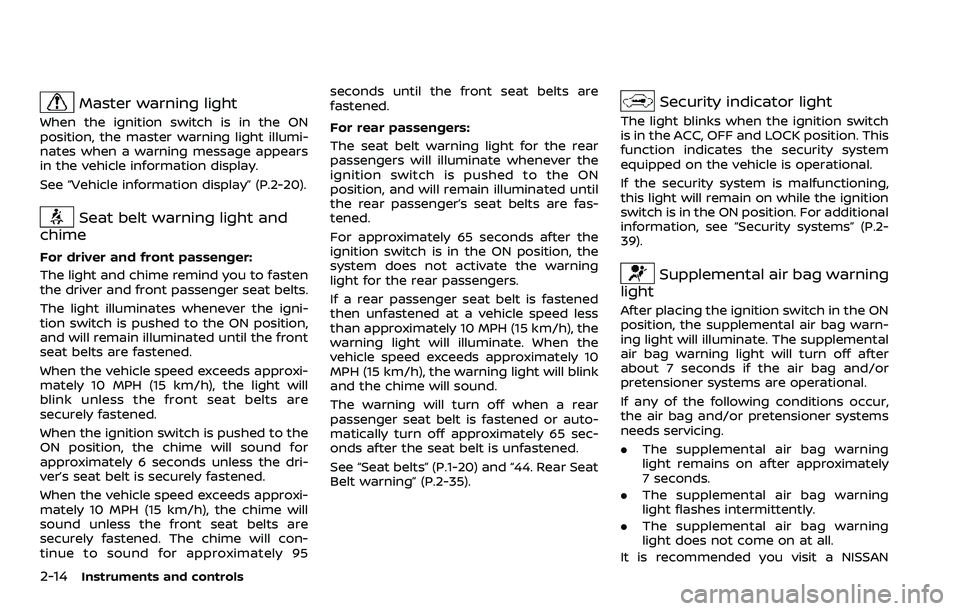
Seat belt warning light and
chime
For driver and front passenger:
The light and chime remind you to fasten
the driver and front passenger seat belts.
The light illuminates whenever the igni-
tion switch is pushed to the ON position,
and will remain illuminated until the front
seat belts are fastened.
When the vehicle speed exceeds approxi-
mately 10 MPH (15 km/h), the light will
blink unless the front seat belts are
securely fastened.
When the ignition switch is pushed to the
ON position, the chime will sound for
approximately 6 seconds unless the dri-
ver’s seat belt is securely fastened.
When the vehicle speed exceeds approxi-
mately 10 MPH (15 km/h), the chime will
sound unless the front seat belts are
securely fastened. The chime will con-
tinue to sound for approximately 95 seconds until the front seat belts are
fastened.
For rear passengers:
The seat belt warning light for the rear
passengers will illuminate whenever the
ignition switch is pushed to the ON
position, and will remain illuminated until
the rear passenger’s seat belts are fas-
tened.
For approximately 65 seconds after the
ignition switch is in the ON position, the
system does not activate the warning
light for the rear passengers.
If a rear passenger seat belt is fastened
then unfastened at a vehicle speed less
than approximately 10 MPH (15 km/h), the
warning light will illuminate. When the
vehicle speed exceeds approximately 10
MPH (15 km/h), the warning light will blink
and the chime will sound.
The warning will turn off when a rear
passenger seat belt is fastened or auto-
matically turn off approximately 65 sec-
onds after the seat belt is unfastened.
See “Seat belts” (P.1-20) and “44. Rear Seat
Belt warning” (P.2-35).
Security indicator light
The light blinks when the ignition switch
is in the ACC, OFF and LOCK position. This
function indicates the security system
equipped on the vehicle is operational.
If the security system is malfunctioning,
this light will remain on while the ignition
switch is in the ON position. For additional
information, see “Security systems” (P.2-
39).
Supplemental air bag warning
light
After placing the ignition switch in the ON
position, the supplemental air bag warn-
ing light will illuminate. The supplemental
air bag warning light will turn off after
about 7 seconds if the air bag and/or
pretensioner systems are operational.
If any of the following conditions occur,
the air bag and/or pretensioner systems
needs servicing.
. The supplemental air bag warning
light remains on after approximately
7 seconds.
. The supplemental air bag warning
light flashes intermittently.
. The supplemental air bag warning
light does not come on at all.
It is recommended you visit a NISSAN
Page 125 of 604
gent Key battery discharge” (P.5-15).)
10. Release Parking Brake
This warning appears when the vehicle
speed is above 4 MPH (7 km/h) and the
parking brake is applied. Stop the vehicle
and release the parking brake.
11. Low Fuel
This warning appears when the fuel level
in the tank is getting low. Refuel as soon
as it is convenient, preferably before the
fuel gauge reaches the 0 (Empty) position.
There is a small reserve of fuel remain-
ing in the tank when the fuel gauge
reaches the 0 (Empty) position.
12. Low Washer Fluid
This warning appears when the washer
tank fluid is at a low level. Add washer
fluid as necessary. (See “Window washer
fluid” (P.8-10).)
13. Loose Fuel Cap
This warning appears when the fuel-filler
cap is not tightened correctly after the
vehicle has been refueled. (See “Fuel-filler
cap” (P.3-26).)
14. Tire Pressure Low Add Air
This warning appears when the low tire
pressure warning light in the meter
illuminates and low tire pressure is de-
tected. The warning appears each time
the ignition switch is placed in the ON
position as long as the low tire pressure
warning light remains illuminated. If this
warning appears, stop the vehicle and
adjust the tire pressure to the recom-
mended COLD tire pressure shown on the
Tire and Loading Information label. (See
“Low tire pressure warning light” (P.2-16)
and “Tire Pressure Monitoring System
(TPMS)” (P.5-5).)
15. SNOW mode indicator
This indicator appears when SNOW mode
is selected by the SNOW mode switch.
(See “SNOW mode” (P.5-135).)
16. Four-Wheel Drive (4WD) shift
indicator (4WD models)
This indicator shows the Four-Wheel
Drive (4WD) driving mode (AUTO, 4HI or
4LO) that is selected by the 4WD shift
switch. (See “NISSAN all-mode 4WD®” (P.5-
124).)
17. Door/liftgate open warning
(ignition switch is in the ON posi-
tion)
This warning appears if any of the doors
and/or the liftgate are open or not closed
securely. The vehicle icon indicates which
door or the liftgate is open on the display.
18. Power will turn off to save the
battery
This warning appears after a period of
time if the ignition switch is in ACC or ON
position.
19. Power turned off to save the
battery
This warning appears after the ignition
switch is automatically turned OFF to
save the battery.
20. Light reminder warning
This warning appears when the driver
side door is opened with the headlight
switch is left ON and the ignition switch is
placed in the OFF or LOCK position. Place
the headlight switch in the OFF (if so
equipped) or AUTO position. For addi-
tional information, see “Headlight and
turn signal switch” (P.2-46).
Instruments and controls2-31