2023 HYUNDAI NEXO buttons
[x] Cancel search: buttonsPage 92 of 558
3-5
Convenient features of your vehicle
3
The Two Press Unlock feature can
also be enabled or disabled by
pressing the door lock and unlock
buttons simultaneously on the KeyFOB:
Press and hold both the Door Lock
button and the Door Unlock button
simultaneously until the hazard
warning lights blink.
This will enable or disable the Two
Press Unlock feature. Repeat this
procedure to enable/disable themode again.Information
The door handle buttons will only operate when the smart key is with-
in 0.7~1 m (28-40 inches) from the
outside door handle
Either the driver or front passenger door can be opened with the door
handle button when the smart key is
within this range
If you press the front passenger out- side door handle with the smart key
in your possession, all the doors will
unlockOpening the tailgate
Non-power tailgate
To unlock and open the tailgate:
1. Make sure you have the smart key in your possession.
2. Press either the tailgate handle release switch on the vehicle or
press and hold the Tailgate Unlock
button on the smart key for more
than one second. The hazard
warning lights will blink two times
and the tailgate latch will unlock.
3. Once the tailgate is opened and then closed, the tailgate will auto-
matically re-lock after 30 seconds.
Information
The tailgate handle switch will only operate when the smart key is with-
in 0.7 m (28 inches) from the tailgate
handle.
The Tailgate Unlock button (3) will only unlock the tailgate. It will not
release the latch and open the tail-
gate automatically. If the Tailgate
Unlock button is used, someone
must still press the tailgate handle
switch to open the tailgate.
Power tailgate
To unlock and open the tailgate:
1. Make sure you have the smart key in your possession.
2. Press either the tailgate handle release switch on the vehicle or
press and hold the Tailgate Unlock
button on the smart key for more
than one second. The hazard
warning lights will blink two timesand the tailgate latch will open.
3. Once the tailgate is opened and then closed, the tailgate will auto-
matically re-lock after 30 seconds.
Information
The tailgate handle switch will only
operate when the smart key is within
0.7 m (28 inches) from the tailgate
handle.
i
i
i
Page 113 of 558
3-26
Convenient features of your vehicle
To adjust the Zone setting:
1. Determine the desired ZoneNumber based upon your current
location on the Zone Map.
2. Press and hold the button for more than 3 but less than 6 sec-
onds, the current Zone Number
will appear on the display.
3. Pressing and holding the button again will cause the numbers to
increment (Note: they will repeat
…13, 14, 15, 1, 2, …). Releasing
the button when the desired Zone
Number appears on the display
will set the new Zone.
4. Within about 5 seconds the com- pass will start displaying a com-pass heading again.
There are some conditions that can
cause changes to the vehicle mag-
nets, such as installing a ski rack or
a CB antenna. Body repair work on
the vehicle can also cause changes
to the vehicle's magnetic field. In
these situations, the compass will
need to be re-calibrated to quickly
correct these changes. If you need to recalibrate the com-pass:
1. Press and hold the button for
more than 6 seconds. When the
compass memory is cleared a "C"
will appear in the display.
2. Drive the vehicle in 2 complete cir- cles at less than 8 km/h (5 mph).Integrated HomeLink ®
Wireless
Control System
The HomeLink ®
Wireless Control
System can replace up to three hand-
held radio-frequency (RF) transmit-
ters with a single built-in device. This
innovative feature will learn the radiofrequency codes of most current
transmitters to operate devices such
as gate operators, garage door open-
ers, entry door locks, security sys-
tems, even home lighting. Both stan-
dard and rolling code-equipped trans-
mitters can be programmed by fol-
lowing the outlined procedures. Additional HomeLink ®
information
can be found at: www.homelink.com
or by calling 1-800-355-3515.
Retain the original transmitter of the
RF device you are programming for
use in other vehicles as well as forfuture HomeLink ®
programming. It is
also suggested that upon the sale of
the vehicle, the programmedHomeLink ®
buttons be erased for
security purposes.
Page 115 of 558
3-28
Convenient features of your vehicle
To train rolling code devices, follow
these instructions:
1. At the garage door opener receiv-er (motor-head unit) in the garage,
locate the "learn" or "smart" but-
ton. This can usually be foundwhere the hanging antenna wire isattached to the motor-head unit.
Exact location and color of the but-
ton may vary by garage door
opener brand. If there is difficulty
locating the training button, refer-
ence the device owner’s manual or
please visit our Web site at
www.homelink.com.
2. Firmly press and release the "learn" or "smart" button (which
activates the "training light"). You
will have 30 seconds to initiatestep 3. 3. Return to the vehicle and firmly
press, hold for two seconds andthen release the desiredHomeLink ®
button. Repeat the
"press/hold/release" sequence asecond time to complete the pro-
gramming. (Some devices may
require you to repeat thissequence a third time to complete
the programming.)
4. Press and hold the just-trained HomeLink ®
button and observe
the red Status Indicator LED. If the
indicator light stays on constantly,
programming is complete and
your device should activate.
5. To program the remaining two HomeLink ®
buttons, follow either
steps 1 through 4 above for other
Rolling Code devices or steps 2
through 5 in Standard Programming
for standard devices.Standard programming
To train most devices, follow these
instructions:
1. For first-time programming, press and hold the two outside buttons, HomeLink ®
Channel 1 and
Channel 3 Buttons, until the indi-cator light begins to flash (after 20
seconds). Release both buttons.
Do not hold the buttons for longer
than 30 seconds.
2. Position the end of your hand-held transmitter 1-3 inches (2-8 cm)
away from the HomeLink ®
buttons
while keeping the indicator light in
view.
3. Simultaneously press and hold both the HomeLink ®
and hand-
held transmitter button. DO NOT
release the buttons until step 4has been completed.
4. While continuing to hold the but- tons the red Indicator Status LED
will flash slowly and then rapidlyafter HomeLink ®
successfully
trains to the frequency signal from
the hand-held transmitter. Release
both buttons.
Page 116 of 558
3-29
Convenient features of your vehicle
3
5. Press and hold the just-trainedHomeLink ®
button and observe
the red Status Indicator LED. If the
indicator light stays on constantly,
programming is complete and
your device should activate whenthe HomeLink ®
button is pressed
and released.
6. To program the remaining two HomeLink ®
buttons, follow steps 2
through 5.Gate operator & Canadian program-
ming
During programming, your handheld
transmitter may automatically stop
transmitting. Continue to press the
Integrated HomeLink ®
Wireless
Control System button (note steps 2 through 4 in the Standard
Programming portion of this docu-
ment) while you press and re-press
("cycle") your handheld transmitter
every two seconds until the frequen-
cy signal has been learned. The indi-
cator light will flash slowly and then
rapidly after several seconds upon
successful training.
Operating HomeLink®
To operate, simply press and release
the programmed HomeLink ®
button.
Activation will now occur for the
trained device (i.e. garage door
opener, gate operator, security sys-
tem, entry door lock, home/office
lighting, etc.). For convenience, the
hand-held transmitter of the device
may also be used at any time.
Reprogramming a single
HomeLink®button
To program a new device to a previ-
ously trained HomeLink ®
button, fol-
low these steps:
1. Press and hold the desired HomeLink ®
button. Do NOT
release until step 4 has been com- pleted.
2. When the indicator light begins to flash slowly (after 20 seconds),
position the handheld transmitter 1
to 3 inches away from theHomeLink ®
surface.
3. Press and hold the handheld transmitter button. The HomeLink ®
indicator light will flash, first slowly
and then rapidly.
4. When the indicator light begins to flash rapidly, release both buttons.
5. Press and hold the just-trained HomeLink ®
button and observe
the red Status Indicator LED. If the
indicator light stays on constantly,
programming is complete and
your new device should activate.
Page 117 of 558
3-30
Convenient features of your vehicle
Erasing HomeLink®buttons
Individual buttons cannot be erased.
However, to erase all three pro-
grammed buttons:
1. Press and hold the two outerHomeLink ®
buttons until the indi-
cator light begins to flash-after 20
seconds.
2. Release both buttons. Do not hold for longer than 30 seconds.
The Integrated HomeLink ®
Wireless
Control System is now in the training
(learn) mode and can be pro-
grammed at any time following the
appropriate steps in the Programming
chapters above. NVS ®
is a registered trademark and
Z-Nav™ is a trademark of the Gentex
Corporation, Zeeland, Michigan.HomeLink ®
is a registered trademark
owned by Johnson Controls,
Incorporated, Milwaukee, Wisconsin.
FCC ID : NZLHFCHL4
IC : 4112A-HFCHL4 Information
This device complies with Industry
Canada RSS-210 standard.
Operation is subject to the following
three conditions:
1. This device may not cause harmful interference.
2. This device must accept any inter- ference received, including interfer-
ence that may cause undesired
operation.
3. The transceiver has been tested and complies with FCC and Industry
Canada rules. Changes or modifi-
cations not expressly approved by
the party responsible for compli-
ance could void the user's authority
to operate the device.
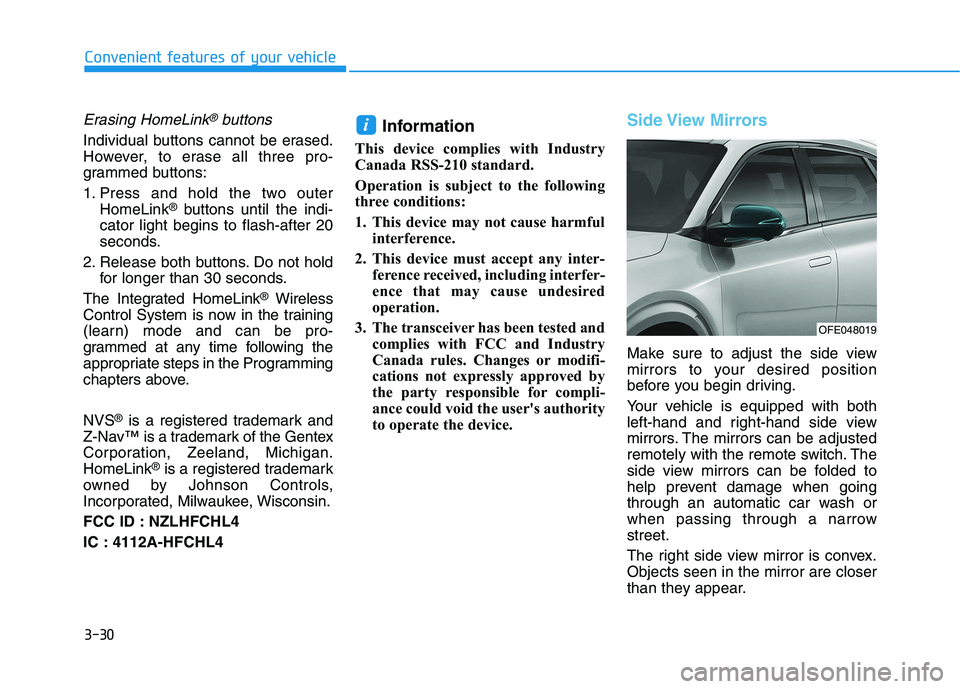
Side View Mirrors
Make sure to adjust the side view
mirrors to your desired position
before you begin driving.
Your vehicle is equipped with both
left-hand and right-hand side view
mirrors. The mirrors can be adjusted
remotely with the remote switch. The
side view mirrors can be folded to
help prevent damage when going
through an automatic car wash or
when passing through a narrowstreet.
The right side view mirror is convex. Objects seen in the mirror are closer
than they appear.
i
OFE048019
Page 135 of 558
3-48
Convenient features of your vehicle
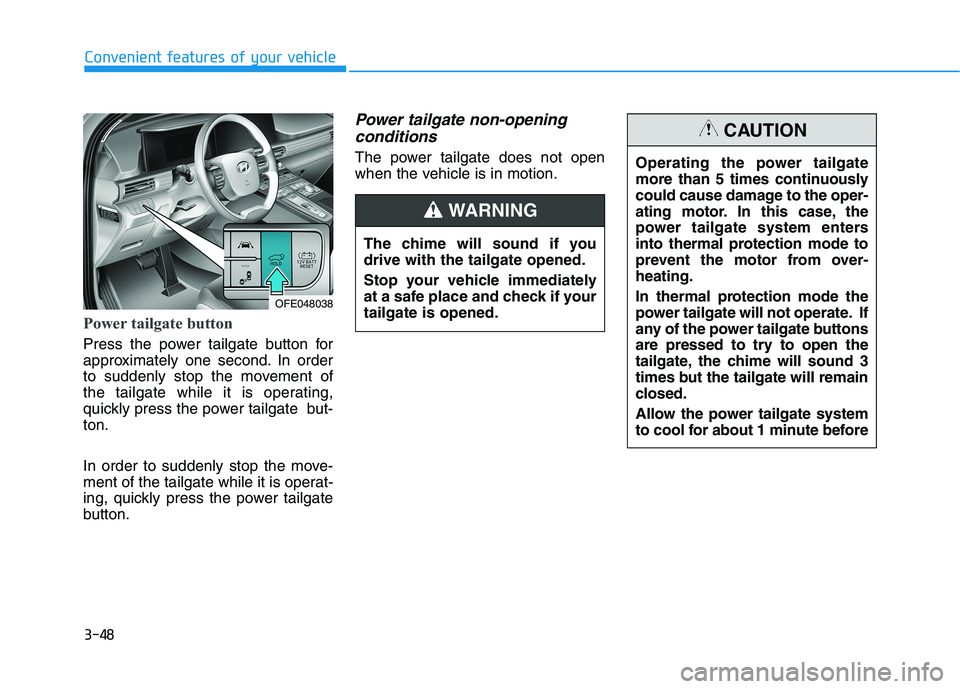
Power tailgate button
Press the power tailgate button for
approximately one second. In order
to suddenly stop the movement of
the tailgate while it is operating,
quickly press the power tailgate but-ton.
In order to suddenly stop the move-
ment of the tailgate while it is operat-
ing, quickly press the power tailgate
button.
Power tailgate non-openingconditions
The power tailgate does not open
when the vehicle is in motion.
The chime will sound if youdrive with the tailgate opened.
Stop your vehicle immediately
at a safe place and check if yourtailgate is opened.
WARNING
OFE048038 Operating the power tailgate
more than 5 times continuously
could cause damage to the oper-
ating motor. In this case, the
power tailgate system enters
into thermal protection mode to
prevent the motor from over-heating.
In thermal protection mode the
power tailgate will not operate. If
any of the power tailgate buttons
are pressed to try to open the
tailgate, the chime will sound 3
times but the tailgate will remain
closed.
Allow the power tailgate system
to cool for about 1 minute before
CAUTION
Page 198 of 558
3-111
Convenient features of your vehicle
3
Always keep the camera lens
clean. The camera may not work
normally if the lens is covered
with foreign material.
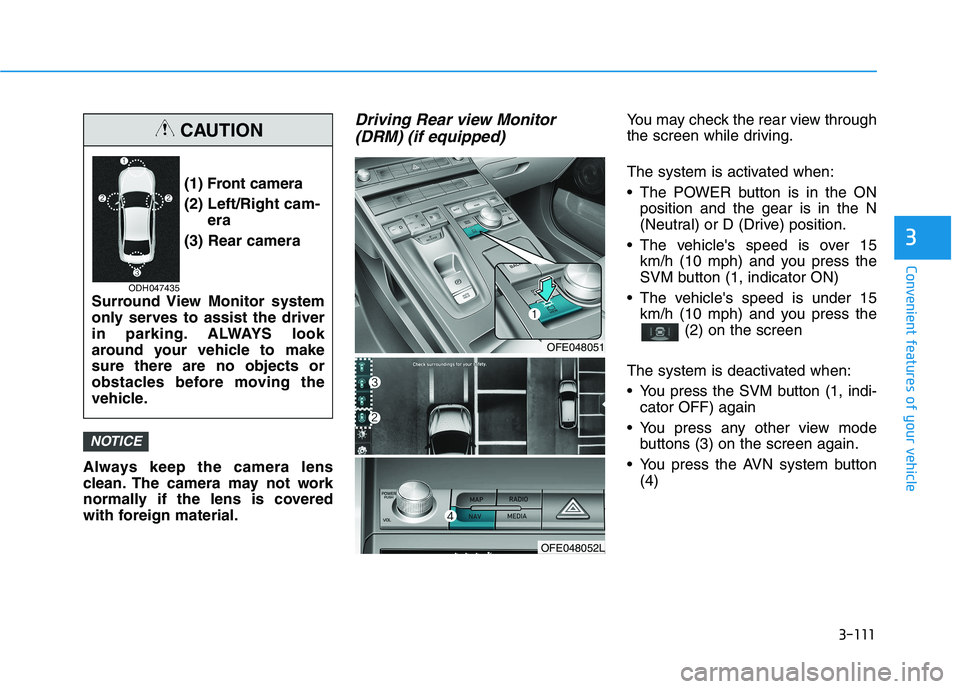
Driving Rear view Monitor(DRM) (if equipped)You may check the rear view through
the screen while driving.
The system is activated when:
The POWER button is in the ON position and the gear is in the N
(Neutral) or D (Drive) position.
The vehicle's speed is over 15 km/h (10 mph) and you press the
SVM button (1, indicator ON)
The vehicle's speed is under 15 km/h (10 mph) and you press the (2) on the screen
The system is deactivated when:
You press the SVM button (1, indi- cator OFF) again
You press any other view mode buttons (3) on the screen again.
You press the AVN system button (4)
NOTICE
(1) Front camera
(2) Left/Right cam- era
(3) Rear camera
Surround View Monitor system
only serves to assist the driver
in parking. ALWAYS look
around your vehicle to makesure there are no objects or
obstacles before moving the
vehicle.
CAUTION
ODH047435
OFE048051
OFE048052L
Page 199 of 558
3-112
Convenient features of your vehicle
Information
If vehicle speed is over 15 km/h (10 mph)
- the DRM image stays ON when therear view was on the screen
- screen (top, front wide, front right and front left) of other modes of
SVM system turns OFF and
switches to the original AVN
screen when other modes were on
the screen
If the SVM system is ON and the vehicle speed is under 15 km/h (10
mph)
- the rear image stays ON when therear view was on the screen
- a pop-up for selecting the SVM mode (top, front wide, front right
and front left) appears when press-
ing any other view mode buttons
(3) than (2) on the screen. When the vehicle is backing up, the
rear image will appear on the screen
automatically regardless of vehicle
speed or SVM button (1) status.
- If the rear image was ON, thescreen switches to the parking
assist screen.
- If the screen (top, front wide, front right and front left) of other modes
of SVM system was ON, the screen
for setting the initial rear view
mode appears.
- When the shift gear is moved from R (Reverse) to D (Drive), the
screen of the previous mode is dis-
played.
A warning appears on the system when:
- The tailgate is opened
- The driver's door is opened
- The passenger's door is opened
- The outer side view mirror is folded If the system is not operating nor-
mally, the system should be checked
by an authorized HYUNDAI dealer.
For more details, refer to the sep-
arately supplied manual with your
vehicle.i