2023 HYUNDAI KONA EV steering wheel
[x] Cancel search: steering wheelPage 429 of 548
Driver assistance system
7-96
•
Always have your eyes on the road,
and it is the responsibility of the
driver to avoid violating traffic laws.
The vehicle manufacturer is not
responsible for any traffic violation
or accidents caused by the driver.
• Highway Driving Assist may not
be able to recognize all traffic
situations. Highway Driving Assist
may not detect possible collisions
due to limitations of the function.
Always be aware of the limitations
of the function. Obstacles such as
vehicles, motorcycles, bicycles,
pedestrians, or unspecified objects
or structures such as guardrails,
tollgate, etc. that may collide with
the vehicle may not be detected.
• Highway Driving Assist will turn off
automatically under the following
situations:
- Driving on roads that Highway
Driving Assist does not operate,
such as a rest area, intersection,
junction, etc.
- The navigation does not operate
properly such as when the
navigation is being updated or
restarted •
Highway Driving Assist may
inadvertently operate or turn off
depending on road conditions
(navigation information) and
surroundings.
• Lane Following Assist function may
be temporarily disabled when the
front view camera cannot detect
lanes properly or the hands-off
warning is on.
• You may not hear the warning sound
of Highway Driving Assist if the
surrounding is noisy.
• If the vehicle is driven at high speed
above a certain speed at a curve,
your vehicle may drive to one side or
may depart from the driving lane.
• When you are towing a trailer or
another vehicle, we recommend that
Highway Driving Assist is turned off
due to safety reasons.
• The hands–off warning message
may appear early or late depending
on how the steering wheel is held or
road conditions. Always have your
hands on the steering wheel while driving.
• For your safety, please read the
owner's manual before using the
Highway Driving Assist.
• Highway Driving Assist will not
operate when the vehicle is started,
or when the detecting sensors or
navigation is being initialized.
Page 436 of 548
07
7-103
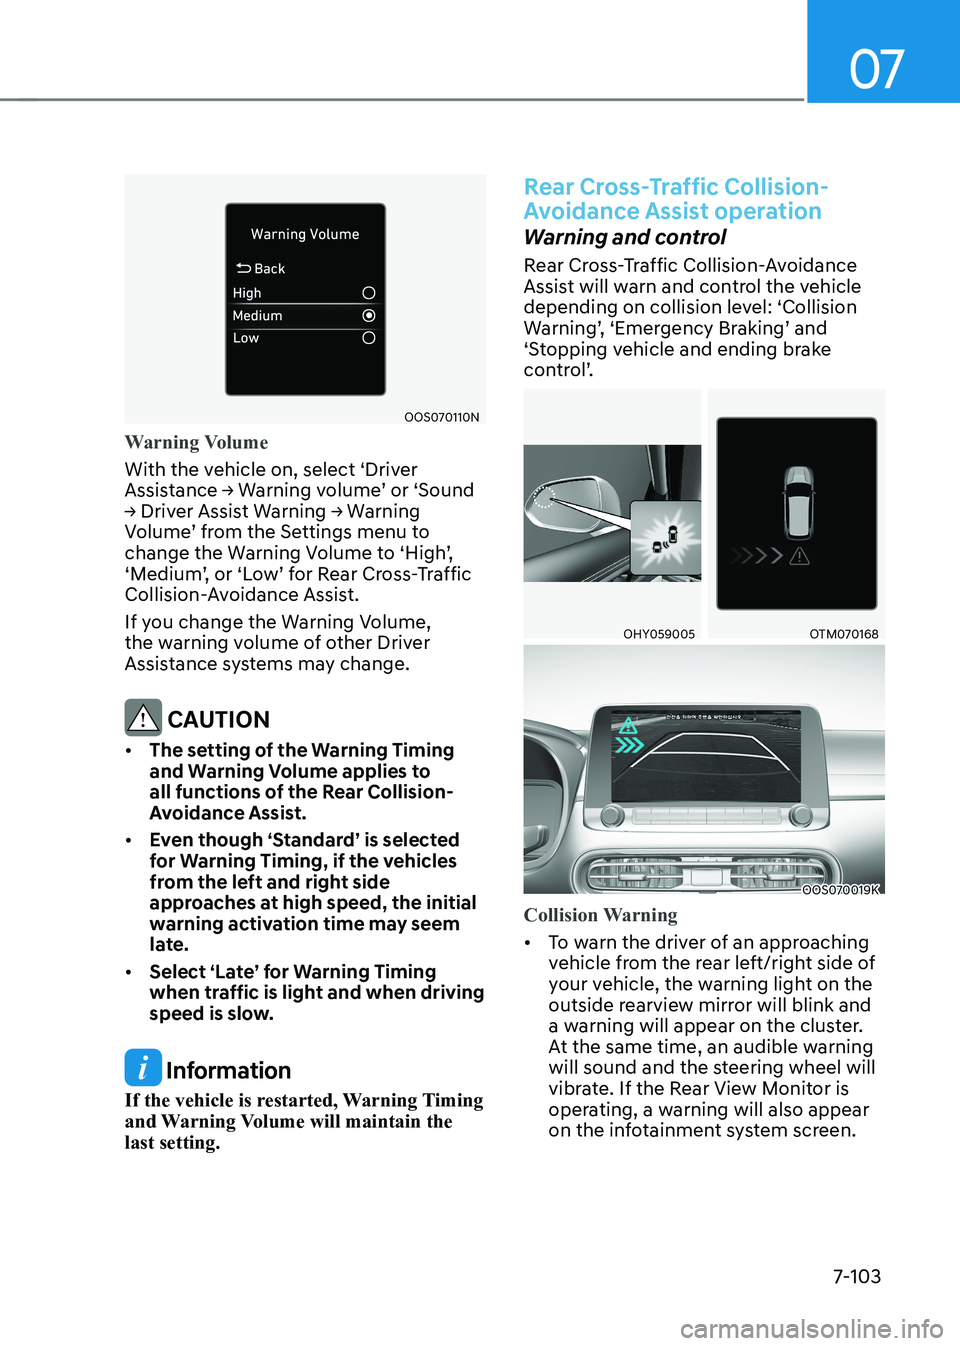
OOS070110N
Warning Volume
With the vehicle on, select ‘Driver
Assistance → Warning volume’ or ‘Sound
→ Driver Assist Warning → Warning
Volume’ from the Settings menu to
change the Warning Volume to ‘High’,
‘Medium’, or ‘Low’ for Rear Cross-Traffic
Collision-Avoidance Assist.
If you change the Warning Volume,
the warning volume of other Driver
Assistance systems may change.
CAUTION
• The setting of the Warning Timing
and warning volume applies to
all functions of the Rear Collision-
Avoidance Assist.
• even though ‘standard’ is selected
for Warning Timing, if the vehicles
from the left and right side
approaches at high speed, the initial
warning activation time may seem
late.
• Select ‘Late’ for Warning Timing
when traffic is light and when driving
speed is slow.
Information
If the vehicle is restarted, Warning Timing
and Warning Volume will maintain the last setting.
Rear Cross-Traffic Collision-
Avoidance Assist operation
Warning and control
Rear Cross-Traffic Collision-Avoidance
Assist will warn and control the vehicle
depending on collision level: ‘Collision
Warning’, ‘Emergency Braking’ and
‘Stopping vehicle and ending brake
control’.
OHY059005OTM070168
OOS070019K
Collision Warning
• To warn the driver of an approaching
vehicle from the rear left/right side of
your vehicle, the warning light on the
outside rearview mirror will blink and
a warning will appear on the cluster.
At the same time, an audible warning
will sound and the steering wheel will
vibrate. If the Rear View Monitor is
operating, a warning will also appear
on the infotainment system screen.
Page 437 of 548
Driver assistance system
7-104
•
Rear Cross-Traffic Collision-Avoidance
Assist will operate when all the
following conditions are satisfied:
- The gear is shifted to R (Reverse)
- Vehicle speed is below 8 km/h (5 mph)
- The approaching vehicle is within approximately 25 m (82 ft.) from the
left and right side of your vehicle
- The speed of the vehicle approaching from the left and right
is above 5 km/h (3 mph)
Information
If the operating conditions are satisfied,
there will be a warning whenever the
vehicle approaches from the left or right
side even though your vehicle speed is 0 km/h (0 mph).
OHY059005OTM070122N
OOS070019K
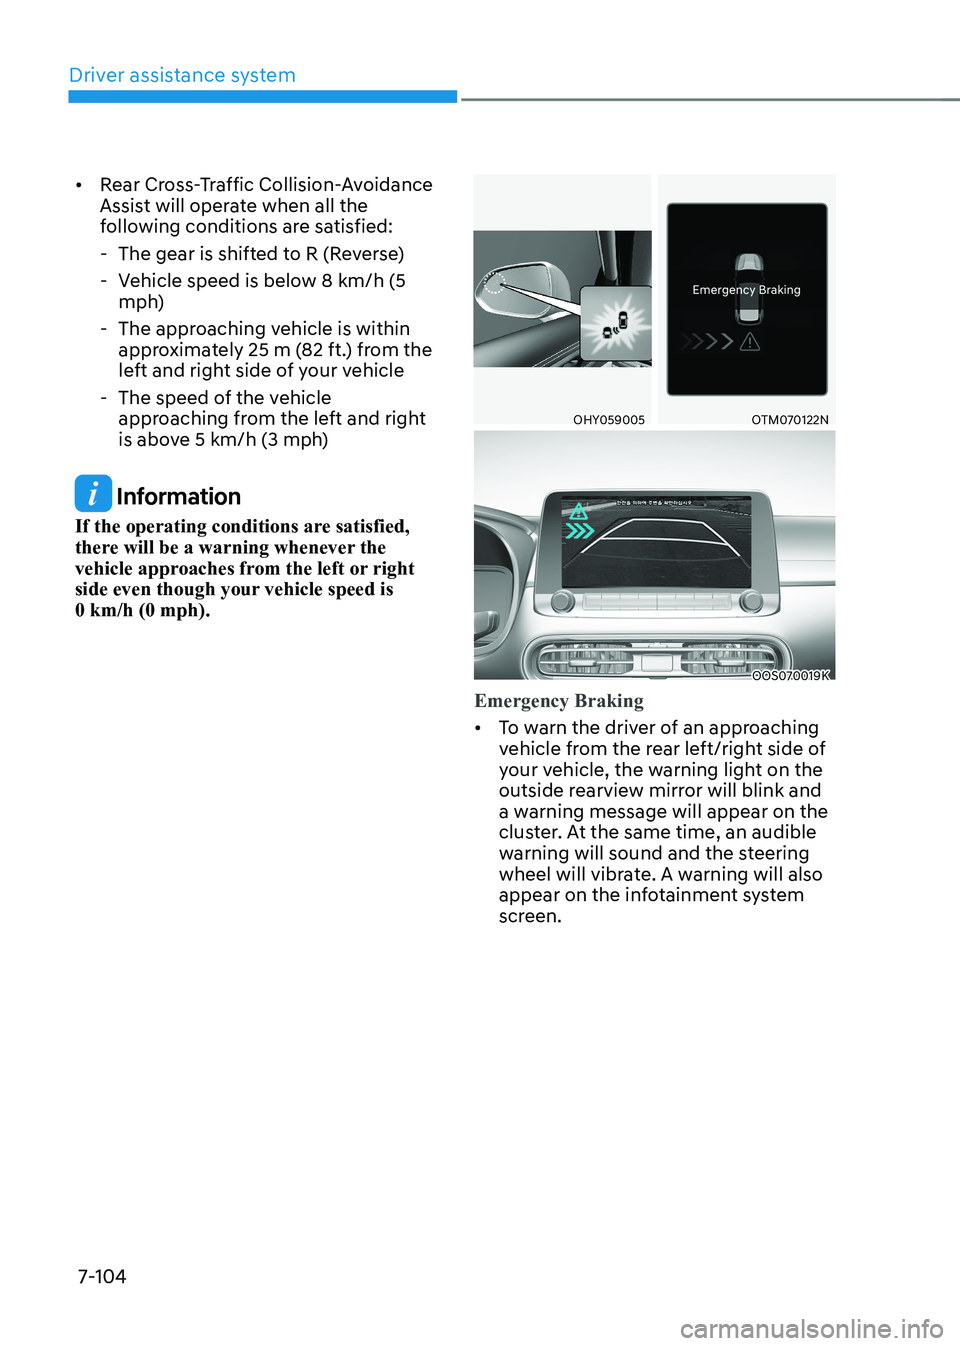
Emergency Braking
• To warn the driver of an approaching
vehicle from the rear left/right side of
your vehicle, the warning light on the
outside rearview mirror will blink and
a warning message will appear on the
cluster. At the same time, an audible
warning will sound and the steering
wheel will vibrate. A warning will also
appear on the infotainment system
screen.
Page 468 of 548
08
8-13
WARNING
Sealant • Keep out of reach of children.
• Avoid contact with eyes.
• Do not swallow.
Using the Tire Mobility Kit When
a tire is flat
CAUTION
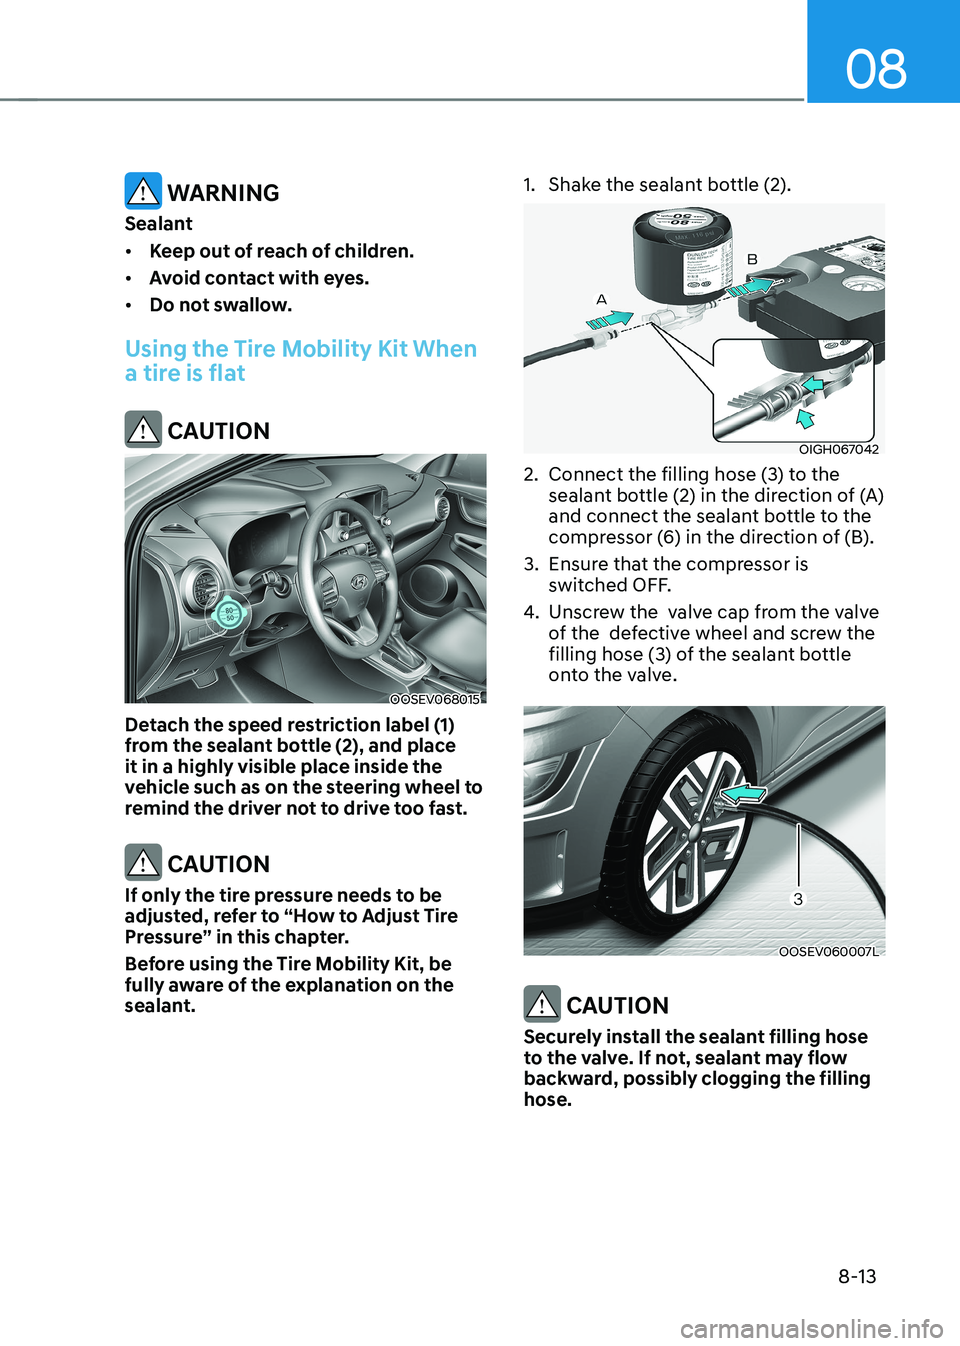
OOSEV068015
Detach the speed restriction label (1)
from the sealant bottle (2), and place
it in a highly visible place inside the
vehicle such as on the steering wheel to
remind the driver not to drive too fast.
CAUTION
If only the tire pressure needs to be
adjusted, refer to “How to Adjust Tire
Pressure” in this chapter.
Before using the Tire Mobility Kit, be
fully aware of the explanation on the
sealant. 1. Shake the sealant bottle (2).
OIGH067042
2. Connect the filling hose (3) to the sealant bottle (2) in the direction of (A)
and connect the sealant bottle to the
compressor (6) in the direction of (B).
3. Ensure that the compressor is switched OFF.
4. Unscrew the valve cap from the valve
of the defective wheel and screw the
filling hose (3) of the sealant bottle
onto the valve.
OOSEV060007L
CAUTION
Securely install the sealant filling hose
to the valve. If not, sealant may flow
backward, possibly clogging the filling hose.
Page 475 of 548
Emergency situations
8-20
Emergency towing
If towing is necessary, we recommend
you have it done by an authorized
HYUNDAI dealer or a commercial tow truck service.
If a towing service is not available in
an emergency, your vehicle may be
temporarily towed using a cable or chain
secured to the emergency towing hook
at the front (or rear) of the vehicle.
Use extreme caution when towing the
vehicle with a cable or chain. A driver
must be in the vehicle to steer it and
operate the brakes.
Towing in this manner may be done
only on hard-surfaced roads for a short
distance and at low speeds. Also, the
wheels, axles, power train, steering and
brakes must all be in good condition.
CAUTION
The driver must be in the vehicle for
steering and braking operations when
the vehicle is being towed. Passengers
other than the driver must not be in the
vehicle. Always follow these emergency towing
precautions: •
While depressing the brake pedal
shift to the N (Neutral) position and
turn the vehicle off. The START/STOP
button will be in the ACC position.
• Release the parking brake.
• Depress the brake pedal with more
force than normal as you will have
reduced braking performance.
• More steering effort will be required
because the power steering system will be disabled.
• Use a vehicle heavier than your own to
tow your vehicle.
• The drivers of both vehicles should
communicate with each other
frequently.
• Before emergency towing, check that
the hook is not broken or damaged.
• Fasten the towing cable or chain
securely to the hook.
• Do not jerk the hook. Apply steady
and even force.
Page 482 of 548
Maintenance
9-6
While operating your vehicle: •
Check for vibrations in the steering
wheel. Notice if there is any increased
steering effort or looseness in the
steering wheel, or change in its
straight-ahead position.
• Notice if your vehicle constantly turns
slightly or “pulls” to one side when
traveling on smooth, level road.
• When stopping, listen and check for
unusual sounds, pulling to one side,
increased brake pedal travel or “hard-
to-push” brake pedal.
• If any slipping or changes in the
operation of your reduction gear
occurs, check the reduction gear fluid
level.
• Check the reduction gear p (park) function.
• Check the parking brake.
• Check for fluid leaks under your
vehicle (water dripping from the air
conditioning system during or after use is normal).
At least monthly: • Check coolant level in the coolant
reservoir.
• Check the operation of all exterior
lights, including the stoplights, turn
signals and hazard warning flashers.
• Check the inflation pressures of all
tires including the spare for tires that
are worn, show uneven wear, or are damaged.
• Check for loose wheel lug nuts.
• Do not add regular green coolant. •
At least twice a year:
(i.e., every Spring and Autumn)
• Check radiator, heater and air
conditioning hoses for leaks or damage.
• Check windshield washer spray and
wiper operation. Clean wiper blades
with a clean cloth dampened with
washer fluid.
• Check headlamp alignment.
• Check the seat belts for wear and function.
At least once a year: • Clean body and door drain holes.
• Lubricate door hinges and hood hinges.
• Lubricate door and hood locks and
latches.
• Lubricate door rubber weather strips.
• Check the air conditioning system.
• Inspect and lubricate reduction gear
linkage and controls.
• Clean the battery and terminals.
• Check the brake fluid level.
Page 485 of 548
09
9-9
EXPLANATION OF SCHEDULED MAINTENANCE ITEMS
Cooling system
Check the cooling system parts, such
as radiator, coolant reservoir, hoses and
connections for leakage and damage.
Replace any damaged parts.
Coolant
The coolant should be changed at the
intervals specified in the maintenance schedule.
Reduction gear fluid
The reduction gear fluid should be
inspected according to the intervals
specified in the maintenance schedule.
Brake hoses and lines
Visually check for proper installation,
chafing, cracks, deterioration and any
leakage. Replace any deteriorated or
damaged parts immediately.
Brake fluid
Check the brake fluid level in the brake
fluid reservoir. The level should be
between “MIN” and “MAX” marks on the
side of the reservoir. Use only hydraulic
brake fluid conforming to DOT 3 or DOT 4
specification.
Brake pads, calipers and rotors
Check the pads for excessive wear, discs
for run out and wear, and calipers for
fluid leakage.
For more information on checking the
pads or lining wear limit, refer to the
HYUNDAI web site.
(http://service.hyundai-motor.com)
Suspension mounting bolts
Check the suspension connections for
looseness or damage. Retighten to the
specified torque.
Steering gear box, linkage &
boots/lower arm ball joint
With the vehicle stopped, check for
excessive free-play in the steering wheel.
Check the linkage for bends or damage.
Check the dust boots and ball joints
for deterioration, cracks, or damage.
Replace any damaged parts.
Drive shafts and boots
Check the drive shafts, boots and clamps
for cracks, deterioration, or damage.
Replace any damaged parts and, if
necessary, repack the grease.
Air conditioning refrigerant/
compressor
Check the air conditioning lines and
connections for leakage and damage.
Page 496 of 548
Maintenance
9-20
TIRE AND WHEELS
WARNING
Tire failure may cause loss of vehicle
control resulting in an accident. To
reduce risk of SERIOUS INJURY or
DEATH, take the following precautions: • Inspect your tires monthly for proper
inflation as well as wear and damage.
• The recommended cold tire pressure
for your vehicle can be found in this
manual and on the tire label located
on the driver’s side center pillar.
Always use a tire pressure gauge to
measure tire pressure. Tires with
too much or too little pressure wear
unevenly causing poor handling.
• Check the pressure of the spare
every time you check the pressure of
the other tires on your vehicle.
• Replace tires that are worn, show
uneven wear, or are damaged.
Worn tires can cause loss of braking
effectiveness, steering control, or
traction.
• ALWAYS replace tires with the same
size as each tire that was originally
supplied with this vehicle. Using
tires and wheels other than the
recommended sizes could cause
unusual handling characteristics,
poor vehicle control, or negatively
affect your vehicle’s Anti-Lock Brake
System (ABS) resulting in a serious
accident.Tire care
For proper maintenance, safety, and
maximum electric energy economy, you
must always maintain recommended
tire inflation pressures and stay within
the load limits and weight distribution
recommended for your vehicle.
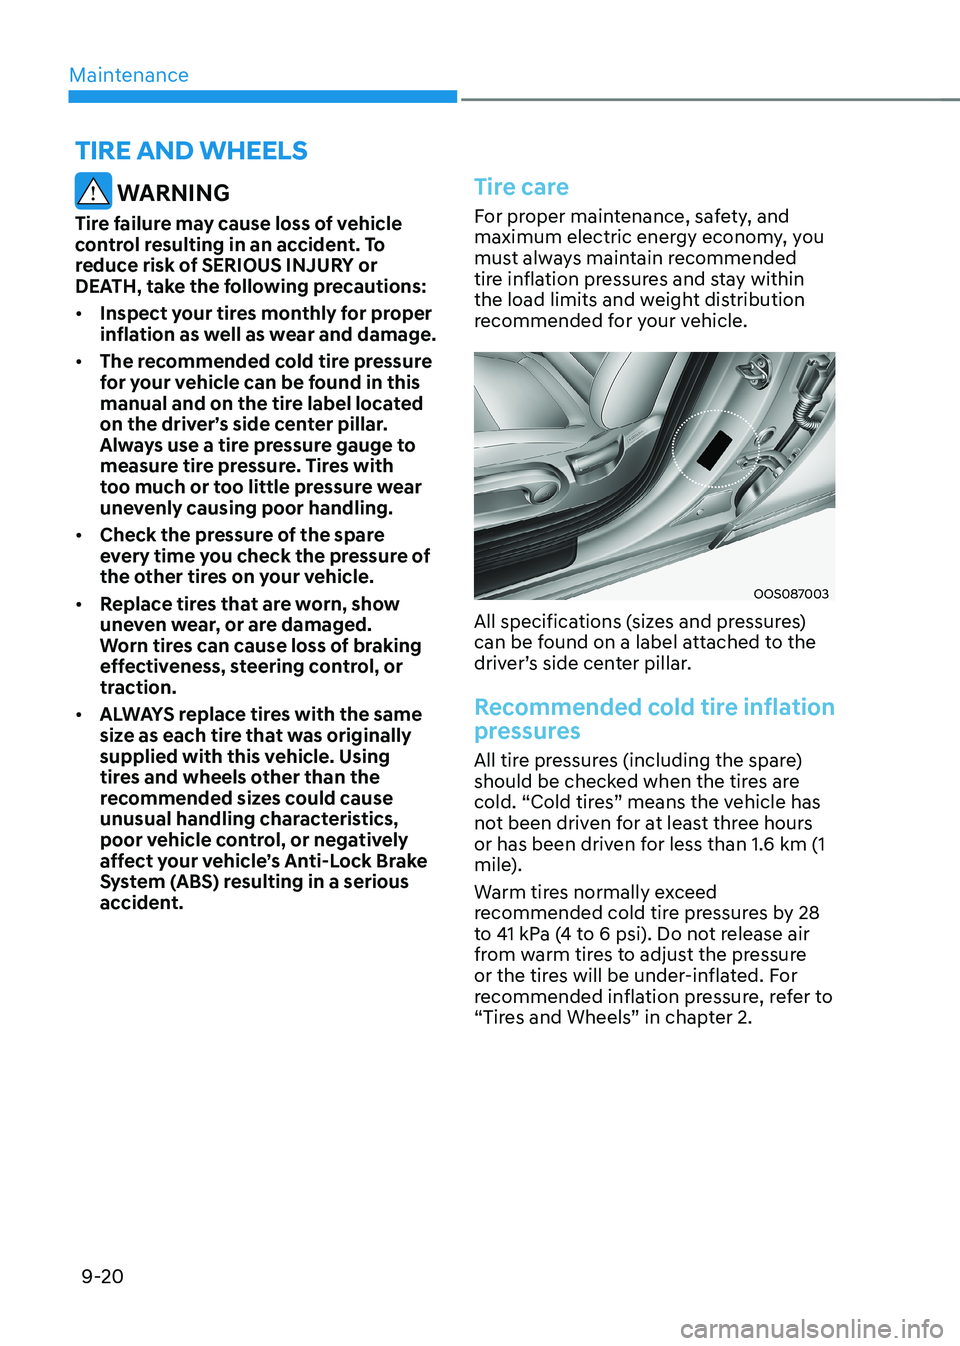
OOS087003
All specifications (sizes and pressures)
can be found on a label attached to the
driver’s side center pillar.
Recommended cold tire inflation
pressures
All tire pressures (including the spare)
should be checked when the tires are
cold. “Cold tires” means the vehicle has
not been driven for at least three hours
or has been driven for less than 1.6 km (1
mile).
Warm tires normally exceed
recommended cold tire pressures by 28
to 41 kpa (4 to 6 psi). Do not release air
from warm tires to adjust the pressure
or the tires will be under-inflated. For
recommended inflation pressure, refer to
“Tires and Wheels” in chapter 2.