2023 HYUNDAI IONIQ 5 Sound
[x] Cancel search: SoundPage 7 of 680

1
Charging the Electric Vehicle (abrupt stop) ...................................................1-49
Action to be taken when charging stops abruptly ...................................................1-49
Driving Electric Vehicle ................................................................................... 1-50
How to Start the Vehicle ............................................................................................ 1-50
How to Stop the Vehicle ............................................................................................ 1-50
Virtual Engine Sound System ..................................................................................... 1-51
Distance to Empty ....................................................................................................... 1-51
Tips for Improving Distance to Empty ...................................................................... 1-52
ECO Driving ................................................................................................................ 1-53
Electricity Use ............................................................................................................. 1-53
Power/Charge Gauge ................................................................................................ 1-54
State Of Charge (SOC) Gauge for High Voltage Battery ..........................................1-54
Aux. Battery Saver+ .................................................................................................... 1-55
Warning and Indicator Lights (related to electric vehicle) ......................................1-56
LCD Display Messages ............................................................................................... 1-58
Safety Precautions for Electric Vehicle ..........................................................1-63
If an Accident Occurs ................................................................................................. 1-63
Other Precautions for Electric Vehicle ...................................................................... 1-64
High Voltage cut-off Switch ...................................................................................... 1-65
Page 40 of 680

01
1-35
ONE1Q011041
6. Check if the charging indicator light (
) of the high voltage battery in
the instrument cluster is turned ON.
Charging is not active when the
charging indicator light (
) is OFF.
When the charging connector is not
connected properly, reconnect the
charging cable to charge it again.
During cold weather, DC charging
may not be available to prevent high
voltage battery degradation.
Information
To control the temperature of the high voltage battery while charging, the
air conditioner is used to cool down the battery which may generate noise
from operation of the air conditioner
compressor and cooling fan.
Also, the air conditioner’s performance
may be degraded during summer due to
operation of the cooling system for the
high voltage battery.
Information
Even though charging is possible with
the Start/Stop button in the ON/START
position, for you safety, start charging when the Start/Stop button is in the
OFF position and the vehicle shifted to P
(Park). After charging has started, you can use electrical components such as the
radio by pressing the Start/Stop button to
the ACC or ON position.
During charging, the gear cannot be
shifted from P (Park) to any other gear.
ONE1Q011059E
7. After charging has started, the
estimated charging time is displayed
on the instrument cluster for about 1
minute.
If you open the driver seat door while
charging, the estimated charging time
is also displayed on the instrument
cluster for about 1 minute.
Information
• Depending on the condition and
durability of the high voltage battery,
charger specifications, and ambient
temperature, the time required for
charging the battery may vary.
• In rare cases, you might hear high
frequency noise (very little beep sound)
outside the car when charging with
400V fast charger that is deteriorated
or has long communication delay.
The high frequency noise can be
generated only when the car tries to
reduce its own electromagnetic waves to keep fast charging as possible.
So there is no need to worry about this little noise, because it is the intentional
operation of the car that does not
affect any charging performance or the vehicle itself at all.
Page 56 of 680

01
1-51
Virtual Engine Sound System
The Virtual Engine Sound System
generates engine sound for pedestrians
to hear vehicle sound because there is
no sound while the Electric Vehicle (EV)
is operating. • If the vehicle is in the ready (
)
mode and the gear is not in P (Park),
the VESS will be operated.
• When the gear is shifted to R
(Reverse), an additional warning
sound will be heard.
CAUTION
• The vehicle is much quieter while
driving than a conventional gasoline-
powered vehicle. Be aware of your
surroundings and always drive safely.
• After you park the vehicle or while
you are waiting at a traffic light,
check whether there are children or
obstacles around the vehicle.
• Check if there is something behind
the vehicle when driving in reverse.
Pedestrians may not hear the sound
of the vehicle.
Distance to Empty
ONE1Q011049E
The distance to empty is displayed
differently according to the selected
drive mode in the Drive Mode Integrated
Control System.
For more information, refer to “Drive
Mode Integrated Control System” in
chapter 6.
When destination is not set • On average, a vehicle can drive about
199 miles (320 km) (Standard type) /
249 miles (400 km) (Extended type).
• Under certain circumstances where
the air conditioner/heater is ON,
the distance to empty is impacted,
resulting in a possible distance range
from 106 ~ 286 miles (170 ~ 460 km)
(Standard type) / 130 ~ 354 miles
(210 ~ 570 km) (Extended type).
When using the heater during cold
weather or driving at high speed, the
high voltage battery consumes a lot
more electricity. This may reduce the
distance to empty significantly.
• After ‘0 km’ has been displayed,
the vehicle can drive an additional
2~5 miles (3~8 km) depending on
driving speed, heater/air conditioner,
weather, driving style, and other
factors.
Page 67 of 680

Foreword / Electric Vehicle System Overview
1-62
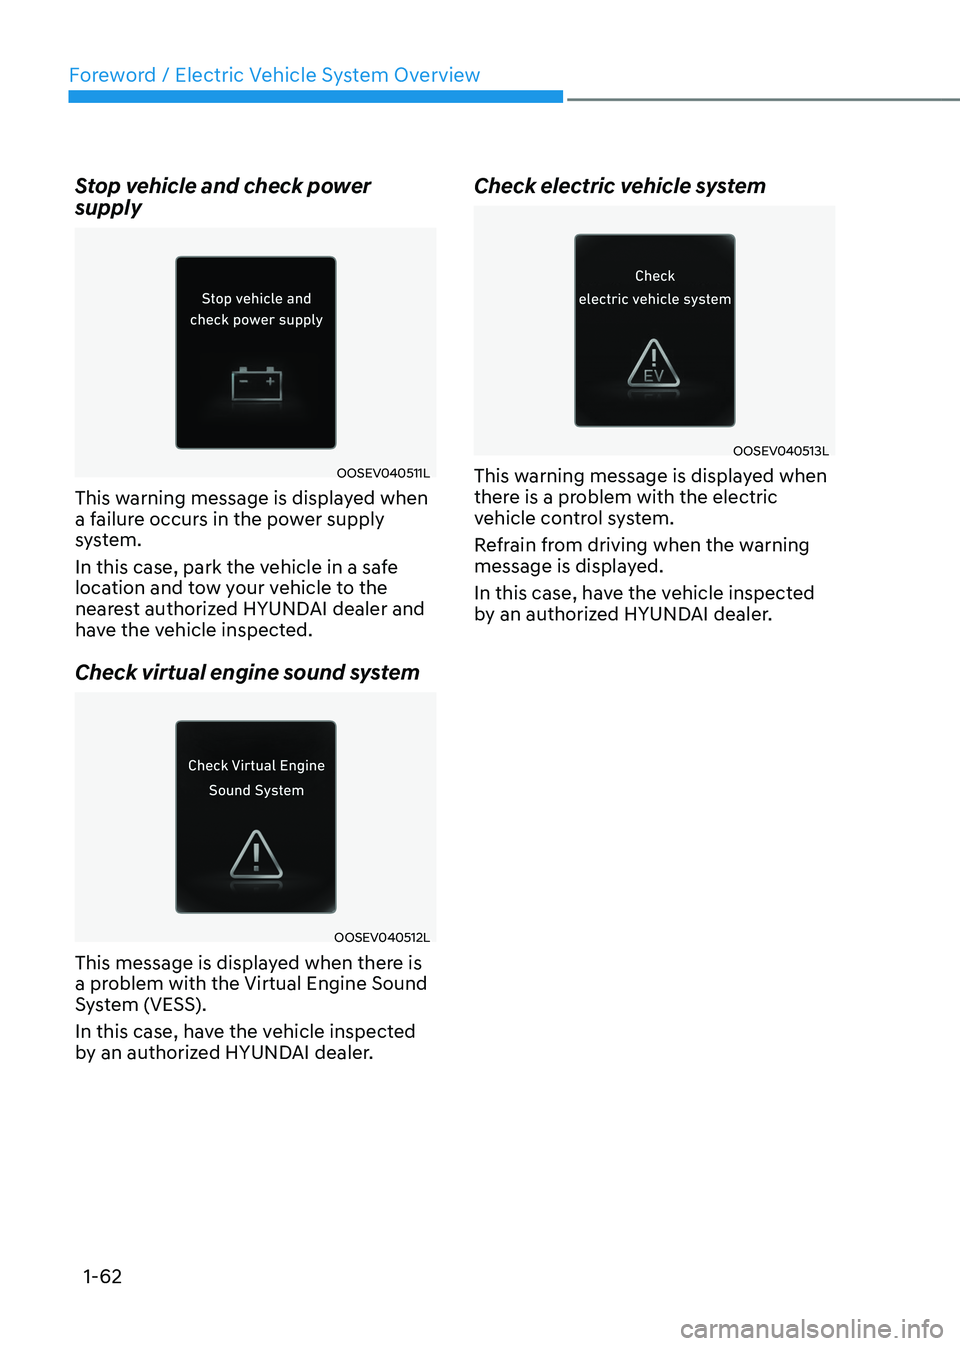
Stop vehicle and check power supply
OOSEV040511L
This warning message is displayed when
a failure occurs in the power supply
system.
In this case, park the vehicle in a safe
location and tow your vehicle to the
nearest authorized HYUNDAI dealer and
have the vehicle inspected.
Check virtual engine sound system
OOSEV040512L
This message is displayed when there is
a problem with the Virtual Engine Sound
System (VESS).
In this case, have the vehicle inspected
by an authorized HYUNDAI dealer. Check electric vehicle system
OOSEV040513L
This warning message is displayed when
there is a problem with the electric
vehicle control system.
Refrain from driving when the warning
message is displayed.
In this case, have the vehicle inspected
by an authorized HYUNDAI dealer.
Page 117 of 680

Seats & Safety System
3-30
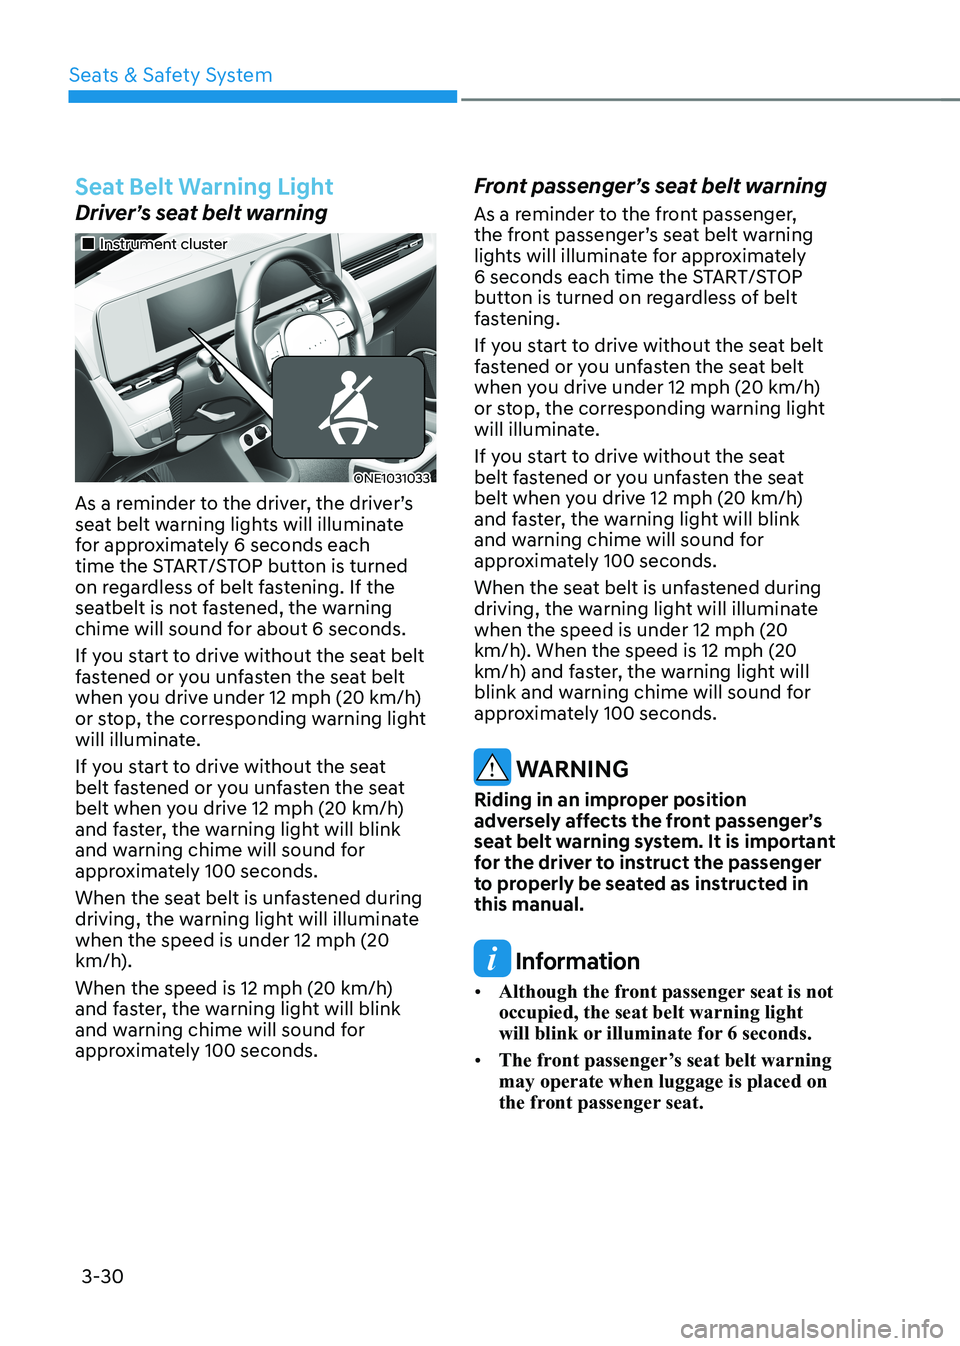
Seat Belt Warning Light
Driver’s seat belt warning
„„Instrument cluster
ONE1031033
As a reminder to the driver, the driver’s
seat belt warning lights will illuminate
for approximately 6 seconds each
time the START/STOP button is turned
on regardless of belt fastening. If the
seatbelt is not fastened, the warning
chime will sound for about 6 seconds.
If you start to drive without the seat belt
fastened or you unfasten the seat belt
when you drive under 12 mph (20 km/h)
or stop, the corresponding warning light
will illuminate.
If you start to drive without the seat
belt fastened or you unfasten the seat
belt when you drive 12 mph (20 km/h)
and faster, the warning light will blink
and warning chime will sound for
approximately 100 seconds.
When the seat belt is unfastened during
driving, the warning light will illuminate when the speed is under 12 mph (20
km/h).
When the speed is 12 mph (20 km/h)
and faster, the warning light will blink
and warning chime will sound for
approximately 100 seconds. Front passenger’s seat belt warning
As a reminder to the front passenger,
the front passenger’s seat belt warning
lights will illuminate for approximately
6 seconds each time the START/STOP
button is turned on regardless of belt
fastening.
If you start to drive without the seat belt
fastened or you unfasten the seat belt
when you drive under 12 mph (20 km/h)
or stop, the corresponding warning light
will illuminate.
If you start to drive without the seat
belt fastened or you unfasten the seat
belt when you drive 12 mph (20 km/h)
and faster, the warning light will blink
and warning chime will sound for
approximately 100 seconds.
When the seat belt is unfastened during
driving, the warning light will illuminate when the speed is under 12 mph (20
km/h). When the speed is 12 mph (20
km/h) and faster, the warning light will
blink and warning chime will sound for
approximately 100 seconds.
WARNING
Riding in an improper position
adversely affects the front passenger’s
seat belt warning system. It is important
for the driver to instruct the passenger
to properly be seated as instructed in this manual.
Information
• Although the front passenger seat is not occupied, the seat belt warning light
will blink or illuminate for 6 seconds.
• The front passenger’s seat belt warning may operate when luggage is placed on
the front passenger seat.
Page 134 of 680

03
3-47
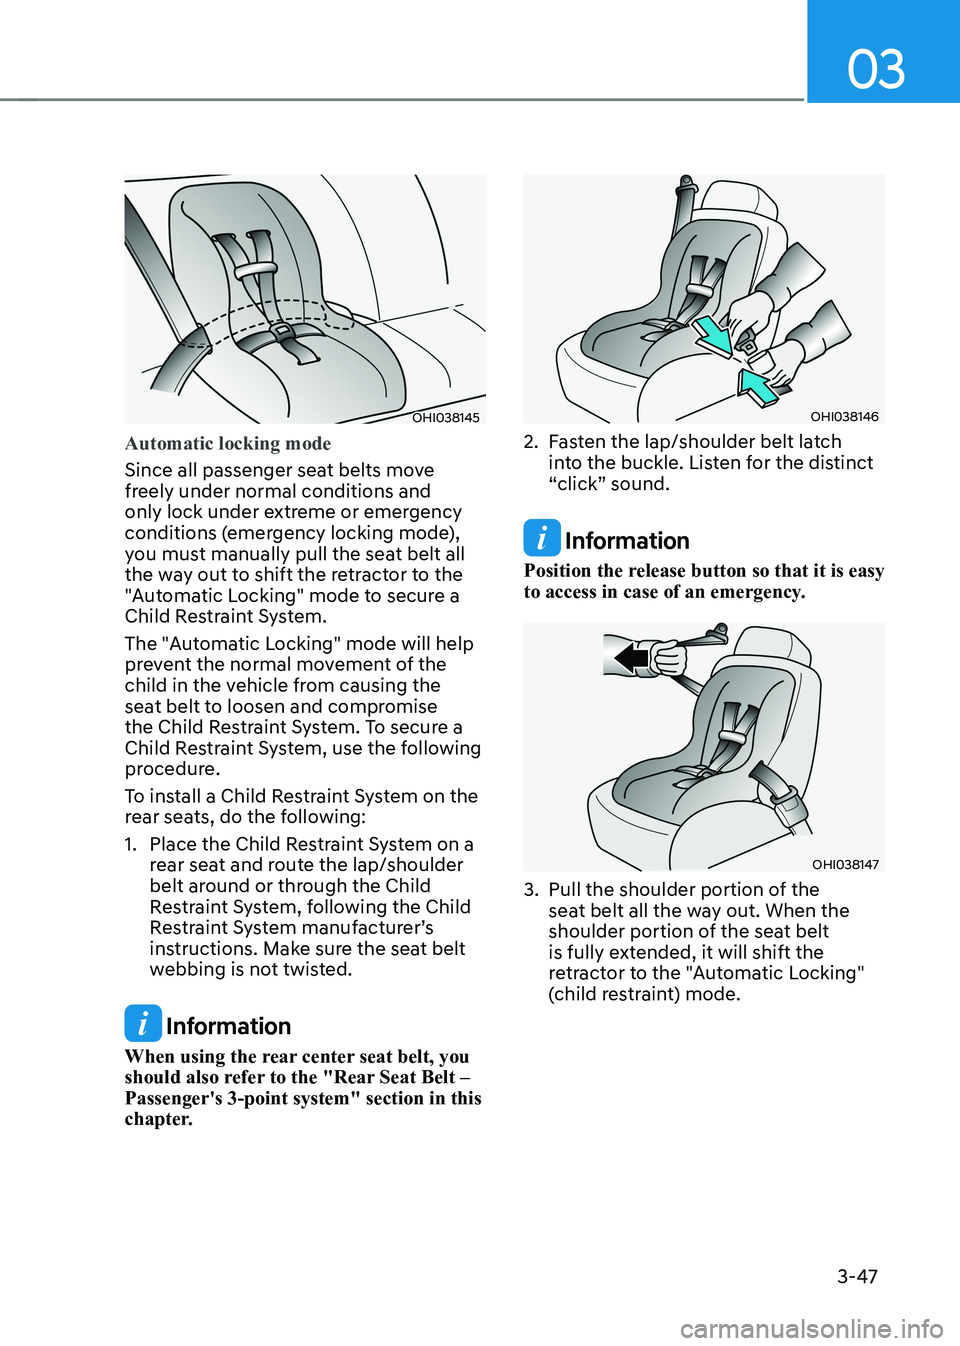
OHI038145
Automatic locking mode
Since all passenger seat belts move
freely under normal conditions and
only lock under extreme or emergency
conditions (emergency locking mode),
you must manually pull the seat belt all
the way out to shift the retractor to the
"Automatic Locking" mode to secure a
Child Restraint System.
The "Automatic Locking" mode will help
prevent the normal movement of the
child in the vehicle from causing the
seat belt to loosen and compromise
the Child Restraint System. To secure a
Child Restraint System, use the following
procedure.
To install a Child Restraint System on the
rear seats, do the following:
1. Place the Child Restraint System on a rear seat and route the lap/shoulder
belt around or through the Child
Restraint System, following the Child
Restraint System manufacturer’s
instructions. Make sure the seat belt
webbing is not twisted.
Information
When using the rear center seat belt, you
should also refer to the "Rear Seat Belt – Passenger's 3-point system" section in this
chapter.
OHI038146
2. Fasten the lap/shoulder belt latch into the buckle. Listen for the distinct
“click” sound.
Information
Position the release button so that it is easy
to access in case of an emergency.
OHI038147
3. Pull the shoulder portion of the seat belt all the way out. When the
shoulder portion of the seat belt
is fully extended, it will shift the
retractor to the "Automatic Locking"
(child restraint) mode.
Page 135 of 680

3-48
Seats & Safety System
OHI038148
4. Slowly allow the shoulder portion of
the seat belt to retract and listen for
an audible "clicking" or "ratcheting"
sound. This indicates that the retractor
is in the "Automatic Locking" mode.
If no distinct sound is heard, repeat
steps 3 and 4.
5. Remove as much slack from the belt as possible by pushing down on the
Child Restraint System while feeding
the shoulder belt back into the
retractor.
6. Push and pull on the Child Restraint System to confirm that the seat belt
is holding it firmly in place. If it is not,
release the seat belt and repeat steps
2 through 6.
7. Double check that the retractor is in
the "Automatic Locking" mode by
attempting to pull more of the seat
belt out of the retractor. If you cannot,
the retractor is in the "Automatic
Locking" mode.
If your Child Restraint System
manufacturer instructs or recommends
you to use a tether anchor with the lap/
shoulder belt, refer to the previous pages
for more information.
Information
When the seat belt is allowed to retract to
its fully stowed position, the retractor will
automatically switch from the “Automatic Locking” mode to the emergency lock
mode for normal adult usage.
WARNING
If the retractor is not in the “Automatic
Locking” mode, the child restraint
can move when your vehicle turns or
stops suddenly. A child can be seriously
injured or killed if the child restraint
is not properly anchored in the car,
including manually pulling the seat belt
all the way out to shift the retractor to
the “Automatic Locking” mode.
To remove the Child Restraint System,
press the release button on the buckle
and then pull the lap/shoulder belt out of
the Child Restraint System and allow the
seat belt to retract fully.
Page 160 of 680

4
LCD Display Messages ............................................................................................... 4-19
Shift to P ................................................................................................................... 4-19
Low key battery ....................................................................................................... 4-19
Press START button while turning wheel ...............................................................4-19
Press brake pedal to start vehicle .......................................................................... 4-19
Key not in vehicle .................................................................................................... 4-20
Key not detected ...................................................................................................... 4-20
Press START button again ...................................................................................... 4-20
Press START button with key .................................................................................. 4-20
Check BRAKE SWITCH fuse ................................................................................... 4-20
Shift to P or N to start vehicle ................................................................................. 4-20
Check smart key system .......................................................................................... 4-20
Door, Hood, Liftgate open indicator ........................................................................ 4-21
Low tire pressure ...................................................................................................... 4-21
Lights ......................................................................................................................... 4-21
Wiper ........................................................................................................................ 4-22
Low washer fluid ...................................................................................................... 4-22
Check headlight ....................................................................................................... 4-22
Check turn signal ..................................................................................................... 4-22
Check headlamp LED .............................................................................................. 4-22
Shift to P to charge/Shift to P to start charging ....................................................4-23
Remaining time ........................................................................................................ 4-23
Unplug vehicle to start ............................................................................................ 4-23
Charging door open ................................................................................................. 4-23
Charging stopped. Check the AC/DC charger .......................................................4-24
Charging stopped. Check the cable connection ...................................................4-24
Check regenerative brakes...................................................................................... 4-25
Low EV battery ......................................................................................................... 4-25
Charge immediately. Power limited ....................................................................... 4-25
12V battery discharging due to additional electrical devices ..............................4-26
Power limited due to low EV battery temperature. Charge battery .....................4-26
EV battery overheated! Stop vehicle ...................................................................... 4-27
Power limited ........................................................................................................... 4-27
Stop vehicle and check power supply .................................................................... 4-28
Check active air flap system ................................................................................... 4-28
Check virtual engine sound system........................................................................4-28
Check electric vehicle system ................................................................................ 4-28