Page 48 of 556

SENSITIVE LOCKING MODE
WHAT IS SENSITIVE LOCKINGMODE
Sensitive locking mode is a seatbeltretractor feature that allows shoulder beltlength adjustment according to yourmovements and locking in response tovehicle movement.
HOW DOES SENSITIVE LOCKINGMODE WORK
If the driver suddenly brakes, turns a cornersharply, or the vehicle receives an impactof about 5 mph (8 km/h) or more, theseatbelts lock to help reduce forwardmovement of the driver and passengers.
In addition, the seatbelt retractor locks ifyou pull the seatbelt webbing out tooquickly. If the retractor locks, slowly lowerthe height adjuster to allow the seatbeltto retract.
If the retractor does not unlock, pull theseatbelt out slowly then feed a smalllength of webbing back toward the stowedposition.
AUTOMATIC LOCKING MODE
WHAT IS AUTOMATIC LOCKINGMODE
This is a safety feature built into theseatbelt retractors that keeps theseatbelts pre-locked.
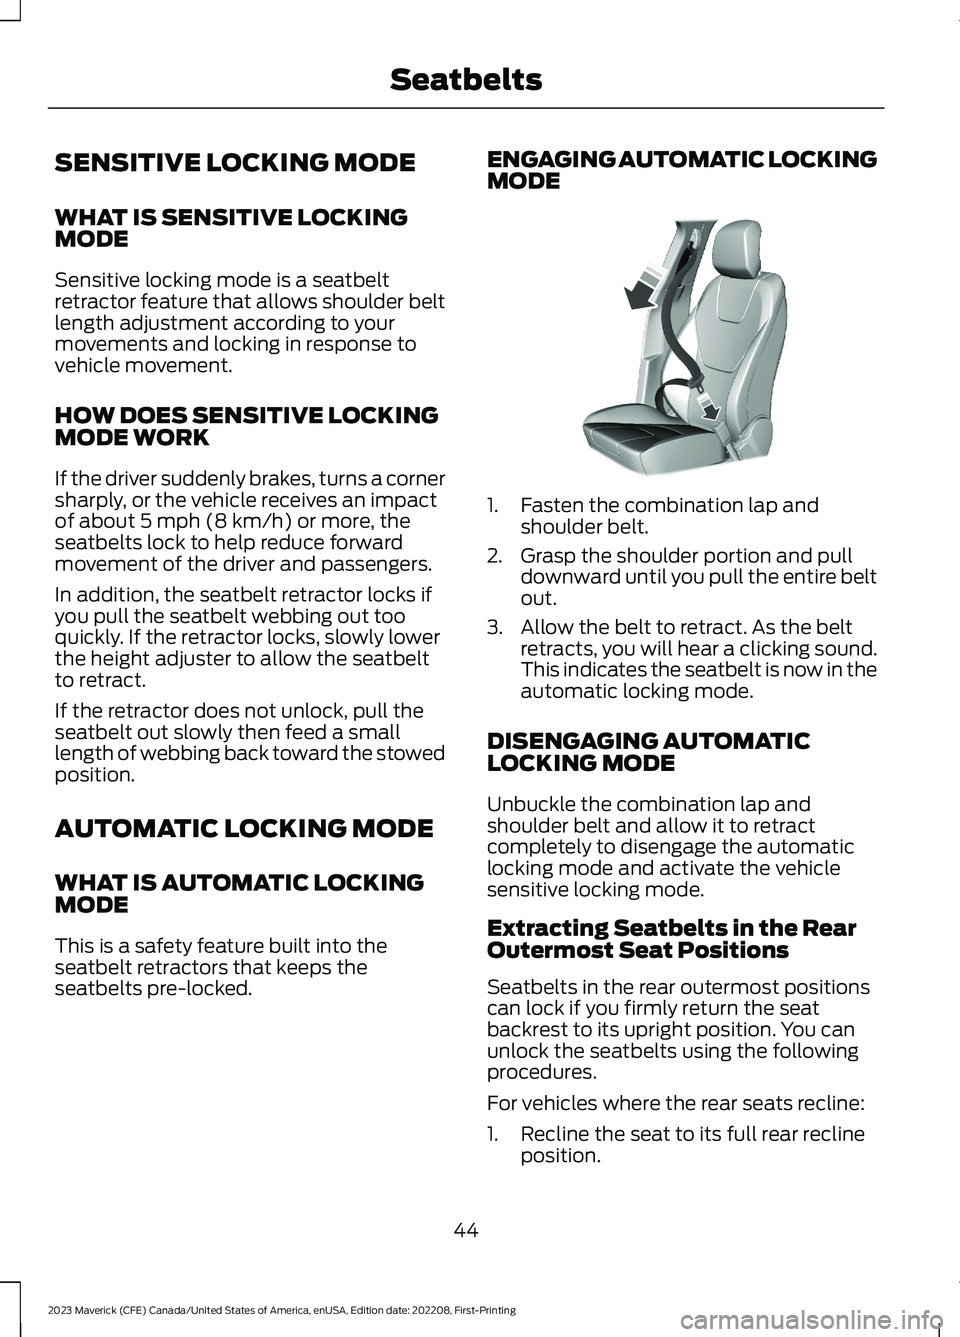
ENGAGING AUTOMATIC LOCKINGMODE
1.Fasten the combination lap andshoulder belt.
2.Grasp the shoulder portion and pulldownward until you pull the entire beltout.
3.Allow the belt to retract. As the beltretracts, you will hear a clicking sound.This indicates the seatbelt is now in theautomatic locking mode.
DISENGAGING AUTOMATICLOCKING MODE
Unbuckle the combination lap andshoulder belt and allow it to retractcompletely to disengage the automaticlocking mode and activate the vehiclesensitive locking mode.
Extracting Seatbelts in the RearOutermost Seat Positions
Seatbelts in the rear outermost positionscan lock if you firmly return the seatbackrest to its upright position. You canunlock the seatbelts using the followingprocedures.
For vehicles where the rear seats recline:
1.Recline the seat to its full rear reclineposition.
44
2023 Maverick (CFE) Canada/United States of America, enUSA, Edition date: 202208, First-PrintingSeatbeltsE142591
Page 324 of 556

Electrical Accessory Installation
To make sure the battery managementsystem works correctly, do not connect anelectrical device ground connectiondirectly to the battery negative post. Thiscan cause inaccurate measurements ofthe battery condition and potentialincorrect system operation.
Note:If you add electrical accessories orcomponents to the vehicle, it may adverselyaffect battery performance and durability.This may also affect the performance ofother electrical systems in the vehicle.
Remove and Reinstall the Battery
Install a battery approved for use by ourspecifications. See Capacities andSpecifications (page 363).
To disconnect or remove the battery, dothe following:
1.Apply the parking brake and switch theignition off.
2.Switch all electrical equipment off, forexample lights and radio.
3.Wait a minimum of two minutes beforedisconnecting the battery.
Note:The engine management system hasa power hold function and remains poweredfor a period of time after you switch theignition off. This is to allow the system tostore diagnostic and adaptive tables.Disconnecting the battery without waitingcan cause damage not covered by thevehicle warranty.
4.Disconnect the negative battery cableterminal.
5.Disconnect the positive battery cableterminal.
6.Remove the battery securing clamp.
7.Remove the battery.
8.To install, reverse the removalprocedure.
Note:Before reconnecting the battery,make sure the ignition remains switched off.
Note:Make sure to fully tighten the batterycables.
If you disconnect or replace the vehiclebattery, you must reset the followingfeatures:
•Window bounce-back. See What IsWindow Bounce-Back (page 100).
•Clock Settings.
•Pre-set radio stations.
Battery Disposal
Make sure that you dispose ofold batteries in anenvironmentally friendly way.Seek advice from your local authorityabout recycling old batteries.
ADJUSTING THE HEADLAMPS
Vertical Aim Adjustment
The headlamps on your vehicle areproperly aimed at the assembly plant. Ifyour vehicle has been in an accident, havethe alignment of your headlamps checkedas soon as possible.
8 ft (2.4 m)A
Center height of lamp to groundB
320
2023 Maverick (CFE) Canada/United States of America, enUSA, Edition date: 202208, First-PrintingMaintenanceE107998 E142592
Page 325 of 556

25 ft (7.6 m)C
Horizontal reference lineD
1.Park the vehicle directly in front of awall or screen on a level surface,approximately 25 ft (7.6 m) away.
2.Measure the height of the headlampbulb center from the ground and markan 8 ft (2.4 m) horizontal reference lineon the vertical wall or screen at thisheight.
Note:To see a clearer light pattern foradjusting, block the light from oneheadlamp when adjusting the other.
3.Switch on the low beam headlamps toilluminate the wall or screen and openthe hood.
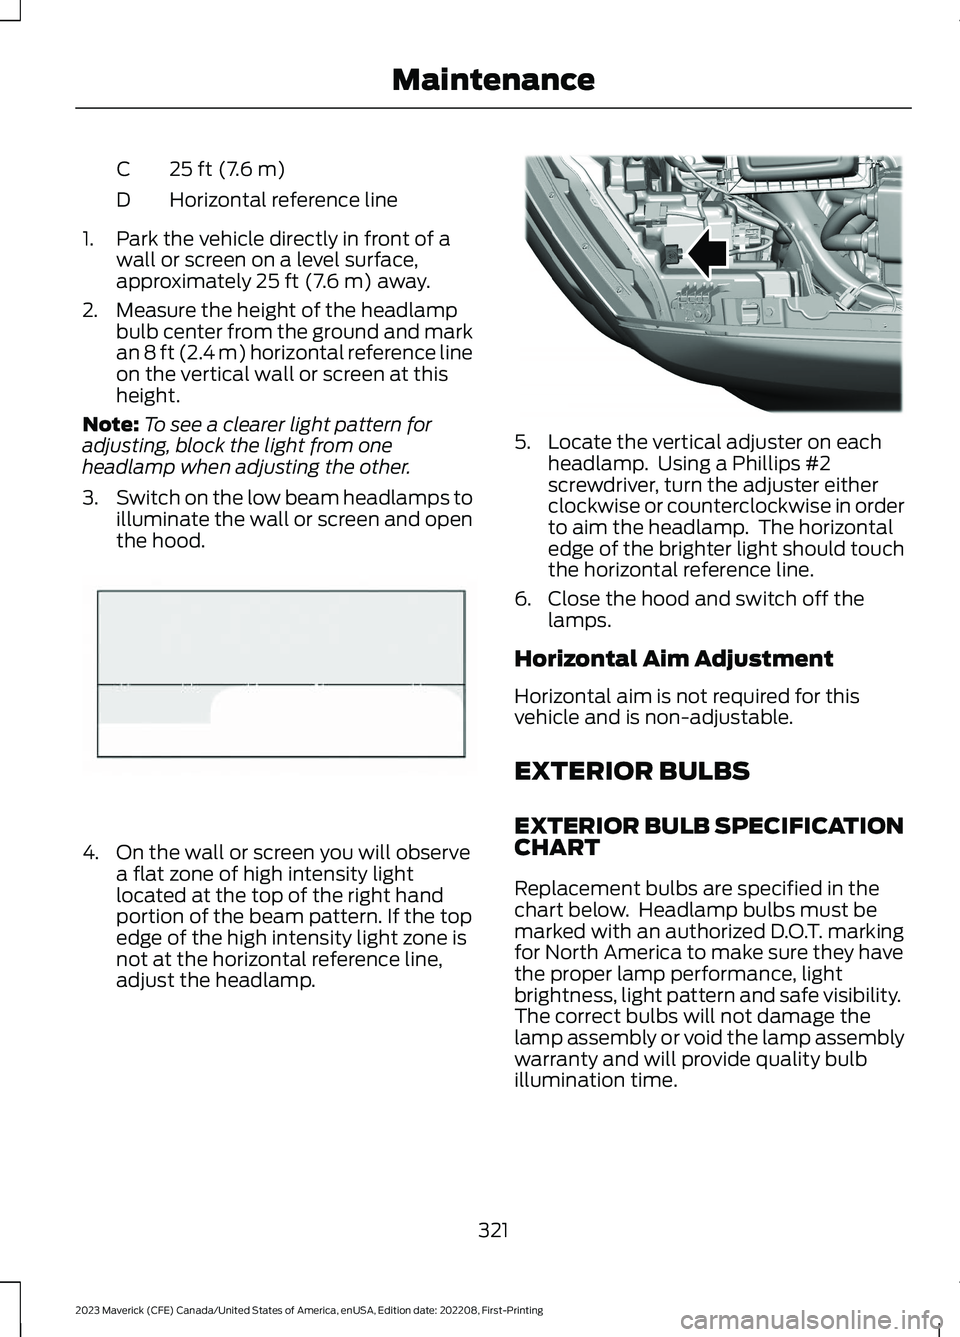
4.On the wall or screen you will observea flat zone of high intensity lightlocated at the top of the right handportion of the beam pattern. If the topedge of the high intensity light zone isnot at the horizontal reference line,adjust the headlamp.
5.Locate the vertical adjuster on eachheadlamp. Using a Phillips #2screwdriver, turn the adjuster eitherclockwise or counterclockwise in orderto aim the headlamp. The horizontaledge of the brighter light should touchthe horizontal reference line.
6.Close the hood and switch off thelamps.
Horizontal Aim Adjustment
Horizontal aim is not required for thisvehicle and is non-adjustable.
EXTERIOR BULBS
EXTERIOR BULB SPECIFICATIONCHART
Replacement bulbs are specified in thechart below. Headlamp bulbs must bemarked with an authorized D.O.T. markingfor North America to make sure they havethe proper lamp performance, lightbrightness, light pattern and safe visibility.The correct bulbs will not damage thelamp assembly or void the lamp assemblywarranty and will provide quality bulbillumination time.
321
2023 Maverick (CFE) Canada/United States of America, enUSA, Edition date: 202208, First-PrintingMaintenanceE142465 E355886