Page 376 of 642
3.To complete the glass removalprocess, lift the glass up, pull it out androck down.
4.Once removed, safely store the glassand the screws in the storage bag.
To install the glass back on your vehicle:
1.From the outside of your vehicle, alignand seat the glass pins into the rubberframe.
2.Insert the glass hook into the frame.
3.Go to the inside of the vehicle.
4.Pull the glass tight by grabbing thepaddle.
5.Using the provided head driver, alignand secure the screws into the glassframe.
REMOVING AND INSTALLING THEREAR QUARTER WINDOWS -VEHICLES WITH: SOFT TOP
The following procedure shows the driverside rear window, passenger side similar.
1.Release the rear edge of the panel bypulling the fabric out of the slot.
372
2023 Bronco (TG1) Canada/United States of America, enUSA, Edition date: 202208, DOMRemovable Vehicle ComponentsE385079 E347134
Page 377 of 642
2.Unbuckle the three clips at the top.
3.Release the front edge of the panel bypulling the fabric out of the slot toremove.
4.Slide the bottom panel forward out ofthe slot to remove.
5.To install the rear quarter window,perform the steps above in reverseorder.
6.When installing the rear quarterwindow, make sure to tuck the windowunder the tension cable.
373
2023 Bronco (TG1) Canada/United States of America, enUSA, Edition date: 202208, DOMRemovable Vehicle ComponentsE347135 E347136 E347137 E347138
Page 378 of 642

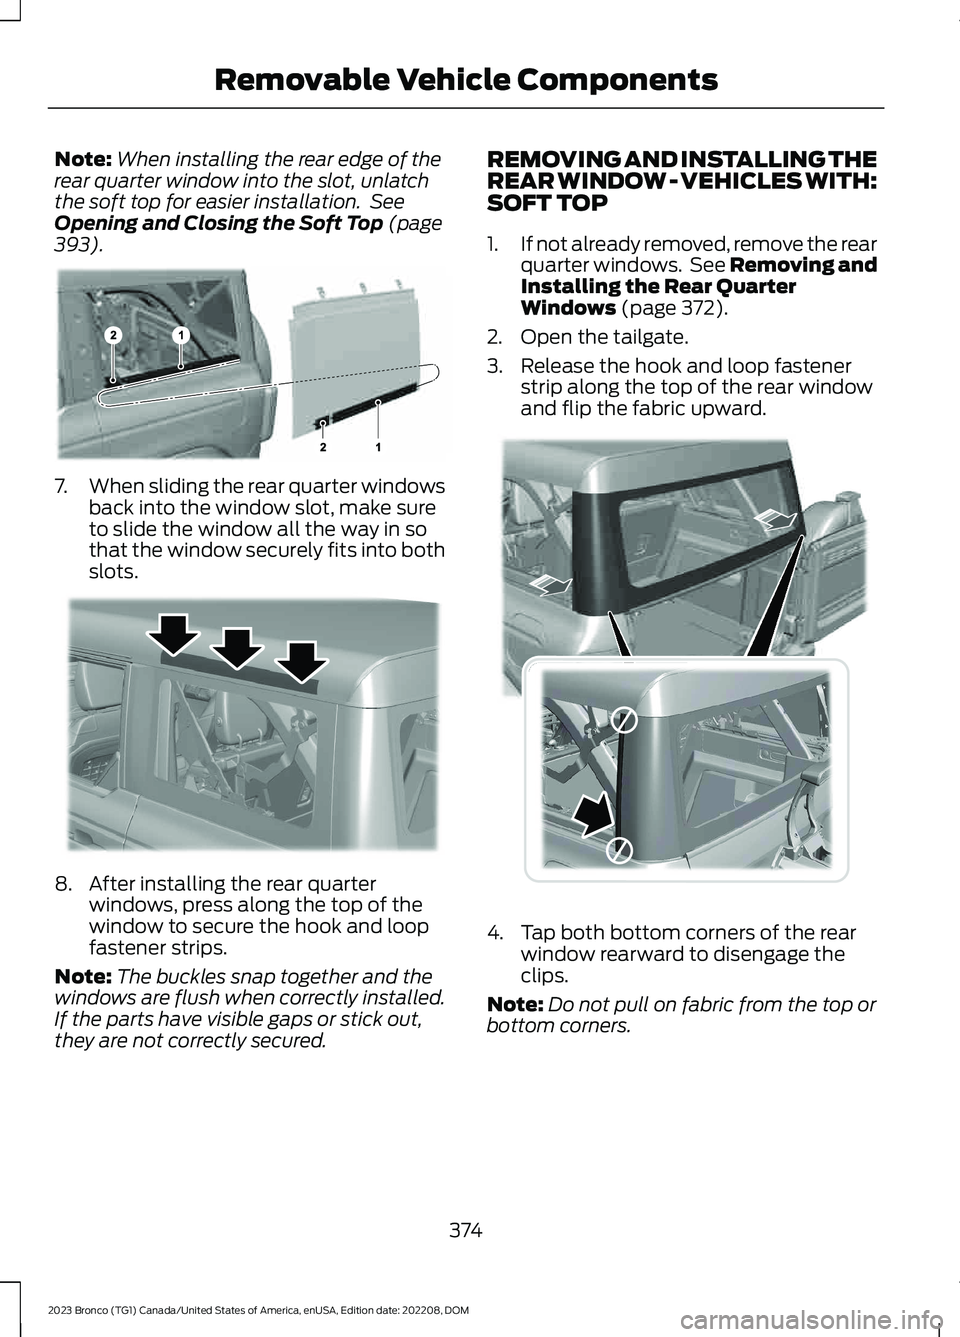
Note:When installing the rear edge of therear quarter window into the slot, unlatchthe soft top for easier installation. SeeOpening and Closing the Soft Top (page393).
7.When sliding the rear quarter windowsback into the window slot, make sureto slide the window all the way in sothat the window securely fits into bothslots.
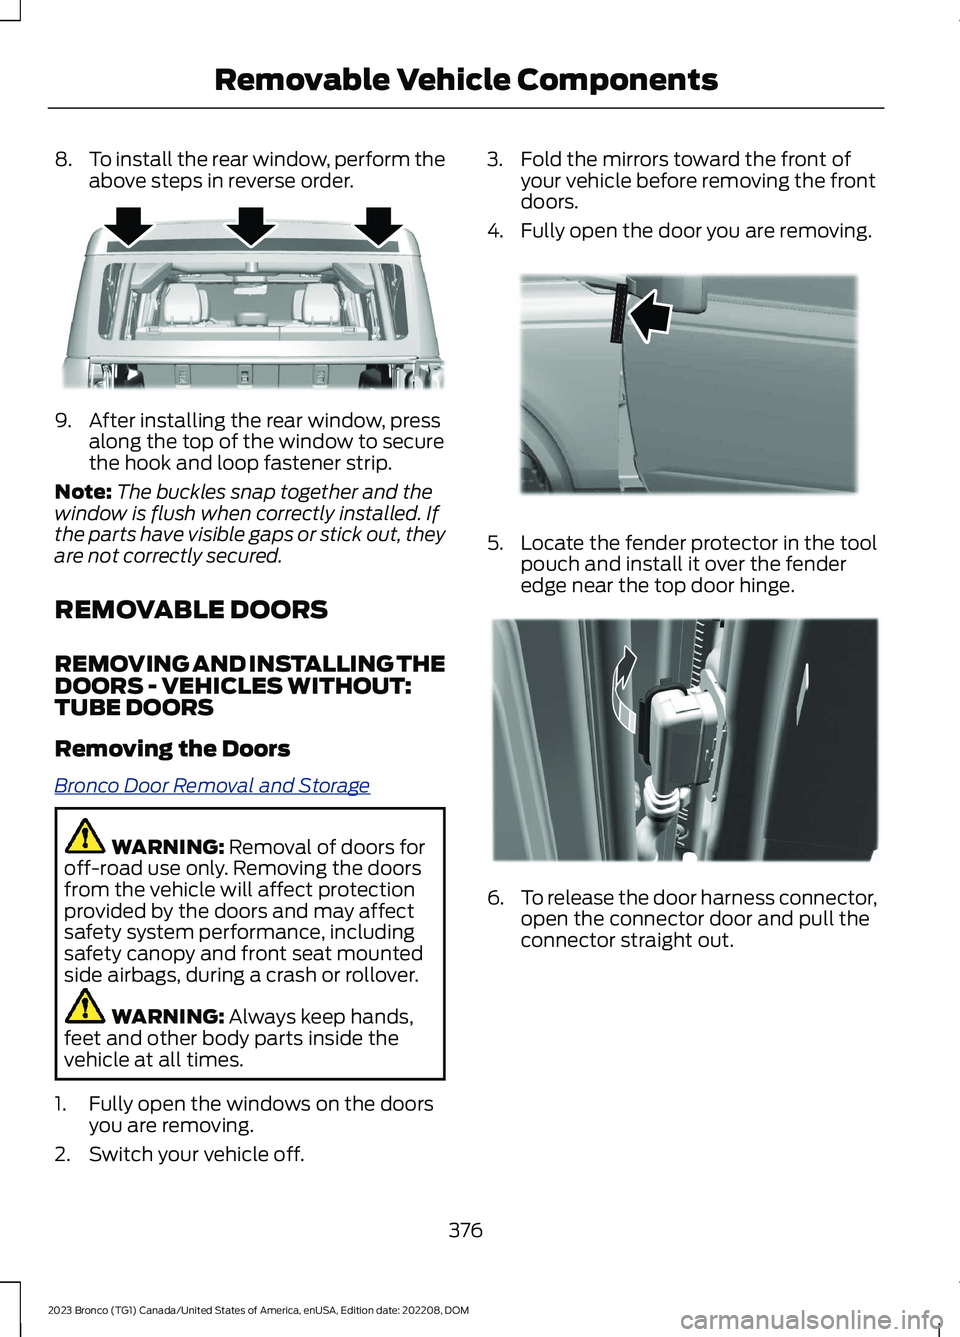
8.After installing the rear quarterwindows, press along the top of thewindow to secure the hook and loopfastener strips.
Note:The buckles snap together and thewindows are flush when correctly installed.If the parts have visible gaps or stick out,they are not correctly secured.
REMOVING AND INSTALLING THEREAR WINDOW - VEHICLES WITH:SOFT TOP
1.If not already removed, remove the rearquarter windows. See Removing andInstalling the Rear QuarterWindows (page 372).
2.Open the tailgate.
3.Release the hook and loop fastenerstrip along the top of the rear windowand flip the fabric upward.
4.Tap both bottom corners of the rearwindow rearward to disengage theclips.
Note:Do not pull on fabric from the top orbottom corners.
374
2023 Bronco (TG1) Canada/United States of America, enUSA, Edition date: 202208, DOMRemovable Vehicle ComponentsE385272 E347139 E374615
Page 379 of 642
5.Remove both top corners from theslots.6.Unbuckle the four clips at the top.
7.Make sure to unbuckle all clips. Grabthe plastic behind the fabric at thebottom corners of the rear window andthen slide the bottom left or right outof the slot to remove.
375
2023 Bronco (TG1) Canada/United States of America, enUSA, Edition date: 202208, DOMRemovable Vehicle ComponentsE347144 E347145 E347146
Page 380 of 642

8.To install the rear window, perform theabove steps in reverse order.
9.After installing the rear window, pressalong the top of the window to securethe hook and loop fastener strip.
Note:The buckles snap together and thewindow is flush when correctly installed. Ifthe parts have visible gaps or stick out, theyare not correctly secured.
REMOVABLE DOORS
REMOVING AND INSTALLING THEDOORS - VEHICLES WITHOUT:TUBE DOORS
Removing the Doors
Bronco Door Removal and Storage
WARNING: Removal of doors foroff-road use only. Removing the doorsfrom the vehicle will affect protectionprovided by the doors and may affectsafety system performance, includingsafety canopy and front seat mountedside airbags, during a crash or rollover.
WARNING: Always keep hands,feet and other body parts inside thevehicle at all times.
1.Fully open the windows on the doorsyou are removing.
2.Switch your vehicle off.
3.Fold the mirrors toward the front ofyour vehicle before removing the frontdoors.
4.Fully open the door you are removing.
5.Locate the fender protector in the toolpouch and install it over the fenderedge near the top door hinge.
6.To release the door harness connector,open the connector door and pull theconnector straight out.
376
2023 Bronco (TG1) Canada/United States of America, enUSA, Edition date: 202208, DOMRemovable Vehicle ComponentsE347147 E347602 E328722
Page 391 of 642

REMOVING AND INSTALLING THECENTER ROOF PANEL - RAPTOR,4-DOOR
WARNING: Do not remove ormodify the B-Pillar brace or trim. Doingso could affect safety systemperformance, including safety canopyand front seat mounted side airbags,during a crash or rollover.
Do not remove or modify the C-pillar brace.
Remove both of the front roof panelsbefore removing the center roof panel.
1.Turn the three L-shaped latches on thecenter roof panel, unlocking them fromthe rear roof panel.
2.Unlatch the driver side and passengerside latches of the center roof panel.
3.Remove the center roof panel.
4.To install, reverse the removalprocedure.
REMOVING AND INSTALLING THEREAR ROOF PANEL - 4-DOOR,EXCLUDING: RAPTOR
Remove the front panels and center panelbefore removing the rear roof panel.
1.Open the rear doors.
2.Open the tailgate window. SeeOpening and Closing the Windows(page 113).
3.Locate the wire harness and washerhose on the driver side rear insidecorner of the vehicle.
4.Release the locking tab by pushing itdown.
5.Push the tab inward when pulling downto disconnect and remove the wiringharness.
6.Push the release button on the hoseconnector and pull down to removethe washer hose.
387
2023 Bronco (TG1) Canada/United States of America, enUSA, Edition date: 202208, DOMRemovable Vehicle ComponentsE333996 E335339
Page 392 of 642

7.Secure the wiring harness to the bodyside by plugging it into the receptacleand pushing up on the locking tab.
8.Secure the washer hose by snapping itinto the top of the body sidereceptacle.
9.Remove the two fasteners that securethe rear roof panel at the C-pillar usingthe provided head driver and ratchet.
10.Remove the four fasteners on eachside of your vehicle that secure therear roof panel to the vehicle usingthe provided head driver and ratchet.
11.With the tailgate window open, grabthe opening with one hand andslightly lift with the other hand. Liftthe rear roof panel straight up andoff. Place the rear roof panel on a softsurface to prevent damage.
Note:Store the rear roof panel with thetailgate window open to prevent damageto the glass seal.
12.To install, reverse the removalprocedure. Torque the fasteners thatsecure the rear roof panel to yourvehicle to 15 ± 2 lb.ft (20 ± 3 Nm).
Note:Make sure the locating pins on therear roof panel sit flush in your vehicle wheninstalled.
Note:Do not overtighten the fasteners. Youcan strip the fasteners if they areovertightened.
388
2023 Bronco (TG1) Canada/United States of America, enUSA, Edition date: 202208, DOMRemovable Vehicle ComponentsE335340 E345383 E333997
Page 393 of 642

REMOVING AND INSTALLING THEREAR ROOF PANEL - RAPTOR, 4-DOOR
WARNING: Do not remove ormodify the B-Pillar brace or trim. Doingso could affect safety systemperformance, including safety canopyand front seat mounted side airbags,during a crash or rollover.
Do not remove or modify the C-pillar brace.
Remove the front panels and center panelbefore removing the rear roof panel.
1.Open the rear doors.
2.Open the tailgate window. SeeOpening and Closing the Windows(page 113).
3.Locate the wire harness and washerhose on the driver side rear insidecorner of the vehicle.
4.Release the locking tab by pushing itdown.
5.Push the tab inward when pulling downto disconnect and remove the wiringharness.
6.Push the release button on the hoseconnector and pull down to removethe washer hose.
7.Secure the wiring harness to the bodyside by plugging it into the receptacleand pushing up on the locking tab.
8.Secure the washer hose by snapping itinto the top of the body sidereceptacle.
389
2023 Bronco (TG1) Canada/United States of America, enUSA, Edition date: 202208, DOMRemovable Vehicle ComponentsE335339 E335340 E345383