2023 CHEVROLET MALIBU automatic transmission
[x] Cancel search: automatic transmissionPage 6 of 332
Chevrolet Malibu Owner Manual (GMNA-Localizing-U.S./Canada-
16273584) - 2023 - CRC - 9/28/22
Introduction 5
1.Air Vents 0162.
2. Turn Signal Lever. See Turn and
Lane-Change Signals 0105.
IntelliBeam System Button (If Equipped).
See Exterior Lamp Controls 0102.
3. Instrument Cluster 080.
Driver Information Center (DIC) (Base
Level) 095 or
Driver Information Center (DIC) (Uplevel)
0 98.
4. Windshield Wiper/Washer 075.
5. Light Sensor. See Automatic Headlamp
System 0104.
6. Infotainment. See Overview0110.
7. Climate Control Systems 0157.
Dual Automatic Climate Control System
0 159 (If Equipped).
8. Hazard Warning Flashers 0104.
Stop/Start Disable Button (If Equipped).
See Stop/Start System 0177.
9. Power Outlets 076.
10. Traction Control/Electronic Stability
Control 0186.
Assistance Systems for Parking or Backing
0 198 (If Equipped). 11. Shift Lever. See
Automatic Transmission
0 182.
12. Electric Parking Brake 0185 (If Equipped).
13. USB Port 0118.
14. ENGINE START/STOP Button. See Ignition
Positions 0175.
15. Steering Wheel Controls 075.
Driver Information Center Buttons. See
Driver Information Center (DIC) (Base
Level) 095 or
Driver Information Center (DIC) (Uplevel)
0 98.
16. Horn 075.
17. Steering Wheel Adjustment 075 (Out
of View).
18. Cruise Control 0188.
Adaptive Cruise Control (Advanced) 0190
(If Equipped).
Heated Steering Wheel 075 (If
Equipped).
Forward Collision Alert (FCA) System
0 202 (If Equipped).
Lane Keep Assist (LKA) 0209 (If
Equipped).
19. Hood Release. See Hood0222. 20. Data Link Connector (Out of View). See
Malfunction Indicator Lamp (Check
Engine Light) 088.
21. Exterior Lamp Controls 0102.
22. Instrument Panel Illumination Control
0105.
Page 18 of 332
Chevrolet Malibu Owner Manual (GMNA-Localizing-U.S./Canada-
16273584) - 2023 - CRC - 9/28/22
Keys, Doors, and Windows 17
Delayed locking can only be turned on when
the Open Door Anti-Lockout feature has
been turned off.
When
Qis pressed on the power door lock
switch with the door open, a chime will
sound three times indicating that delayed
locking is active.
The doors will then lock automatically
five seconds after all doors are closed. If a
door is reopened before five seconds have
elapsed, the five-second timer will reset once
all the doors are closed again.
Press
Qon the door lock switch again,
or press
Qon the RKE transmitter, to
override this feature and lock the doors
immediately.
Delayed locking can be programmed. To
view available settings for this feature,
touch the Settings icon on the infotainment
home page. Select “Vehicle”to display the
list of available options and select “Power
Door Locks”.
Automatic Door Locks
The doors will lock automatically when all
doors are closed, the ignition is on, and the
vehicle is shifted out of P (Park). If a vehicle door is unlocked, and then
opened and closed, the doors will lock either
when your foot is removed from the brake
or the vehicle speed becomes faster than
13 km/h (8 mph).
To unlock the doors:
.PressKon the power door lock switch.
.Shift the transmission into P (Park).
Automatic door locking cannot be disabled.
Automatic door unlocking can be
programmed. To view available settings for
this feature, touch the Settings icon on the
infotainment home page. Select “Vehicle”to
display the list of available options and
select “Power Door Locks”.
Lockout Protection
If the ignition is on or in accessory mode
and the power door lock switch is pressed
with the driver door open, all the doors will
lock and only the driver door will unlock.
If the vehicle is off and locking is requested
while a door is open, when all doors are
closed the vehicle will check for remote keys
inside. If an remote key is detected and the
number of remote keys inside has not
reduced, the driver door will unlock and the
horn will chirp three times. Lockout Protection can be manually
overridden with the driver door open by
pressing and holding
Qon the power door
lock switch.
Open Door Anti-Lockout
If Open Door Anti-Lockout has been turned
on and the vehicle is off, the driver door is
open, and locking is requested, all the doors
will lock and the driver door will remain
open. The Open Door Anti-Lockout feature
can be turned on or off. To view available
settings from the infotainment screen, touch
the Settings > Vehicle > Power Door Locks.
Safety Locks
The rear door safety locks prevent
passengers from opening the rear doors
from inside the vehicle.
Page 148 of 332
Chevrolet Malibu Owner Manual (GMNA-Localizing-U.S./Canada-
16273584) - 2023 - CRC - 9/28/22
Infotainment System 147
The menu may contain the following:
Name
Touch to edit your user name that will be
displayed in the vehicle.
Vehicle Account Information
Touch to view the vehicle account
information and to change the account
password.
An“unverified user account” pop-up will
display until the account information
verification process has been completed on
the Internet. Check your registered e-mail
account for an activation e-mail to complete
the verification process.
Profile Picture
Touch to choose or change your profile
picture.
Profile Identifiers
Touch to have the vehicle recognize the
identifier you choose.
Touch Vehicle Key 1 and/or Vehicle Key 2.
If the remote key is lost or stolen, see your
dealer. Security
Touch to have your profile secured with
a PIN.
Touch No or Yes.
Vehicle Name
Touch to edit your vehicle name.
Vehicle Account
Touch to view the vehicle account
information and to change the account
password.
Delete Profile
Touch to remove the profile from the
vehicle.
Touch Remove or Cancel.
Teen Driver
If equipped, this allows multiple keys to be
registered for beginner drivers to encourage
safe driving habits. When the vehicle is
started with a Teen Driver key, it will
automatically activate certain safety
systems, allow setting of some features, and
limit the use of others. The Report Card will
record vehicle data about driving behavior
that can be viewed later. When the vehicleis started with a registered key, the Driver
Information Center (DIC) displays a message
that Teen Driver is active.
To access:
1. Touch Settings on the Home Page, then touch Vehicle, and then Teen Driver.
2. Create a Personal Identification Number (PIN) by choosing a four-digit PIN.
Re-enter the PIN to confirm. To change
the PIN, touch Change PIN.
The PIN is required to:
.Set up/Add or remove keys.
.Change Teen Driver settings.
.Change or clear the Teen Driver PIN.
.Access or delete Report Card data.
Set up/Add keys to activate Teen Driver and
assign restrictions to the key:
Any vehicle key can be registered, up to a
maximum of eight keys. Label the key to
tell it apart from the other keys.
For a pushbutton start system: 1. Start the vehicle.
2. For automatic transmissions, the vehicle must be in P (Park). For manual
transmissions, the vehicle must be
stopped with the parking brake set.
Page 149 of 332
Chevrolet Malibu Owner Manual (GMNA-Localizing-U.S./Canada-
16273584) - 2023 - CRC - 9/28/22
148 Infotainment System
3. From the Settings menu, touch Vehicleand then Teen Driver.
4. Enter the PIN.
5. Place the remote key you wish to register in the transmitter pocket. The
key does not need to be the one that
started the vehicle. See Remote Key
Operation 07for transmitter pocket
location.
6. From the Teen Driver menu, touch Setup Keys or Add/Remove Teen Driver Keys.
.If the remote key has not previously
been registered, the option to add
the key displays. Touch Add and a
confirmation message displays. Teen
Driver restrictions will be applied
whenever this remote key is used to
operate the vehicle.
.If the remote key has already been
registered, the option to remove the
key displays. If Remove is touched,
the remote key is no longer
registered. A confirmation message
displays, and Teen Driver restrictions
will not be applied if this remote key
is used to operate the vehicle.
In vehicles with a pushbutton start system,
if a Teen Driver and a non-Teen Driver key
are both present at start up, the vehicle will recognize the non-Teen Driver key to start
the vehicle. The Teen Driver settings will not
be active.
For a keyed ignition system:
1. Start the vehicle.
2. For automatic transmissions, the vehicle must be in P (Park). For manual
transmissions, the vehicle must be
stopped with the parking brake set.
3. From the Settings menu, touch Vehicle and then Teen Driver.
4. Enter the PIN.
5. Touch Setup Keys or Add/Remove Teen Driver Keys. The system displays
instructions for registering or
unregistering a key. A confirmation
message displays.
Manage Settings or Teen Driver Settings
Depending on the options of your vehicle,
the following menu items may be displayed:
Buckle to Drive : When turned ON, Buckle to
Drive prevents the driver from shifting out
of P (Park) for a period of time after the
brake pedal is pressed if the driver, or on
some vehicles the detected passenger, has
not buckled their seat belt. On some vehicles, Buckle to Drive is always ON when
Teen Driver is active and is not configurable.
See
Buckle To Drive 038.
Audio Volume Limit : Allows a maximum
audio volume to be set. Turn the audio
volume limit on or off. Use the arrows to
choose the maximum allowable level for the
audio volume. On some infotainment
systems, touch Set Audio Volume Limit to
choose the maximum allowable audio
volume level.
Set Audio Volume Limit : Use the arrows to
choose the maximum allowable level for the
audio volume.
Teen Driver Speed Limiter : Limits the
maximum speed of the vehicle. When the
speed limiter is turned on and the vehicle is
started with a Teen Driver key, the DIC
displays a message that the top speed is
limited.
On certain vehicles, when the Speed Limiter
is turned ON, the vehicle’s maximum
acceleration will be limited. The DIC will
display a message that the acceleration is
limited.
Teen Driver Speed Warning : Displays a
warning in the DIC when exceeding a
selectable speed. Turn the speed warning on
Page 166 of 332
Chevrolet Malibu Owner Manual (GMNA-Localizing-U.S./Canada-
16273584) - 2023 - CRC - 9/28/22
Driving and Operating 165
Driving and Operating
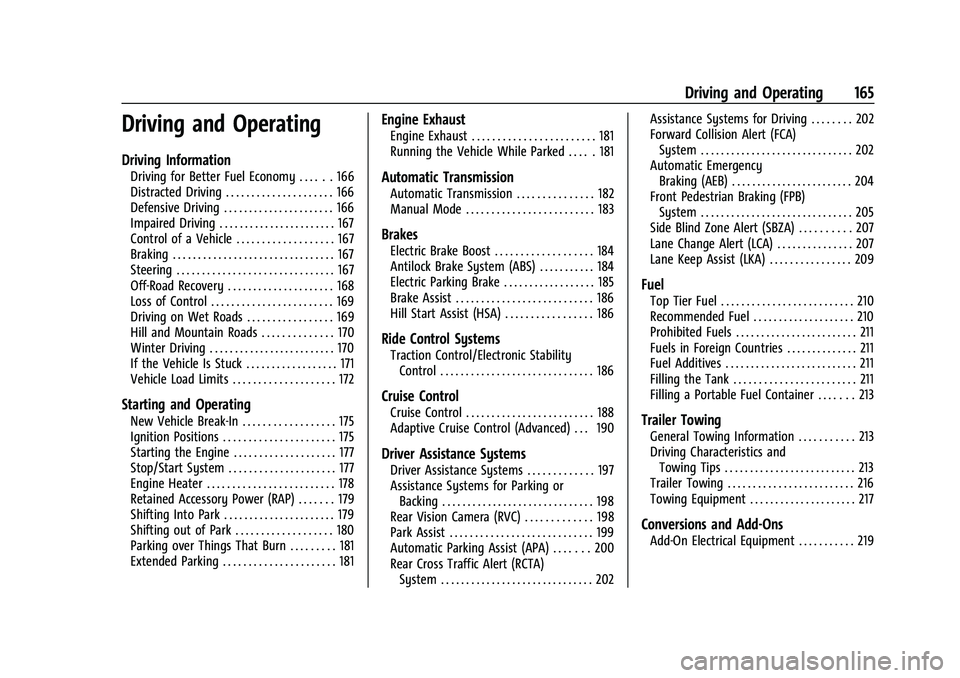
Driving Information
Driving for Better Fuel Economy . . . . . . 166
Distracted Driving . . . . . . . . . . . . . . . . . . . . . 166
Defensive Driving . . . . . . . . . . . . . . . . . . . . . . 166
Impaired Driving . . . . . . . . . . . . . . . . . . . . . . . 167
Control of a Vehicle . . . . . . . . . . . . . . . . . . . 167
Braking . . . . . . . . . . . . . . . . . . . . . . . . . . . . . . . . 167
Steering . . . . . . . . . . . . . . . . . . . . . . . . . . . . . . . 167
Off-Road Recovery . . . . . . . . . . . . . . . . . . . . . 168
Loss of Control . . . . . . . . . . . . . . . . . . . . . . . . 169
Driving on Wet Roads . . . . . . . . . . . . . . . . . 169
Hill and Mountain Roads . . . . . . . . . . . . . . 170
Winter Driving . . . . . . . . . . . . . . . . . . . . . . . . . 170
If the Vehicle Is Stuck . . . . . . . . . . . . . . . . . . 171
Vehicle Load Limits . . . . . . . . . . . . . . . . . . . . 172
Starting and Operating
New Vehicle Break-In . . . . . . . . . . . . . . . . . . 175
Ignition Positions . . . . . . . . . . . . . . . . . . . . . . 175
Starting the Engine . . . . . . . . . . . . . . . . . . . . 177
Stop/Start System . . . . . . . . . . . . . . . . . . . . . 177
Engine Heater . . . . . . . . . . . . . . . . . . . . . . . . . 178
Retained Accessory Power (RAP) . . . . . . . 179
Shifting Into Park . . . . . . . . . . . . . . . . . . . . . . 179
Shifting out of Park . . . . . . . . . . . . . . . . . . . 180
Parking over Things That Burn . . . . . . . . . 181
Extended Parking . . . . . . . . . . . . . . . . . . . . . . 181
Engine Exhaust
Engine Exhaust . . . . . . . . . . . . . . . . . . . . . . . . 181
Running the Vehicle While Parked . . . . . 181
Automatic Transmission
Automatic Transmission . . . . . . . . . . . . . . . 182
Manual Mode . . . . . . . . . . . . . . . . . . . . . . . . . 183
Brakes
Electric Brake Boost . . . . . . . . . . . . . . . . . . . 184
Antilock Brake System (ABS) . . . . . . . . . . . 184
Electric Parking Brake . . . . . . . . . . . . . . . . . . 185
Brake Assist . . . . . . . . . . . . . . . . . . . . . . . . . . . 186
Hill Start Assist (HSA) . . . . . . . . . . . . . . . . . 186
Ride Control Systems
Traction Control/Electronic StabilityControl . . . . . . . . . . . . . . . . . . . . . . . . . . . . . . 186
Cruise Control
Cruise Control . . . . . . . . . . . . . . . . . . . . . . . . . 188
Adaptive Cruise Control (Advanced) . . . 190
Driver Assistance Systems
Driver Assistance Systems . . . . . . . . . . . . . 197
Assistance Systems for Parking orBacking . . . . . . . . . . . . . . . . . . . . . . . . . . . . . . 198
Rear Vision Camera (RVC) . . . . . . . . . . . . . 198
Park Assist . . . . . . . . . . . . . . . . . . . . . . . . . . . . 199
Automatic Parking Assist (APA) . . . . . . . 200
Rear Cross Traffic Alert (RCTA) System . . . . . . . . . . . . . . . . . . . . . . . . . . . . . . 202 Assistance Systems for Driving . . . . . . . . 202
Forward Collision Alert (FCA)
System . . . . . . . . . . . . . . . . . . . . . . . . . . . . . . 202
Automatic Emergency Braking (AEB) . . . . . . . . . . . . . . . . . . . . . . . . 204
Front Pedestrian Braking (FPB) System . . . . . . . . . . . . . . . . . . . . . . . . . . . . . . 205
Side Blind Zone Alert (SBZA) . . . . . . . . . . 207
Lane Change Alert (LCA) . . . . . . . . . . . . . . . 207
Lane Keep Assist (LKA) . . . . . . . . . . . . . . . . 209
Fuel
Top Tier Fuel . . . . . . . . . . . . . . . . . . . . . . . . . . 210
Recommended Fuel . . . . . . . . . . . . . . . . . . . . 210
Prohibited Fuels . . . . . . . . . . . . . . . . . . . . . . . . 211
Fuels in Foreign Countries . . . . . . . . . . . . . . 211
Fuel Additives . . . . . . . . . . . . . . . . . . . . . . . . . . 211
Filling the Tank . . . . . . . . . . . . . . . . . . . . . . . . 211
Filling a Portable Fuel Container . . . . . . . 213
Trailer Towing
General Towing Information . . . . . . . . . . . 213
Driving Characteristics and Towing Tips . . . . . . . . . . . . . . . . . . . . . . . . . . 213
Trailer Towing . . . . . . . . . . . . . . . . . . . . . . . . . 216
Towing Equipment . . . . . . . . . . . . . . . . . . . . . 217
Conversions and Add-Ons
Add-On Electrical Equipment . . . . . . . . . . . 219
Page 179 of 332
Chevrolet Malibu Owner Manual (GMNA-Localizing-U.S./Canada-
16273584) - 2023 - CRC - 9/28/22
178 Driving and Operating
{Warning
The automatic engine Stop/Start feature
causes the engine to shut off while the
vehicle is still on. Do not exit the vehicle
before shifting to P (Park). The vehicle
may restart and move unexpectedly.
Always shift to P (Park), and then turn
the ignition off before exiting the vehicle.
Auto Engine Stop/Start
When the brakes are applied and the vehicle
is at a complete stop, the engine may turn
off. When stopped, the tachometer displays
AUTO STOP. See Tachometer083. When the
brake pedal is released or the accelerator
pedal is pressed, the engine will restart.
To maintain vehicle performance, other
conditions may cause the engine to
automatically restart before the brake pedal
is released.
Auto Stops may not occur and/or auto
restarts may occur because:
.The climate control settings require the
engine to be running to cool or heat the
vehicle interior.
.The vehicle battery needs to charge.
.The vehicle battery has recently been
disconnected.
.Minimum vehicle speed has not been
reached since the last Auto Stop.
.The accelerator pedal is pressed.
.The engine or transmission is not at the
required operating temperature.
.The outside temperature is not in the
required operating range.
.The vehicle transmission is shifted out of
D (Drive) to any gear other than P (Park).
.Certain driver modes have been selected.
.The vehicle is on a steep hill or grade.
.The driver door has been opened or driver
seat belt has been unbuckled.
.The hood has been opened.
.The Auto Stop has reached the maximum
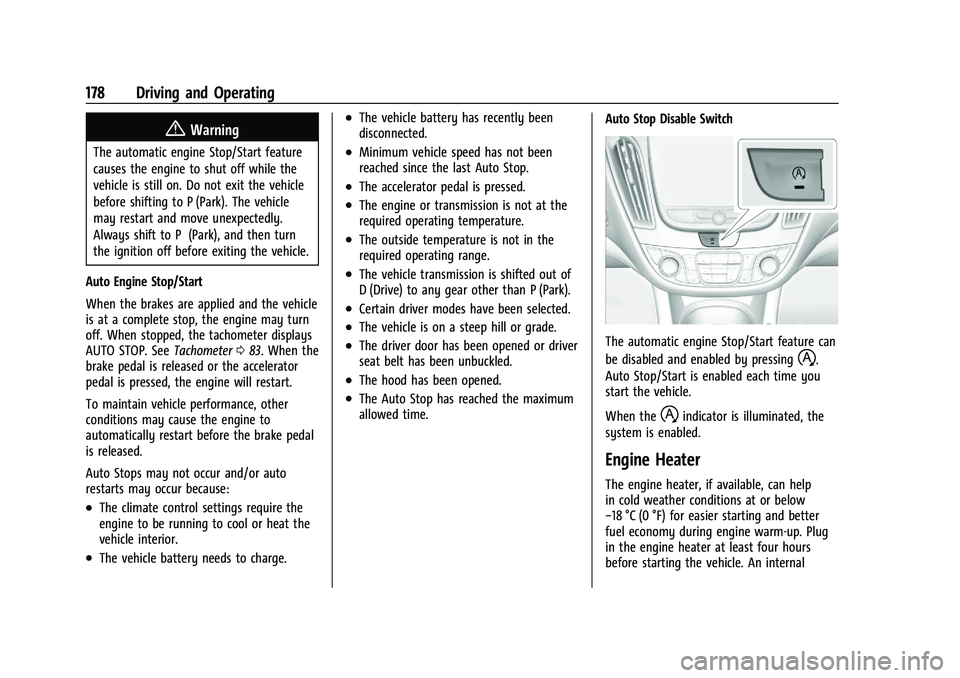
allowed time. Auto Stop Disable Switch
The automatic engine Stop/Start feature can
be disabled and enabled by pressing
h.
Auto Stop/Start is enabled each time you
start the vehicle.
When the
hindicator is illuminated, the
system is enabled.
Engine Heater
The engine heater, if available, can help
in cold weather conditions at or below
−18 °C (0 °F) for easier starting and better
fuel economy during engine warm-up. Plug
in the engine heater at least four hours
before starting the vehicle. An internal
Page 183 of 332
Chevrolet Malibu Owner Manual (GMNA-Localizing-U.S./Canada-
16273584) - 2023 - CRC - 9/28/22
182 Driving and Operating
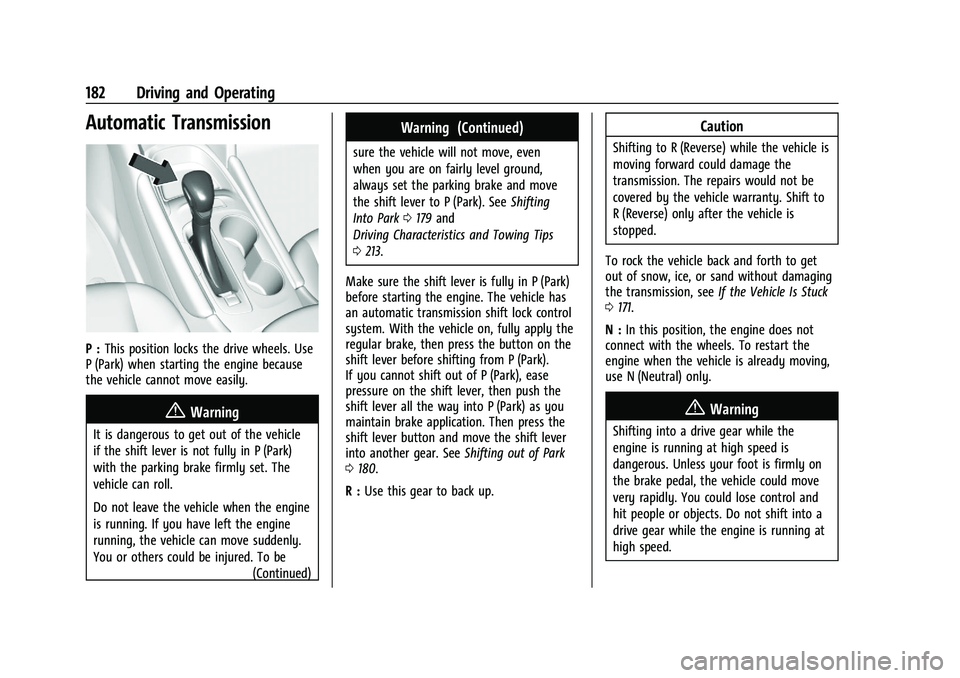
Automatic Transmission
P :This position locks the drive wheels. Use
P (Park) when starting the engine because
the vehicle cannot move easily.
{Warning
It is dangerous to get out of the vehicle
if the shift lever is not fully in P (Park)
with the parking brake firmly set. The
vehicle can roll.
Do not leave the vehicle when the engine
is running. If you have left the engine
running, the vehicle can move suddenly.
You or others could be injured. To be
(Continued)
Warning (Continued)
sure the vehicle will not move, even
when you are on fairly level ground,
always set the parking brake and move
the shift lever to P (Park). SeeShifting
Into Park 0179 and
Driving Characteristics and Towing Tips
0 213.
Make sure the shift lever is fully in P (Park)
before starting the engine. The vehicle has
an automatic transmission shift lock control
system. With the vehicle on, fully apply the
regular brake, then press the button on the
shift lever before shifting from P (Park).
If you cannot shift out of P (Park), ease
pressure on the shift lever, then push the
shift lever all the way into P (Park) as you
maintain brake application. Then press the
shift lever button and move the shift lever
into another gear. See Shifting out of Park
0 180.
R : Use this gear to back up.
Caution
Shifting to R (Reverse) while the vehicle is
moving forward could damage the
transmission. The repairs would not be
covered by the vehicle warranty. Shift to
R (Reverse) only after the vehicle is
stopped.
To rock the vehicle back and forth to get
out of snow, ice, or sand without damaging
the transmission, see If the Vehicle Is Stuck
0 171.
N : In this position, the engine does not
connect with the wheels. To restart the
engine when the vehicle is already moving,
use N (Neutral) only.
{Warning
Shifting into a drive gear while the
engine is running at high speed is
dangerous. Unless your foot is firmly on
the brake pedal, the vehicle could move
very rapidly. You could lose control and
hit people or objects. Do not shift into a
drive gear while the engine is running at
high speed.
Page 184 of 332
Chevrolet Malibu Owner Manual (GMNA-Localizing-U.S./Canada-
16273584) - 2023 - CRC - 9/28/22
Driving and Operating 183
Caution
Shifting out of P (Park) or N (Neutral) with
the engine running at high speed may
damage the transmission. The repairs
would not be covered by the vehicle
warranty. Be sure the engine is not
running at high speed when shifting the
vehicle.
Caution
A transmission hot message may display
if the automatic transmission fluid is too
hot. Driving under this condition can
damage the vehicle. Stop and idle the
engine to cool the automatic
transmission fluid. This message clears
when the transmission fluid has cooled
sufficiently.
D : This position is for normal driving.
If more power is needed for passing, press
the accelerator pedal down.
Caution
If the vehicle does not shift gears, the
transmission could be damaged. Have the
vehicle serviced right away.
If the vehicle is stopped on a hill, with your
foot off the brake pedal, the vehicle may
roll. This is normal and is due to the torque
converter designed to improve fuel economy
and performance. Use the brake to hold the
vehicle on a hill. Do not use the accelerator
pedal.
L : This position gives you access to gear
ranges. This provides more engine braking
but lower fuel economy than D (Drive). You
can use it on very steep hills, or in deep
snow or mud. See Manual Mode0183.
Operating Modes : The transmission may
operate in a lower gear than normal to
improve vehicle performance. The engine
speed may be higher and there may be an
increase in noise during the following
conditions:
.When climbing a grade
.When driving downhill
.When driving in hot temperatures, or at
high altitude
Manual Mode
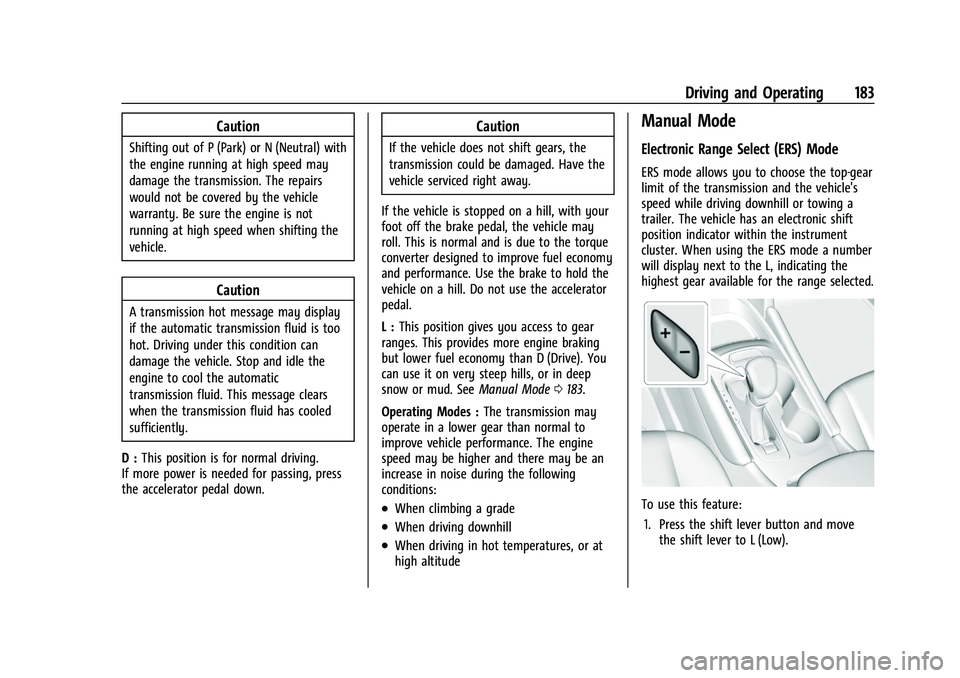
Electronic Range Select (ERS) Mode
ERS mode allows you to choose the top-gear
limit of the transmission and the vehicle's
speed while driving downhill or towing a
trailer. The vehicle has an electronic shift
position indicator within the instrument
cluster. When using the ERS mode a number
will display next to the L, indicating the
highest gear available for the range selected.
To use this feature:
1. Press the shift lever button and move the shift lever to L (Low).