2023 CHEVROLET MALIBU length
[x] Cancel search: lengthPage 56 of 332
Chevrolet Malibu Owner Manual (GMNA-Localizing-U.S./Canada-
16273584) - 2023 - CRC - 9/28/22
Seats and Restraints 55
The manufacturer instructions that come
with the booster seat state the weight and
height limitations for that booster. Use a
booster seat with a lap-shoulder belt until
the child passes the fit test below:
.Sit all the way back on the seat. Do the
knees bend at the seat edge? If yes,
continue. If no, return to the booster seat.
.Buckle the lap-shoulder belt. Does the
shoulder belt rest on the shoulder? If yes,
continue. If no, try using the rear seat
belt comfort guide, if available. See“Rear
Seat Belt Comfort Guides” under
Lap-Shoulder Belt 041. If a comfort guide
is not available, or if the shoulder belt
still does not rest on the shoulder, then
return to the booster seat.
.Does the lap belt fit low and snug on the
hips, touching the thighs? If yes, continue.
If no, return to the booster seat.
.Can proper seat belt fit be maintained for
the length of the trip? If yes, continue.
If no, return to the booster seat.
Q: What is the proper way to wear seat belts?
A: An older child should wear a lap-shoulder
belt and get the additional restraint a
shoulder belt can provide. The shoulder
belt should not cross the face or neck. The lap belt should fit snugly below the
hips, just touching the top of the thighs.
This applies belt force to the child's
pelvic bones in a crash. It should never
be worn over the abdomen, which could
cause severe or even fatal internal
injuries in a crash.
Also see “Rear Seat Belt Comfort Guides”
under Lap-Shoulder Belt 041.
According to accident statistics, children are
safer when properly restrained in a rear
seating position.
In a crash, children who are not buckled up
can strike other people who are buckled up,
or can be thrown out of the vehicle. Older
children need to use seat belts properly.
{Warning
Never allow more than one child to wear
the same seat belt. The seat belt cannot
properly spread the impact forces. In a
crash, they can be crushed together and
seriously injured. A seat belt must be
used by only one person at a time.
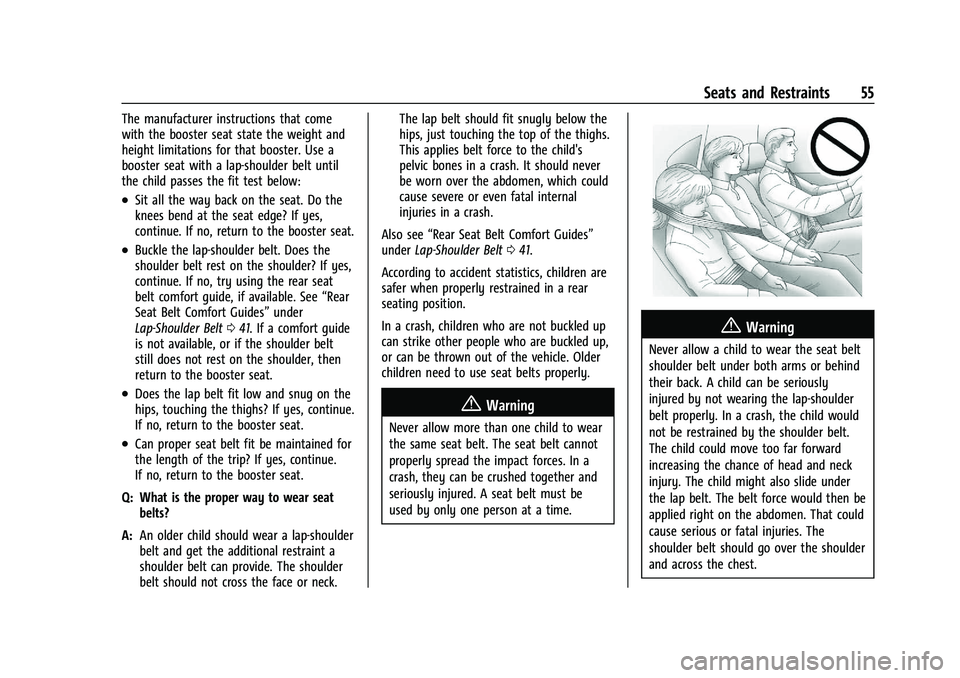
{Warning
Never allow a child to wear the seat belt
shoulder belt under both arms or behind
their back. A child can be seriously
injured by not wearing the lap-shoulder
belt properly. In a crash, the child would
not be restrained by the shoulder belt.
The child could move too far forward
increasing the chance of head and neck
injury. The child might also slide under
the lap belt. The belt force would then be
applied right on the abdomen. That could
cause serious or fatal injuries. The
shoulder belt should go over the shoulder
and across the chest.
Page 67 of 332
Chevrolet Malibu Owner Manual (GMNA-Localizing-U.S./Canada-
16273584) - 2023 - CRC - 9/28/22
66 Seats and Restraints
length and attach it to the anchor. Refer
to the child restraint instructions and the
following steps:
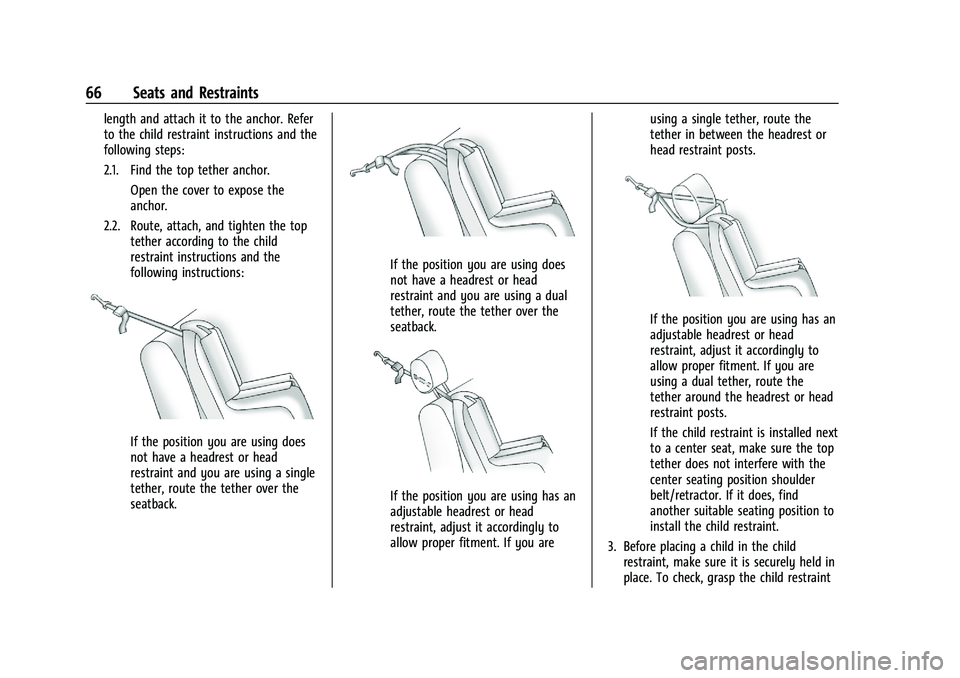
2.1. Find the top tether anchor.Open the cover to expose the
anchor.
2.2. Route, attach, and tighten the top tether according to the child
restraint instructions and the
following instructions:
If the position you are using does
not have a headrest or head
restraint and you are using a single
tether, route the tether over the
seatback.
If the position you are using does
not have a headrest or head
restraint and you are using a dual
tether, route the tether over the
seatback.
If the position you are using has an
adjustable headrest or head
restraint, adjust it accordingly to
allow proper fitment. If you are using a single tether, route the
tether in between the headrest or
head restraint posts.
If the position you are using has an
adjustable headrest or head
restraint, adjust it accordingly to
allow proper fitment. If you are
using a dual tether, route the
tether around the headrest or head
restraint posts.
If the child restraint is installed next
to a center seat, make sure the top
tether does not interfere with the
center seating position shoulder
belt/retractor. If it does, find
another suitable seating position to
install the child restraint.
3. Before placing a child in the child restraint, make sure it is securely held in
place. To check, grasp the child restraint
Page 151 of 332
Chevrolet Malibu Owner Manual (GMNA-Localizing-U.S./Canada-
16273584) - 2023 - CRC - 9/28/22
150 Infotainment System
.Forward Automatic Braking, also called
Automatic Emergency Braking (if
equipped)–the number of times the
vehicle detected that a forward collision
was imminent and applied the brakes.
.Reverse Automatic Braking (if equipped) –
the number of times the vehicle detected
that a rearward collision was imminent
and applied the brakes.
.Traction Control –the number of times
the Traction Control System activated to
reduce wheel spin or loss of traction.
.Stability Control –the number of events
which required the use of electronic
stability control.
.Antilock Braking System Active –The
number of Antilock Brake System
activations.
.Tailgating Alerts (if equipped)– the
number of times the driver was alerted
for following a vehicle ahead too closely.
Report Card Data
Cumulative Data is saved for all trips until
the Report Card is reset or until the
maximum count is exceeded. If the
maximum count is exceeded for a Report
Card line item, that item will no longer be
updated in the Report Card until it is reset. Each item will report a maximum of
1,000 counts. The distance driven will report
a maximum of 64 374 km (40,000 mi).
To delete Report Card data, do one of the
following:
.From the Report Card display, touch
Reset.
.Touch Clear PIN and All Teen Driver Keys
from the Teen Driver menu. This will also
unregister any Teen Driver keys and
delete the PIN.
Forgotten PIN
See your dealer to reset the PIN.
Trademarks and License
Agreements
FCC Information
See Radio Frequency Statement 0308.
"Made for iPhone," means that an electronic
accessory has been designed to connect
specifically to iPhone, and has been certified
by the developer to meet Apple
performance standards. Apple is not
responsible for the operation of this device
or its compliance with safety and regulatory
standards. Please note that the use of this
accessory with iPhone may affect wireless
performance. iPhone are trademarks of
Apple Inc., registered in the U.S. and other
countries.
Trial length and service availability may vary
by model, model year or trim. Service will
automatically stop at the end of your trial
subscription period unless you decide to
continue service. If you do not wish to enjoy
your trial, you can cancel by calling the
number below. All SiriusXM services require
a subscription, each sold separately by
SiriusXM after the trial period. Service
subject to the applicable SiriusXM Customer
Agreement and Privacy Policy, visit
Page 180 of 332
Chevrolet Malibu Owner Manual (GMNA-Localizing-U.S./Canada-
16273584) - 2023 - CRC - 9/28/22
Driving and Operating 179
thermostat in the plug end of the cord will
prevent engine heater operation at
temperatures above−18 °C (0 °F).
To Use the Engine Heater
1. Turn off the engine.
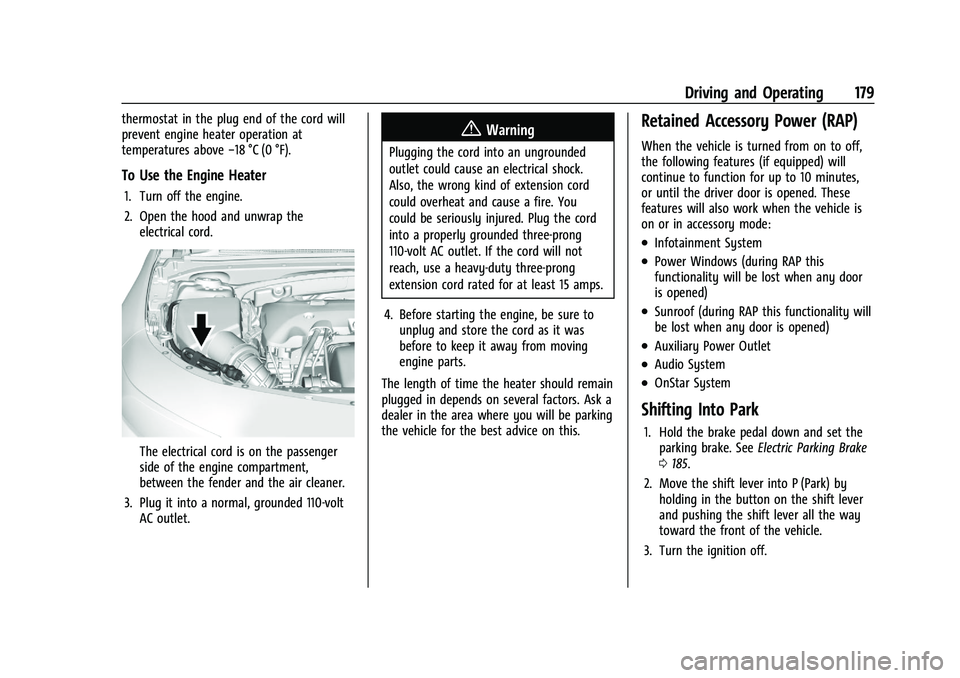
2. Open the hood and unwrap the
electrical cord.
The electrical cord is on the passenger
side of the engine compartment,
between the fender and the air cleaner.
3. Plug it into a normal, grounded 110-volt AC outlet.
{Warning
Plugging the cord into an ungrounded
outlet could cause an electrical shock.
Also, the wrong kind of extension cord
could overheat and cause a fire. You
could be seriously injured. Plug the cord
into a properly grounded three-prong
110-volt AC outlet. If the cord will not
reach, use a heavy-duty three-prong
extension cord rated for at least 15 amps.
4. Before starting the engine, be sure to unplug and store the cord as it was
before to keep it away from moving
engine parts.
The length of time the heater should remain
plugged in depends on several factors. Ask a
dealer in the area where you will be parking
the vehicle for the best advice on this.
Retained Accessory Power (RAP)
When the vehicle is turned from on to off,
the following features (if equipped) will
continue to function for up to 10 minutes,
or until the driver door is opened. These
features will also work when the vehicle is
on or in accessory mode:
.Infotainment System
.Power Windows (during RAP this
functionality will be lost when any door
is opened)
.Sunroof (during RAP this functionality will
be lost when any door is opened)
.Auxiliary Power Outlet
.Audio System
.OnStar System
Shifting Into Park
1. Hold the brake pedal down and set the parking brake. See Electric Parking Brake
0 185.
2. Move the shift lever into P (Park) by holding in the button on the shift lever
and pushing the shift lever all the way
toward the front of the vehicle.
3. Turn the ignition off.
Page 238 of 332
Chevrolet Malibu Owner Manual (GMNA-Localizing-U.S./Canada-
16273584) - 2023 - CRC - 9/28/22
Vehicle Care 237
Park Brake and P (Park)
Mechanism Check
{Warning
When you are doing this check, the
vehicle could begin to move. You or
others could be injured and property
could be damaged. Make sure there is
room in front of the vehicle in case it
begins to roll. Be ready to apply the
regular brake at once should the vehicle
begin to move.
Park on a fairly steep hill, with the vehicle
facing downhill. Keeping your foot on the
regular brake, set the parking brake.
.To check the parking brake's holding
ability: With the engine running and the
transmission in N (Neutral), slowly remove
foot pressure from the regular brake
pedal. Do this until the vehicle is held by
the parking brake only.
.To check the P (Park) mechanism's holding
ability: With the engine running, shift to
P (Park). Then release the parking brake
followed by the regular brake.
Contact your dealer if service is required.
Wiper Blade Replacement
Windshield wiper blades should be inspected
for wear or cracking.
It is a good idea to clean the wiper blade
assembly on a regular basis. When worn,
or when cleaning is ineffective, replace the
wiper blade. For proper windshield wiper
blade length and type, see Maintenance
Replacement Parts 0295.
Caution
Allowing the wiper arm to touch the
windshield when no wiper blade is
installed could damage the windshield.
Any damage that occurs would not be
covered by the vehicle warranty. Do not
allow the wiper arm to touch the
windshield.
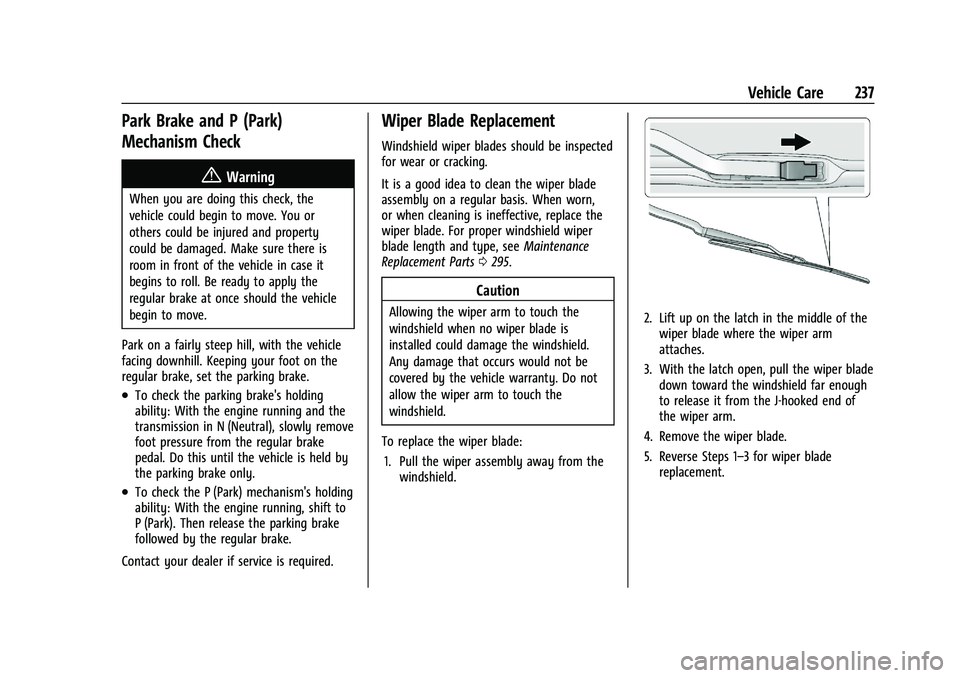
To replace the wiper blade: 1. Pull the wiper assembly away from the windshield.2. Lift up on the latch in the middle of thewiper blade where the wiper arm
attaches.
3. With the latch open, pull the wiper blade down toward the windshield far enough
to release it from the J-hooked end of
the wiper arm.
4. Remove the wiper blade.
5. Reverse Steps 1–3 for wiper blade replacement.