2023 CHEVROLET MALIBU child lock
[x] Cancel search: child lockPage 4 of 332
Chevrolet Malibu Owner Manual (GMNA-Localizing-U.S./Canada-
16273584) - 2023 - CRC - 9/28/22
Introduction 3
A circle with a slash through it is a safety
symbol which means“Do not,” “Do not do
this,” or“Do not let this happen.”
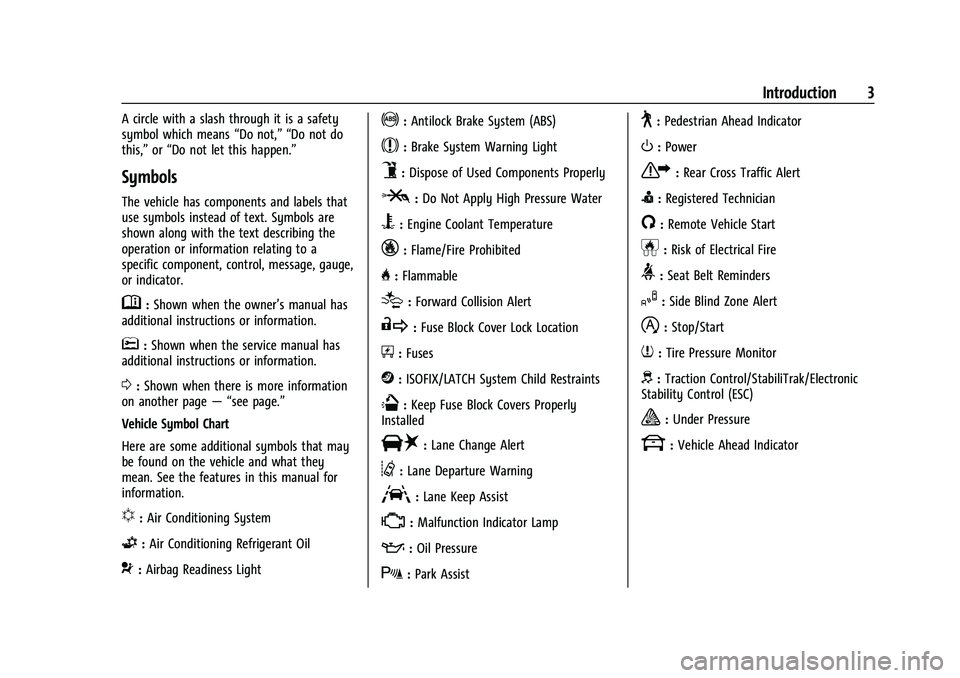
Symbols
The vehicle has components and labels that
use symbols instead of text. Symbols are
shown along with the text describing the
operation or information relating to a
specific component, control, message, gauge,
or indicator.
M:Shown when the owner’s manual has
additional instructions or information.
*: Shown when the service manual has
additional instructions or information.
0: Shown when there is more information
on another page — “see page.”
Vehicle Symbol Chart
Here are some additional symbols that may
be found on the vehicle and what they
mean. See the features in this manual for
information.
u: Air Conditioning System
G:Air Conditioning Refrigerant Oil
9:Airbag Readiness Light
!:Antilock Brake System (ABS)
$:Brake System Warning Light
9:Dispose of Used Components Properly
P:Do Not Apply High Pressure Water
B:Engine Coolant Temperature
_:Flame/Fire Prohibited
H: Flammable
[:Forward Collision Alert
R:Fuse Block Cover Lock Location
+:Fuses
j:ISOFIX/LATCH System Child Restraints
Q:Keep Fuse Block Covers Properly
Installed
|: Lane Change Alert
@:Lane Departure Warning
A:Lane Keep Assist
*: Malfunction Indicator Lamp
::Oil Pressure
X:Park Assist
~:Pedestrian Ahead Indicator
O:Power
7:Rear Cross Traffic Alert
I:Registered Technician
/:Remote Vehicle Start
h:Risk of Electrical Fire
>:Seat Belt Reminders
I:Side Blind Zone Alert
h:Stop/Start
7:Tire Pressure Monitor
d:Traction Control/StabiliTrak/Electronic
Stability Control (ESC)
a: Under Pressure
k: Vehicle Ahead Indicator
Page 7 of 332
Chevrolet Malibu Owner Manual (GMNA-Localizing-U.S./Canada-
16273584) - 2023 - CRC - 9/28/22
6 Keys, Doors, and Windows
Keys, Doors, and
Windows
Keys and Locks
Keys . . . . . . . . . . . . . . . . . . . . . . . . . . . . . . . . . . . . . 6
Remote Key . . . . . . . . . . . . . . . . . . . . . . . . . . . . . 7
Remote Key Operation . . . . . . . . . . . . . . . . . . . 7
Remote Vehicle Start . . . . . . . . . . . . . . . . . . . 13
Door Locks . . . . . . . . . . . . . . . . . . . . . . . . . . . . . . 14
Power Door Locks . . . . . . . . . . . . . . . . . . . . . . . 16
Delayed Locking . . . . . . . . . . . . . . . . . . . . . . . . 16
Automatic Door Locks . . . . . . . . . . . . . . . . . . . 17
Lockout Protection . . . . . . . . . . . . . . . . . . . . . . 17
Safety Locks . . . . . . . . . . . . . . . . . . . . . . . . . . . . 17
Doors
Trunk . . . . . . . . . . . . . . . . . . . . . . . . . . . . . . . . . . . 18
Vehicle Security
Vehicle Security . . . . . . . . . . . . . . . . . . . . . . . . 19
Vehicle Alarm System . . . . . . . . . . . . . . . . . . 20
Immobilizer . . . . . . . . . . . . . . . . . . . . . . . . . . . . . 21
Immobilizer Operation . . . . . . . . . . . . . . . . . . 21
Exterior Mirrors
Convex Mirrors . . . . . . . . . . . . . . . . . . . . . . . . . 21
Power Mirrors . . . . . . . . . . . . . . . . . . . . . . . . . . 22
Folding Mirrors . . . . . . . . . . . . . . . . . . . . . . . . . 22
Heated Mirrors . . . . . . . . . . . . . . . . . . . . . . . . . 22
Reverse Tilt Mirrors . . . . . . . . . . . . . . . . . . . . . 22
Interior Mirrors
Interior Rearview Mirrors . . . . . . . . . . . . . . . 22
Manual Rearview Mirror . . . . . . . . . . . . . . . . 23
Automatic Dimming Rearview Mirror . . . 23
Windows
Windows . . . . . . . . . . . . . . . . . . . . . . . . . . . . . . . 23
Power Windows . . . . . . . . . . . . . . . . . . . . . . . . 23
Sun Visors . . . . . . . . . . . . . . . . . . . . . . . . . . . . . . 25
Roof
Sunroof . . . . . . . . . . . . . . . . . . . . . . . . . . . . . . . . . 25
Keys and Locks
Keys
{Warning
Leaving children in a vehicle with a
Remote Keyless Entry (RKE) transmitter is
dangerous and children or others could
be seriously injured or killed. They could
operate the power windows or other
controls or make the vehicle move. The
windows will function with the RKE
transmitter in the vehicle, and children or
others could be caught in the path of a
closing window. Do not leave children in
a vehicle with an RKE transmitter.
Page 15 of 332
Chevrolet Malibu Owner Manual (GMNA-Localizing-U.S./Canada-
16273584) - 2023 - CRC - 9/28/22
14 Keys, Doors, and Windows
If your vehicle is low on fuel, do not use the
remote start feature. The vehicle may run
out of fuel.
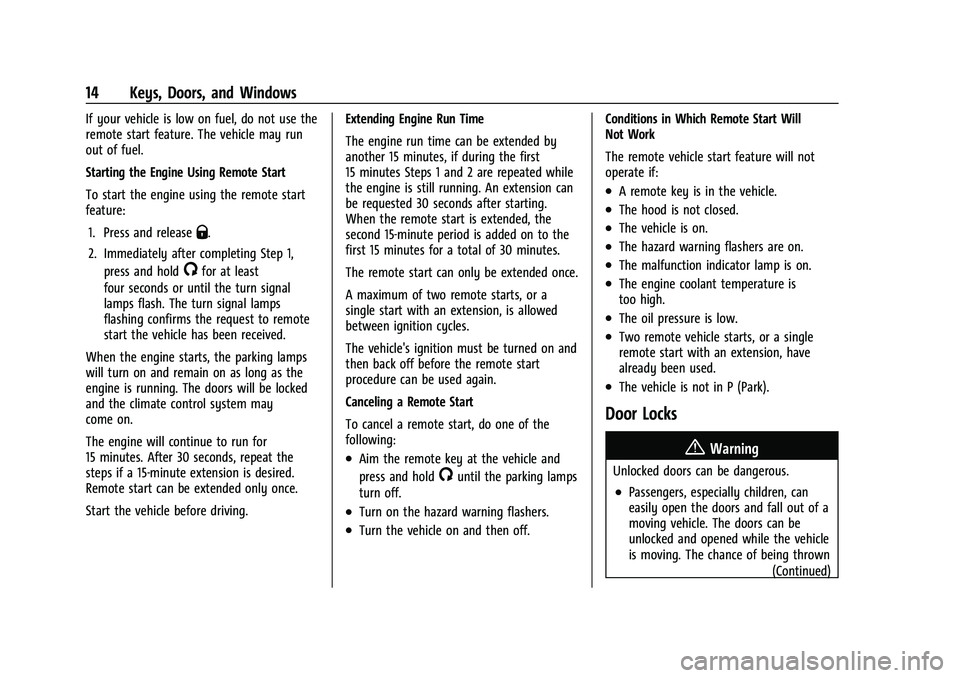
Starting the Engine Using Remote Start
To start the engine using the remote start
feature:1. Press and release
Q.
2. Immediately after completing Step 1, press and hold
/for at least
four seconds or until the turn signal
lamps flash. The turn signal lamps
flashing confirms the request to remote
start the vehicle has been received.
When the engine starts, the parking lamps
will turn on and remain on as long as the
engine is running. The doors will be locked
and the climate control system may
come on.
The engine will continue to run for
15 minutes. After 30 seconds, repeat the
steps if a 15-minute extension is desired.
Remote start can be extended only once.
Start the vehicle before driving. Extending Engine Run Time
The engine run time can be extended by
another 15 minutes, if during the first
15 minutes Steps 1 and 2 are repeated while
the engine is still running. An extension can
be requested 30 seconds after starting.
When the remote start is extended, the
second 15-minute period is added on to the
first 15 minutes for a total of 30 minutes.
The remote start can only be extended once.
A maximum of two remote starts, or a
single start with an extension, is allowed
between ignition cycles.
The vehicle's ignition must be turned on and
then back off before the remote start
procedure can be used again.
Canceling a Remote Start
To cancel a remote start, do one of the
following:
.Aim the remote key at the vehicle and
press and hold
/until the parking lamps
turn off.
.Turn on the hazard warning flashers.
.Turn the vehicle on and then off. Conditions in Which Remote Start Will
Not Work
The remote vehicle start feature will not
operate if:
.A remote key is in the vehicle.
.The hood is not closed.
.The vehicle is on.
.The hazard warning flashers are on.
.The malfunction indicator lamp is on.
.The engine coolant temperature is
too high.
.The oil pressure is low.
.Two remote vehicle starts, or a single
remote start with an extension, have
already been used.
.The vehicle is not in P (Park).
Door Locks
{Warning
Unlocked doors can be dangerous.
.Passengers, especially children, can
easily open the doors and fall out of a
moving vehicle. The doors can be
unlocked and opened while the vehicle
is moving. The chance of being thrown
(Continued)
Page 16 of 332
Chevrolet Malibu Owner Manual (GMNA-Localizing-U.S./Canada-
16273584) - 2023 - CRC - 9/28/22
Keys, Doors, and Windows 15
Warning (Continued)
out of the vehicle in a crash is
increased if the doors are not locked.
So, all passengers should wear seat
belts properly and the doors should be
locked whenever the vehicle is driven.
.Young children who get into unlocked
vehicles may be unable to get out.
A child can be overcome by extreme
heat and can suffer permanent injuries
or even death from heat stroke.
Always lock the vehicle whenever
leaving it.
.Outsiders can easily enter through an
unlocked door when you slow down
or stop the vehicle. Locking the doors
can help prevent this from happening.
To lock or unlock the doors from the
outside:
.PressQorKon the remote key. See
Remote Key Operation 07.
.In the case of a dead battery, use the key
in the driver door. The key lock cylinder is
covered with a cap. To lock or unlock the doors from the inside:
.PressQorKon the power door lock
switch.
.Pull the door handle once to unlock the
door. Pull the handle again to unlatch it.
Keyless Access
The remote key must be within 1 m (3 ft) of
the trunk or door being opened. Press the
button on the door handle to open. See
“Keyless Access Operation” inRemote Key
Operation 07.
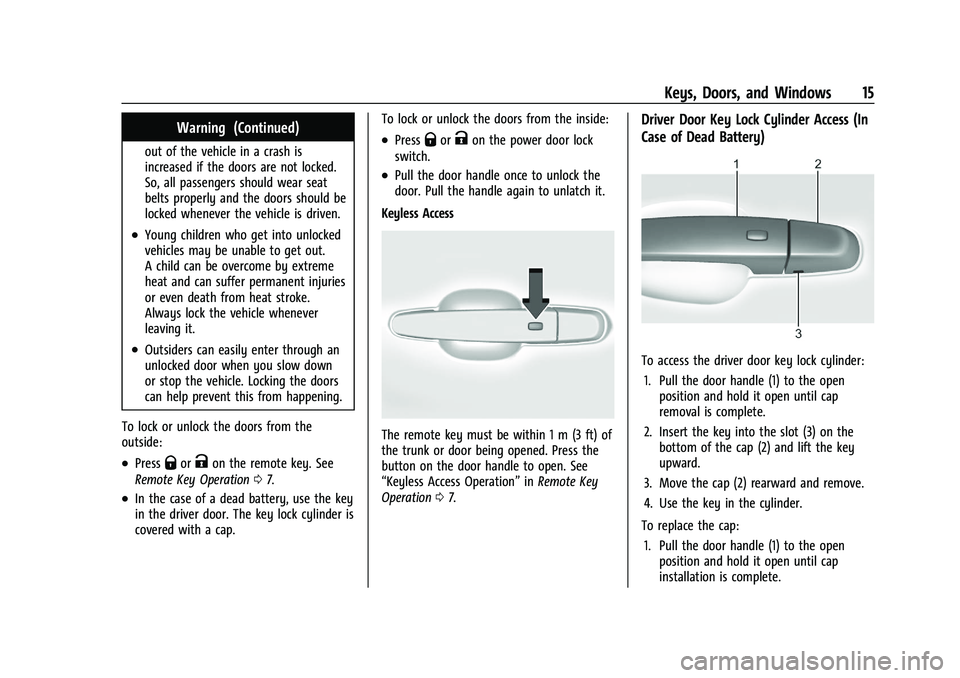
Driver Door Key Lock Cylinder Access (In
Case of Dead Battery)
To access the driver door key lock cylinder:
1. Pull the door handle (1) to the open position and hold it open until cap
removal is complete.
2. Insert the key into the slot (3) on the bottom of the cap (2) and lift the key
upward.
3. Move the cap (2) rearward and remove.
4. Use the key in the cylinder.
To replace the cap: 1. Pull the door handle (1) to the open position and hold it open until cap
installation is complete.
Page 19 of 332
Chevrolet Malibu Owner Manual (GMNA-Localizing-U.S./Canada-
16273584) - 2023 - CRC - 9/28/22
18 Keys, Doors, and Windows
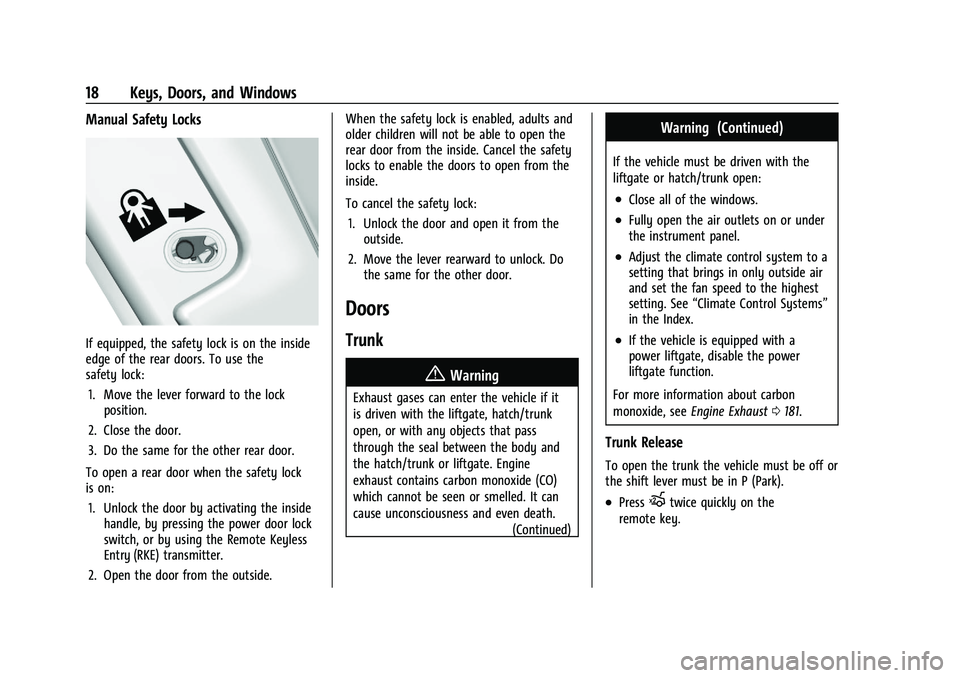
Manual Safety Locks
If equipped, the safety lock is on the inside
edge of the rear doors. To use the
safety lock:1. Move the lever forward to the lock position.
2. Close the door.
3. Do the same for the other rear door.
To open a rear door when the safety lock
is on: 1. Unlock the door by activating the inside handle, by pressing the power door lock
switch, or by using the Remote Keyless
Entry (RKE) transmitter.
2. Open the door from the outside. When the safety lock is enabled, adults and
older children will not be able to open the
rear door from the inside. Cancel the safety
locks to enable the doors to open from the
inside.
To cancel the safety lock:
1. Unlock the door and open it from the outside.
2. Move the lever rearward to unlock. Do the same for the other door.
Doors
Trunk
{Warning
Exhaust gases can enter the vehicle if it
is driven with the liftgate, hatch/trunk
open, or with any objects that pass
through the seal between the body and
the hatch/trunk or liftgate. Engine
exhaust contains carbon monoxide (CO)
which cannot be seen or smelled. It can
cause unconsciousness and even death.
(Continued)
Warning (Continued)
If the vehicle must be driven with the
liftgate or hatch/trunk open:
.Close all of the windows.
.Fully open the air outlets on or under
the instrument panel.
.Adjust the climate control system to a
setting that brings in only outside air
and set the fan speed to the highest
setting. See“Climate Control Systems”
in the Index.
.If the vehicle is equipped with a
power liftgate, disable the power
liftgate function.
For more information about carbon
monoxide, see Engine Exhaust 0181.
Trunk Release
To open the trunk the vehicle must be off or
the shift lever must be in P (Park).
.PressXtwice quickly on the
remote key.
Page 24 of 332
Chevrolet Malibu Owner Manual (GMNA-Localizing-U.S./Canada-
16273584) - 2023 - CRC - 9/28/22
Keys, Doors, and Windows 23
Manual Rearview Mirror
If equipped, push the tab forward for
daytime use and pull it rearward for
nighttime use to avoid glare of the
headlamps from behind.
Automatic Dimming Rearview
Mirror
If equipped, automatic dimming reduces the
glare of headlamps from behind. The
dimming feature comes on when the vehicle
is started.
Windows{
Warning
Never leave a child, a helpless adult, or a
pet alone in a vehicle, especially with the
windows closed in warm or hot weather.
They can be overcome by the extreme
heat and suffer permanent injuries or
even death from heat stroke.
The vehicle aerodynamics are designed to
improve fuel economy performance. This
may result in a pulsing sound when either
rear window is down and the front windows
are up. To reduce the sound, open either a
front window or the sunroof, if equipped.
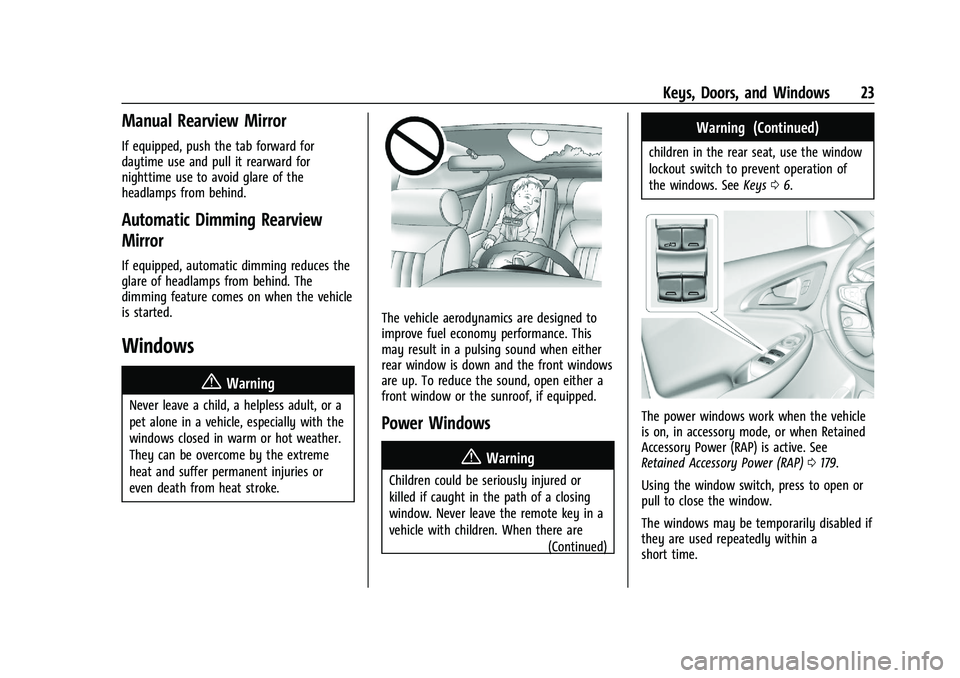
Power Windows
{Warning
Children could be seriously injured or
killed if caught in the path of a closing
window. Never leave the remote key in a
vehicle with children. When there are (Continued)
Warning (Continued)
children in the rear seat, use the window
lockout switch to prevent operation of
the windows. SeeKeys06.
The power windows work when the vehicle
is on, in accessory mode, or when Retained
Accessory Power (RAP) is active. See
Retained Accessory Power (RAP) 0179.
Using the window switch, press to open or
pull to close the window.
The windows may be temporarily disabled if
they are used repeatedly within a
short time.
Page 42 of 332
Chevrolet Malibu Owner Manual (GMNA-Localizing-U.S./Canada-
16273584) - 2023 - CRC - 9/28/22
Seats and Restraints 41
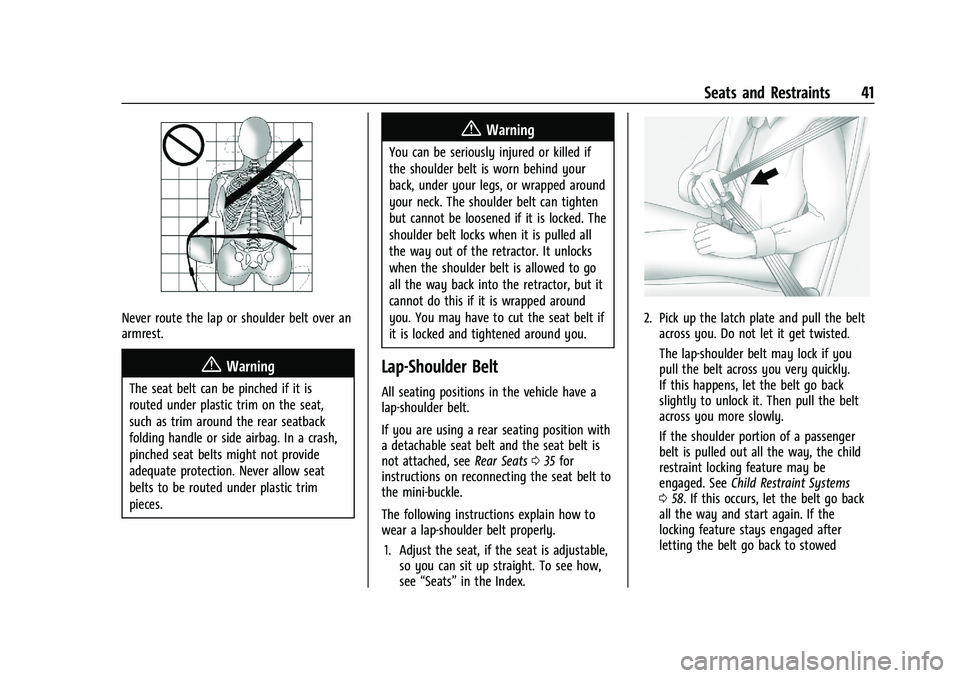
Never route the lap or shoulder belt over an
armrest.
{Warning
The seat belt can be pinched if it is
routed under plastic trim on the seat,
such as trim around the rear seatback
folding handle or side airbag. In a crash,
pinched seat belts might not provide
adequate protection. Never allow seat
belts to be routed under plastic trim
pieces.
{Warning
You can be seriously injured or killed if
the shoulder belt is worn behind your
back, under your legs, or wrapped around
your neck. The shoulder belt can tighten
but cannot be loosened if it is locked. The
shoulder belt locks when it is pulled all
the way out of the retractor. It unlocks
when the shoulder belt is allowed to go
all the way back into the retractor, but it
cannot do this if it is wrapped around
you. You may have to cut the seat belt if
it is locked and tightened around you.
Lap-Shoulder Belt
All seating positions in the vehicle have a
lap-shoulder belt.
If you are using a rear seating position with
a detachable seat belt and the seat belt is
not attached, seeRear Seats035 for
instructions on reconnecting the seat belt to
the mini-buckle.
The following instructions explain how to
wear a lap-shoulder belt properly.
1. Adjust the seat, if the seat is adjustable, so you can sit up straight. To see how,
see “Seats” in the Index.
2. Pick up the latch plate and pull the belt
across you. Do not let it get twisted.
The lap-shoulder belt may lock if you
pull the belt across you very quickly.
If this happens, let the belt go back
slightly to unlock it. Then pull the belt
across you more slowly.
If the shoulder portion of a passenger
belt is pulled out all the way, the child
restraint locking feature may be
engaged. See Child Restraint Systems
0 58. If this occurs, let the belt go back
all the way and start again. If the
locking feature stays engaged after
letting the belt go back to stowed
Page 43 of 332
Chevrolet Malibu Owner Manual (GMNA-Localizing-U.S./Canada-
16273584) - 2023 - CRC - 9/28/22
42 Seats and Restraints
position on the seat, move the seat
rearward or recline the seat until the
shoulder belt retractor lock releases.
Engaging the child restraint locking
feature in the front outboard seating
position may affect the passenger
sensing system. SeePassenger Sensing
System 050.
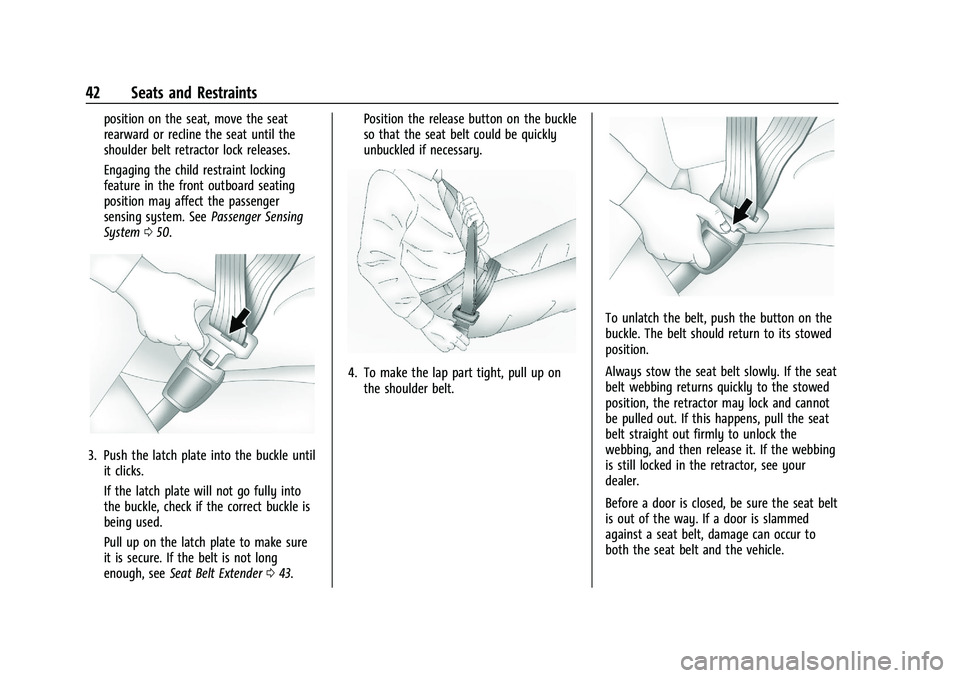
3. Push the latch plate into the buckle until
it clicks.
If the latch plate will not go fully into
the buckle, check if the correct buckle is
being used.
Pull up on the latch plate to make sure
it is secure. If the belt is not long
enough, see Seat Belt Extender 043. Position the release button on the buckle
so that the seat belt could be quickly
unbuckled if necessary.
4. To make the lap part tight, pull up on
the shoulder belt.
To unlatch the belt, push the button on the
buckle. The belt should return to its stowed
position.
Always stow the seat belt slowly. If the seat
belt webbing returns quickly to the stowed
position, the retractor may lock and cannot
be pulled out. If this happens, pull the seat
belt straight out firmly to unlock the
webbing, and then release it. If the webbing
is still locked in the retractor, see your
dealer.
Before a door is closed, be sure the seat belt
is out of the way. If a door is slammed
against a seat belt, damage can occur to
both the seat belt and the vehicle.