2023 ALFA ROMEO STELVIO brake light
[x] Cancel search: brake lightPage 102 of 268

STARTING AND OPERATING
100
STOP/START SYSTEM
The Stop/Start system automatically shuts off
the engine during a vehicle stop if the required
conditions are met. Releasing the brake pedal or
pressing the accelerator pedal will automatically
restart the engine.
The function was designed to increase vehicle
efficiency by reducing fuel consumption, gas
emissions, and sound pollution.
NOTE:
When the Stop/Start system stops the engine,
the power steering is also disabled.
OPERATING MODE
Stopping The Engine
With the vehicle at a standstill and brake pedal
pressed, the Stop/Start system shuts off the
engine if the gear selector is in a position other
than REVERSE (R).
The system does not operate when the gear
selector is in REVERSE (R), in order to make
parking maneuvers easier.
In the event of uphill stops, the Stop/Start system
is disabled to make the “Hill Start Assist” function
available (works only with running engine).
NOTE:
The engine can only be automatically stopped
after having run at about 6 mph (10 km/h). After
an automatic restart, the vehicle only needs to
exceed a speed of 0.3 mph (0.5 km/h) to stop the engine.
Engine stopping is signaled by the symbol
lighting up on the instrument cluster display. Restarting The Engine
To restart the engine, release the brake pedal or,
turn the steering wheel slightly (if equipped).
With the brake pressed and the transmission in
automatic mode DRIVE (D), the engine will restart
by shifting to REVERSE (R), to PARK (P) or to
“AutoStick”
Ú
page 93.
With brake pressed if the gear selector is in
“AutoStick” mode, the engine will restart by
shifting to PARK (P) or by moving the selector
to + or -
Ú
page 93.
SYSTEM MANUAL ACTIVATION/
D
EACTIVATION
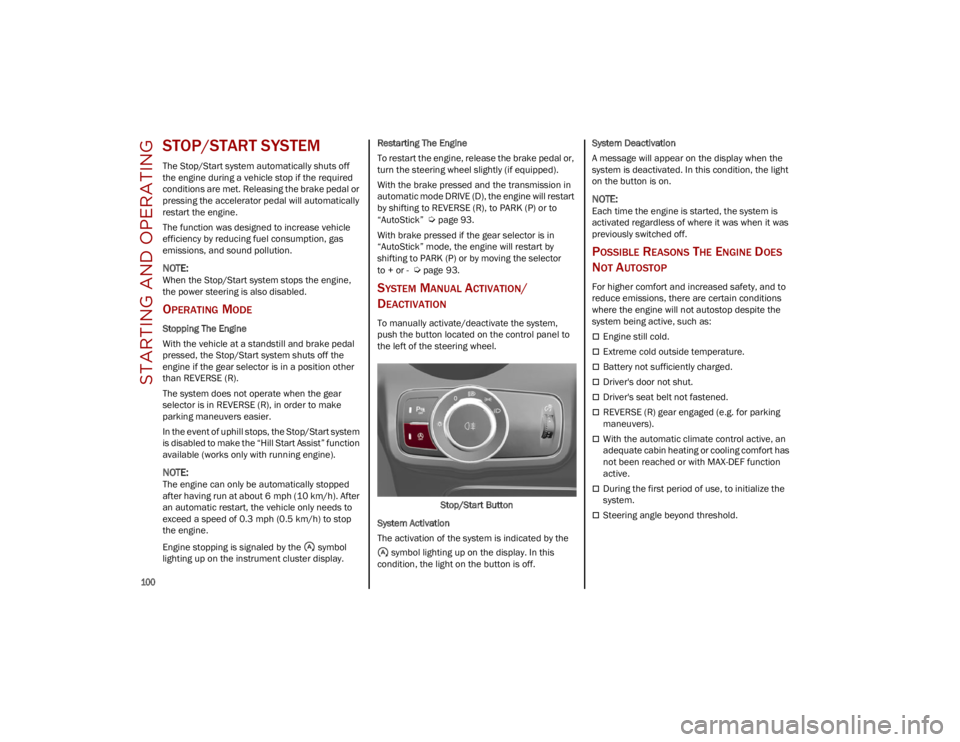
To manually activate/deactivate the system,
push the button located on the control panel to
the left of the steering wheel.
Stop/Start Button
System Activation
The activation of the system is indicated by the symbol lighting up on the display. In this
condition, the light on the button is off. System Deactivation
A message will appear on the display when the
system is deactivated. In this condition, the light
on the button is on.
NOTE:
Each time the engine is started, the system is
activated regardless of where it was when it was
previously switched off.
POSSIBLE REASONS THE ENGINE DOES
N
OT AUTOSTOP
For higher comfort and increased safety, and to
reduce emissions, there are certain conditions
where the engine will not autostop despite the
system being active, such as:
Engine still cold.
Extreme cold outside temperature.
Battery not sufficiently charged.
Driver's door not shut.
Driver's seat belt not fastened.
REVERSE (R) gear engaged (e.g. for parking
maneuvers).
With the automatic climate control active, an
adequate cabin heating or cooling comfort has
not been reached or with MAX-DEF function
active.
During the first period of use, to initialize the
system.
Steering angle beyond threshold.
23_GU_OM_EN_USC_t.book Page 100
Page 105 of 268

103
CRUISE CONTROL
When engaged, the Cruise Control takes over
accelerator operations at speeds greater than
20 mph (32 km/h).Cruise Control On/Off Switch
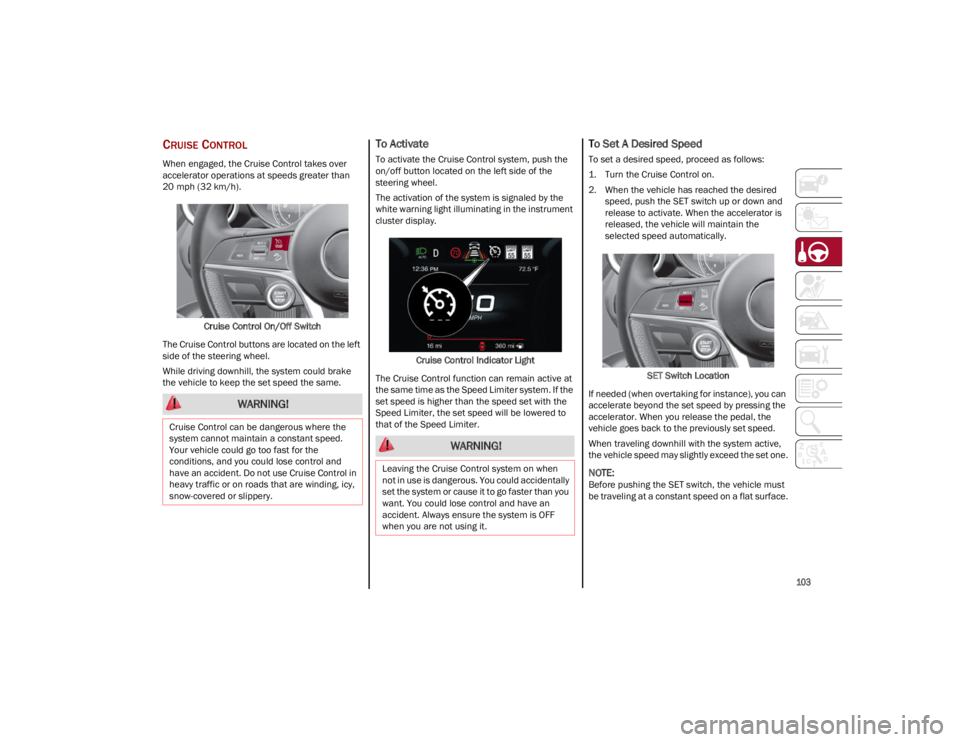
The Cruise Control buttons are located on the left
side of the steering wheel.
While driving downhill, the system could brake
the vehicle to keep the set speed the same.
To Activate
To activate the Cruise Control system, push the
on/off button located on the left side of the
steering wheel.
The activation of the system is signaled by the
white warning light illuminating in the instrument
cluster display.
Cruise Control Indicator Light
The Cruise Control function can remain active at
the same time as the Speed Limiter system. If the
set speed is higher than the speed set with the
Speed Limiter, the set speed will be lowered to
that of the Speed Limiter.
To Set A Desired Speed
To set a desired speed, proceed as follows:
1. Turn the Cruise Control on.
2. When the vehicle has reached the desired speed, push the SET switch up or down and
release to activate. When the accelerator is
released, the vehicle will maintain the
selected speed automatically.
SET Switch Location
If needed (when overtaking for instance), you can
accelerate beyond the set speed by pressing the
accelerator. When you release the pedal, the
vehicle goes back to the previously set speed.
When traveling downhill with the system active,
the vehicle speed may slightly exceed the set one.
NOTE:
Before pushing the SET switch, the vehicle must
be traveling at a constant speed on a flat surface.
WARNING!
Cruise Control can be dangerous where the
system cannot maintain a constant speed.
Your vehicle could go too fast for the
conditions, and you could lose control and
have an accident. Do not use Cruise Control in
heavy traffic or on roads that are winding, icy,
snow-covered or slippery.
WARNING!
Leaving the Cruise Control system on when
not in use is dangerous. You could accidentally
set the system or cause it to go faster than you
want. You could lose control and have an
accident. Always ensure the system is OFF
when you are not using it.
23_GU_OM_EN_USC_t.book Page 103
Page 106 of 268

STARTING AND OPERATING
104
To Vary The Speed Setting
To Increase Or Decrease The Set Speed
When the Cruise Control is set, you can increase
the speed by pushing the SET switch upward or
decrease the speed by pushing the SET switch
downward.
U.S. Speed (mph)
Pushing the SET switch once will result in a
1 mph speed adjustment. Each subsequent
movement of the switch results in an
adjustment of 1 mph.
If the switch is continually pushed, the set
speed will continue to adjust until the switch is
released, then the new set speed will be
established.
Metric Speed (km/h)
Pushing the SET switch once will result in a
1 km/h speed adjustment. Each subsequent
movement of the switch results in an
adjustment of 1 km/h.
If the switch is continually pushed, the set
speed will continue to adjust until the switch is
released, then the new set speed will be
established.
NOTE:
Moving the SET switch allows for adjusting of the
speed according to the selected unit of measure -
ment set on the radio system. Refer to the Infor -
mation and Entertainment System Owner’s
Manual for more information.
To Accelerate For Passing
While the Cruise Control is set, press the
accelerator to pass as you would normally. When
the pedal is released, the vehicle will return to the
set speed.
Using Cruise Control On Hills
The transmission may downshift on hills to
maintain the vehicle set speed.
The Cruise Control system maintains speed up
and down hills. A slight speed change on
moderate hills is normal. On steep hills, a greater
speed loss or gain may occur so it may be
preferable to drive without Cruise Control.
To Resume Speed
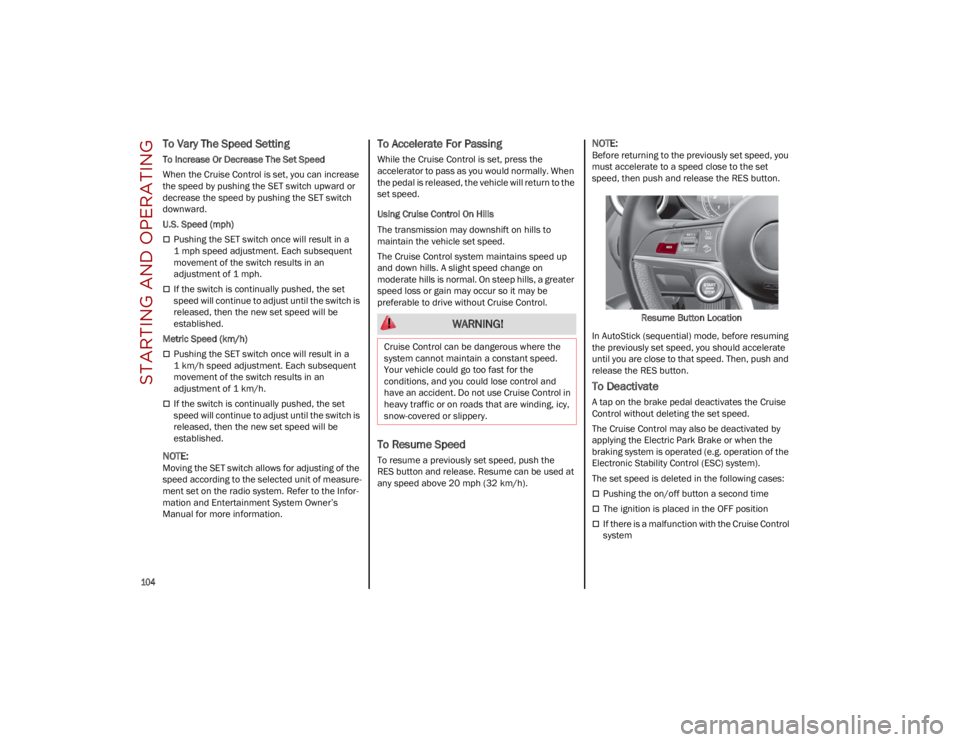
To resume a previously set speed, push the
RES button and release. Resume can be used at
any speed above 20 mph (32 km/h).
NOTE:
Before returning to the previously set speed, you
must accelerate to a speed close to the set
speed, then push and release the RES button.
Resume Button Location
In AutoStick (sequential) mode, before resuming
the previously set speed, you should accelerate
until you are close to that speed. Then, push and
release the RES button.
To Deactivate
A tap on the brake pedal deactivates the Cruise
Control without deleting the set speed.
The Cruise Control may also be deactivated by
applying the Electric Park Brake or when the
braking system is operated (e.g. operation of the
Electronic Stability Control (ESC) system).
The set speed is deleted in the following cases:
Pushing the on/off button a second time
The ignition is placed in the OFF position
If there is a malfunction with the Cruise Control
system
WARNING!
Cruise Control can be dangerous where the
system cannot maintain a constant speed.
Your vehicle could go too fast for the
conditions, and you could lose control and
have an accident. Do not use Cruise Control in
heavy traffic or on roads that are winding, icy,
snow-covered or slippery.
23_GU_OM_EN_USC_t.book Page 104
Page 107 of 268

105
(Continued)
ADAPTIVE CRUISE CONTROL (ACC)
The Adaptive Cruise Control (ACC) is a driver
assist system that combines the Cruise Control
functions with controlling the distance from the
vehicle ahead. ACC will adjust the vehicle speed
up to the preset speed to maintain a distance
with the vehicle ahead. ACC increases the driving
convenience provided by Cruise Control while
traveling on highways and major roadways.
However, it is not a safety system and not
designed to prevent collisions. The Cruise Control
function performs differently
Ú
page 103.
ACC will allow you to keep Cruise Control engaged
in light to moderate traffic conditions without the
constant need to reset your Cruise Control. ACC
uses a radar sensor located behind the front
bumper and a camera located in the center/
upper part of the windshield, to detect the
presence of a vehicle close ahead.
The system sets and holds the vehicle at the
desired speed without needing to press the
accelerator. It also sets and holds a distance from
the vehicle ahead (these settings are set by
the driver). Front Bumper Radar Location
Windshield Camera Location
If the system detects a vehicle ahead, it will
automatically intervene by slightly braking or
accelerating in order to maintain the preset
distance. It will not exceed the original set speed
when adapting to the speed of the vehicle ahead.
NOTE:
Adaptive Cruise Control performance is not guar -
anteed under the following circumstances. You
should not utilize the ACC system when:
Driving in fog, heavy rain, sleet, or snow.
Driving in heavy traffic and complex driving
situations (e.g., in construction zones).
Driving on icy, snowy, slippery roads, roads
with steep inclines or downhill slopes, or roads
with numerous turns and bends.
Entering a turn lane or highway off-ramp.
While towing a trailer.
When circumstances do not allow safe driving
at a constant speed
Ú
page 259.
WARNING!
Adaptive Cruise Control (ACC) is a
convenience system. It is not a substitute for
active driver involvement. It is always the
driver’s responsibility to be attentive of road,
traffic, and weather conditions, vehicle
speed, distance to the vehicle ahead and,
most importantly, brake operation to ensure
safe operation of the vehicle under all road
conditions. Your complete attention is
always required while driving to maintain
safe control of your vehicle. Failure to follow
these warnings can result in a collision and
death or serious personal injury.
23_GU_OM_EN_USC_t.book Page 105
Page 109 of 268

107
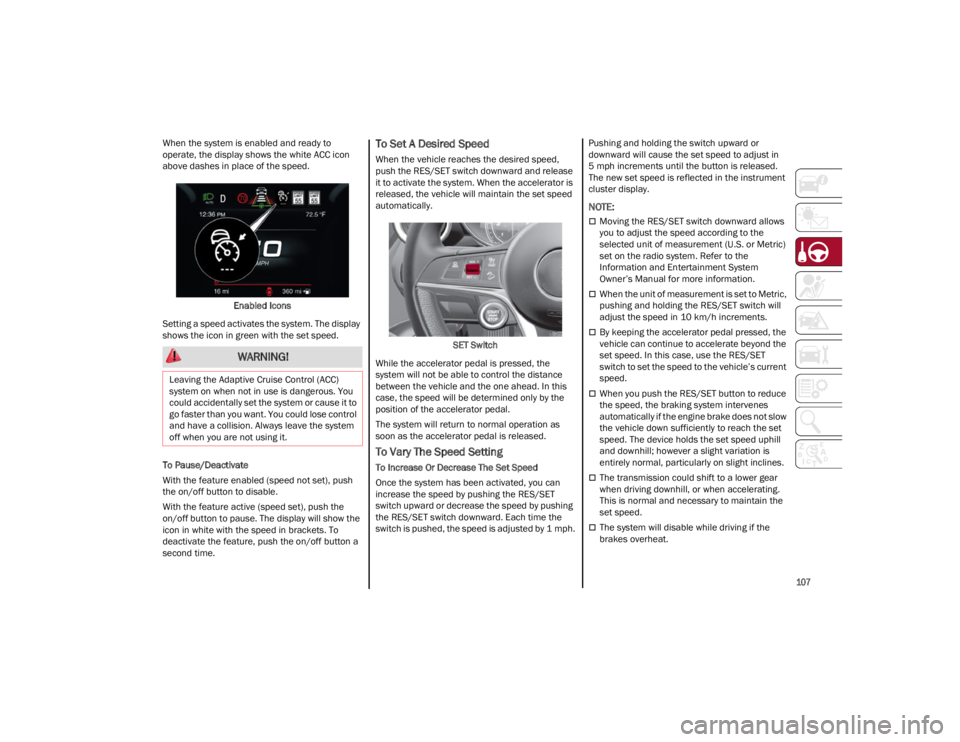
When the system is enabled and ready to
operate, the display shows the white ACC icon
above dashes in place of the speed.Enabled Icons
Setting a speed activates the system. The display
shows the icon in green with the set speed.
To Pause/Deactivate
With the feature enabled (speed not set), push
the on/off button to disable.
With the feature active (speed set), push the
on/off button to pause. The display will show the
icon in white with the speed in brackets. To
deactivate the feature, push the on/off button a
second time.To Set A Desired Speed
When the vehicle reaches the desired speed,
push the RES/SET switch downward and release
it to activate the system. When the accelerator is
released, the vehicle will maintain the set speed
automatically.
SET Switch
While the accelerator pedal is pressed, the
system will not be able to control the distance
between the vehicle and the one ahead. In this
case, the speed will be determined only by the
position of the accelerator pedal.
The system will return to normal operation as
soon as the accelerator pedal is released.
To Vary The Speed Setting
To Increase Or Decrease The Set Speed
Once the system has been activated, you can
increase the speed by pushing the RES/SET
switch upward or decrease the speed by pushing
the RES/SET switch downward. Each time the
switch is pushed, the speed is adjusted by 1 mph. Pushing and holding the switch upward or
downward will cause the set speed to adjust in
5 mph increments until the button is released.
The new set speed is reflected in the instrument
cluster display.
NOTE:
Moving the RES/SET switch downward allows
you to adjust the speed according to the
selected unit of measurement (U.S. or Metric)
set on the radio system. Refer to the
Information and Entertainment System
Owner’s Manual for more information.
When the unit of measurement is set to Metric,
pushing and holding the RES/SET switch will
adjust the speed in 10 km/h increments.
By keeping the accelerator pedal pressed, the
vehicle can continue to accelerate beyond the
set speed. In this case, use the RES/SET
switch to set the speed to the vehicle’s current
speed.
When you push the RES/SET button to reduce
the speed, the braking system intervenes
automatically if the engine brake does not slow
the vehicle down sufficiently to reach the set
speed. The device holds the set speed uphill
and downhill; however a slight variation is
entirely normal, particularly on slight inclines.
The transmission could shift to a lower gear
when driving downhill, or when accelerating.
This is normal and necessary to maintain the
set speed.
The system will disable while driving if the
brakes overheat.
WARNING!
Leaving the Adaptive Cruise Control (ACC)
system on when not in use is dangerous. You
could accidentally set the system or cause it to
go faster than you want. You could lose control
and have a collision. Always leave the system
off when you are not using it.
23_GU_OM_EN_USC_t.book Page 107
Page 122 of 268

STARTING AND OPERATING
120
If the speed set by the ACC system is the same as
the speed detected by the TSR system, the speed
limit indicator on the instrument cluster display
will be highlighted with a green circle.
1 — Suggested Speed Higher Than Current Speed
2 — Suggested Speed Lower Than Current Speed1 —Road Sign Recognized
PARKSENSE FRONT/REAR
PARK ASSIST SYSTEM —
IF EQUIPPED
The ParkSense system provides visual and
audible indications of the distance between the
rear, and if equipped, the front fascia/bumper
and a detected obstacle when backing up or
moving forward (e.g. during a parking maneuver).
The vehicle brakes may be automatically applied
and released when performing a reverse parking
maneuver if the system detects a possible
collision with an obstacle.
When the REVERSE gear is engaged and the
system is on, the front and rear sensors are
activated. If the vehicle moves from REVERSE to
a forward gear, the rear sensors are deactivated,
while the front sensors remain active until the
speed of 9 mph (15 km/h) is exceeded.
NOTE:
In certain operating conditions, the system could
start detecting an obstacle only after the vehicle
has moved slightly (a few inches).
WARNING!
Drivers must be careful when backing up even
when using the ParkSense system. Always
check carefully behind your vehicle, and be
sure to check for pedestrians, animals, other
vehicles, obstructions, or blind spots before
backing up. You are responsible for the safety
of your surroundings and must continue to pay
attention while backing up. Failure to do so
can result in serious injury or death.
CAUTION!
The ParkSense system is only a parking aid
and it is unable to recognize every obstacle,
including small obstacles. Parking curbs
might be temporarily detected or not
detected at all. Obstacles located above or
below the sensors will not be detected when
they are in close proximity.
The vehicle must be driven slowly when using
the ParkSense system in order to be able to
stop in time when an obstacle is detected. It
is recommended that the driver looks over
his/her shoulder when using the ParkSense
system.
23_GU_OM_EN_USC_t.book Page 120
Page 125 of 268

123
(Continued)
PARKSENSE SYSTEM USAGE
P
RECAUTIONS
NOTE:
Some conditions may influence the performance
of the ParkSense system:
Reduced sensor sensitivity could be due to the
presence of ice, snow, mud, or thick paint on
the surface of the sensor.
The sensors may detect a false obstacle (echo
interference) due to mechanical interference,
for example when washing the vehicle or in
extreme weather.
The signals sent by the sensors can be
altered by the presence of ultrasonic systems
(e.g. pneumatic brake systems of trucks or
pneumatic drills) near the vehicle.
System performance can be influenced by the
position of the sensors. For example, due to a
change in the ride setting (caused by wear to
the shock absorbers or suspension), by
changing tires, overloading the vehicle or
operations that require the vehicle to be
lowered.
Be sure not to place bumper stickers or other
adhesives over the sensors as this will affect
system performance.
The presence of a trailer hitch without a trailer.
This may interfere with the operation of the
parking sensors. Before using the ParkSense
system, it is recommended to remove or close
the trailer hitch assembly when the vehicle is
not being used for towing.
LANE DEPARTURE
WARNING (LDW) SYSTEM
LANE DEPARTURE WARNING OPERATION
The Lane Departure Warning system uses a
forward looking camera located on the
windshield to detect lane markings and measure
vehicle position within the lane boundaries.
When one or both lane limits are detected and
the vehicle passes over one without an activated
turn signal, the system emits a visual as well as
an acoustic signal.
If the vehicle continues to go beyond the line of
the lane without any intervention from the driver,
the surpassed line will light up on the display
(left or right) to urge the driver to bring the vehicle
back into the limits of the lane.
CAUTION!
Projecting loads on the roof of the vehicle
may interfere with the correct operation of
the camera. Before starting, make sure the
load is correctly positioned in order not to
cover the camera operating range.
Do not cover the operating range of the
camera with stickers or other objects.
Do not tamper with nor operate on the
camera. Do not close the openings in the
aesthetic cover located under the interior
rearview mirror. In the event of a failure of
the camera, contact an authorized dealer.
The camera may have limited or absent
operation due to weather conditions such as:
heavy rain, hail, thick fog, heavy snow, or
formation of ice layers on the windshield.
Camera operation may also be compromised
by the presence of dust, condensation, dirt
or ice on the windshield, by traffic conditions
(e.g. vehicles that are driving not aligned with
yours, vehicle driving in a transverse or
opposite way on the same lane, bend with a
small radius of curvature), by road surface
conditions and by driving conditions (e.g.
off-road driving). Make sure the windshield is
always clean. Use specific detergents and
clean cloths to avoid scratching the
windshield. The camera operation may also
be limited or absent in some driving, traffic
and road surface conditions.
If the windshield must be replaced due to
scratches, chipping or breakage, contact
exclusively an authorized dealer. Do not
replace the windshield on your own. It is
advisable to replace the windshield if it is
damaged in the area of the camera.
CAUTION!
23_GU_OM_EN_USC_t.book Page 123
Page 138 of 268

STARTING AND OPERATING
136
Towing Requirements — Tires
Do not attempt to tow a trailer while using a
compact spare tire.
Do not drive more than 50 mph (80 km/h)
when towing while using a full size spare tire.
Proper tire inflation pressures are essential to
the safe and satisfactory operation of your
vehicle.
Check the trailer tires for proper tire inflation
pressures before trailer usage.
Check for signs of tire wear or visible tire
damage before towing a trailer.
Replacing tires with a higher load carrying
capacity will not increase the vehicle's GVWR
and GAWR limits.
For proper tire inflation procedures
Ú
page 224.
Towing Requirements — Trailer Brakes
Do not interconnect the hydraulic brake
system or vacuum system of your vehicle with
that of the trailer. This could cause inadequate
braking and possible personal injury.
An electronically actuated trailer brake
controller is required when towing a trailer with
electronically actuated brakes. When towing a
trailer equipped with a hydraulic surge
actuated brake system, an electronic brake
controller is not required.
Trailer brakes are recommended for trailers
over 1,000 lb (453 kg) and required for trailers
in excess of 2,000 lb (907 kg).
Towing Requirements — Trailer Lights
And Wiring
Whenever you pull a trailer, regardless of the
trailer size, stoplights and turn signals on the
trailer are required for motoring safety.
The Trailer Tow Package may include a four- and
seven-pin wiring harness. Use a factory approved
trailer harness and connector.
NOTE:
Do not cut or splice wiring into the vehicle’s wiring
harness.
The electrical connections are all complete to the
vehicle but you must mate the harness to a trailer
connector. Refer to the following illustrations.
NOTE:
Disconnect trailer wiring connector from the
vehicle before launching a boat (or any other
device plugged into vehicle’s electrical
connect) into water.
Be sure to reconnect once clear from
water area.
Then, during the first 500 miles (805 km)
that a trailer is towed, do not drive over
50 mph (80 km/h) and do not make starts
at full throttle. This helps the engine and
other parts of the vehicle wear in at the
heavier loads.
CAUTION!
WARNING!
Do not connect trailer brakes to your
vehicle's hydraulic brake lines. It can
overload your brake system and cause it to
fail. You might not have brakes when you
need them and could have an accident.
Towing any trailer will increase your stopping
distance. When towing, you should allow for
additional space between your vehicle and
the vehicle in front of you. Failure to do so
could result in an accident.
CAUTION!
If the trailer weighs more than 1,000 lb
(453 kg) loaded, it should have its own brakes
and they should be of adequate capacity.
Failure to do this could lead to accelerated
brake lining wear, higher brake pedal effort,
and longer stopping distances.
23_GU_OM_EN_USC_t.book Page 136