2023 ALFA ROMEO GIULIA lock
[x] Cancel search: lockPage 57 of 248

55
With the Stop/Start system on (engine is off), air
flow is reduced to keep the compartment comfort
conditions for longer.
Until the temperature drastically changes within
the cabin, the climate control system will
continue to maintain the temperature while the
engine is off. By deactivating the Stop/Start
system with the button (located by the
headlight switch), the climate control system
operates normally according to the settings.
NOTE:
In harsh climate conditions, limit the use of the
Stop/Start system to prevent the compressor
from continuously switching on and off. This
will prevent rapid misting of the windows and
the accumulation of humidity in the passenger
compartment.
When the Stop/Start system is on, the climate
control system will always take air in from
outside, reducing the probability of the
windows fogging up.
System Maintenance
In winter months, the Climate Control system
must be turned on at least once a month for
approximately ten minutes.
Have the system inspected at an authorized
dealer before the summer.
INTERIOR STORAGE AND
EQUIPMENT
GLOVE COMPARTMENT
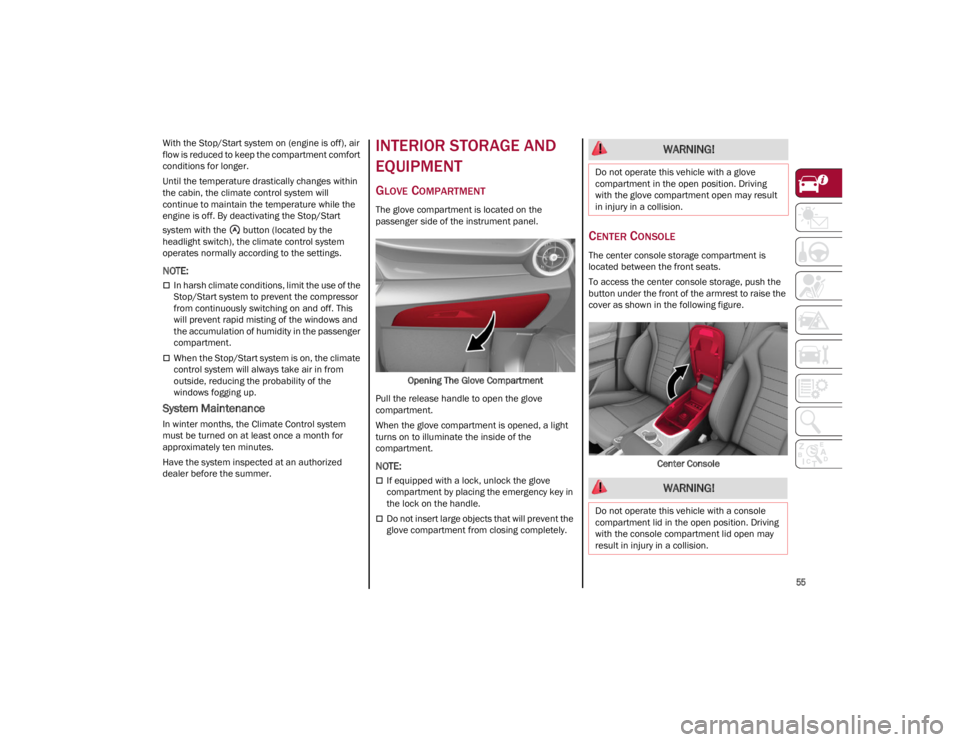
The glove compartment is located on the
passenger side of the instrument panel.Opening The Glove Compartment
Pull the release handle to open the glove
compartment.
When the glove compartment is opened, a light
turns on to illuminate the inside of the
compartment.
NOTE:
If equipped with a lock, unlock the glove
compartment by placing the emergency key in
the lock on the handle.
Do not insert large objects that will prevent the
glove compartment from closing completely.
CENTER CONSOLE
The center console storage compartment is
located between the front seats.
To access the center console storage, push the
button under the front of the armrest to raise the
cover as shown in the following figure.
Center Console
WARNING!
Do not operate this vehicle with a glove
compartment in the open position. Driving
with the glove compartment open may result
in injury in a collision.
WARNING!
Do not operate this vehicle with a console
compartment lid in the open position. Driving
with the console compartment lid open may
result in injury in a collision.
23_GA_OM_EN_USC_t.book Page 55
Page 59 of 248

57
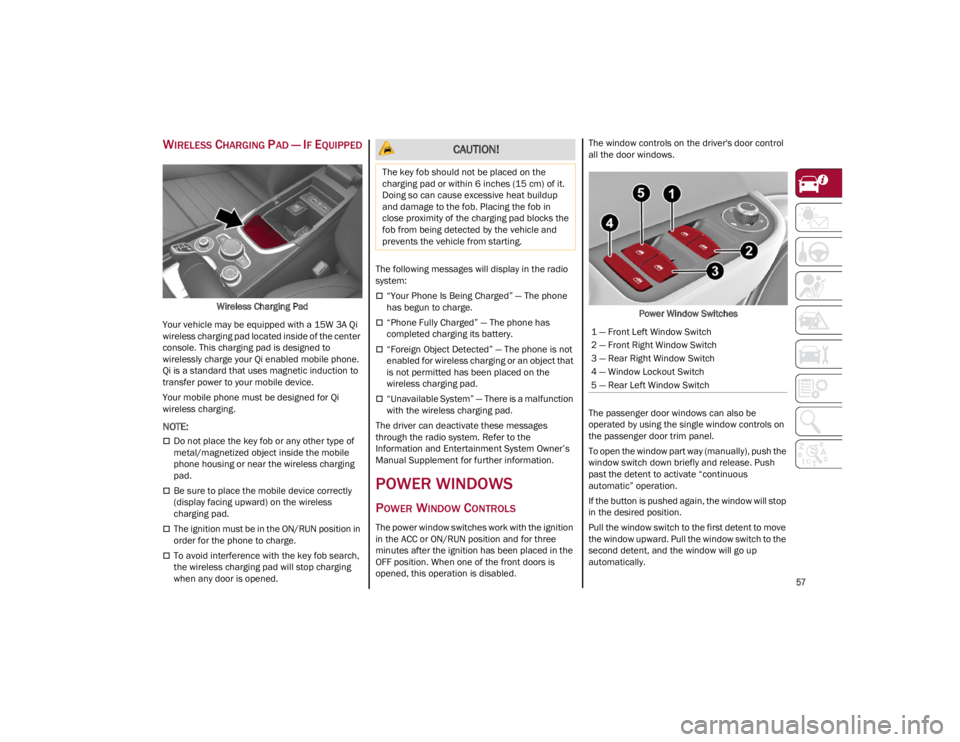
WIRELESS CHARGING PAD — IF EQUIPPED
Wireless Charging Pad
Your vehicle may be equipped with a 15W 3A Qi
wireless charging pad located inside of the center
console. This charging pad is designed to
wirelessly charge your Qi enabled mobile phone.
Qi is a standard that uses magnetic induction to
transfer power to your mobile device.
Your mobile phone must be designed for Qi
wireless charging.
NOTE:
Do not place the key fob or any other type of
metal/magnetized object inside the mobile
phone housing or near the wireless charging
pad.
Be sure to place the mobile device correctly
(display facing upward) on the wireless
charging pad.
The ignition must be in the ON/RUN position in
order for the phone to charge.
To avoid interference with the key fob search,
the wireless charging pad will stop charging
when any door is opened. The following messages will display in the radio
system:
“Your Phone Is Being Charged” — The phone
has begun to charge.
“Phone Fully Charged” — The phone has
completed charging its battery.
“Foreign Object Detected” — The phone is not
enabled for wireless charging or an object that
is not permitted has been placed on the
wireless charging pad.
“Unavailable System” — There is a malfunction
with the wireless charging pad.
The driver can deactivate these messages
through the radio system. Refer to the
Information and Entertainment System Owner’s
Manual Supplement for further information.
POWER WINDOWS
POWER WINDOW CONTROLS
The power window switches work with the ignition
in the ACC or ON/RUN position and for three
minutes after the ignition has been placed in the
OFF position. When one of the front doors is
opened, this operation is disabled. The window controls on the driver's door control
all the door windows.
Power Window Switches
The passenger door windows can also be
operated by using the single window controls on
the passenger door trim panel.
To open the window part way (manually), push the
window switch down briefly and release. Push
past the detent to activate “continuous
automatic” operation.
If the button is pushed again, the window will stop
in the desired position.
Pull the window switch to the first detent to move
the window upward. Pull the window switch to the
second detent, and the window will go up
automatically.
CAUTION!
The key fob should not be placed on the
charging pad or within 6 inches (15 cm) of it.
Doing so can cause excessive heat buildup
and damage to the fob. Placing the fob in
close proximity of the charging pad blocks the
fob from being detected by the vehicle and
prevents the vehicle from starting.
1 — Front Left Window Switch
2 — Front Right Window Switch
3 — Rear Right Window Switch
4 — Window Lockout Switch
5 — Rear Left Window Switch
23_GA_OM_EN_USC_t.book Page 57
Page 61 of 248

59
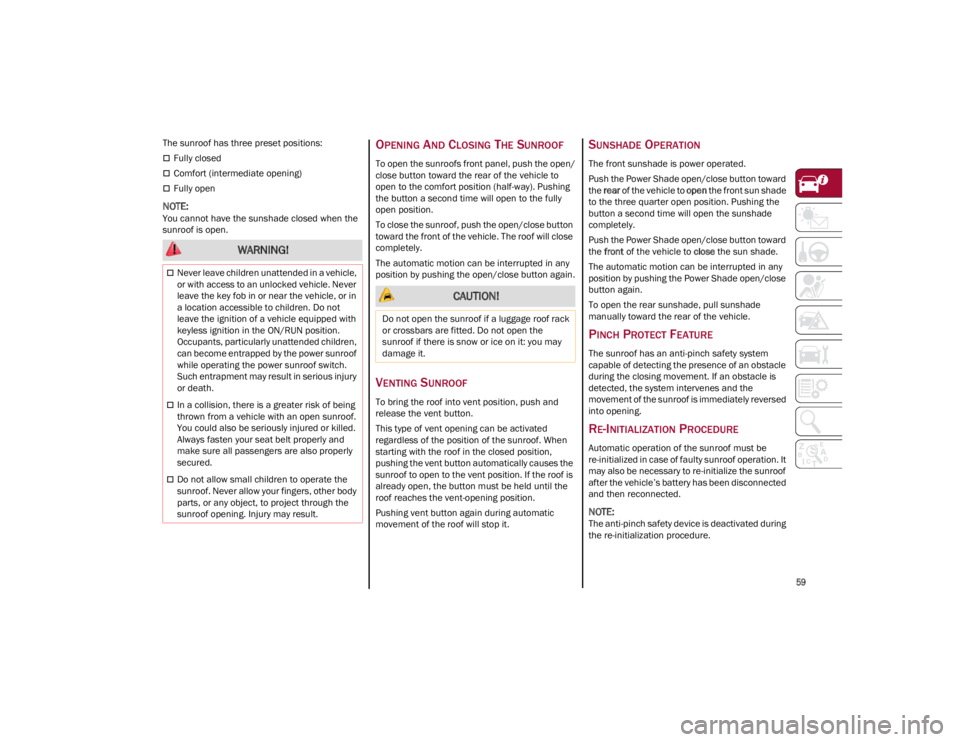
The sunroof has three preset positions:
Fully closed
Comfort (intermediate opening)
Fully open
NOTE:
You cannot have the sunshade closed when the
sunroof is open.
OPENING AND CLOSING THE SUNROOF
To open the sunroofs front panel, push the open/
close button toward the rear of the vehicle to
open to the comfort position (half-way). Pushing
the button a second time will open to the fully
open position.
To close the sunroof, push the open/close button
toward the front of the vehicle. The roof will close
completely.
The automatic motion can be interrupted in any
position by pushing the open/close button again.
VENTING SUNROOF
To bring the roof into vent position, push and
release the vent button.
This type of vent opening can be activated
regardless of the position of the sunroof. When
starting with the roof in the closed position,
pushing the vent button automatically causes the
sunroof to open to the vent position. If the roof is
already open, the button must be held until the
roof reaches the vent-opening position.
Pushing vent button again during automatic
movement of the roof will stop it.
SUNSHADE OPERATION
The front sunshade is power operated.
Push the Power Shade open/close button toward
the rear of the vehicle to open the front sun shade
to the three quarter open position. Pushing the
button a second time will open the sunshade
completely.
Push the Power Shade open/close button toward
the front of the vehicle to close the sun shade.
The automatic motion can be interrupted in any
position by pushing the Power Shade open/close
button again.
To open the rear sunshade, pull sunshade
manually toward the rear of the vehicle.
PINCH PROTECT FEATURE
The sunroof has an anti-pinch safety system
capable of detecting the presence of an obstacle
during the closing movement. If an obstacle is
detected, the system intervenes and the
movement of the sunroof is immediately reversed
into opening.
RE-INITIALIZATION PROCEDURE
Automatic operation of the sunroof must be
re-initialized in case of faulty sunroof operation. It
may also be necessary to re-initialize the sunroof
after the vehicle’s battery has been disconnected
and then reconnected.
NOTE:
The anti-pinch safety device is deactivated during
the re-initialization procedure.
WARNING!
Never leave children unattended in a vehicle,
or with access to an unlocked vehicle. Never
leave the key fob in or near the vehicle, or in
a location accessible to children. Do not
leave the ignition of a vehicle equipped with
keyless ignition in the ON/RUN position.
Occupants, particularly unattended children,
can become entrapped by the power sunroof
while operating the power sunroof switch.
Such entrapment may result in serious injury
or death.
In a collision, there is a greater risk of being
thrown from a vehicle with an open sunroof.
You could also be seriously injured or killed.
Always fasten your seat belt properly and
make sure all passengers are also properly
secured.
Do not allow small children to operate the
sunroof. Never allow your fingers, other body
parts, or any object, to project through the
sunroof opening. Injury may result.
CAUTION!
Do not open the sunroof if a luggage roof rack
or crossbars are fitted. Do not open the
sunroof if there is snow or ice on it: you may
damage it.
23_GA_OM_EN_USC_t.book Page 59
Page 63 of 248

61
CLOSING THE HOOD
To close, lower the hood to approximately
16 inches (40 cm) from the engine compartment
then let it drop. Make sure that the hood is
completely closed and fully latched.
NOTE:
Since the hood is equipped with a double locking
system, one for each side, check that it is closed
on both its sides.
TRUNK
The trunk unlocking is electrically operated and is
deactivated when the vehicle is in motion.
OPENING
Opening From The Outside
When unlocked, the trunk lid can be opened from
outside the vehicle using the exterior trunk lid
release button located between the plate lights.
Push the button until you hear a “click.” The trunk
lid can also be opened by quickly pushing the
trunk lid release button on the key fob twice.Exterior Trunk Lid Release Button
The turn signal indicators will blink and the
interior lights will turn on when the trunk lid is
opened. They turn off automatically when the
trunk lid is closed.
The interior lights turn off automatically after a
few minutes if the trunk lid is left open.
Opening From The Inside
When unlocked, the trunk lid can be opened from
inside the vehicle using the interior trunk lid
release button, located under the dashboard
near the engine hood opening lever. Push the
trunk lid release button until you hear a “click.” Interior Trunk Lid Release Button
Trunk Lid Emergency Release
In the event of an individual being locked inside
the trunk, the trunk can be opened by actuating a
glow-in-the-dark lever in the interior lock cover on
the trunk lid.
Emergency Release Button
Pull the lever in the direction indicated by the
arrow to open the trunk lid.
WARNING!
Be sure the hood is fully latched before driving
your vehicle. If the hood is not fully latched, it
could open when the vehicle is in motion and
block your vision. Failure to follow this warning
could result in serious injury or death.
23_GA_OM_EN_USC_t.book Page 61
Page 64 of 248

GETTING TO KNOW YOUR VEHICLE
62
CLOSING
Grip one of the trunk lid interior handles and pull
the trunk lid down until it is low enough to place
your hands on the exterior surface of the trunk.
Use your hands to then push the trunk lid down
until you hear the lock latch into place.Trunk Lid Interior Handles
NOTE:
It will not be possible to open the trunk lid with
the key fob or by pushing the interior trunk lid
release button when the battery is disconnected.
Always position the manual trunk lid opening
strap on the trunk lid lock before disconnecting
the battery
Ú
page 220.
Before closing the trunk lid, make sure your key
fob is not inside the trunk. If the key fob is
detected, the trunk lid will latch then automati -
cally unlock so that the key fob cannot be locked
in the trunk.
TRUNK RE-INITIALIZATION
NOTE:
If the battery is disconnected or the protection
fuse blows, the trunk lid opening/closing mecha -
nism must be re-initialized as follows:
1. Close all the doors and the trunk lid.
2. Push the lock button on the remote control.
3. Push the unlock button on the remote control.
TRUNK SPECIFICATIONS
Access To The Tire Service Kit (Quadrifoglio
Models)
To access the Tire Service Kit, lift the carpet in the
trunk
Ú
page 171.
Cargo Area (Quadrifoglio Models) Rear Cargo Tie–Downs — If Equipped
There are four hooks inside the trunk for
attaching the cargo net or cables which can
safely secure the cargo.
Rear Cargo Tie-Downs
NOTE:
Do not apply a load greater than 22 lb (10 kg) on
a single hook.
Cargo Net — If Equipped
This is useful for correctly arranging the cargo
and/or for transporting light materials.
23_GA_OM_EN_USC_t.book Page 62
Page 71 of 248

69
Dynamic
Race (If Equipped)
The display graphically shows the values of: ○ engine torque;
○ turbocharger pressure;
○ engine oil pressure (L = low pressure/ H= high pressure).
NOTE:
The engine torque and turbocharger pressure
values vary according to the engine type.
Race Dynamic
Acceleration Gauge
The displayed parameters are related to vehi -
cle stability, the graphs illustrate the trend of
the longitudinal/lateral accelerations (G-me -
ter information), considering gravity accelera -
tion as a reference unit.
Lateral acceleration peaks are also indicated.
11. Driving Mode Display (Alfa DNA System)
12. Distance Traveled (miles/km) display
13. Fuel Consumption
14. Warning Indications Display (e.g. danger of ice, open doors, ABS operation, etc.)
15. Range
CUSTOMER PROGRAMMABLE SETTINGS
Multiple settings can be programmed by the user
using the radio. This section describes only the
basic settings:
Units & Language
Clock & Date
Cluster
To access the settings list in the radio, proceed as
follows:
Press the Home button to access the main
menu.
Select Settings from the main menu using the
Rotary Knob or by pressing Settings on the
touchscreen.
Rotary Knob
1 — ON/OFF Control And Volume Knob
2 — OPTION Button
3 — Rotary Pad
4 — Home Button
23_GA_OM_EN_USC_t.book Page 69
Page 72 of 248

GETTING TO KNOW YOUR INSTRUMENT PANEL
70
Units & Language
The following settings can be modified under the
“Units & Language” menu:
Units: select US, Metric, or Custom. The
custom option allows for individual selection of
the unit measures
Language: change the language of the system
Restore Unit & Language Settings: restores the
factory settings
To access and change the setting, turn and push
the Rotary Pad or press the desired setting on the
touchscreen.
Clock & Date
The following settings can be modified under the
“Clock & Date” menu:
Sync With GPS Time (if equipped): activates or
deactivates the clock synchronization through
the GPS. If the function is deactivated, the
options Set Time and Set Date are enabled
Set Time: set the time manually
Time Format: set the time format to either a
12-hour or a 24-hour clock
Set Date: set the date manually
Restore Clock & Date Settings: restores the
factory settings
To access and change the setting, turn and push
the Rotary Pad or press the desired setting on the
touchscreen. Cluster
The following settings can be modified when this
mode is selected:
Warning Buzzer Volume: set the volume of the
warning buzzer on seven levels
Trip B: activate or deactivate the Trip function
Show Phone Info: activate/deactivate
repetition of the phone function screens also
on the instrument panel display
Show Audio Info: activate/deactivate
repetition of the audio function screens (Radio
and Media) also on the instrument panel
display
Show Nav Info (if equipped): activate/
deactivate repetition of the navigator function
screens also on the instrument panel display
Digital speed on all screens: activate/deacti
-
vating of digital speed on the instrument panel
display screens other than the main screen
Consumption Bar: activate/deactivate the
consumption baron the display screens of the
instrument panel where it is available
Performance pages: choose, for each driving
mode, one of the two alternative contents
displayed in the screen
Custom areas: select which content to display
in each of the three customizable areas on the
display of the instrument panel: time, date,
outside temperature, radio information,
compass
Restore Cluster Settings: deletes the current
settings and restores the factory settings To access and change the setting, turn and push
the Rotary Pad or press the desired setting on the
touchscreen.
WARNING LIGHTS AND
MESSAGES ON THE
INSTRUMENT PANEL
The following pages consist of warning lights and
messages.
NOTE:
The warning light turns on together with a
dedicated message and/or chime when
applicable. These indications are precau
-
tionary and as such must not be considered as
exhaustive and/or alternative to the
information contained in the Owner’s Manual,
which you are advised to read carefully in all
cases. Always refer to the information in this
section in the event of a failure indication.
The failure indicators appearing on the display
are divided into two categories: very serious
and less serious faults. Serious faults are
indicated by a repeated and prolonged
warning "cycle.” Less serious faults are
indicated by a warning "cycle" with a shorter
duration. You can stop the warning cycle in
both cases by pushing the button located on
the windshield wiper stalk. The instrument
panel warning light will stay on until the cause
of the failure is eliminated.
23_GA_OM_EN_USC_t.book Page 70
Page 73 of 248

71
RED WARNING LIGHTS
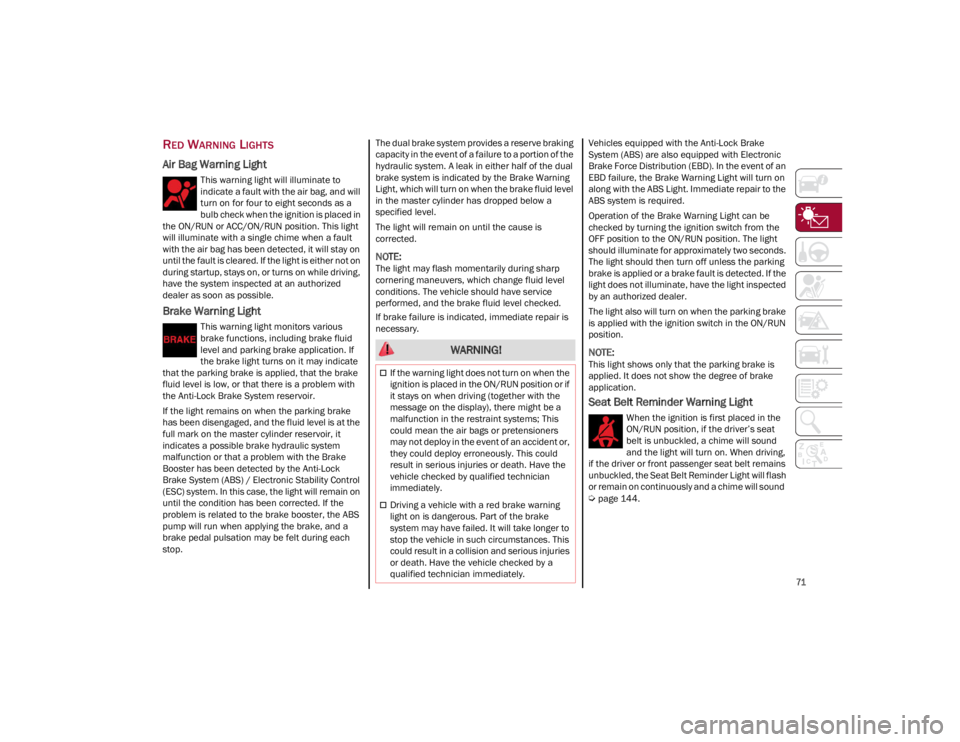
Air Bag Warning Light
This warning light will illuminate to
indicate a fault with the air bag, and will
turn on for four to eight seconds as a
bulb check when the ignition is placed in
the ON/RUN or ACC/ON/RUN position. This light
will illuminate with a single chime when a fault
with the air bag has been detected, it will stay on
until the fault is cleared. If the light is either not on
during startup, stays on, or turns on while driving,
have the system inspected at an authorized
dealer as soon as possible.
Brake Warning Light
This warning light monitors various
brake functions, including brake fluid
level and parking brake application. If
the brake light turns on it may indicate
that the parking brake is applied, that the brake
fluid level is low, or that there is a problem with
the Anti-Lock Brake System reservoir.
If the light remains on when the parking brake
has been disengaged, and the fluid level is at the
full mark on the master cylinder reservoir, it
indicates a possible brake hydraulic system
malfunction or that a problem with the Brake
Booster has been detected by the Anti-Lock
Brake System (ABS) / Electronic Stability Control
(ESC) system. In this case, the light will remain on
until the condition has been corrected. If the
problem is related to the brake booster, the ABS
pump will run when applying the brake, and a
brake pedal pulsation may be felt during each
stop. The dual brake system provides a reserve braking
capacity in the event of a failure to a portion of the
hydraulic system. A leak in either half of the dual
brake system is indicated by the Brake Warning
Light, which will turn on when the brake fluid level
in the master cylinder has dropped below a
specified level.
The light will remain on until the cause is
corrected.
NOTE:
The light may flash momentarily during sharp
cornering maneuvers, which change fluid level
conditions. The vehicle should have service
performed, and the brake fluid level checked.
If brake failure is indicated, immediate repair is
necessary.
Vehicles equipped with the Anti-Lock Brake
System (ABS) are also equipped with Electronic
Brake Force Distribution (EBD). In the event of an
EBD failure, the Brake Warning Light will turn on
along with the ABS Light. Immediate repair to the
ABS system is required.
Operation of the Brake Warning Light can be
checked by turning the ignition switch from the
OFF position to the ON/RUN position. The light
should illuminate for approximately two seconds.
The light should then turn off unless the parking
brake is applied or a brake fault is detected. If the
light does not illuminate, have the light inspected
by an authorized dealer.
The light also will turn on when the parking brake
is applied with the ignition switch in the ON/RUN
position.
NOTE:
This light shows only that the parking brake is
applied. It does not show the degree of brake
application.
Seat Belt Reminder Warning Light
When the ignition is first placed in the
ON/RUN position, if the driver’s seat
belt is unbuckled, a chime will sound
and the light will turn on. When driving,
if the driver or front passenger seat belt remains
unbuckled, the Seat Belt Reminder Light will flash
or remain on continuously and a chime will sound
Ú
page 144.
WARNING!
If the warning light does not turn on when the
ignition is placed in the ON/RUN position or if
it stays on when driving (together with the
message on the display), there might be a
malfunction in the restraint systems; This
could mean the air bags or pretensioners
may not deploy in the event of an accident or,
they could deploy erroneously. This could
result in serious injuries or death. Have the
vehicle checked by qualified technician
immediately.
Driving a vehicle with a red brake warning
light on is dangerous. Part of the brake
system may have failed. It will take longer to
stop the vehicle in such circumstances. This
could result in a collision and serious injuries
or death. Have the vehicle checked by a
qualified technician immediately.
23_GA_OM_EN_USC_t.book Page 71