2023 ALFA ROMEO GIULIA child lock
[x] Cancel search: child lockPage 93 of 248
91
(Continued)
ALFA DNA / PRO SELECTOR
ALFA DNA SYSTEM
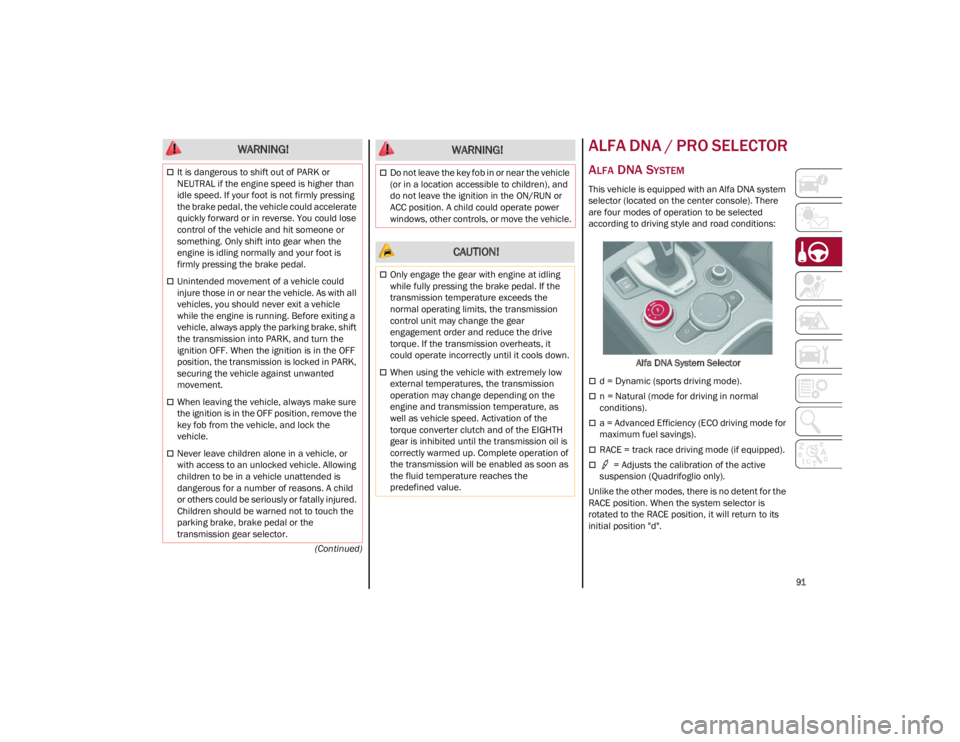
This vehicle is equipped with an Alfa DNA system
selector (located on the center console). There
are four modes of operation to be selected
according to driving style and road conditions:Alfa DNA System Selector
d = Dynamic (sports driving mode).
n = Natural (mode for driving in normal
conditions).
a = Advanced Efficiency (ECO driving mode for
maximum fuel savings).
RACE = track race driving mode (if equipped).
= Adjusts the calibration of the active
suspension (Quadrifoglio only).
Unlike the other modes, there is no detent for the
RACE position. When the system selector is
rotated to the RACE position, it will return to its
initial position "d".
WARNING!
It is dangerous to shift out of PARK or
NEUTRAL if the engine speed is higher than
idle speed. If your foot is not firmly pressing
the brake pedal, the vehicle could accelerate
quickly forward or in reverse. You could lose
control of the vehicle and hit someone or
something. Only shift into gear when the
engine is idling normally and your foot is
firmly pressing the brake pedal.
Unintended movement of a vehicle could
injure those in or near the vehicle. As with all
vehicles, you should never exit a vehicle
while the engine is running. Before exiting a
vehicle, always apply the parking brake, shift
the transmission into PARK, and turn the
ignition OFF. When the ignition is in the OFF
position, the transmission is locked in PARK,
securing the vehicle against unwanted
movement.
When leaving the vehicle, always make sure
the ignition is in the OFF position, remove the
key fob from the vehicle, and lock the
vehicle.
Never leave children alone in a vehicle, or
with access to an unlocked vehicle. Allowing
children to be in a vehicle unattended is
dangerous for a number of reasons. A child
or others could be seriously or fatally injured.
Children should be warned not to touch the
parking brake, brake pedal or the
transmission gear selector.
Do not leave the key fob in or near the vehicle
(or in a location accessible to children), and
do not leave the ignition in the ON/RUN or
ACC position. A child could operate power
windows, other controls, or move the vehicle.
CAUTION!
Only engage the gear with engine at idling
while fully pressing the brake pedal. If the
transmission temperature exceeds the
normal operating limits, the transmission
control unit may change the gear
engagement order and reduce the drive
torque. If the transmission overheats, it
could operate incorrectly until it cools down.
When using the vehicle with extremely low
external temperatures, the transmission
operation may change depending on the
engine and transmission temperature, as
well as vehicle speed. Activation of the
torque converter clutch and of the EIGHTH
gear is inhibited until the transmission oil is
correctly warmed up. Complete operation of
the transmission will be enabled as soon as
the fluid temperature reaches the
predefined value.
WARNING!
23_GA_OM_EN_USC_t.book Page 91
Page 151 of 248
149
Switchable Automatic Locking Retractors
(ALR)
The seat belts in the passenger seating positions
are equipped with a Switchable Automatic
Locking Retractor (ALR) which is used to secure a
child restraint system. For additional information
on ALR, see
Ú
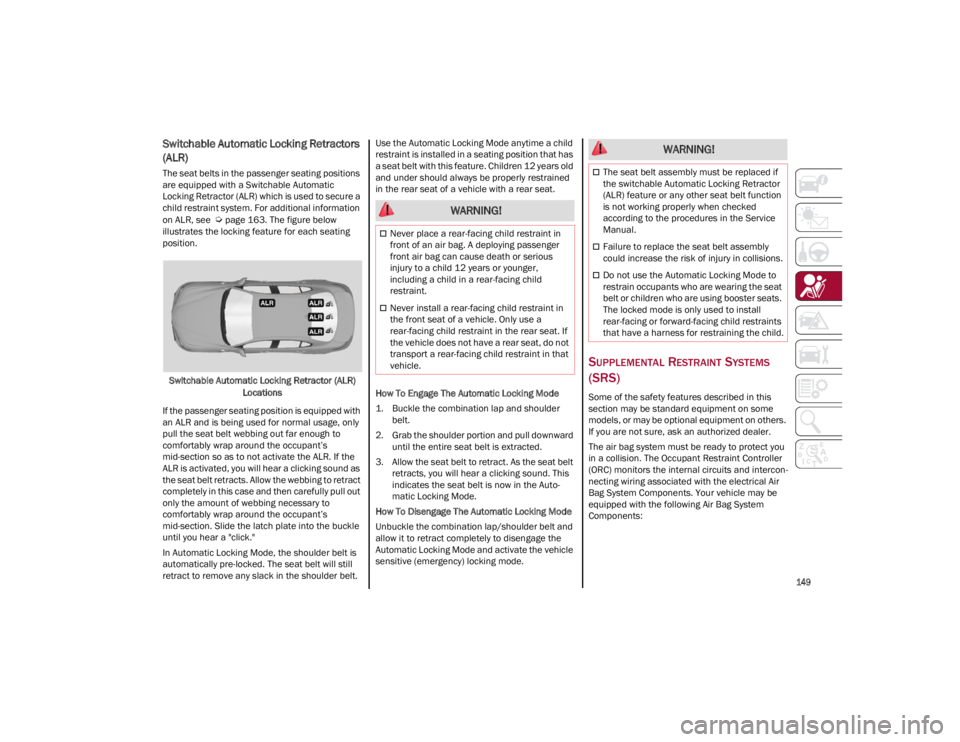
page 163. The figure below
illustrates the locking feature for each seating
position.
Switchable Automatic Locking Retractor (ALR) Locations
If the passenger seating position is equipped with
an ALR and is being used for normal usage, only
pull the seat belt webbing out far enough to
comfortably wrap around the occupant’s
mid-section so as to not activate the ALR. If the
ALR is activated, you will hear a clicking sound as
the seat belt retracts. Allow the webbing to retract
completely in this case and then carefully pull out
only the amount of webbing necessary to
comfortably wrap around the occupant’s
mid-section. Slide the latch plate into the buckle
until you hear a "click."
In Automatic Locking Mode, the shoulder belt is
automatically pre-locked. The seat belt will still
retract to remove any slack in the shoulder belt. Use the Automatic Locking Mode anytime a child
restraint is installed in a seating position that has
a seat belt with this feature. Children 12 years old
and under should always be properly restrained
in the rear seat of a vehicle with a rear seat.
How To Engage The Automatic Locking Mode
1. Buckle the combination lap and shoulder
belt.
2. Grab the shoulder portion and pull downward until the entire seat belt is extracted.
3. Allow the seat belt to retract. As the seat belt retracts, you will hear a clicking sound. This
indicates the seat belt is now in the Auto -
matic Locking Mode.
How To Disengage The Automatic Locking Mode
Unbuckle the combination lap/shoulder belt and
allow it to retract completely to disengage the
Automatic Locking Mode and activate the vehicle
sensitive (emergency) locking mode.
SUPPLEMENTAL RESTRAINT SYSTEMS
(SRS)
Some of the safety features described in this
section may be standard equipment on some
models, or may be optional equipment on others.
If you are not sure, ask an authorized dealer.
The air bag system must be ready to protect you
in a collision. The Occupant Restraint Controller
(ORC) monitors the internal circuits and intercon -
necting wiring associated with the electrical Air
Bag System Components. Your vehicle may be
equipped with the following Air Bag System
Components:
WARNING!
Never place a rear-facing child restraint in
front of an air bag. A deploying passenger
front air bag can cause death or serious
injury to a child 12 years or younger,
including a child in a rear-facing child
restraint.
Never install a rear-facing child restraint in
the front seat of a vehicle. Only use a
rear-facing child restraint in the rear seat. If
the vehicle does not have a rear seat, do not
transport a rear-facing child restraint in that
vehicle.
WARNING!
The seat belt assembly must be replaced if
the switchable Automatic Locking Retractor
(ALR) feature or any other seat belt function
is not working properly when checked
according to the procedures in the Service
Manual.
Failure to replace the seat belt assembly
could increase the risk of injury in collisions.
Do not use the Automatic Locking Mode to
restrain occupants who are wearing the seat
belt or children who are using booster seats.
The locked mode is only used to install
rear-facing or forward-facing child restraints
that have a harness for restraining the child.
23_GA_OM_EN_USC_t.book Page 149
Page 155 of 248
153
Supplemental Side Air Bags
Supplemental Seat-Mounted Side Air Bags
(SABs)
This vehicle is equipped with Supplemental
Seat-Mounted Side Air Bags (SABs).
Supplemental Seat-Mounted Side Air Bags (SABs)
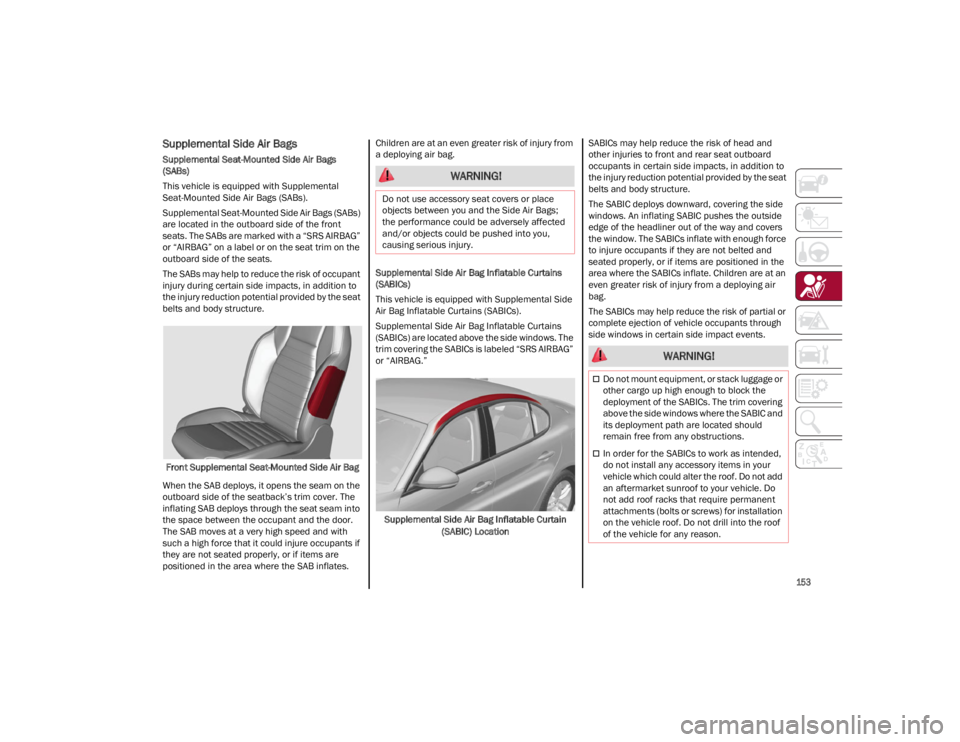
are located in the outboard side of the front
seats. The SABs are marked with a “SRS AIRBAG”
or “AIRBAG” on a label or on the seat trim on the
outboard side of the seats.
The SABs may help to reduce the risk of occupant
injury during certain side impacts, in addition to
the injury reduction potential provided by the seat
belts and body structure.Front Supplemental Seat-Mounted Side Air Bag
When the SAB deploys, it opens the seam on the
outboard side of the seatback’s trim cover. The
inflating SAB deploys through the seat seam into
the space between the occupant and the door.
The SAB moves at a very high speed and with
such a high force that it could injure occupants if
they are not seated properly, or if items are
positioned in the area where the SAB inflates. Children are at an even greater risk of injury from
a deploying air bag.
Supplemental Side Air Bag Inflatable Curtains
(SABICs)
This vehicle is equipped with Supplemental Side
Air Bag Inflatable Curtains (SABICs).
Supplemental Side Air Bag Inflatable Curtains
(SABICs) are located above the side windows. The
trim covering the SABICs is labeled “SRS AIRBAG”
or “AIRBAG.”
Supplemental Side Air Bag Inflatable Curtain (SABIC) Location SABICs may help reduce the risk of head and
other injuries to front and rear seat outboard
occupants in certain side impacts, in addition to
the injury reduction potential provided by the seat
belts and body structure.
The SABIC deploys downward, covering the side
windows. An inflating SABIC pushes the outside
edge of the headliner out of the way and covers
the window. The SABICs inflate with enough force
to injure occupants if they are not belted and
seated properly, or if items are positioned in the
area where the SABICs inflate. Children are at an
even greater risk of injury from a deploying air
bag.
The SABICs may help reduce the risk of partial or
complete ejection of vehicle occupants through
side windows in certain side impact events.
WARNING!
Do not use accessory seat covers or place
objects between you and the Side Air Bags;
the performance could be adversely affected
and/or objects could be pushed into you,
causing serious injury.
WARNING!
Do not mount equipment, or stack luggage or
other cargo up high enough to block the
deployment of the SABICs. The trim covering
above the side windows where the SABIC and
its deployment path are located should
remain free from any obstructions.
In order for the SABICs to work as intended,
do not install any accessory items in your
vehicle which could alter the roof. Do not add
an aftermarket sunroof to your vehicle. Do
not add roof racks that require permanent
attachments (bolts or screws) for installation
on the vehicle roof. Do not drill into the roof
of the vehicle for any reason.
23_GA_OM_EN_USC_t.book Page 153
Page 165 of 248
163
Always follow the directions of the child restraint
manufacturer when installing your child restraint.
Not all child restraint systems will be installed as
described here.
To Install A LATCH-Compatible Child
Restraint
If the selected seating position has a Switchable
Automatic Locking Retractor (ALR) seat belt, stow
the seat belt, following the instructions below.
See
Ú
page 163 to check what type of seat belt
each seating position has.
1. Loosen the adjusters on the lower straps and on the tether strap of the child seat so that
you can more easily attach the hooks or
connectors to the vehicle anchorages.
2. Place the child seat between the lower anchorages for that seating position. If the
second row seat can be reclined, you may
recline the seat and/or raise the head
restraint (if adjustable) to get a better fit. If
the rear seat can be moved forward and rear -
ward in the vehicle, you may wish to move it
to its rear-most position to make room for the
child seat. You may also move the front seat
forward to allow more room for the child seat. 3. Attach the lower hooks or connectors of the
child restraint to the lower anchorages in the
selected seating position.
4. If the child restraint has a tether strap, connect it to the top tether anchorage. See
Ú
page 165 for directions to attach a tether
anchor.
5. Tighten all of the straps as you push the child restraint rearward and downward into the
seat. Remove slack in the straps according to
the child restraint manufacturer’s instruc -
tions.
6. Test that the child restraint is installed tightly by pulling back and forth on the child seat at
the belt path. It should not move more than
1 inch (25.4 mm) in any direction.
How To Stow An Unused Switchable-ALR
(ALR) Seat Belt:
When using the LATCH attaching system to install
a child restraint, stow all ALR seat belts that are
not being used by other occupants or being used
to secure child restraints. An unused belt could
injure a child if they play with it and accidentally
lock the seat belt retractor. Before installing a
child restraint using the LATCH system, buckle
the seat belt behind the child restraint and out of
the child’s reach. If the buckled seat belt
interferes with the child restraint installation,
instead of buckling it behind the child restraint,
route the seat belt through the child restraint belt
path and then buckle it. Do not lock the seat belt.
Remind all children in the vehicle that the seat
belts are not toys and that they should not play
with them.
Installing Child Restraints Using The
Vehicle Seat Belt
Child restraint systems are designed to be
secured in vehicle seats by lap belts or the lap
belt portion of a lap/shoulder belt.
Never use the same lower anchorage to
attach more than one child restraint. See
Ú
page 163 for typical installation
instructions.
WARNING! WARNING!
Improper installation of a child restraint to
the LATCH anchorages can lead to failure of
the restraint. The child could be badly injured
or killed. Follow the child restraint
manufacturer’s directions exactly when
installing an infant or child restraint.
Child restraint anchorages are designed to
withstand only those loads imposed by
correctly-fitted child restraints. Under no
circumstances are they to be used for adult
seat belts, harnesses, or for attaching other
items or equipment to the vehicle.
WARNING!
Improper installation or failure to properly
secure a child restraint can lead to failure of
the restraint. The child could be badly injured
or killed.
Follow the child restraint manufacturer’s
directions exactly when installing an infant or
child restraint.
23_GA_OM_EN_USC_t.book Page 163
Page 166 of 248
SAFETY
164
The seat belts in the passenger seating positions
are equipped with a Switchable Automatic
Locking Retractor (ALR) that is designed to keep
the lap portion of the seat belt tight around the
child restraint so that it is not necessary to use a
locking clip. The ALR retractor can be “switched”
into a locked mode by pulling all of the webbing
out of the retractor and then letting the webbing
retract back into the retractor. If it is locked, the
ALR will make a clicking noise while the webbing
is pulled back into the retractor.
See the “Automatic Locking Mode” description
Ú
page 149 for additional information on ALR.
Please see the table below and the following
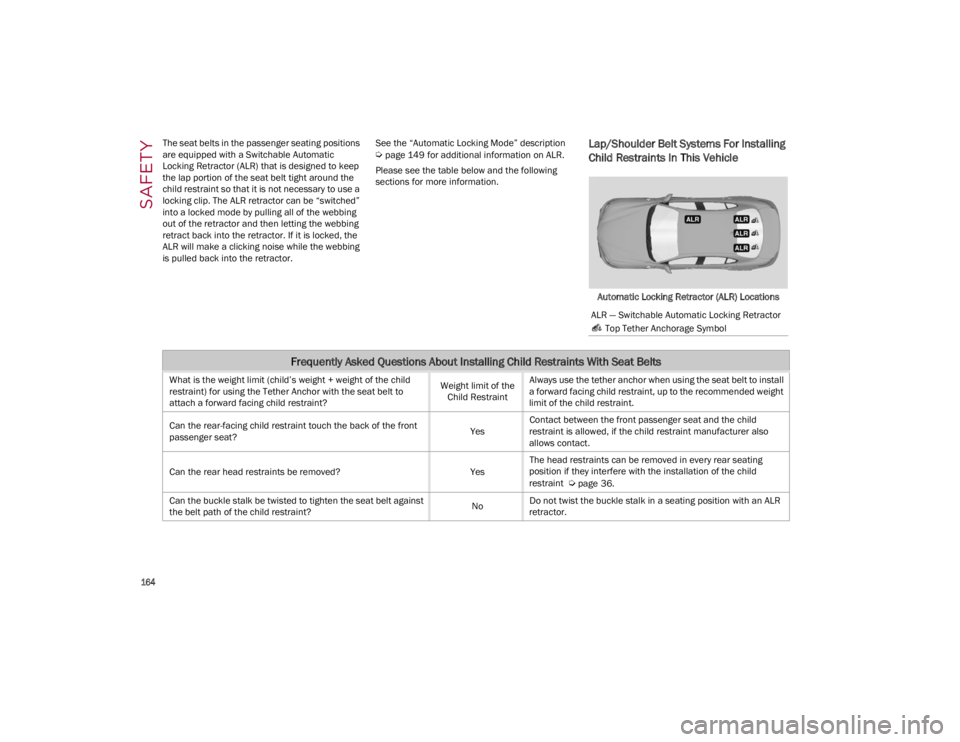
sections for more information.Lap/Shoulder Belt Systems For Installing
Child Restraints In This Vehicle
Automatic Locking Retractor (ALR) Locations
ALR — Switchable Automatic Locking Retractor Top Tether Anchorage Symbol
Frequently Asked Questions About Installing Child Restraints With Seat Belts
What is the weight limit (child’s weight + weight of the child
restraint) for using the Tether Anchor with the seat belt to
attach a forward facing child restraint? Weight limit of the
Child Restraint Always use the tether anchor when using the seat belt to install
a forward facing child restraint, up to the recommended weight
limit of the child restraint.
Can the rear-facing child restraint touch the back of the front
passenger seat? YesContact between the front passenger seat and the child
restraint is allowed, if the child restraint manufacturer also
allows contact.
Can the rear head restraints be removed? YesThe head restraints can be removed in every rear seating
position if they interfere with the installation of the child
restraint
Ú
page 36.
Can the buckle stalk be twisted to tighten the seat belt against
the belt path of the child restraint? NoDo not twist the buckle stalk in a seating position with an ALR
retractor.
23_GA_OM_EN_USC_t.book Page 164
Page 167 of 248
165
Installing A Child Restraint With A
Switchable Automatic Locking Retractor
(ALR):
Child restraint systems are designed to be
secured in vehicle seats by lap belts or the lap
belt portion of a lap/shoulder belt.
1. Place the child seat in the center of the seating position. If the second row seat can
be reclined, you may recline the seat and/or
raise the head restraint (if adjustable) to get
a better fit. If the rear seat can be moved
forward and rearward in the vehicle, you may
wish to move it to its rear-most position to
make room for the child seat. You may also
move the front seat forward to allow more
room for the child seat.
2. Pull enough of the seat belt webbing from the retractor to pass it through the belt path of
the child restraint. Do not twist the belt
webbing in the belt path. 3. Slide the latch plate into the buckle until you
hear a “click.”
4. Pull on the webbing to make the lap portion tight against the child seat.
5. To lock the seat belt, pull down on the shoulder part of the belt until you have pulled
all the seat belt webbing out of the retractor.
Then, allow the webbing to retract back into
the retractor. As the webbing retracts, you will
hear a clicking sound. This means the seat
belt is now in the Automatic Locking mode.
6. Try to pull the webbing out of the retractor. If it is locked, you should not be able to pull out
any webbing. If the retractor is not
locked,
repeat step 5.
7. Finally, pull up on any excess webbing to tighten the lap portion around the child
restraint while you push the child restraint
rearward and downward into the vehicle seat.
8. If the child restraint has a top tether strap and the seating position has a top tether
anchorage, connect the tether strap to the
anchorage and tighten the tether strap. See
Ú
page 165 for directions to attach a tether
anchor.
9. Test that the child restraint is installed tightly by pulling back and forth on the child seat at
the belt path. It should not move more than
1 inch (25.4 mm) in any direction.
Any seat belt system will loosen with time, so
check the belt occasionally, and pull it tight if
necessary.
Installing Child Restraints Using The Top
Tether Anchorage:
1. Look behind the seating position where you plan to install the child restraint to find the
tether anchorage. You may need to move the
seat forward to provide better access to the
tether anchorage. If there is no top tether
anchorage for that seating position, move the
child restraint to another position in the
vehicle if one is available.
WARNING!
Improper installation or failure to properly
secure a child restraint can lead to failure of
the restraint. The child could be badly injured
or killed.
Follow the child restraint manufacturer’s
directions exactly when installing an infant or
child restraint.
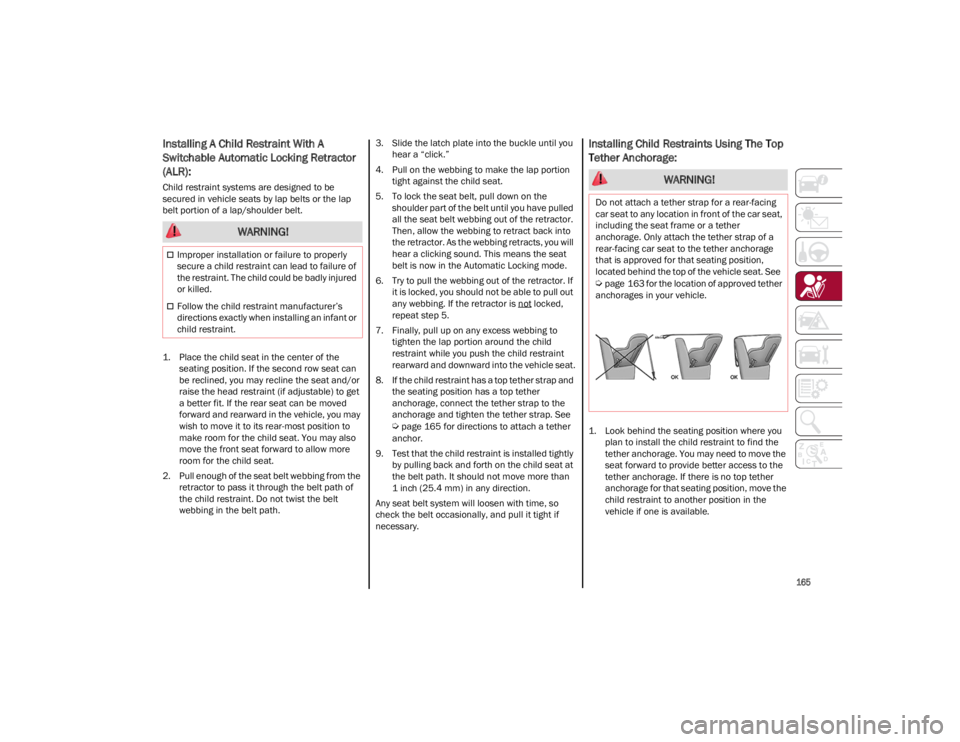
WARNING!
Do not attach a tether strap for a rear-facing
car seat to any location in front of the car seat,
including the seat frame or a tether
anchorage. Only attach the tether strap of a
rear-facing car seat to the tether anchorage
that is approved for that seating position,
located behind the top of the vehicle seat. See
Ú
page 163 for the location of approved tether
anchorages in your vehicle.
23_GA_OM_EN_USC_t.book Page 165
Page 242 of 248

240
INDEX
A
Accessories Purchased By The Owner.......... 4
Active Blind Spot Assist .............................134
Active Safety Systems ................................ 129
Active Torque Vectoring (ATV) System ......129
Adaptive Cruise Control (ACC)
(Cruise Control) ............................................ 97Off ........................................................... 101
On............................................................101
Additives, Fuel ............................................ 230
Adjust Forward.............................................. 31, 34
Rearward ........................................... 31, 34
Air Bag......................................................... 150 Air Bag Operation ...................................152Air Bag Warning Light ............................150
Driver Knee Air Bag................................ 152Enhanced Accident Response .....155, 181
Event Data Recorder (EDR) ...................181
Front Air Bag...........................................150
If Deployment Occurs ............................155
Knee Impact Bolsters ............................152
Maintaining Your Air Bag System.......... 157
Maintenance ..........................................157
Redundant Air Bag Warning Light.........150
Side Air Bags ..........................................153
Transporting Pets...................................166
Air Bag Light ......................................150, 167
Air Pressure Tires ........................................................212
Alarm Security Alarm .......................................... 24
Alfa Active Suspension (AAS)....................... 94
Alfa DNA System .......................................... 91
Anti-Lock Braking (ABS) System ................ 129 Anti-Lock Warning Light ...............................72
Automatic Door Locks ..................................28
Automatic Headlights ...................................43
Automatic Temperature Control (ATC) ........49
Automatic Transmission ..............................86
Auxiliary Driving Systems .......................... 132
B
Back-Up Camera ........................................ 123
Battery ..................................................74, 190 Charging System Light .............................74
Battery Recharging .................................... 191
Belts, Seat .................................................. 167
Blind Spot Monitoring ............................... 132
Bodywork (Cleaning And Maintenance) ... 221
B-Pillar Location......................................... 209
Brake System Warning Light .................................... 71, 72
Brakes ........................................................ 226 Brake Fluid Level................................... 190
Bulbs, Light ................................................ 168
C
Camera, Rear ............................................. 123
Carbon Monoxide Warning ....................... 168
Cargo Tie-Downs ...........................................62
Certification Label ..................................... 125
Chart, Tire Sizing........................................ 207
Check Engine Light (Malfunction
Indicator Light)..............................................80
Checking Levels ................................ 187, 188
Checking Your Vehicle For Safety............. 166
Checks, Safety ........................................... 166
Child Restraint ........................................... 158 Child Restraints
Booster Seats ........................................ 159
Child Seat Installation ........................... 165
How To Stow An unused ALR SeatBelt ..................................................... 163
Infant And Child Restraints ................... 159
LATCH Positions ..................................... 161
Lower Anchors And Tethers For Children .............................................. 161
Older Children And Child Restraints ..... 159
Seating Positions ................................... 160
Using The Top Tether Anchorage.......... 165
Clean Air Gasoline ..................................... 230
Cleaning Wheels.................................................... 217
Climate Control ......................................48, 54
Compact Spare Tire ................................... 216
Contract, Service........................................ 237
Cruise Control (Speed Control) ................... 97
Customer Assistance ................................. 236
D
Daytime Running Lights .............................. 43
Deck Lid Power Release ......................................... 61
Defroster, Windshield ................................ 167
Dimmer Switch Headlight .................................................. 46
Door Ajar.................................................75, 76
Door Ajar Light .......................................75, 76
Door Locks Automatic ................................................. 28
Door Opener, Garage................................... 39
23_GA_OM_EN_USC_t.book Page 240
Page 244 of 248

242
INDEX
J
Jump Starting ............................................. 175
K
Keyless Enter 'n Go™ ................................... 26Passive Entry ............................................ 26
Keys .............................................................. 19
L
Lane Change And Turn Signals ................... 45
Lane Change Assist...................................... 45
Lane Keeping Assist System .....................120
LaneSense ..................................................118
Lap/Shoulder Belts ....................................145
Latches .......................................................168
Leaks, Fluid ................................................168
Life Of Tires.................................................215
Light Bulbs ..................................................168
Lights .......................................................... 168 Air Bag ...........................................150, 167
Ambient .................................................... 46
Brake Warning .................................. 71, 72Courtesy/Reading ............................. 45, 46Daytime Running ..................................... 43
Electronic Stability Program (ESP) Indicator ............................................... 75
Exterior ............................................ 42, 168
Fog ............................................................ 44
Hazard Warning Flasher ........................ 169
High Beam/Low Beam Select ................. 43
Interior ...................................................... 45
Low Fuel ................................................... 76
Malfunction Indicator (Check Engine) .... 73 Park ........................................................ 44, 74
Seat Belt Reminder ..................................71
Turn Signals .............................. 45, 74, 168
Types Of Bulbs ....................................... 202
Warning Instrument Cluster Descriptions .................................. 74, 75
Loading Vehicle ......................................... 125 Tires........................................................ 209
Locks Automatic Door.........................................28
Child Protection ........................................ 28
M
Maintenance .................................................60
Malfunction Indicator Light (Check
Engine) ..........................................................73
Manual Service ................................................... 238
Memory Feature (Memory Seats) ................30
Memory Seat.................................................30
Methanol .................................................... 230
Mirrors Automatic Dimming..................................37
Electric Powered.......................................38
Exterior Folding.........................................38
Heated ...................................................... 39
Rearview ...................................................37
Vanity ..................................................... 204
O
Occupant Restraints.................................. 144
Oil Pressure Light .........................................75
Oil, Engine Pressure Warning Light............................75 Onboard Diagnostic System........................ 79
Opener, Garage Door (Homelink) ............... 39
Operator Manual
Owner's Manual ..................................... 238
P
Paintwork (Cleaning And Maintenance) ... 221
Panic Brake Assist (PBA) System.............. 131
ParkSense System ..................................... 115
Passive Entry ................................................ 26
Performance (Top Speed) ......................... 235
Pets ............................................................. 166
Pinch Protection ........................................... 59
Placard, Tire And Loading Information ..... 209
Power Deck Lid Release ..................................... 61
Outlet (Auxiliary Electrical Outlet) ........... 56
Seats ........................................................ 34
Sunroof..................................................... 58Windows ................................................... 57
Power Seats Forward ..............................................31, 34
Rearward............................................31, 34
Recline ...............................................31, 34
Power Supply.............................................. 225
Pregnant Women And Seat Belts ............. 148
Pretensioners Seat Belts ............................................... 148
Programmable Settings ............................... 69
Prolonged Vehicle Inactivity ...................... 220
R
Radial Ply Tires........................................... 214
Radio Transmitters And Mobile Phones ........4
Rear Camera .............................................. 123
23_GA_OM_EN_USC_t.book Page 242