2022 VOLKSWAGEN T-ROC infotainment
[x] Cancel search: infotainmentPage 115 of 502

Remove leaves and other loose items from the glass roof guide rails at regular intervals using a
vacuum cleaner, or by hand.
The roll-back function will not work properly if there is a malfunction in the glass roof. Go to a
qualified workshop.
Convenience opening or closing of the glass roof
Convenience opening and closing
The glass roof can be opened and closed from outside the vehicle using the vehicle key:
Press and hold the locking or unlocking button on the vehicle key. The glass roof is tilted or closed.
In vehicles with the Keyless Access locking and starting system: place your finger on the locking
sensor in the door handle for a few seconds until the glass roof is closed Unlocking or locking the
vehicle with Keyless Access
Release the locking or unlocking button to interrupt this function.
The convenience closing function closes all the windows in the doors and the glass roof. All turn
signals will flash once as confirmation that all the windows and the glass roof have been closed.
Make settings for operation of the glass roof in the Vehicle settings menu in the Infotainment
system Infotainment system controls and displays
Some settings can be saved in the user accounts for personalisation and therefore change
automatically when the user account is changed Personalisation
Glass roof roll-back function
The roll-back function reduces the risk of crush injuries f the glass roof is obstructed during
the closing process, it will open again immediately.
Check to see why the glass roof has not closed.
Try to close the glass roof again.
If the glass roof still cannot be closed, close it without the roll-back function.
Closing the glass roof without the roll-back function
Press the button to the second position until the glass roof has fully closed.
The glass roof will now close without the roll-back function.
Please go to a qualified workshop if the glass roof still cannot be closed.
If you release the switch during the closing procedure, the glass roof will open automatically.
Page 129 of 502

The rear centre armrest must always be folded up while the vehicle is in motion in order to reduce
the risk of injury.
The middle seat on the rear bench seat must never be used when the centre armrest is folded down
neither by adults nor children. An incorrect sitting position can cause severe injuries.
Lights
Turn signals
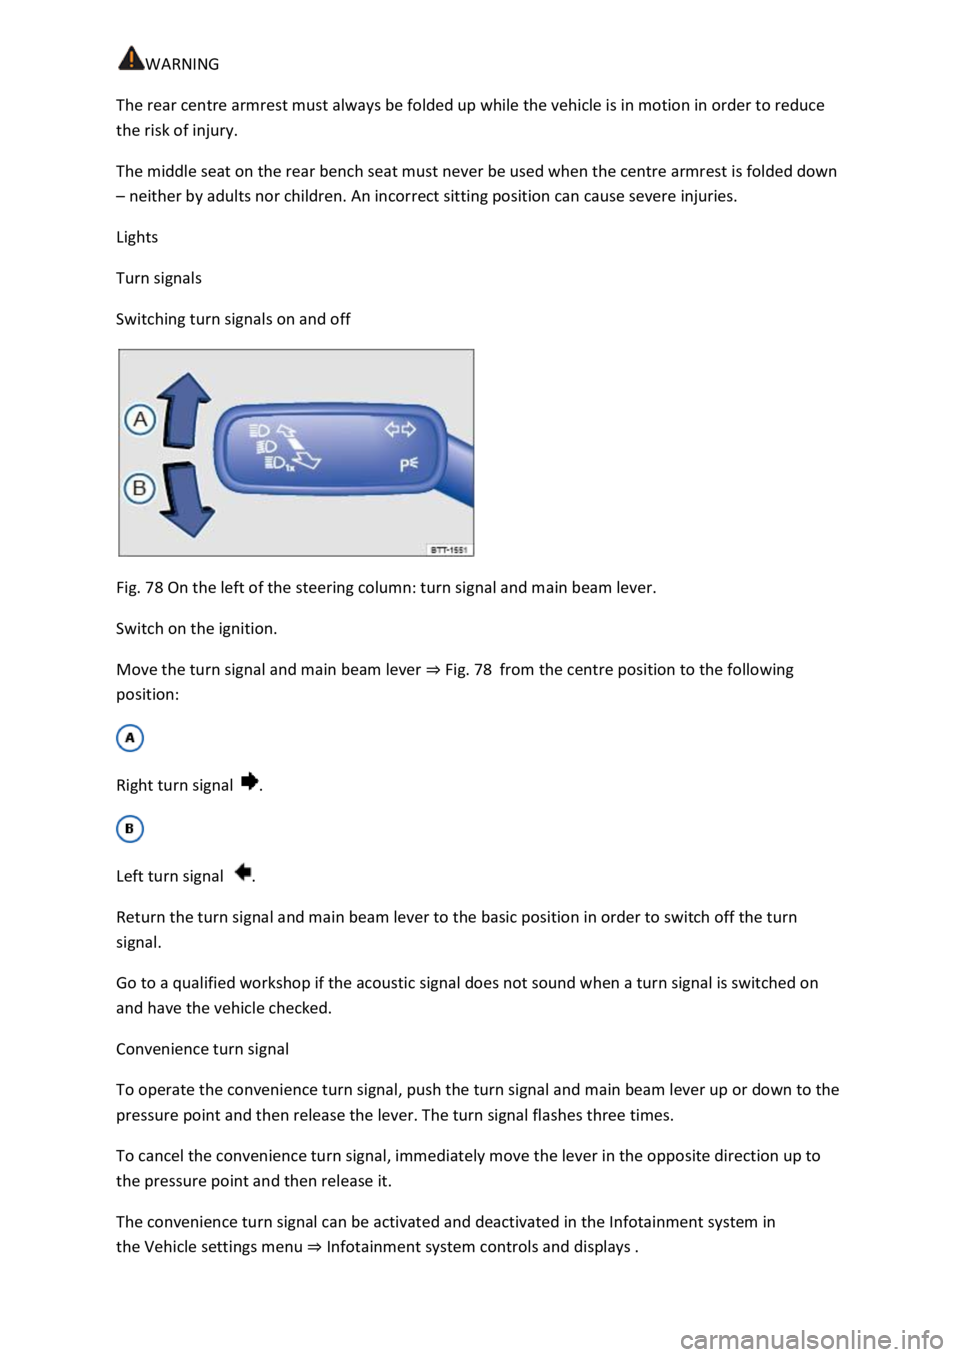
Switching turn signals on and off
Fig. 78 On the left of the steering column: turn signal and main beam lever.
Switch on the ignition.
Move the turn signal and main beam lever Fig. 78from the centre position to the following
position:
Right turn signal .
Left turn signal .
Return the turn signal and main beam lever to the basic position in order to switch off the turn
signal.
Go to a qualified workshop if the acoustic signal does not sound when a turn signal is switched on
and have the vehicle checked.
Convenience turn signal
To operate the convenience turn signal, push the turn signal and main beam lever up or down to the
pressure point and then release the lever. The turn signal flashes three times.
To cancel the convenience turn signal, immediately move the lever in the opposite direction up to
the pressure point and then release it.
The convenience turn signal can be activated and deactivated in the Infotainment system in
the Vehicle settings menu Infotainment system controls and displays
Page 132 of 502

both sides of the vehicle switches on to
provide better illumination of the surrounding area when manoeuvring.
Switching the fog lights on and off
Switching on the front fog lights : pull the light switch Fig. 79out to the first position. The
indicator lamp in the light switch lights up green.
Switching on the rear fog light : pull the light switch all the way out. The indicator lamp in the
instrument cluster lights up yellow.
To switch the fog lights off, press in the light switch or turn it to position .
When the automatic headlights are switched on and the front or rear fog lights are switched
on, the dipped beam headlights will also be switched on irrespective of the current light conditions
outside.
In vehicles with a factory-fitted towing bracket: the vehicle's rear fog light is not switched on if a
trailer with rear fog light is electrically connected to the vehicle Trailer towing
Light functions
Side lights
If the side lights are switched on, both headlights light up with the side lights, parts of the tail
light clusters, the number plate lighting and the buttons in the centre console and the dash panel.
The daytime running lights also switch on when the ignition is switched on.
If the vehicle is not locked from outside when the ignition is switched off, the continuous parking
light on both sides of the vehicle switches on automatically after around 10 minutes to reduce 12-
volt vehicle battery discharge Switching the parking lights on and off
Automatic headlights
If the automatic headlights are switched on, the vehicle lighting and the instrument and
switch lighting will switch on and off according to the light conditions. When the lights are switched
on, the indicator lamp lights up yellow.
The automatic headlights are merely an aid and will not always be able to detect all driving
situations.
In vehicles with a corresponding equipment level, the switch-on time of the automatic headlights
can be adjusted in the Infotainment system in the Vehicle settings menu Infotainment system
controls an
Cornering light
A cornering light is switched on when turning slowly or travelling around very tight bends.
Signal tones if lights are not switched off
Page 134 of 502

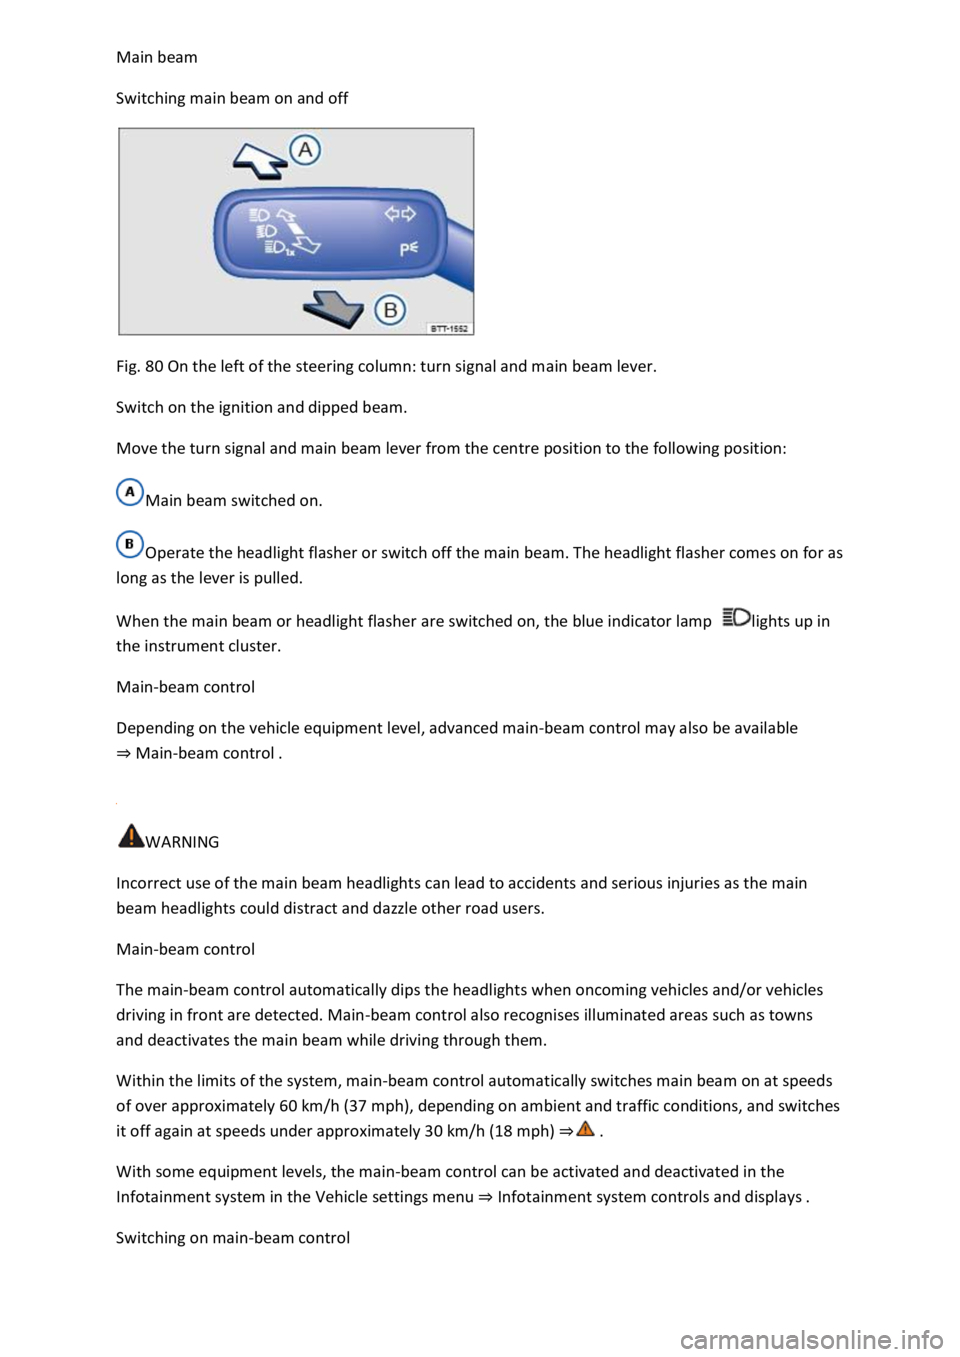
Switching main beam on and off
Fig. 80 On the left of the steering column: turn signal and main beam lever.
Switch on the ignition and dipped beam.
Move the turn signal and main beam lever from the centre position to the following position:
Main beam switched on.
Operate the headlight flasher or switch off the main beam. The headlight flasher comes on for as
long as the lever is pulled.
When the main beam or headlight flasher are switched on, the blue indicator lamp lights up in
the instrument cluster.
Main-beam control
Depending on the vehicle equipment level, advanced main-beam control may also be available
Main-beam control
WARNING
Incorrect use of the main beam headlights can lead to accidents and serious injuries as the main
beam headlights could distract and dazzle other road users.
Main-beam control
The main-beam control automatically dips the headlights when oncoming vehicles and/or vehicles
driving in front are detected. Main-beam control also recognises illuminated areas such as towns
and deactivates the main beam while driving through them.
Within the limits of the system, main-beam control automatically switches main beam on at speeds
of over approximately 60 km/h (37 mph), depending on ambient and traffic conditions, and switches
it off again at speeds under approximately 30 km/h (18 mph)
With some equipment levels, the main-beam control can be activated and deactivated in the
Infotainment system in the Vehicle settings menu Infotainment system controls and displays
Switching on main-beam control
Page 137 of 502

Lock the vehicle from the outside.
Automatic switch-off of side lights and parking lights
If the battery capacity is not sufficient for the side lights or parking light to remain switched on for
two hours, the 12-volt vehicle battery can be discharged to such an extent that it is no longer
possible to start the engine
In the case of standing times of more than two hours, the vehicle will detect a weak 12-volt vehicle
battery and switch off the side lights or parking light so that the engine can still be started.
WARNING
Accidents and serious injuries can occur if the vehicle is parked without sufficient illumination, as
other road users might have difficulty seeing the vehicle, or may not see it at all.
Always park the vehicle safely and with sufficient lighting. Observe any applicable local regulations.
If the vehicle lighting is required for several hours, switch on the right or left parking light if possible.
The illumination time of the parking light on one side is generally twice as long as for continuous
parking light on both sides of the vehicle.
Coming Home and Leaving Home function (orientation lighting)
The Coming Home and Leaving Home function lights up the area immediately surrounding the
vehicle when you get in or out of the vehicle in darkness.
Not in China: the Coming Home function is switched on manually. In contrast, the Leaving
Home function is controlled automatically by a rain/light sensor.
Only in China: the Coming Home and Leaving Home function is controlled automatically by a
rain/light sensor.
The switch-off delay can be adjusted and the function activated or deactivated in the Vehicle
settings menu in the Infotainment system Infotainment system controls and displays
Activating the Coming Home function
Not in China
Switch off the ignition.
Operate the headlight flasher for approximately one second.
The Coming Home lighting is switched on when the driver door is opened. The switch-off delay starts
when the last vehicle door or the boot lid has been closed.
Activating the Coming Home function
Page 138 of 502

Switch off the ignition.
The Coming Home lighting is switched on when the light switch is in position and the
rain/light sensor detects that it is dark.
The switch-off delay starts when the last vehicle door or the boot lid has been closed.
Deactivating the Coming Home function
Automatically after the selected switch-off delay has elapsed.
OR: automatically if a door or the boot lid is still open approximately 30 seconds after switching on.
OR: turn light switch to position .
OR: switch on the ignition.
Activating the Leaving Home function
Unlock the vehicle when the light switch is in position and the rain/light sensor detects that it
is dark.
Deactivating the Leaving Home function
Automatically after the switch-off delay.
OR: lock the vehicle.
OR: turn light switch to position .
OR: switch on the ignition.
Some settings can be stored in the user accounts of the personalisation function and therefore
change automatically when the user account changes Personalisation
Headlights
Headlight range control
Fig. 82 In the Infotainment system: slider for headlight range control.
Headlight range control can be used to adjust the light cone of the dipped beam headlights to the
vehicle load level. This gives the driver the best visibility possible and means that oncoming traffic
will not be dazzled
Page 139 of 502

system Fig. 82
Manual headlight range control
Press the button or function button.
Touch the Vehicle and function buttons to open the Vehicle settings menu.
Touch the Lights function button to open the Light settings menu.
Touch the Headlight range controlFig. 82
Move the slider to the required position (typical vehicle load level).
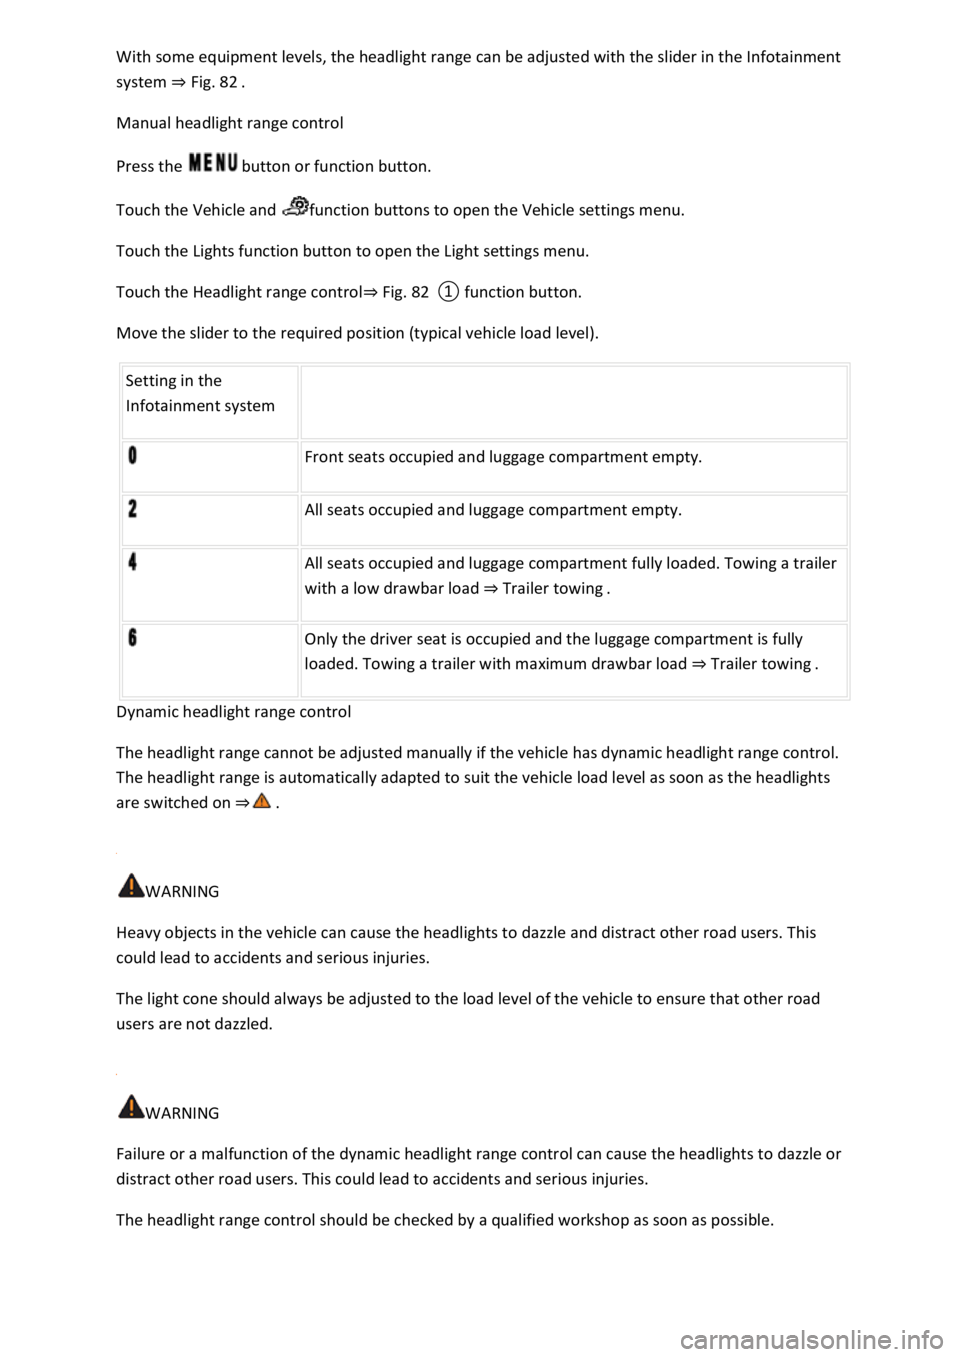
Setting in the
Infotainment system
Front seats occupied and luggage compartment empty.
All seats occupied and luggage compartment empty.
All seats occupied and luggage compartment fully loaded. Towing a trailer
with a low drawbar load Trailer towing.
Only the driver seat is occupied and the luggage compartment is fully
loaded. Towing a trailer with maximum drawbar load Trailer towing.
Dynamic headlight range control
The headlight range cannot be adjusted manually if the vehicle has dynamic headlight range control.
The headlight range is automatically adapted to suit the vehicle load level as soon as the headlights
are switched on
WARNING
Heavy objects in the vehicle can cause the headlights to dazzle and distract other road users. This
could lead to accidents and serious injuries.
The light cone should always be adjusted to the load level of the vehicle to ensure that other road
users are not dazzled.
WARNING
Failure or a malfunction of the dynamic headlight range control can cause the headlights to dazzle or
distract other road users. This could lead to accidents and serious injuries.
The headlight range control should be checked by a qualified workshop as soon as possible.
Page 140 of 502

If you have to drive a right-hand drive vehicle in a left-hand drive country, or vice versa, the
asymmetric dipped beam headlights may dazzle oncoming traffic. The headlights must therefore be
switched over when you travel to these countries.
With some equipment levels, the headlight alignment can be adjusted in the Infotainment system in
the Vehicle settings menu Infotainment system controls and displays
In vehicles in which the headlights cannot be switched over in the menu, masking stickers should be
applied to certain parts of the headlight lenses, or the headlights should be adjusted by a qualified
workshop. A qualified workshop can provide you with further information. Volkswagen recommends
using a Volkswagen dealership for this purpose.
Travel mode may be used only for a short period. Please contact a qualified workshop for a
permanent conversion. Volkswagen recommends using a Volkswagen dealership for this purpose.
Interior lighting
Instrument and switch lighting
The brightness of the instrument and switch lighting can be adjusted in the Infotainment system in
the Vehicle settings menu Infotainment system controls and displays
The brightness setting is automatically adjusted to the changing light conditions in the vehicle.
When the light switch is in position , a sensor will switch the dipped beam and the lighting in
the instruments and switches on and off automatically depending on the ambient brightness level.
When the light is switched off and the ignition switched on, the instrument and switch lighting
(needles and scales) is switched on. As the ambient light becomes lower, the illumination of the
scales is automatically reduced and may be switched off entirely. This function is intended to remind
the driver to switch on the dipped beam in good time, i.e. when driving through tunnels.
Interior and reading lights
Press the appropriate button or move the switch to the appropriate position:
Switch off the interior light.Switch on the interior lights.The interior lights are switched on
automatically when the vehicle is unlocked, a door is opened or the vehicle key is removed from the
ignition.Switch the reading light on or off.
Stowage compartment and luggage compartment lights
A light will be switched on and off when the stowage compartment on the front passenger side or
the boot lid is opened or closed.
Background lighting