2022 TOYOTA SUPRA high beam
[x] Cancel search: high beamPage 32 of 498

302-1. QUICK REFERENCE
1Wipers
2 Instrument cluster
3 Turn indicator, high-beam head-
lights
4 Light switch element
Indicator and warning lamps can
illuminate in a variety of combina-
tions and colours.
When the engine starts or the
standby state is switched on, the
functionality of some lights is briefly
checked.
1 Exterior mirrors
2 Power window switches
3 Central locking system
4 Unlocking the boot lid
1 Selector lever
2 Controller
3 Auto Start & Stop cancel button
4 Sport mode switch
5 Park Assistant button
6 VSC OFF button
7 Toyota Supra Safety button
8 Parking brake
Toyota Supra Command brings
together the functions of a number
of switches. These functions can be
operated using the Controller and,
depending on the equipment ver-
sion, the touchscreen.
Displays and controls
Around the steering wheel
Indicator and warning lamps
Driver's door
1
2
3
4
321
4
Switch cluster
Toyota Supra Command
Principle
Page 40 of 498
382-1. QUICK REFERENCE
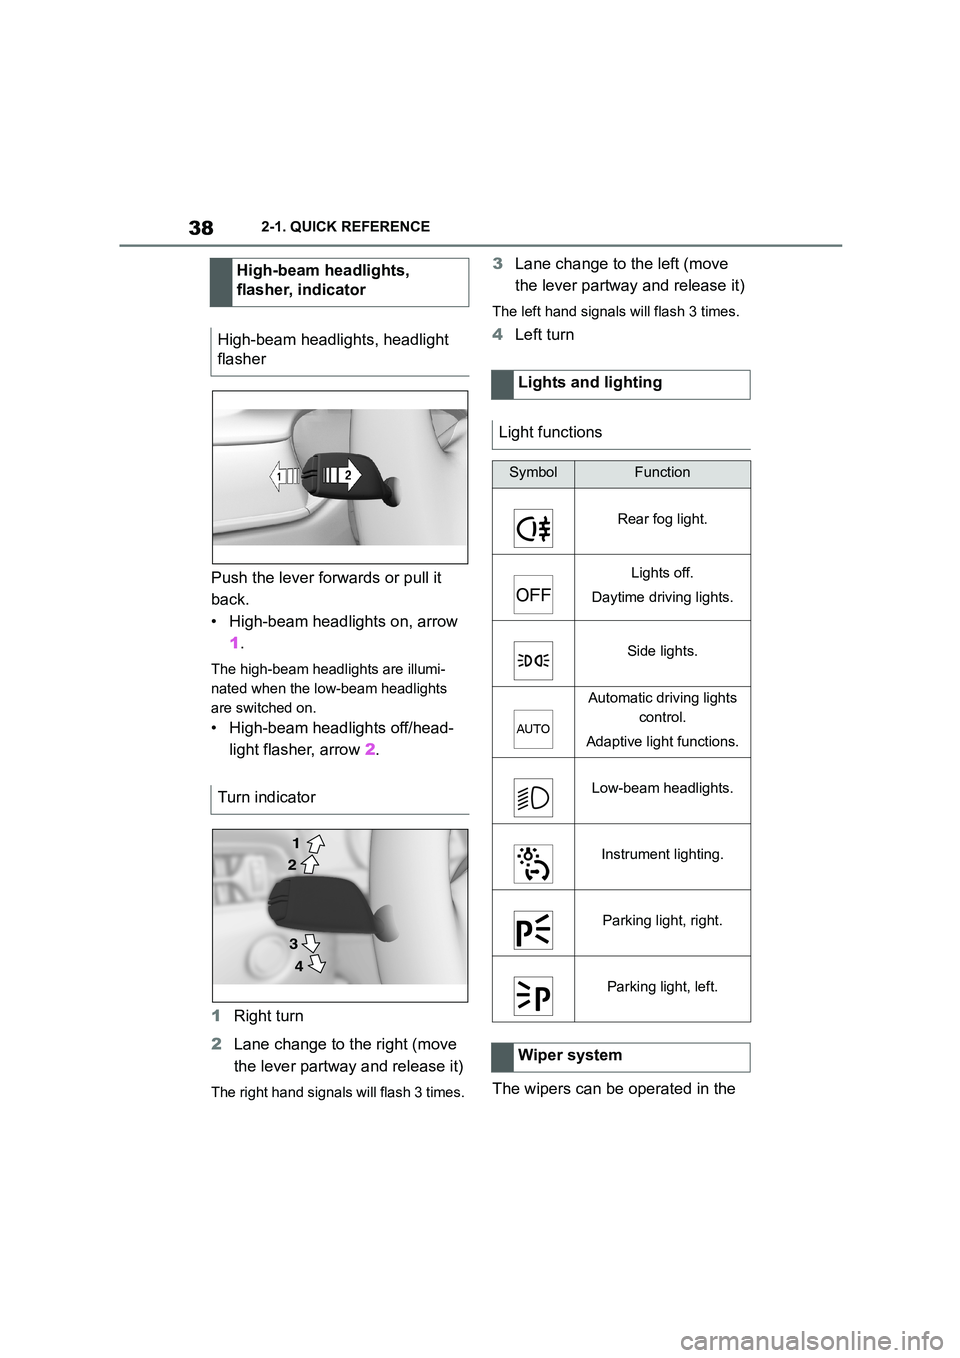
Push the lever forwards or pull it
back.
• High-beam headlights on, arrow
1 .
The high-beam headlights are illumi-
nated when the low-beam headlights
are switched on.
• High-beam headlights off/head-
light flasher, arrow 2.
1 Right turn
2 Lane change to the right (move
the lever partway and release it)
The right hand signals will flash 3 times.
3 Lane change to the left (move
the lever partway and release it)
The left hand signals will flash 3 times.
4 Left turn
The wipers can be operated in the
High-beam headlights,
flasher, indicator
High-beam headlights, headlight
flasher
Turn indicator
2
1
3
4
Lights and lighting
Light functions
SymbolFunction
Rear fog light.
Lights off.
Daytime driving lights.
Side lights.
Automatic driving lights
control.
Adaptive light functions.
Low-beam headlights.
Instrument lighting.
Parking light, right.
Parking light, left.
Wiper system
Page 49 of 498

47
3
3-1. CONTROLS
CONTROLS
Automatic driving lights
control P.185
Automatic high-beamP.188
Low-beam headlights
P. 1 8 6
Instrument lighting P.191
Right parking light P.186
Left parking light P.186
5 Steering-column lever, left
Turn indicator P.150
High-beam headlights,
headlight flasher P.150
Automatic high-beam
P. 1 8 8
On-board computer P.177
6 Shift paddle P.157
7 Buttons on steering wheel, left
Manual Speed Limiter
P. 2 3 2
Cruise Control on/off
P. 2 3 4
Resuming Cruise Con-
trolP.232
Interrupting Cr uise Control
P. 2 3 2
Dynamic radar cruise con-
trol on/off P.238
Cruise Control: to store a
speed
Speed Limit Assist: accept the
suggested speed P.246
Interrupts Cruise Con-
trol/Resuming Cruise Con-
trolP.232
Dynamic radar cruise con-
trol: to increase the distance/to
reduce the distanceP.232
Rocker switch for Cruise Con-
trolP.232
8 Instrument cluster P.162
9 Buttons on steering wheel, right
Selection lists P.177
Volume, see Navigation
system Owner's manual
Voice control system P.68
Telephone, see Owner's
Manual for Navigation, Enter-
tainment, Communication
Knurled wheel for selection lists
P. 1 7 7
10 Shift paddle P.157
11 Steering-column lever, right
Wiper P.151
Rain sensor P.152
Cleaning windscreen
P. 1 5 3
12 To adjust the steering wheel
P. 1 1 9
Page 53 of 498

51
3
3-1. CONTROLS
CONTROLS
• On steep crests or dips or on
tight bends.
• If the camera field of view is
obscured, for example due to
windscreen fittings or stickers.
• If the camera lens is contami-
nated or damaged.
• In the case of bright oncoming
light or strong reflections, for
example if the sun is low in the
sky.
• In the dark.
• Camera behind the windscreen:
if the camera has overheated
due to excessively high tempera-
tures and has been temporarily
deactivated.
• Camera behind the windscreen:
during camera calibration imme-
diately after vehicle delivery.
A Check Control message may be
displayed if the system has failed.
*: if equipped
The radar sensor is located in the
front bumper.
*: if equipped
The radar sensors are located in
the bumper.
The radar sensors may have lim-
ited functionality or may not be
available at all in the following situ-
ations, for example:
• If the sensors are contaminated,
for example by icing.
• If the sensors are obscured, for
example by stickers, foils or a
number plate holder.
• If the sensor is not correctly
aligned, for example following
parking damage.
• If the area covered by the sen-
sors' radar beam is obscured, for
example due to a projecting load.
• If the sensors' field of view is
obscured, for example due to
garage walls, hedges or mounds
of snow.
• After work performed incorrectly
on the vehicle paintwork near to
the sensors.
Radar sensors
Front radar sensor*
Side radar sensors, rear*
System limits of the radar
sensors
Page 152 of 498
1503-1. CONTROLS
tor lever position P engaged and
then press it.
The procedure can take a few sec-
onds. Any sounds that occur are
normal.
Do not fold in the exterior mirrors
while driving or while operating the
turn indicators or hazard warning
lights to ensure that the turn indica-
tors in the exterior mirrors are well
recognisable.
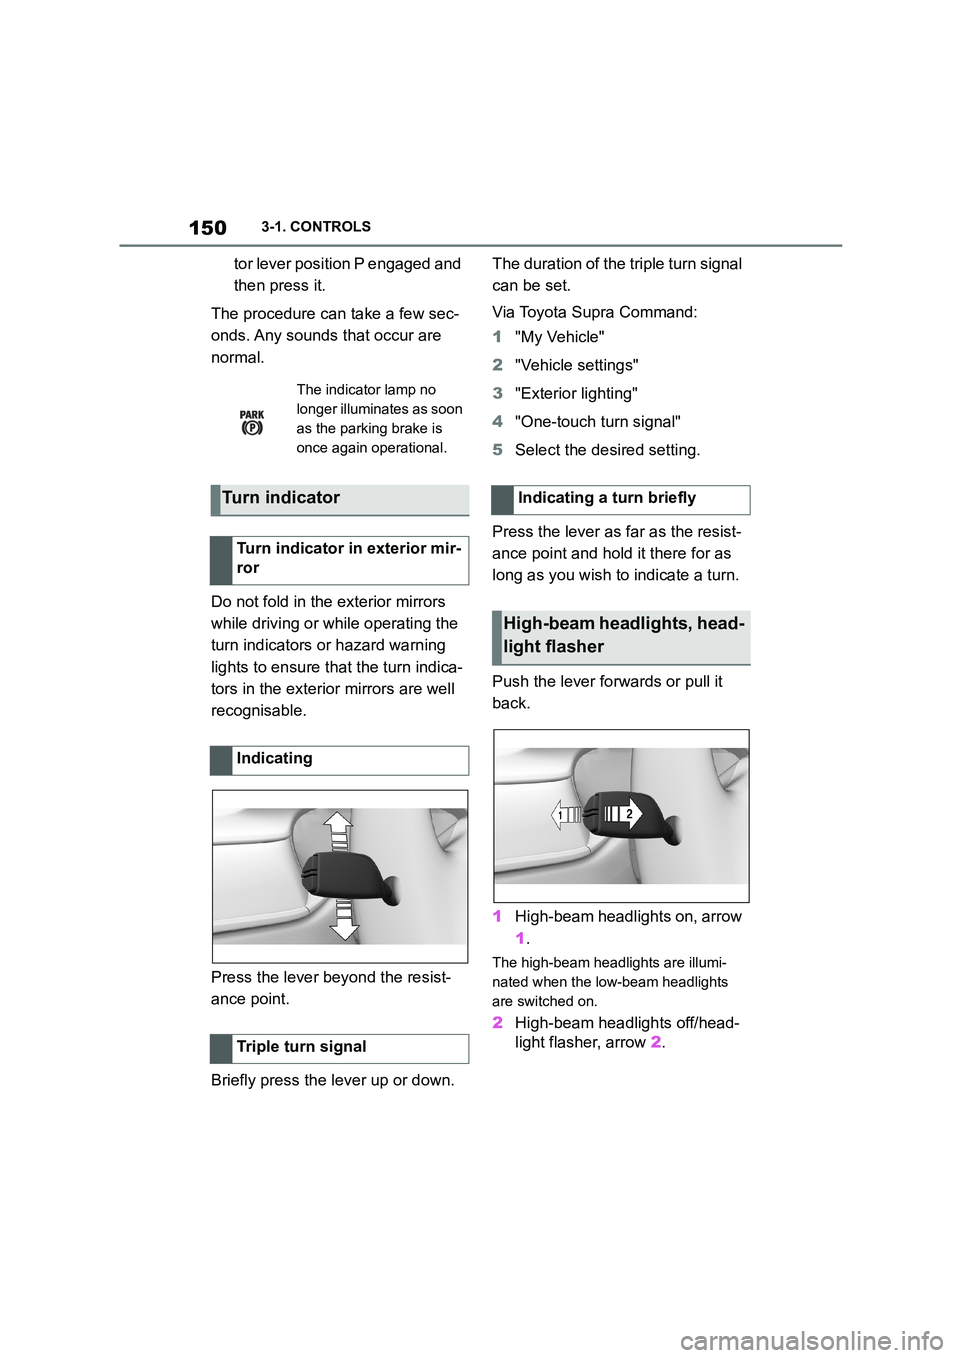
Press the lever beyond the resist-
ance point.
Briefly press the lever up or down.
The duration of the triple turn signal
can be set.
Via Toyota Supra Command:
1 "My Vehicle"
2 "Vehicle settings"
3 "Exterior lighting"
4 "One-touch turn signal"
5 Select the desired setting.
Press the lever as far as the resist-
ance point and hold it there for as
long as you wish to indicate a turn.
Push the lever forwards or pull it
back.
1 High-beam headlights on, arrow
1 .
The high-beam headlights are illumi-
nated when the low-beam headlights
are switched on.
2 High-beam headlights off/head-
light flasher, arrow 2.
The indicator lamp no
longer illuminates as soon
as the parking brake is
once again operational.
Turn indicator
Turn indicator in exterior mir-
ror
Indicating
Triple turn signal
Indicating a turn briefly
High-beam headlights, head-
light flasher
Page 170 of 498
1683-1. CONTROLS
The current fill level of the fuel tank
is displayed.
The angle of the vehicle may cause
the display to fluctuate.
For notes on refuelling, see page
290.
It is vital to avoid engine speeds in
the red warning zone. In this zone,
the fuel supply is interrupted to pro-
tect the engine.
Depending on the equipment, the
shift lights on the revolution counter
indicate the maximum shift point at
which the best possible accelera-
tion can be achieved.
When the selected driving mode is
sport mode, a shift light will be dis-
played.
1 Select SPORT using the sport
mode switch.
2 Activate manual mode of the
transmission.
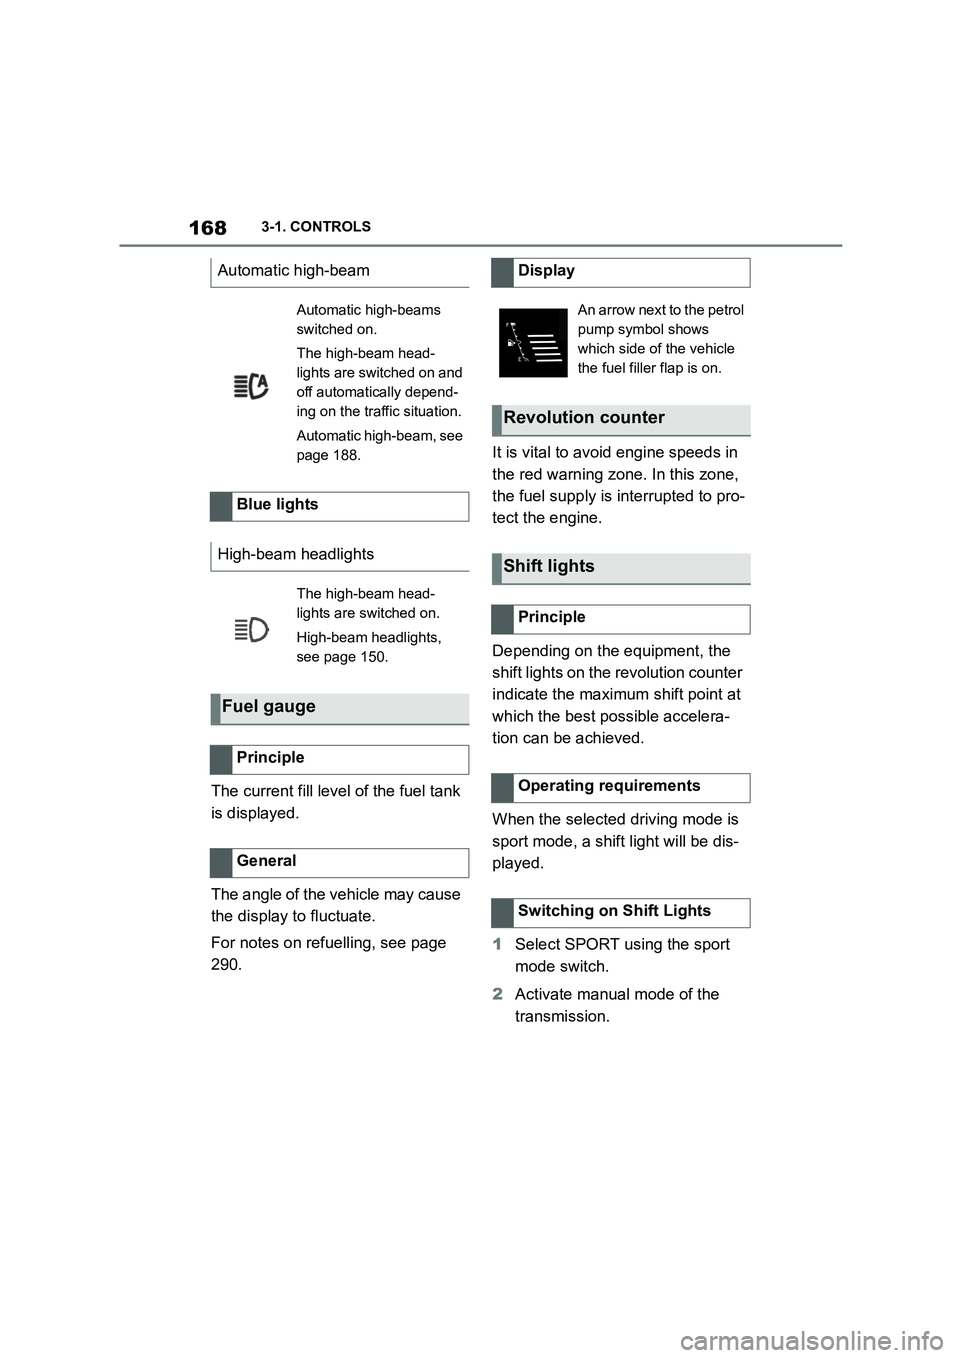
Automatic high-beam
Automatic high-beams
switched on.
The high-beam head-
lights are switched on and
off automatically depend-
ing on the traffic situation.
Automatic high-beam, see
page 188.
Blue lights
High-beam headlights
The high-beam head-
lights are switched on.
High-beam headlights,
see page 150.
Fuel gauge
Principle
General
Display
An arrow next to the petrol
pump symbol shows
which side of the vehicle
the fuel filler flap is on.
Revolution counter
Shift lights
Principle
Operating requirements
Switching on Shift Lights
Page 189 of 498
187
3
3-1. CONTROLS
CONTROLS
Switch off parking lights:
Depending on the equipment ver-
sion, the exterior lights of the vehi-
cle can be individually adjusted.
Via Toyota Supra Command:
1 "My Vehicle"
2 "Vehicle settings"
3 "Exterior lighting"
4 Select the desired setting:
"Welcome lights"
Individual light functions are switched
on for a limited time.
If the high-beam headlights are
activated after switching off
drive-ready state, the low-beam
headlights stay illuminated for a
certain amount of time.
Via Toyota Supra Command:
1 "My Vehicle"
2 "Vehicle settings"
3 "Exterior lighting"
4 "Home lights"
5 Select the desired setting.
The daytime drivin g lights illuminate
if drive-ready state is switched on.
In some countries daytime driving
lights are compulsory, in which
case the daytime driving lights can-
not be deactivated.
Via Toyota Supra Command:
1 "My Vehicle"
2 "Vehicle settings"
3 "Exterior lighting"
ButtonFunction
Parking light, right
on/off.
Parking light, left
on/off.
Press the button on the
light switch element or
switch on the drive-ready
state.
Welcome lights and head-
light courtesy delay feature
Welcome lights
General
Activating/deactivating
Headlight courtesy delay fea-
ture
General
Setting the duration
Daytime driving lights
General
Activating/deactivating
Page 190 of 498
1883-1. CONTROLS
4"Daytime driving lights"
Variable light distribution enables
even better illumination of the car-
riageway.
The light distribution is automati-
cally adapted to the speed.
If equipment includes a navigation
system, the light distribution is
automatically adapted depending
on the navigation data and speed.
The illuminated area of the
low-beam headlights is extended at
the sides.
The range of the low-beam head-
lights is increased.
In sharp turns up to a specified
speed, for example in hairpin bends
or when turning off, a cornering
light is added to illuminate the
inside area of the bend.
The cornering light is activated
automatically depending on the
steering angle or use of the turn
indicators.
The cornering light may be acti-
vated automatically when driving in
reverse, irrespective of the steer-
ing angle.
Automatic high-beam detects other
road users in good time and acti-
vates or deactivates the high beam
depending on the traffic situation.
Automatic high-beam ensures that
the high-beam headlights are
switched on when the traffic situa-
tion allows. The high-beam head-
lights are not switched on by the
system in the low speed range.
The system responds to the lights
from oncoming traffic and traffic
driving ahead of you, and to ambi-
ent lighting, for example in built-up
areas.
The high-beam headlights can be
switched on and off manually at any
time.
If the vehicle is equipped with daz-
zle-free Automatic high-beam, the
high-beam headlights are not
switched off for oncoming vehicles
or vehicles driving ahead of you;
instead, the system masks those
Variable light distribution
Principle
General
City light
Motorway beam pattern
Cornering light
Automatic high-beam
Principle
General