2022 TOYOTA PROACE CITY check engine light
[x] Cancel search: check engine lightPage 130 of 320

130
► Check that the depth of the water does not exceed 15 cm, taking account of waves that might be generated by other users.► Deactivate the Stop & Start function.► Drive as slowly as possible without stalling. In all cases, do not exceed 6 mph (10 km/h).► Do not stop and do not switch off the motor.On leaving the flooded road, as soon as safety conditions allow, make several light brake applications to dry the brake discs and pads.If in doubt about the state of your vehicle, contact any authorized Toyota retailer or Toyota authorized repairer, or any reliable repairer.
Noise (Electric)
On the outside
Due to the vehicle’s quiet operation when driving, the driver must pay particular attention.When manoeuvring, the driver must always check the vehicle's immediate surroundings.At speeds of up to 19 mph (30 km/h), the pedestrian horn warns other road users of the
vehicle’s presence.
NOTIC E
Cooling the traction batteryThe cooling fan comes on during charging to cool the on-board charger and the traction battery.
On the inside
During use, you may hear certain perfectly normal noises specific to electric vehicles, such as:– Traction battery relay when starting.– Vacuum pump when braking.– Vehicle tyres or aerodynamics when driving.– Jolting and knocking noise during hill starts.
In case of towing
WARNI NG
Driving with a trailer places greater demands on the towing vehicle and requires extra care from the driver.
NOTIC E
Respect the maximum towable weights.At altitude: reduce the maximum load by 10% per 1,000 metres (3,280 ft) of altitude; the density of the air decreases with altitude and the performance of the engine reduces.
WARNI NG
New vehicle: do not pull a trailer before having driven at least 1,000 kilometres (620 miles).
NOTIC E
If the outside temperature is high, let the engine idle for 1 to 2 minutes after the vehicle comes to a stop, to help it to cool.
Before setting off
Nose weight
► Distribute the load in the trailer so that the heaviest items are as close as possible to the axle and the nose weight (at the point where it joins your vehicle) approaches the maximum permitted without exceeding it.
Tyres
► Check the tyre pressures of the towing vehicle and of the trailer, observing the recommended pressures.
Lighting
► Check the electrical signalling on the trailer and the headlamp beam height of your vehicle.
NOTIC E
If a genuine TOYOTA towing device is used, the rear parking sensors will be deactivated automatically to avoid the audible signal.
Page 134 of 320
134
Key left in the ignition
NOTIC E
When opening the driver's door, an alert message is displayed, accompanied by an audible signal, to remind you that the key is still in the ignition switch at position 1 (Stop).If the key has been left in the ignition switch at position 2 (Ignition on), the ignition will be
switched off automatically after one hour.To switch the ignition back on, turn the key to position 1 (Stop), then back to position 2 (Ignition on).
With Keyless Entry and Starting
► With the remote control in the recognition zone, press the "START/STOP" button.With a manual gearbox, the engine switches off and the steering column locks.With the EAT8 automatic gearbox, the engine switches off.
NOTIC E
If the vehicle is not immobilised, the engine will not stop.
WARNI NG
To avoid any risk of jamming the pedals:– only use mats which are suited to the fixings already present in the vehicle; these fixings must be used,– never place one mat on top of another.The use of mats not approved by TOYOTA may interfere with access to the pedals and hinder the operation of the cruise control / speed limiter.The mats approved by TOYOTA have two fixings located below the seat.
Starting/Switching off the
electric motor
Starting
The drive selector must be in mode P.► If using a conventional or remote control key, depress the brake pedal and turn the key to position 3 until the motor starts, without
depressing the accelerator. As soon as the motor starts, release the key so it returns to position 2.► If using Keyless Entry and Starting, depress the brake pedal and briefly press the "START/STOP" button.► Keep your foot on the brake pedal until the READY indicator lamp comes on and an audible signal is emitted, indicating that the vehicle is ready to drive.
► With your foot on the brake, select mode D or R.► Release the brake pedal, then accelerate.On starting, the instrument panel lights up and the power indicator cursor moves to the "neutral" position. The steering column automatically unlocks (you may hear a sound and feel the steering wheel move).
Switching off
► If using a conventional or remote control key, turn the key fully to position 1 (Stop).► If using Keyless Entry and Starting, press the "START/STOP" button.Before exiting the vehicle, check that:– The drive selector is in mode P.– The READY indicator lamp is off.
NOTIC E
The drive selector moves automatically to mode P when the motor is switched off or when the driver's door is opened.
NOTIC E
If the driver's door is opened while the required conditions for stopping are not satisfied, an audible signal is emitted,
accompanied by the display of a warning message.
Page 139 of 320
139
Driving
6
Emergency braking
If depressing the brake pedal fails to provide effective braking or in exceptional circumstances (e.g. driver unwell, assisted driving), the vehicle can be braked by sustained pulling on the electric parking brake control. Braking continues for as long as the control is kept pulled, and ceases when the control is released.The ABS and DSC systems stabilise the vehicle during emergency braking.If emergency braking malfunctions, the message "Parking brake fault" will be displayed on the instrument panel.If the ABS and DSC systems malfunction, indicated by lighting one or both warning lamps on the instrument panel, the vehicle’s stability is no longer ensured.► In this case, ensure the vehicle's stability by successive and repeated "pull-release" actions on the electric parking brake control until the vehicle comes to a complete stop.
Hill start assist
System which briefly keeps the vehicle stationary (for approximately 2 seconds) when making a hill start, while you transfer your foot from the brake pedal to the accelerator pedal.It is only active when:– The vehicle is completely stationary, with your foot on the brake pedal.– Certain slope conditions are met.– The driver’s door is closed.
WARNI NG
Do not leave the vehicle while it is being held temporarily by hill start assist.If someone needs to get out of the vehicle with the engine running, apply the parking brake manually. Then check that the parking brake indicator lamp and the P indicator lamp in the electric parking brake control lever are on fixed.
WARNI NG
The hill start assist function cannot be deactivated. However, using the parking brake to immobilise the vehicle interrupts its operation.
Operation
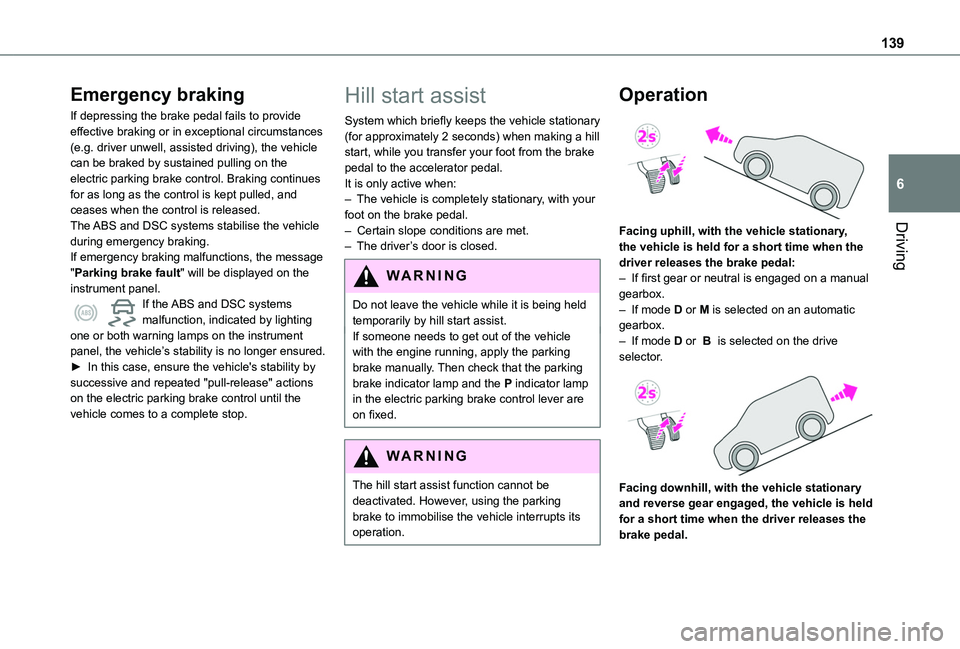
Facing uphill, with the vehicle stationary, the vehicle is held for a short time when the driver releases the brake pedal:– If first gear or neutral is engaged on a manual gearbox.– If mode D or M is selected on an automatic gearbox.– If mode D or B is selected on the drive selector.
Facing downhill, with the vehicle stationary and reverse gear engaged, the vehicle is held for a short time when the driver releases the brake pedal.
Page 140 of 320
140
Malfunction
If the event of a malfunction, these warning lamps light up on the instrument panel, accompanied by the display of a message.Have it checked by any authorized Toyota retailer or Toyota authorized repairer, or any reliable repairer.
5-speed manual gearbox
Engaging reverse gear
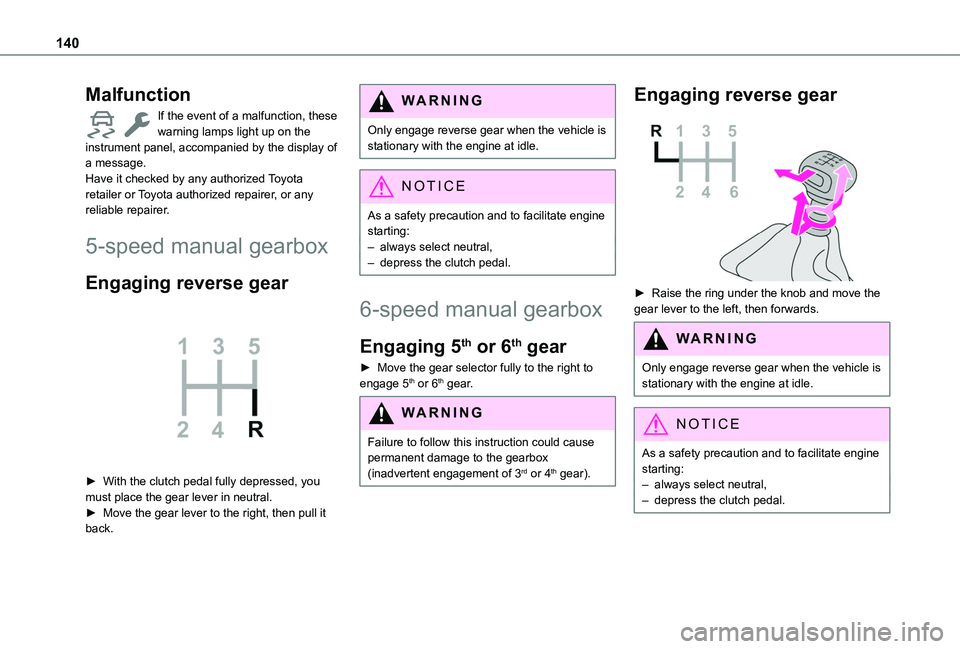
► With the clutch pedal fully depressed, you must place the gear lever in neutral.► Move the gear lever to the right, then pull it back.
WARNI NG
Only engage reverse gear when the vehicle is stationary with the engine at idle.
NOTIC E
As a safety precaution and to facilitate engine starting:
– always select neutral,– depress the clutch pedal.
6-speed manual gearbox
Engaging 5th or 6th gear
► Move the gear selector fully to the right to engage 5th or 6th gear.
WARNI NG
Failure to follow this instruction could cause permanent damage to the gearbox (inadvertent engagement of 3rd or 4th gear).
Engaging reverse gear
► Raise the ring under the knob and move the gear lever to the left, then forwards.
WARNI NG
Only engage reverse gear when the vehicle is stationary with the engine at idle.
NOTIC E
As a safety precaution and to facilitate engine starting:– always select neutral,– depress the clutch pedal.
Page 172 of 320
172
NOTIC E
The speed will be reduced by a maximum of 16 mph (25 km/h) for versions with camera only, or by a maximum of 31 mph (50 km/h) for versions with camera and radar.
Operation
The system operates subject to the following conditions:– At reduced speed in an urban environment, when a pedestrian is detected.– At reduced speed in an urban environment, when a stationary vehicle is detected.– The vehicle's speed is between 10 km/h and 85 km/h (6 mph and 53 mph) when a moving vehicle is detected.This warning lamp flashes (for approximately 10 seconds) as soon as the function applies the vehicle’s brakes.With an automatic gearbox, in the event of automatic emergency braking bringing the
vehicle to a complete stop, keep the brake pedal depressed to prevent the vehicle from moving off again.With a manual gearbox, in the event of automatic emergency braking bringing the vehicle to a complete stop, the engine may stall.
NOTIC E
The driver can maintain control of the vehicle at any time by firmly turning the steering wheel and/or firmly depressing the accelerator pedal.
NOTIC E
The brake pedal may vibrate slightly while the function is operating.If the vehicle comes to a complete stop, automatic braking is maintained for 1 to 2 seconds.
Deactivation/Activation
By default, the system is automatically activated at every engine start.The settings are changed via the Driving / Vehicle touch screen menu.Deactivation of the system is signalled by the illumination of this warning lamp, accompanied by the display of a message.
Malfunction
In the event of a malfunction, this warning lamp comes on on the instrument panel, accompanied by the display of a message and an audible signal.Have it checked by any authorized Toyota retailer or Toyota authorized repairer, or any reliable repairer.If these warning lamps come on after the engine has been switched off and then restarted, contact any authorized Toyota retailer or Toyota authorized repairer, or any reliable repairer to have the system checked.These warning lamps light up on the instrument panel to indicate that the driver's and/or front passenger's seat belt is not fastened (depending on version). The automatic braking system is deactivated until the seat belts are fastened.
Page 190 of 320
190
WARNI NG
During manoeuvring phases, the steering wheel performs rapid turns: do not hold the steering wheel or put your hands between the spokes of the steering wheel. Watch out for any objects that could interfere with the manoeuvre (loose clothing, scarf, tie, etc.). Risk of injury!It is the driver's responsibility to constantly monitor the traffic, especially vehicles coming towards you.The driver should check that no objects or people are obstructing the vehicle’s path.
NOTIC E
The images from the camera(s) displayed on the touch screen may be distorted by the terrain.In shady areas, or in inadequate sunlight or lighting conditions, the image may be darkened and with lower contrast
The manoeuvre can be permanently interrupted at any time, either by the driver or automatically by the system.Interruption by the driver:– taking over control of the steering.
– activating the direction indicator lamps on the opposite side to that of the manoeuvre.– unfastening the driver's seat belt.– switching off the ignition.Interruption by the system:– vehicle exceeding the speed limit of 7 km/h (5 mph) during parking space entry manoeuvres, or 5 km/h (3 mph) during parking space exit manoeuvres.– activation of anti-slip regulation on a slippery road.– opening of a door or the boot.– engine stall.– system malfunction.– after 10 manoeuvres to enter or exit a parallel parking space and after 7 manoeuvres to enter a parking bay.Interrupting the manoeuvre automatically deactivates the function.The manoeuvre symbol is displayed in red, accompanied by the "Manoeuvre cancelled" message on the touch screen.A message prompts the driver to take back
control of the vehicle.The function is deactivated after a few seconds; this warning lamp goes off and the function returns to the initial display.
End of the parking space entry or exit
manoeuvre
The vehicle stops as soon as the manoeuvre is completed.The manoeuvre symbol is displayed in red, accompanied by the message “Manoeuvre completed” on the touch screen.When the function is deactivated, this indicator lamp goes off, accompanied by an audible signal.When entering a parking space, the driver may be required to complete the manoeuvre.
Page 216 of 320
216
Air filter
Depending on the environment and the use of the vehicle (e.g. dusty atmosphere, city driving), change it twice as often, if necessary.
Oil filter
Change the oil filter each time the engine oil is changed.
Particle filter (Diesel)
The start of clogging of the particle filter is indicated by the temporary lighting of this warning lamp, accompanied by an alert message.As soon as the traffic conditions permit, regenerate the filter by driving at a speed of at least 37 mph (60 km/h), with an engine speed above 2,500 rpm, for about 15 minutes (until the warning lamp goes off).If it is not possible to reach 37 mph (60 km/h), leave the engine running at idle for about
15 minutes, then drive with an engine speed above 2,500 rpm for 15 minutes.
NOTIC E
Do not switch off the engine until the filter is fully regenerated; repeated intervals can degrade the engine oil prematurely.Regenerating the filter while the vehicle is stationary is not recommended.
NOTIC E
If the warning lamp stays on, this indicates a low Diesel additive level.For more information on Checking levels, refer to the corresponding section.
NOTIC E
Following prolonged operation of the vehicle at very low speed or at idle, you may, in exceptional circumstances, notice water vapour coming from the exhaust while accelerating. These emissions have no impact on the vehicle’s behaviour and the environment.
NOTIC E
New vehicleDuring the first few particle filter regeneration operations, you may notice a "burning" smell. This is perfectly normal.
Manual gearbox
The gearbox does not require any maintenance (no oil change).
Automatic gearbox
The gearbox does not require any maintenance (no oil change).
Drive selector
The drive selector does not require any maintenance.
Brake pads
Brake wear depends on the style of driving, particularly in the case of vehicles used in town, over short distances. It may be necessary to have the condition of the brakes checked, even between vehicle services.Unless there is a leak in the circuit, a drop in the brake fluid level indicates that the brake pads are worn.
NOTIC E
After washing the vehicle, moisture, or in wintry conditions, ice can form on the brake discs and pads: braking efficiency may be reduced. Gently dab the brakes to dry and defrost them.
Page 231 of 320

231
In the event of a breakdown
8
WARNI NG
Opening the bonnet/Accessing the bulbsProceed with caution when the engine is hot - risk of burns!Take care with objects or clothing that could be caught in the blades of the cooling fan - risk of strangulation!
NOTIC E
Halogen bulbs (Hx)To ensure good quality lighting, check that the bulb is correctly positioned in its housing.
WARNI NG
After changing a bulbTo refit, carry out the fitting operations in reverse order.Close the protective cover very carefully to guarantee the sealing of the lamps.
Light-emitting diode (LED)
headlamps and lamps
Depending on version, the affected types of headlamps / lamps are:– Daytime running lamps / sidelamps.
WARNI NG
For the replacement of this type of bulb, you must contact a TOYOTA dealer or a qualified workshop.
Types of bulb
Various types of bulb are fitted on the vehicle. To remove them:
Type AAll-glass bulb: pull gently as it is fitted by pressure.
Type BBayonet bulb: press on the bulb then turn it anti-clockwise.
Type CHalogen bulb: release the retaining spring from its housing.
Type DHalogen bulb: turn the bulb anti-clockwise.
NOTIC E
When each operation has been completed, check the operation of the lighting.
Front lamps
For more information on Changing a bulb and, in particular, the types of bulb, refer to the corresponding section.
1.Sidelamps / Daytime running lamps.
Type A, W21/5W
2.Main beam headlamps.Type C, H1
3.Dipped beam headlamps.Type C, H7
4.Direction indicator.Type B, PY21W
5.Foglamp.Type D, H11