Page 20 of 356
202-1. QUICK REFERENCE
Close the trunk lid manually.
1Wipers
2 Instrument cluster
3 Turn signal indicator, high
beams
4 Light switch element
The indicator/warning lights can light up in a variety of combina-
tions and colors.
Several of the lights are
checked for proper functioning
and light up temporarily when
the engine is started or standby
state is switched on.
1
Exterior mirrors
2 Power windows
3 Central locking system
4 Unlocking the trunk lid
1 Selector lever
2 Controller
3 Auto Start/Stop cancel button
4 Sport mode button
5 Park Assistant button
Trunk lid
Opening
Press and hold the but-
ton on the remote con-
trol for approximately 1
second. Depending on
the setting, the doors
may also unlock, refer
to page 78.
Closing
Displays and control ele-
ments
In the vicinity of the steer-
ing wheel
Indicator/warning lights
1
2
3
4
Driver's door
Switch console
321
4
Page 27 of 356
272-1. QUICK REFERENCE
2
QUICK REFERENCE
Press button P.
Activate the manual mode:
Press the selector lever to the
left from selector lever position
D.
Manual mode:
• To shift down: press the selector lever forward.
• To shift up: pull the selector lever rearwards.
End the manual mode:
Push the selector lever to the
right. Push the lever forward or pull it
backward.
• High beams on, arrow 1. The
high beams light up when the
low beams are switched on.
• High beams off/headlight flasher, arrow 2.
1 Right turn
2 Lane change to the right
(movethe lever partway and
release it)
The right hand signals will flash 3
times.
Automatic transmission,
manual mode
High beams, headlight
flasher, turn signal
High beams, headlight
flasher
Turn signal
2 1
3 4
Page 28 of 356
282-1. QUICK REFERENCE
3Lane change to the left
(movethe lever partway and
release it)
The left hand signals will flash 3
times.
4Left turn
The wipers can be operated in
the standby state.
■Switching on
Press the lever up until the
desired position is reached.
• Resting position of the wipers: position 0.
• Rain sensor: position 1.
• Normal wiper speed: position 2.
• Fast wiper speed: position 3.
■Brief wipe and switching off
Press the lever down.
• Switching off: press the lever down until it reaches its stan-
dard position (position 0).
• Brief wipe: press the lever down from the standard posi-
tion (position 0).
Lights and lighting
Light functions
SymbolFunction
Lights off.
Daytime running lights.
Parking lights.
Automatic headlight control.
Low beams.
Instrument lighting.
Right roadside parking light.
Left roadside parking light.
Washer/wiper system
Switching the wipers on/off
and brief wipe
Page 37 of 356

373-1. CONTROLS
3
CONTROLS
Automatic high-beam P.156 Low beams P.154
Instrument lighting
P.158
Right roadside parking
light P.154
Left roadside parking
light P.154
5 Steering column stalk, left
Turn signal P.121
High beams, headlight
flasher P.122
Automatic high-beam
P.156
Onboard Computer
P.133
6 Shift paddle P.129
7 Steering wheel buttons, left
Cruise control on/off
P.199
Dynamic radar cruise
control on/off P.203
Cruise control: store
speed
Speed Limit Assist: take over
suggested speed P.211
Continuing cruise con-
trol/Pausing cruise control P. 1 9 9
Dynamic radar cruise
control: increase distance
P. 1 9 9
Dynamic radar cruise
control: reduce distance
P. 1 9 9
Cruise control rocker switch
P. 1 9 9
8 Instrument cluster P.133
9 Steering wheel buttons, right
Selection lists P.145
Volume, see Owner's
Manual for Navigation, Enter-
tainment and Communication
Voice activation system
P. 5 7
Telephone, see
Owner's Manual for Naviga-
tion, Entertainment and Com-
munication
Thumbwheel for selection
lists P.145
10Shift paddle P.129
11Steering column stalk, right
Wiper P.122
Rain sensor P.123
Clean the windshield
P. 1 2 4
12Adjust the steering wheel P. 1 0 7
Page 92 of 356

923-1. CONTROLS
3"Doors/Key"
4 "Turn off after door opening"
Opening the front doors establishes
the idle state, refer to page 43.
When the vehicle is locked, the
vehicle alarm system reacts to
the following changes:
• Opening a door, the hood or
the trunk lid.
• Movements in the car's inte- rior.
• Changes in the vehicle tilt, e. g., during attempts at stealing
a wheel or when towing the
vehicle.
• Disconnected battery voltage.
• Improper use of the socket for OBD Onboard Diagnosis.
• Locking the vehicle while a device is connected to the
socket for the OBD Onboard-
Diagnosis. For socket for the
OBD Onboard Diagnosis,
refer to page 302.
The alarm system signals the
following changes visually and
acoustically:
• Acoustic alarm: Depending on local regulations, the acoustic
alarm may be suppressed.
• Visual alarm: By flashing of the hazard warning system
and headlights, where
required. Do not modify the system to
ensure function of the alarm
system.
When you unlock and lock the
vehicle, either with the remote
control or with Comfort entry, the
alarm system is switched off and
on at the same time.
The alarm system is triggered
when a door is opened if the
door was unlocked using the
integrated key in the door lock.
Switching off the alarm, refer to
page 94.
The trunk lid can be opened
even when the alarm system is
switched on.
After the trunk lid is closed, it is
locked and monitored again pro-
vided the doors are locked. The
hazard warning system flashes
once.
You can trigger the alarm sys-
tem if you find yourself in a dan-
Alarm system
General information
Switching on/off
Opening the doors with
the alarm system switched
on
Opening the trunk lid with
the alarm system switched
on
Panic mode
Page 120 of 356

1203-1. CONTROLS
■General information
To use as emergency brake
while driving:
Pull the switch and hold it. The
vehicle brakes hard while the
switch is being pulled.
A vehicle message is displayed.
If the vehicle is slowed down to
Safety information
WARNING
An unsecured vehicle can begin
to move and possibly roll away.
There is a risk of an accident.
Before exiting, secure the vehicle
against rolling.
In order to ensure that the vehicle
is secured against rolling away,
follow the following:
●Set the parking brake.
●On uphill grades or on a down-
hill slope, turn the front wheels
in the direction of the curb.
●On uphill grades or on a down-
hill slope, also secure the vehi-
cle, for instance with a wheel
chock.
WARNING
Unattended children or animals in
the vehicle can cause the vehicle
to move and endanger them-
selves and traffic, for instance due
to the following actions:
●Pressing the Start/Stop button.
●Releasing the parking brake.
●Opening and closing the doors
or windows.
●Engaging selector lever position
N.
●Using vehicle equipment.
There is a risk of accidents or inju-
ries. Do not leave children or ani-
mals unattended in the vehicle.
Take the remote control with you
when exiting and lock the vehicle.
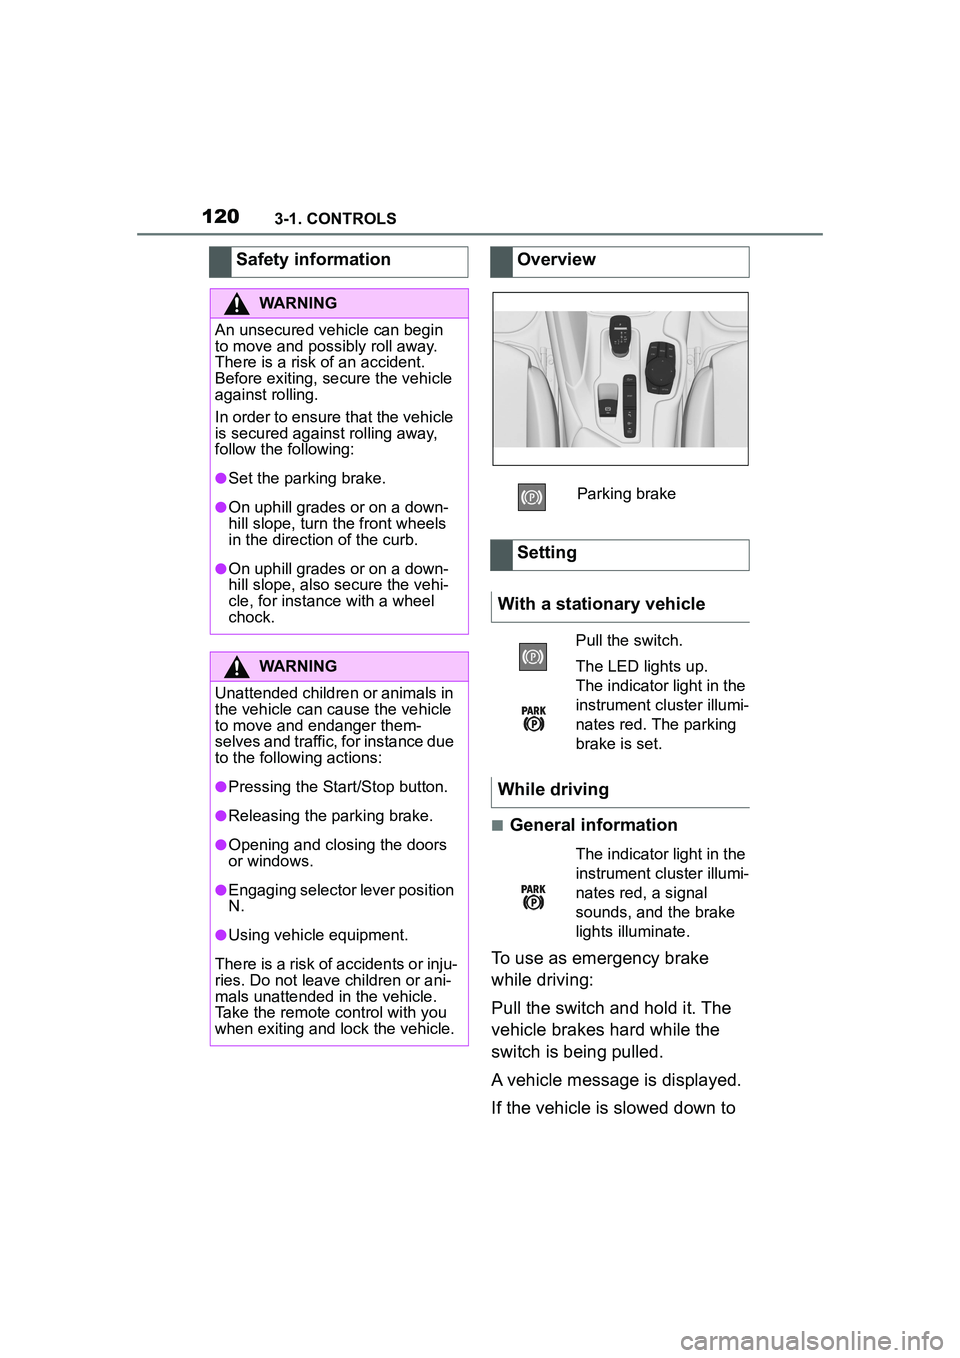
Overview
Parking brake
Setting
With a stationary vehicle
Pull the switch.
The LED lights up.
The indicator light in the
instrument cluster illumi-
nates red. The parking
brake is set.
While driving
The indicator light in the
instrument cluster illumi-
nates red, a signal
sounds, and the brake
lights illuminate.
Page 121 of 356

1213-1. CONTROLS
3
CONTROLS
a speed of approx. 2 mph/3
km/h the parking brake is set.
1Switch on drive-ready state.
2 Press the switch while
the brake is pressed or selec-
tor lever position P is set.
The LED and indicator light go out.
The parking brake is released.
The parking brake is released
automatically when you drive
away.
The LED and indicator light go
out.
In the event of a failure or mal-
function of the parking brake:
Secure the vehicle against roll-
ing away, for instance with a
wheel chock, after existing the
vehicle.
To reestablish parking brake
functionality after a power fail-
ure:
1 Switch on standby state. 2
Pull the switch while
stepping on the brake pedal
or selector lever position P is
set and then push.
This process may take a few
seconds. Any sounds associ-
ated with this are normal.
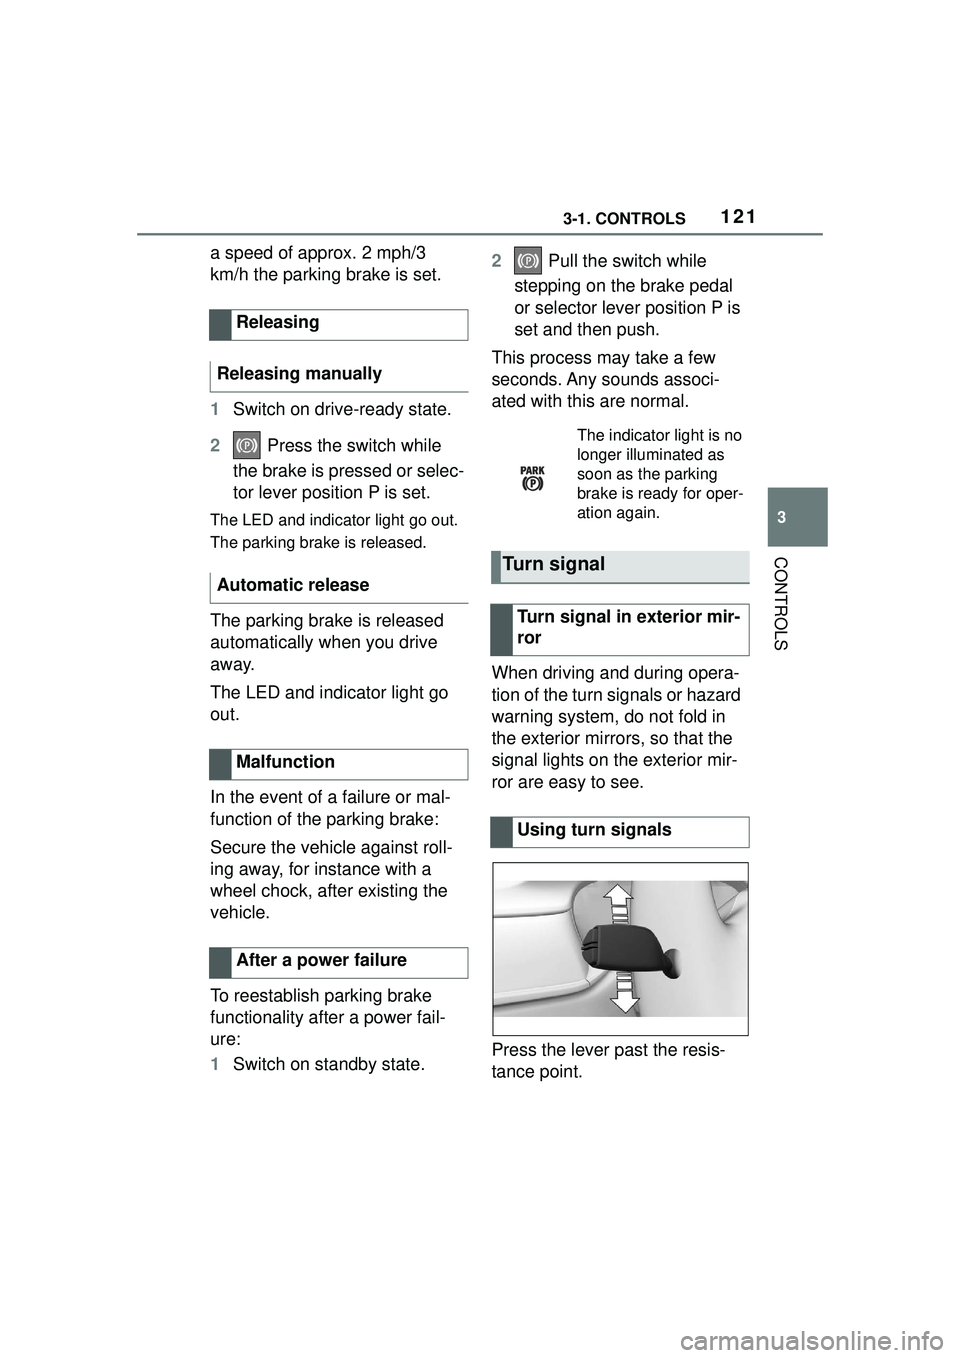
When driving and during opera-
tion of the turn signals or hazard
warning system, do not fold in
the exterior mirrors, so that the
signal lights on the exterior mir-
ror are easy to see.
Press the lever past the resis-
tance point.
Releasing
Releasing manually
Automatic release
Malfunction
After a power failure
The indicator light is no
longer illuminated as
soon as the parking
brake is ready for oper-
ation again.
Turn signal
Turn signal in exterior mir-
ror
Using turn signals
Page 122 of 356

1223-1. CONTROLS
Lightly tap the lever up or down.
The triple turn signal duration
can be adjusted.
Via Toyota Supra Command:
1"My Vehicle"
2 "Vehicle settings"
3 "Exterior lighting"
4 "One-touch turn signal"
5 Select the desired setting.
Press the lever to the resistance
point and hold it there for as
long as you want the turn signal
to flash.
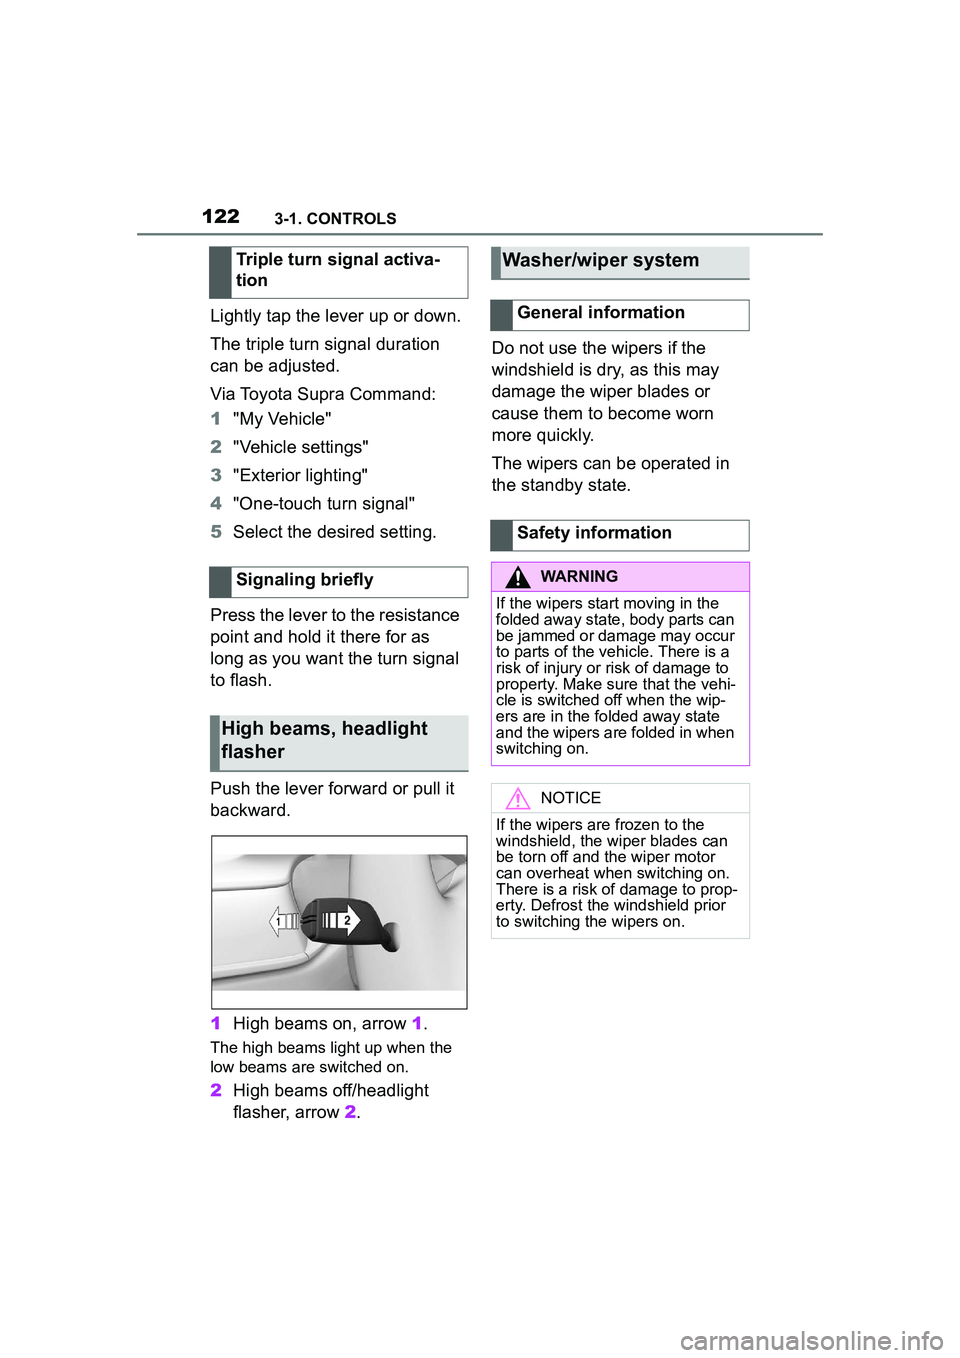
Push the lever forward or pull it
backward.
1 High beams on, arrow 1.
The high beams light up when the
low beams are switched on.
2High beams off/headlight
flasher, arrow 2. Do not use the wipers if the
windshield is dry, as this may
damage the wiper blades or
cause them to become worn
more quickly.
The wipers can be operated in
the standby state.
Triple turn signal activa-
tion
Signaling briefly
High beams, headlight
flasher
Washer/wiper system
General information
Safety information
WARNING
If the wipers start moving in the
folded away state, body parts can
be jammed or damage may occur
to parts of the vehicle. There is a
risk of injury or risk of damage to
property. Make sure that the vehi-
cle is switched off when the wip-
ers are in the folded away state
and the wipers are folded in when
switching on.
NOTICE
If the wipers are frozen to the
windshield, the wiper blades can
be torn off and the wiper motor
can overheat when switching on.
There is a risk of damage to prop-
erty. Defrost the windshield prior
to switching the wipers on.