Page 310 of 584

3104-5. Using the driving support systems
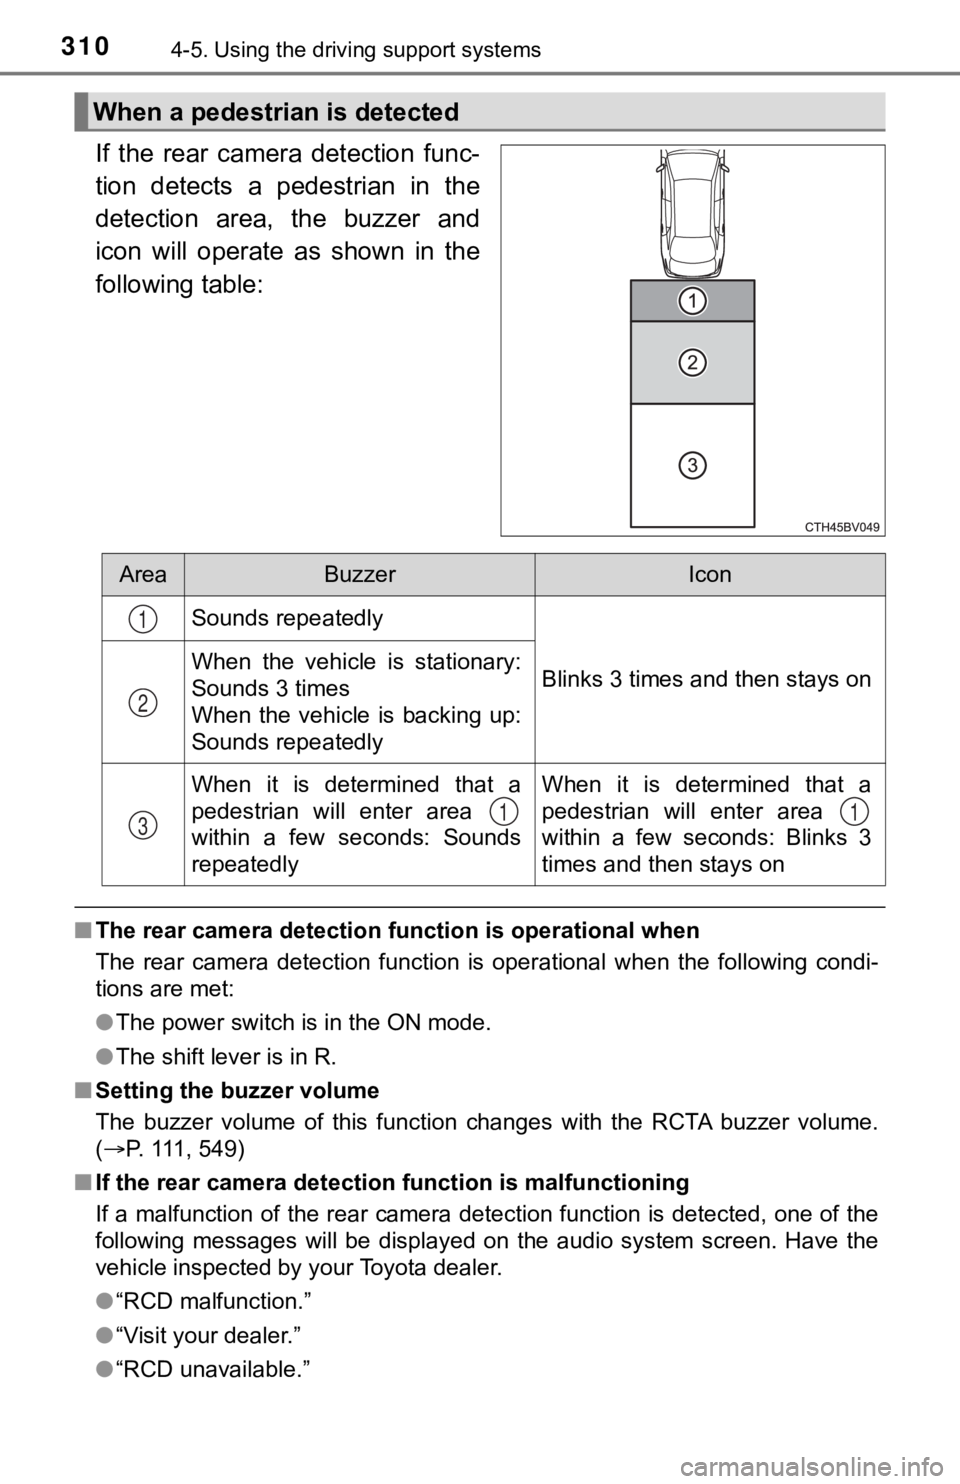
If the rear camera detection func-
tion detects a pedestrian in the
detection area, the buzzer and
icon will operate as shown in the
following table:
■The rear camera detection function is operational when
The rear camera detection function is operational when the foll owing condi-
tions are met:
● The power switch is in the ON mode.
● The shift lever is in R.
■ Setting the buzzer volume
The buzzer volume of this function changes with the RCTA buzzer volume.
( P. 111, 549)
■ If the rear camera detection function is malfunctioning
If a malfunction of the rear camera detection function is detec ted, one of the
following messages will be displayed on the audio system screen. Have the
vehicle inspected by your Toyota dealer.
● “RCD malfunction.”
● “Visit your dealer.”
● “RCD unavailable.”
When a pedestrian is detected
AreaBuzzerIcon
Sounds repeatedly
Blinks 3 times and then stays onWhen the vehicle is stationary:
Sounds 3 times
When the vehicle is backing up:
Sounds repeatedly
When it is determined that a
pedestrian will enter area
within a few seconds: Sounds
repeatedlyWhen it is determined that a
pedestrian will enter area
within a few seconds: Blinks 3
times and then stays on
1
2
311
Page 313 of 584
3134-5. Using the driving support systems
4
Driving
Front corner sensors
Front center sensors
Rear corner sensors
Rear center sensors
Press
/ of the meter con-
trol switches, select .
Press
/ of the meter con-
trol switches, select .
Press of the meter con-
trol switch.
Each time is pressed, t he function changes on/off.
When on, the indicator light comes on to inform the driver that the sys-
tem is operational.
Intuitive parking assist
: If equipped
The distance from your vehicle to nearby objects when parallel
parking or maneuvering into a garage is measured by the sen-
sors and communicated via the displays and a buzzer. Always
check the surrounding area wh en using this system.
Types of sensors
1
2
3
4
Turning the intuitive parking assist on/off
1
2
3
Page 361 of 584
3615-1. Using the air conditioning system and defogger
5
Interior features
Individual mode (indicator off):
The temperature for the driver’s and front passenger’s side can be
adjusted separately.
■
Fan speed setting
To adjust the fan speed, press to increase the fan speed
and to decrease the fan speed.
Press to turn the fan off.
■
Change the airflow mode
To change the airflow mode,
press .
The air outlets used are
switched each time the button is
pressed.
Air flows to the upper body.
Air flows to the upper body
and feet.
Air flows to the feet.
Air flows to the feet and the
windshield defogger oper-
ates.
■Other functions
● Switching between outside air and recirculated air modes
( P. 365)
● Defogging the windshield ( P. 3 6 5 )
● Defogging the rear window and outside rear view mirrors
( P. 365)
1
2
3
4
Page 372 of 584
3725-1. Using the air conditioning system and defogger
Turns the heated steering wheel
on/off
The indicator light comes on when
the heated steering wheel is oper-
ating.
The heated steering wheel can be used when the power switch is in ON
mode.
■
Front
Each time the switch is pressed, the operation condition change s as
follows.
Hi (3 segments lit) Mid (2 segments lit) Lo (1 segment lit) Off
The level indicator lights up during operation.
Heated steering wheel
Seat heaters
Without seat ventilatorsWith seat ventilators
Page 373 of 584
3735-1. Using the air conditioning system and defogger
5
Interior features
■Rear (if equipped)
Turns the heated rear seat on/off
The indicator light will illuminate
when the rear seat heater is oper-
ating.
The seat heaters can be used when the power switch is in ON mod e.
Each time the switch is pressed,
the operation condition changes
as follows.
Hi (3 segments lit) Mid (2 seg-
ments lit) Lo (1 segment lit)
Off
The level indicator lights up during
operation.
■ The seat ventilators can be used when
The power switch is in ON mode.
■ Air conditioning system-linked control mode
When a seat ventilator is set to Hi, the fan speed of the seat ventilator may
increase according to the fan speed of the air conditioning system
Seat ventilators
Page 376 of 584

3765-2. Using the interior lights
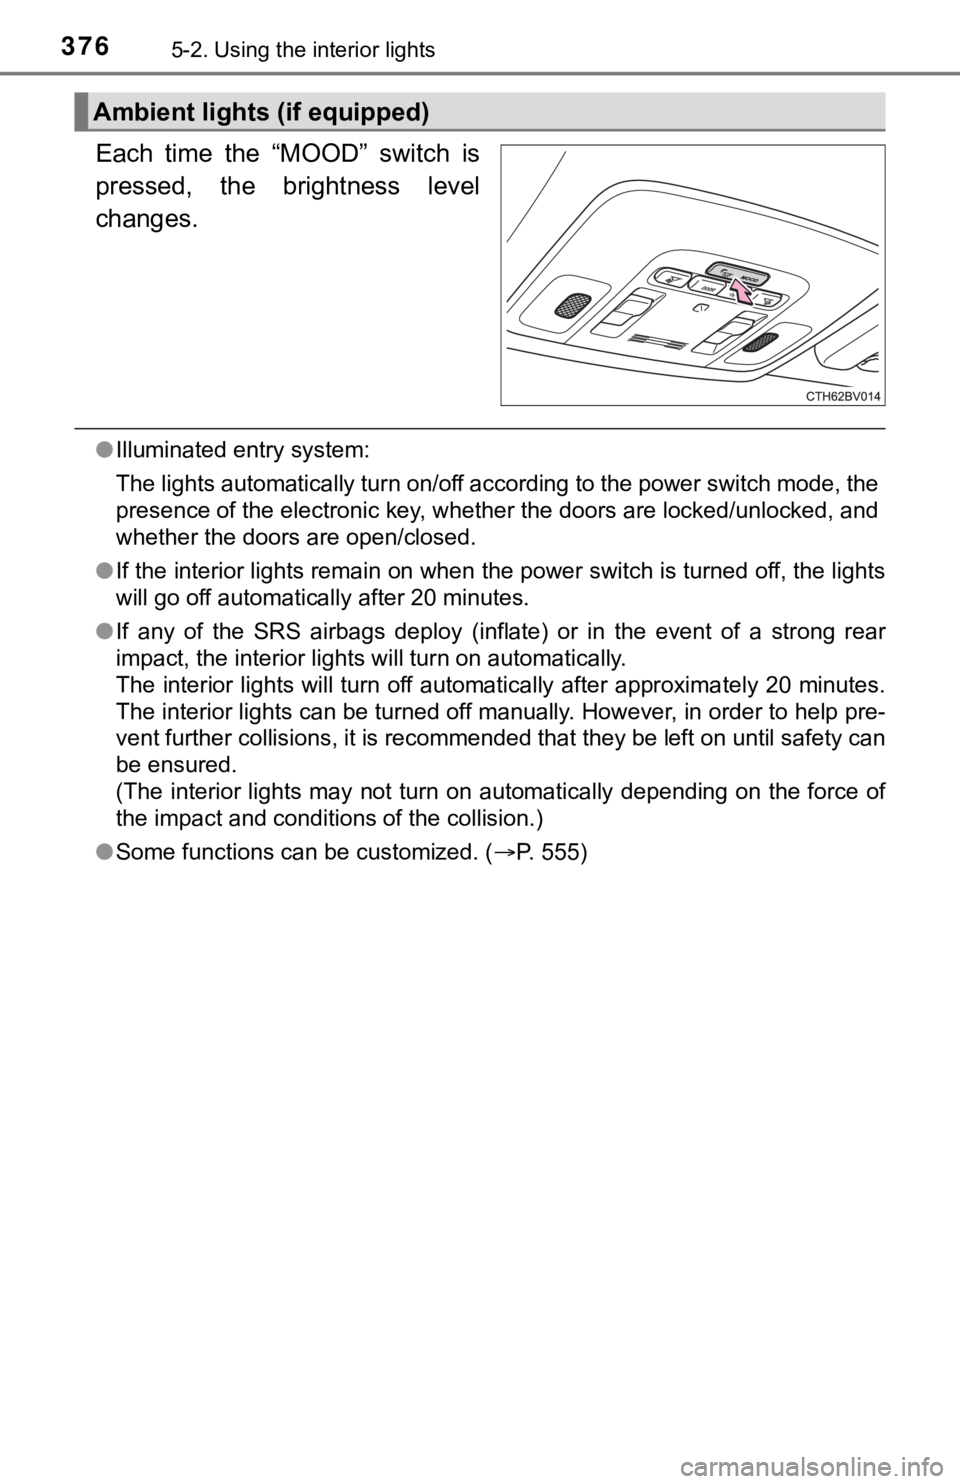
Each time the “MOOD” switch is
pressed, the brightness level
changes.
●Illuminated entry system:
The lights automatically turn on/off according to the power swi tch mode, the
presence of the electronic key, whether the doors are locked/un locked, and
whether the doors are open/closed.
● If the interior lights remain on when the power switch is turned off, the lights
will go off automatically after 20 minutes.
● If any of the SRS airbags deploy (inflate) or in the event of a strong rear
impact, the interior lights will turn on automatically.
The interior lights will turn off automatically after approxima tely 20 minutes.
The interior lights can be turned off manually. However, in ord er to help pre-
vent further collisions, it is recommended that they be left on until safety can
be ensured.
(The interior lights may not turn on automatically depending on the force of
the impact and conditions of the collision.)
● Some functions can be customized. ( P. 555)
Ambient lights (if equipped)
Page 391 of 584

3915-4. Other interior features
5
Interior features
■The wireless charger can be operated when
The power switch is in ACCESSORY or ON mode.
■ Portable devices that can be charged
●Portable devices compatible with the Qi wireless charging stand ard can be
charged by the wireless charger. However, compatibility with all devices
which meet the Qi wireless charging standard is not guaranteed.
● The wireless charger is designed to supply low power electricit y (5 W or
less) to a cellular phone, smartphone, or other portable device .
■ If a cover or accessory is attach ed to the portable device
Do not charge a portable device if a cover or accessory which i s not Qi com-
patible is attached. Depending on the type of cover and/or acce ssory
attached, it may not be possible to charge the portable device. If the portable
device is placed on the charging area and does not charge, remo ve the cover
and/or accessories.
■ If interference is heard in AM ra dio broadcasts while charging
Turn off the wireless charger and check if the noise is reduced. If noise is
reduced, press and hold the power supply switch of the wireless charger for 2
seconds. The frequency of the wireless charger is changed and n oise may be
reduced. When the frequency is changed, the operation indicator light will
blink (orange) 2 times.
■ Charging precautions
●If the electronic key cannot be detected in the cabin, charging cannot be
performed. When a door is opened and closed, charging may be te mporarily
suspended.
● While charging, the wireless charger and the portable device wi ll become
warm. This is not a malfunction.
If a portable device becomes warm while charging and charging stops due
to the protection function of the portable device, wait until the portable
device cools down and charge it again.
■ Sound generated during operation
When the power supply switch is turned on or while a portable d evice is being
identified, operation sounds may be heard. This is not a malfunction.
■ Cleaning the wireless charger
P. 412
Page 441 of 584

4416-3. Do-it-yourself maintenance
6
Maintenance and care
◆Registering ID codes
Every tire pressure warning valve and transmitter has a unique ID
code. When replacing a tire pressure warning valve and transmit ter,
it is necessary to reg ister the ID codes.
The ID codes can be registered on of the multi-information dis -
play.
■How to register the ID codes
Select on the multi-information display using the meter con-
trol switches on the steering wheel. ( P. 1 1 1 )
Select and then press and hold .
Select “TPWS” and then press .
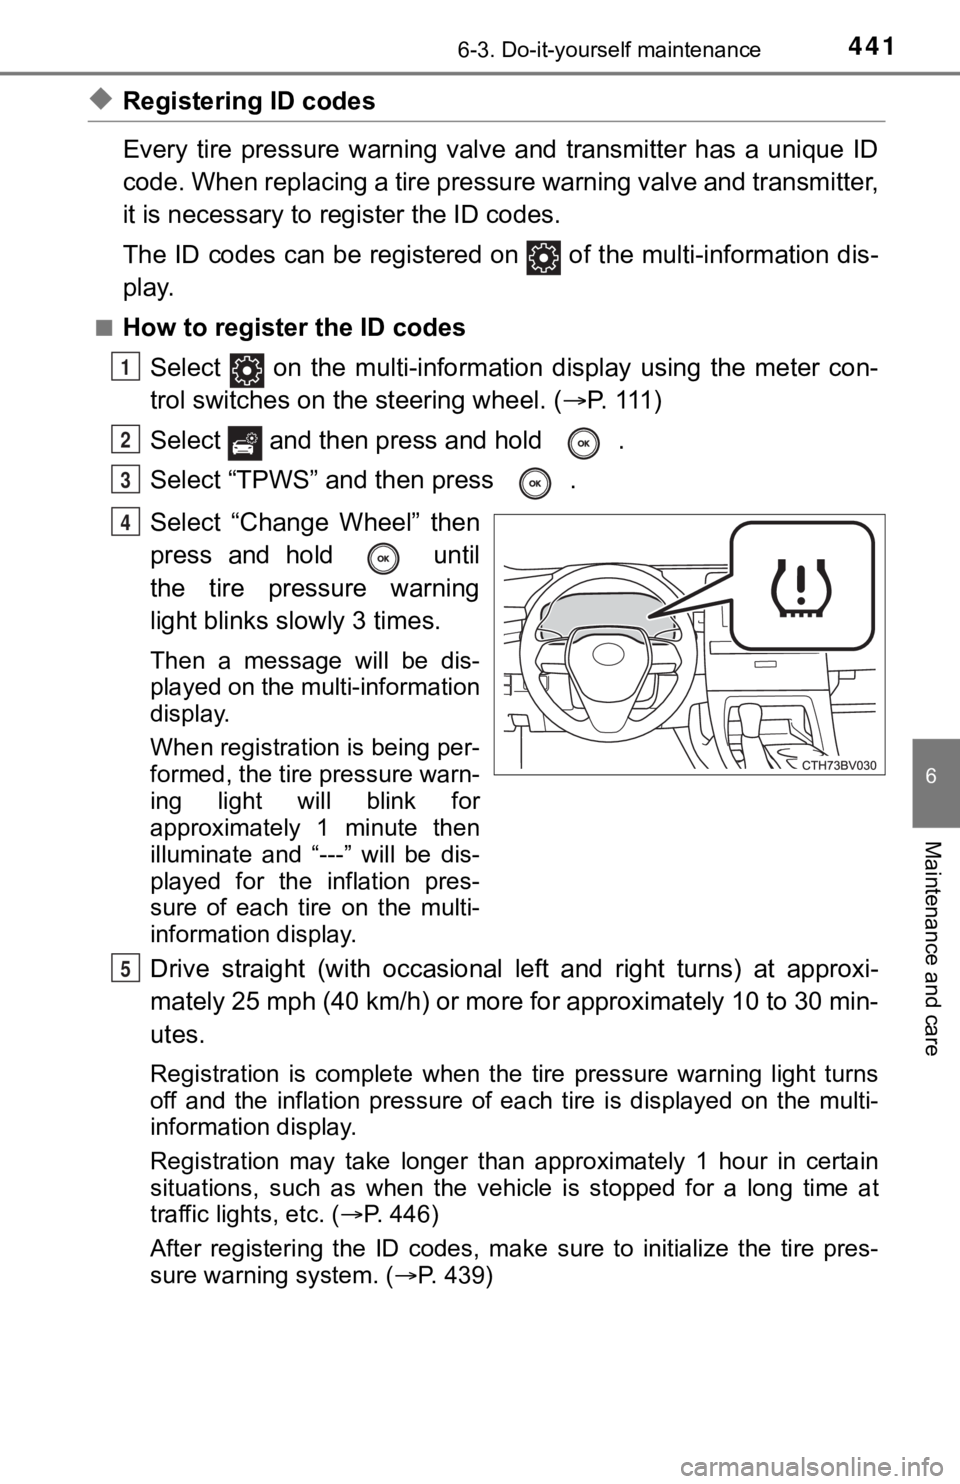
Select “Change Wheel” then
press and hold until
the tire pressure warning
light blinks slowly 3 times.
Then a message will be dis-
played on the multi-information
display.
When registration is being per-
formed, the tire pressure warn-
ing light will blink for
approximately 1 minute then
illuminate and “---” will be dis-
played for the inflation pres-
sure of each tire on the multi-
information display.
Drive straight (with occasional left and right turns) at approxi-
mately 25 mph (40 km/h) or more for approximately 10 to 30 min-
utes.
Registration is complete when the tire pressure warning light t urns
off and the inflation pressure of each tire is displayed on the multi-
information display.
Registration may take longer than approximately 1 hour in certain
situations, such as when the veh icle is stopped for a long time at
traffic lights, etc. ( P. 446)
After registering the ID codes, make sure to initialize the tir e pres-
sure warning system. ( P. 439)
1
2
3
4
5