2022 PEUGEOT LANDTREK wheel
[x] Cancel search: wheelPage 82 of 164
80
Driving
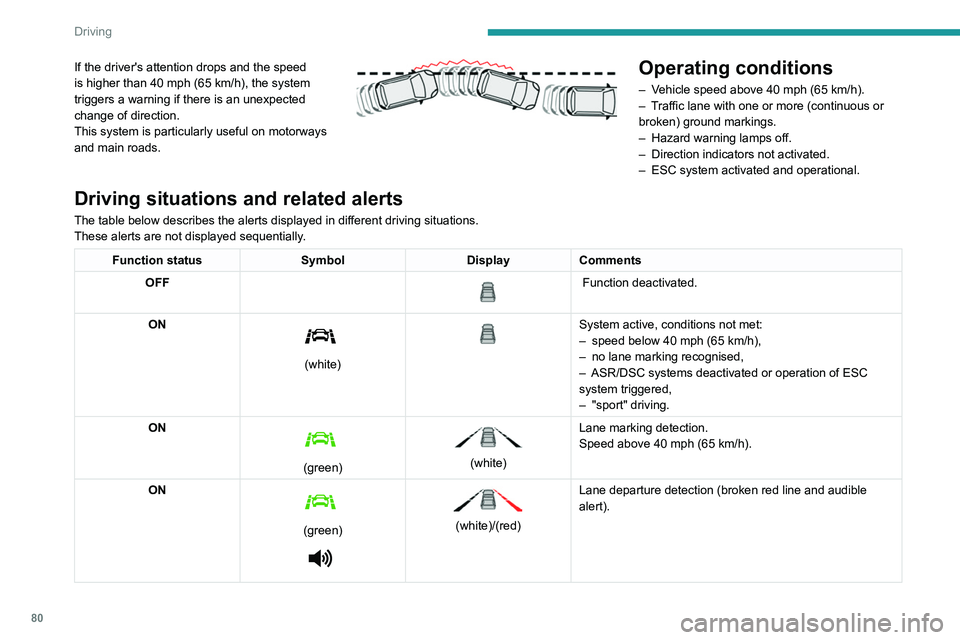
If the driver's attention drops and the speed
is higher than 40 mph (65 km/h), the system
triggers a warning if there is an unexpected
change of direction.
This system is particularly useful on motorways
and main roads.
Operating conditions
– Vehicle speed above 40 mph (65 km/h).
– T raffic lane with one or more (continuous or
broken) ground markings.
–
Hazard warning lamps off.
–
Direction indicators not activated.
–
ESC system activated and operational.
Driving situations and related alerts
The table below describes the alerts displayed in different driving situations.
These alerts are not displayed sequentially.
Function status SymbolDisplayComments
OFF
Function deactivated.
ON
(white)
System active, conditions not met:
– speed below 40 mph (65 km/h),
–
no lane marking recognised,
–
ASR/DSC systems deactivated or operation of ESC
system triggered,
–
"sport" driving.
ON
(green)
(white) Lane marking detection.
Speed above 40 mph (65
km/h).
ON
(green)
(white)/(red)
Lane departure detection (broken red line and audible
alert).
Operating limits
The system goes into standby automatically in
the following cases:
–
ESC deactivated or operation triggered.
– Speed below 40 mph (65 km/h).
– Driving over lane markings.
– Activation of the direction indicators.
– Crossing the inside line on a bend.
– Driving on a tight bend.
– Activation of the hazard warning lamps.
The following situations may interfere
with the operation of the system or
prevent it from working:
– Insufficient contrast between the road
surface and the verge or hard shoulder
(e.g. shade).
– Lane markings worn, hidden (snow, mud)
or multiple (roadworks, etc.),
– Close proximity to the vehicle in front (lane
markings may not be detected).
– Roads that are narrow, winding.
Risk of undesirable operation
The system should be deactivated in the
following situations:
– When changing a wheel or working near a
wheel.
– Towing or with a bicycle carrier on a towing
device, especially with trailer not plugged in or
not approved.
Page 83 of 164
81
Driving
6Operating limits
The system goes into standby automatically in
the following cases:
–
ESC deactivated or operation triggered.
–
Speed below 40 mph (65
km/h).
–
Driving over lane markings.
–
Activation
of the direction indicators.
–
Crossing the inside line on a bend.
–
Driving on a tight bend.
–
Activation
of the hazard warning lamps.
The following situations may interfere with the operation of the system or
prevent it from working:
–
Insufficient contrast between the road
surface and the verge or hard shoulder
(e.g.
shade).
–
Lane markings worn, hidden (snow
, mud)
or multiple (roadworks, etc.),
–
Close proximity to the vehicle in front (lane
markings may not be detected).
–
Roads that are narrow
, winding.
Risk of undesirable operation
The system should be deactivated in the
following situations:
–
When changing a wheel or working near a
wheel.
–
T
owing or with a bicycle carrier on a towing
device, especially with trailer not plugged in or
not approved. –
Road in poor condition, unstable or with very
poor grip (risk of aquaplaning, snow
, ice).
–
Adverse weather conditions.
–
Driving on racing circuits.
–
Driving on a rolling road.
Deactivation/Activation
By default, the system is automatically activated
at every engine start.
►
At any time, press and hold this button (for
around 5 seconds) to deactivate the system
or
press briefly to reactivate it.
The warning lamp lights up on the
instrument panel when the system is
activated.
Malfunction
In the event of a malfunction, this warning
lamp comes on on the instrument panel,
accompanied by the display of a message and
an audible signal.
Contact a PEUGEOT dealer or a qualified
workshop.
Parking sensors
For more information, refer to the
General recommendations on the use
of driving and manoeuvring aids .
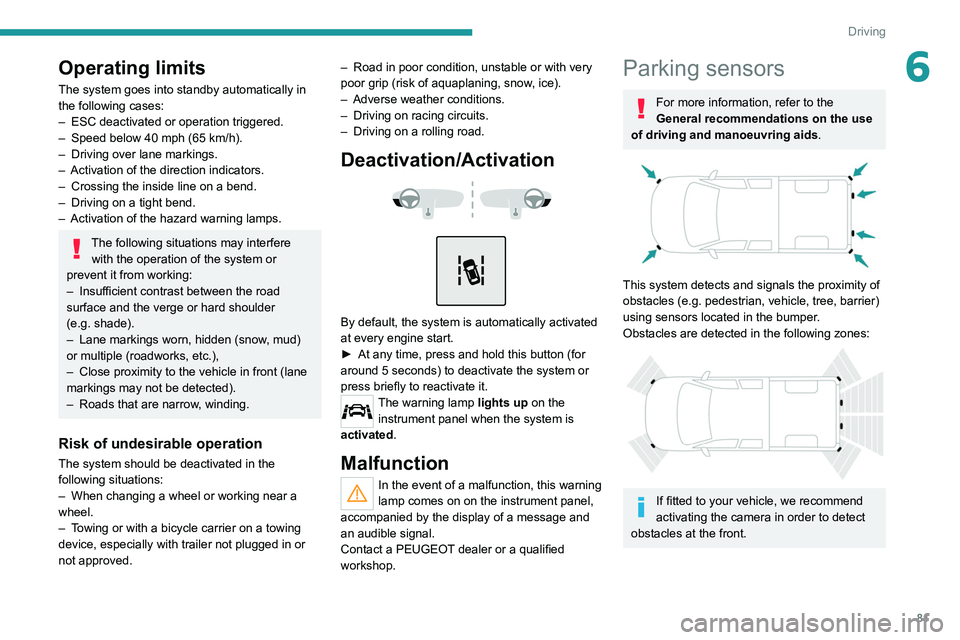
This system detects and signals the proximity of
obstacles (e.g.
pedestrian, vehicle, tree, barrier)
using sensors located in the bumper.
Obstacles are detected in the following zones:
If fitted to your vehicle, we recommend
activating the camera in order to detect
obstacles at the front.
Page 85 of 164
83
Driving
6Reversing camera
For more information, refer to the
General recommendations on the use
of driving and manoeuvring aids .
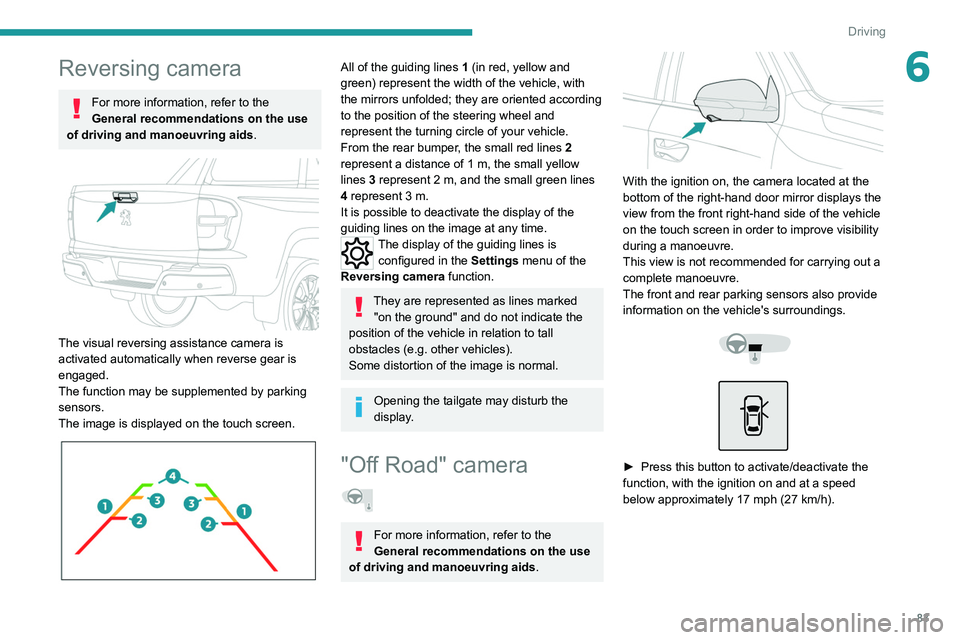
The visual reversing assistance camera is
activated automatically when reverse gear is
engaged.
The function may be supplemented by parking
sensors.
The image is displayed on the touch screen.
All of the guiding lines 1 (in red, yellow and
green) represent the width of the vehicle, with
the mirrors unfolded; they are oriented according
to the position of the steering wheel and
represent the turning circle of your vehicle.
From the rear bumper, the small red lines 2
represent a distance of 1 m, the small yellow
lines 3
represent 2 m, and the small green lines
4
represent 3 m.
It is possible to deactivate the display of the
guiding
lines on the image at any time.
The display of the guiding lines is
configured in the Settings
menu of the
Reversing camera function.
They are represented as lines marked
"on the ground" and do not indicate the
position of the vehicle in relation to tall
obstacles (e.g. other vehicles).
Some distortion of the image is normal.
Opening the tailgate may disturb the
display.
"Off Road" camera
For more information, refer to the
General recommendations on the use
of driving and manoeuvring aids .
With the ignition on, the camera located at the
bottom of the right-hand door mirror displays the
view from the front right-hand side of the vehicle
on the touch screen in order to improve visibility
during a manoeuvre.
This view is not recommended for carrying out a
complete manoeuvre.
The front and rear parking sensors also provide
information on the vehicle's surroundings.
► Press this button to activate/deactivate the
function, with the ignition on and at a speed
below approximately 17 mph (27
km/h).
Page 86 of 164
84
Driving
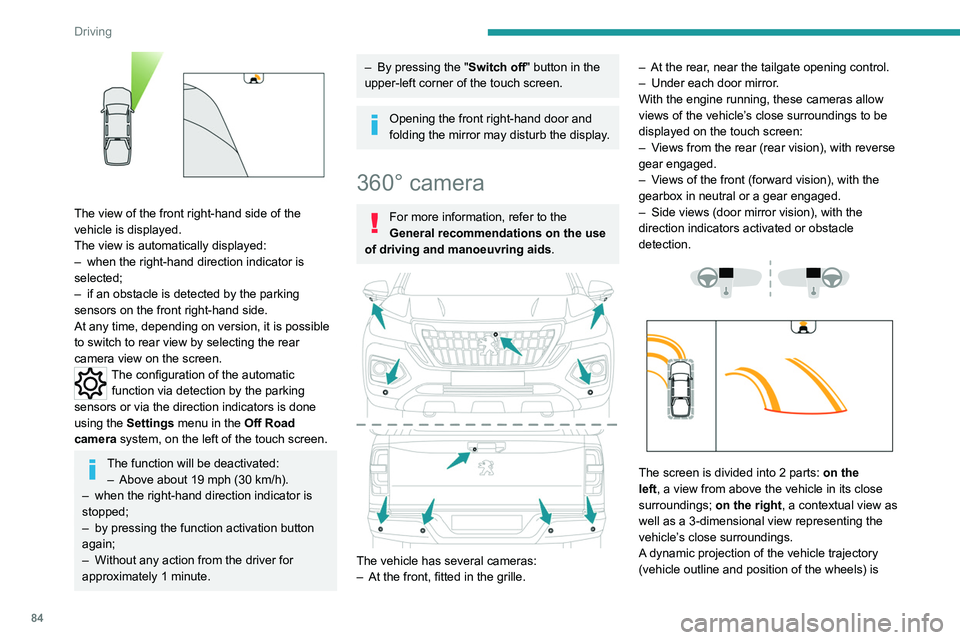
The view of the front right-hand side of the
vehicle is displayed.
The view is automatically displayed:
–
when the right-hand direction indicator is
selected;
–
if an obstacle is detected by the parking
sensors on the front right-hand side.
At any time, depending on version, it is possible
to switch to rear view by selecting the rear
camera view on the screen.
The configuration of the automatic
function via detection by the parking
sensors or via the direction indicators is done
using the
Settings menu in the Off Road
camera system, on the left of the touch screen.
The function will be deactivated:
– Above about 19 mph (30 km/h).
–
when the right-hand direction indicator is
stopped;
–
by pressing the function activation button
again;
–
Without any action from the driver for
approximately 1 minute.
– By pressing the " Switch off" button in the
upper-left corner of the touch screen.
Opening the front right-hand door and
folding the mirror may disturb the display.
360° camera
For more information, refer to the
General recommendations on the use
of driving and manoeuvring aids .
The vehicle has several cameras:
–
At the front, fitted in the grille. –
At the rear
, near the tailgate opening control.
–
Under each door mirror
.
With the engine running, these cameras allow
views of the vehicle’s close surroundings to be
displayed on the touch screen:
–
V
iews from the rear (rear vision), with reverse
gear engaged.
–
V
iews of the front (forward vision), with the
gearbox in neutral or a gear engaged.
–
Side views (door mirror vision), with the
direction indicators activated or obstacle
detection.
The screen is divided into 2 parts: on the
left, a view from above the vehicle in its close
surroundings; on the right, a contextual view as
well as a 3-dimensional view representing the
vehicle’s close surroundings.
A dynamic projection of the vehicle trajectory
(vehicle outline and position of the wheels) is
Page 88 of 164
86
Driving
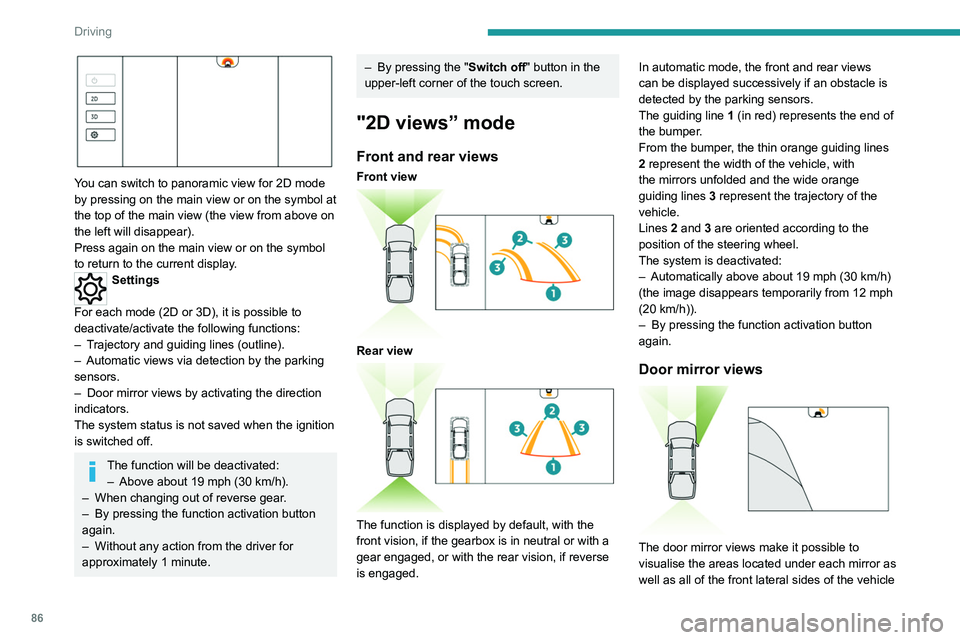
You can switch to panoramic view for 2D mode
by pressing on the main view or on the symbol at
the top of the main view (the view from above on
the left will disappear).
Press again on the main view or on the symbol
to return to the current display.
Settings
For each mode (2D or 3D), it is possible to
deactivate/activate the following functions:
–
T
rajectory and guiding lines (outline).
–
Automatic views via detection by the parking
sensors.
–
Door mirror views by activating the direction
indicators.
The system status is not saved when the ignition
is switched off.
The function will be deactivated: – Above about 19 mph (30 km/h).
–
When changing out of reverse gear
.
–
By pressing the function activation button
again.
–
Without any action from the driver for
approximately 1 minute.
– By pressing the " Switch off" button in the
upper-left corner of the touch screen.
"2D views” mode
Front and rear views
Front view
Rear view
The function is displayed by default, with the
front vision, if the gearbox is in neutral or with a
gear engaged, or with the rear vision, if reverse
is engaged. In automatic mode, the front and rear views
can be displayed successively if an obstacle is
detected by the parking sensors.
The guiding line
1 (in red) represents the end of
the bumper.
From the bumper, the thin orange guiding lines
2 represent the width of the vehicle, with
the mirrors unfolded and the wide orange
guiding lines
3 represent the trajectory of the
vehicle.
Lines 2 and 3 are oriented according to the
position of the steering wheel.
The system is deactivated:
–
Automatically above about 19 mph (30
km/h)
(the image disappears temporarily from 12 mph
(20 km/h)).
–
By pressing the function activation button
again.
Door mirror views
The door mirror views make it possible to
visualise the areas located under each mirror as
well as all of the front lateral sides of the vehicle
in order to manoeuvre the vehicle with the
surrounding obstacles.
This view is not recommended for carrying out a
complete manoeuvre.
This view is automatically available via detection
by the parking sensors or by selecting the
direction indicators (the view of the side
concerned is displayed).
“Split” front view
The "Split" front view allows the two views of the
door mirrors to be displayed simultaneously. For
more information on the Door mirror view, refer
to the corresponding section.
The views appear in the touch screen on the left-
hand side and right-hand side respectively.
This view is particularly suitable for driving
situations in narrow or rough passages.
This view is available by pressing the button for
the view from above the vehicle (located on the
left-hand side).
Page 92 of 164
90
Practical information
Do not continue after the nozzle’s third cut-
out. Doing so may cause malfunctions.
►
Put the filler cap back in place and turn it to
the right.
►
Close the fuel filler flap.
If you have put in the wrong fuel for the
vehicle, you must have the fuel tank
drained and filled with the correct fuel before
starting the engine.
Depending on version, the vehicle is fitted with
a catalytic converter, which helps to reduce the
level of harmful emissions in the exhaust gases.
For petrol engines, you must use unleaded
fuel.
The filler neck is narrower, admitting unleaded
petrol nozzles only.
Towing device
Load distribution
► Distribute the load in the trailer so that the
heaviest items are as close as possible to the
axle, and the nose weight approaches the
maximum permitted without exceeding it.
Air density decreases with altitude, thus reducing
engine performance.
The maximum towable load
must be reduced by 10% per 1,000
metres of
altitude.
Use genuine towing devices and wiring
harnesses approved by PEUGEOT. We
recommend having them fitted by a
PEUGEOT dealer or a qualified workshop.
If not fitted by a PEUGEOT dealer, they must
still be fitted in accordance with the vehicle
manufacturer's instructions.
Certain driving or manoeuvring aid functions
are automatically deactivated while an
approved towing system is in use.
For more information about driving with a
towing device fitted to a trailer and associated
with the Trailer stability assist, refer to the
corresponding section.
Comply with the maximum authorised
towable weight, as indicated on your
vehicle's registration certificate, on the
manufacturer's label and in the Technical
data section of this guide.
If using accessories attached to the
towing device (e.g. bicycle carriers, tow
boxes):
–
Comply with the maximum authorised nose
weight.
–
Do not transport more than 4 conventional
bicycles or 2 electric bicycles.
When loading bicycles onto a bicycle carrier
on a towball, be sure to place the heaviest
bicycles as close as possible to the vehicle.
Observe the legislation in force in the
country where you are driving.
Snow chains
In wintry conditions, snow chains improve
traction as well as the behaviour of the vehicle
when braking.
Snow chains must be fitted only to
driving wheels.
Observe the legislation in force in your
country relating to the use of snow
chains and maximum authorised speeds.
Only use chains designed for the vehicle's wheel
type:
Tyre size Link size
245/70 R16 13 to 16
mm
265/65 R17 13 to 16
mm
265/60 R18 13 to 16
mm
It is also possible to use snow socks.
For more information on snow chains, contact a
PEUGEOT dealer or a qualified workshop.
Installation tips
► To fit the snow chains during a journey, stop
the vehicle on a flat surface at the side of the
road.
►
Apply the parking brake and position any
wheel chocks under the wheels to prevent
movement of the vehicle.
Page 93 of 164
91
Practical information
7► Fit the snow chains following the instructions
provided by the manufacturer .
►
Move off gently and drive for a few moments,
without exceeding 19
mph (30 km/h) for metal
snow chains or 31 mph (50 km/h) for plastic
snow chains.
►
Stop the vehicle and check that the snow
chains are correctly tightened.
It is strongly recommended that you
practise fitting the snow chains on a level
and dry surface before setting off.
Avoid driving with snow chains on roads that have been cleared of snow to avoid
damaging the vehicle's tyres and the road
surface. If the vehicle is fitted with alloy
wheels, check that no part of the chain or its
fixings is in contact with the wheel rim.
Use snow chains that are appropriate for
the size of your tyres and ensure they
are correctly fitted. Chains that are the wrong
size or incorrectly fitted can damage the
braking system, suspension, bodywork and
wheels.
Never exceed the maximum speed limit
stated in the snow chains user guide.
Roof bars
As a safety measure and to avoid damaging the roof, it is essential to use
transverse roof bars approved for your
vehicle.
Observe the instructions on fitting and use
contained in the guide supplied with the roof
bars.
Maximum load distributed over the roof
bars, for a loading height not exceeding
40 cm: 100
kg.
As this value may change, please verify the
maximum load quoted in the guide supplied
with the roof bars.
If the height exceeds 40 cm, adapt the speed
of the vehicle to the profile of the road to
avoid damaging the roof bars and the fixings
on the vehicle.
Be sure to refer to national legislation in order
to comply with the regulations for transporting
objects that are longer than the vehicle.
Recommendations
Distribute the load uniformly, taking care
to avoid overloading one of the sides.
Arrange the heaviest part of the load as close
as possible to the roof.
Secure the load firmly.
Drive gently: the vehicle will be more
susceptible to the effects of side winds and its
stability may be affected.
Regularly check the security and tight
fastening of the roof bars, at least before each
trip.
Remove the roof bars once they are no longer
needed.
Bonnet
When the engine is hot, handle the
exterior safety catch and the bonnet stay
with care (risk of burns), using the protected
area.
When the bonnet is open, take care not to
damage the safety catch.
Do not open the bonnet under very windy
conditions.
Cooling of the engine when stopped
The engine cooling fan may start after
the engine has been switched off.
Take care with objects or clothing that
could be caught in the blades of the fan!
Opening
► Open the driver's door .
Page 98 of 164
96
Practical information
The start of clogging of the particle filter is indicated by the temporary lighting of this
warning lamp, accompanied by an alert
message.
As soon as the traffic conditions permit,
regenerate the filter by driving at a speed of at
least 37
mph (60 km/h) until the warning lamp
goes off.
If the warning lamp stays on, this
indicates a low Diesel additive level.
For more information on Checking levels,
refer to the corresponding section.
Following prolonged operation of the
vehicle at very low speed or at idle, you
may, in exceptional circumstances, notice
water vapour coming from the exhaust while
accelerating. These emissions have no
impact on the vehicle’s behaviour and the
environment.
New vehicle
During the first few particle filter
regeneration operations, you may notice a
"burning" smell. This is perfectly normal.
Manual gearbox
The gearbox does not require any maintenance (no oil change).
Automatic gearbox
For any information on gearbox
maintenance, contact a PEUGEOT dealer
or a qualified workshop.
Brake pads
Brake wear depends on the style of
driving, particularly in the case of vehicles
used in town, over short distances. It may be
necessary to have the condition of the brakes
checked, even between vehicle services.
Unless there is a leak in the circuit, a drop in the
brake fluid level indicates that the brake pads
are worn.
After washing the vehicle, moisture, or in wintry conditions, ice can form on the
brake discs and pads: braking efficiency may
be reduced. Gently dab the brakes to dry and
defrost them.
Brake disc wear
For information on checking brake disc
wear, contact a PEUGEOT dealer or a
qualified workshop.
Manual parking brake
If you notice excessive brake lever travel
or decreased effectiveness, the parking
brake must be adjusted, even between two
services.
This system must be checked by a PEUGEOT
dealer or a qualified workshop.
Steering wheel
Play or a loss of precision in the steering
means that this system needs to be
checked.
This system must be checked by a PEUGEOT
dealer or a qualified workshop.
Wheels and tyres
The inflation pressure of all tyres, including the spare wheel, must be
checked on "cold” tyres at least once a month.
The pressures indicated on the tyre pressure
label are valid for "cold" tyres. If you have driven
for more than 10 minutes or more than 6 miles
(10 kilometres) at over 31 mph (50
km/h), add
0.3 bar (30 kPa) to the values indicated on the
label.
The pressure difference between the left-hand
side and right-hand side tyres must not exceed
0.05 bar (5 kPa).
Under-inflation increases energy
consumption. Non-compliant tyre
pressures cause tyres to wear prematurely
and have an adverse effect on the vehicle's
road holding - risk of accident!
Driving with worn or damaged tyres reduces the
braking and road holding performance of the
vehicle. Regularly check the condition of the