2022 PEUGEOT 308 boot
[x] Cancel search: bootPage 102 of 260
100
Driving
► Remove the key from the ignition switch.
► T o lock the steering column, turn the steering
wheel until it locks.
To facilitate unlocking of the steering column, it is recommended that the
wheels be returned to the straight ahead
position before switching off the engine.
Never switch off the ignition before the
complete immobilisation of the vehicle.
With the engine off, the braking and steering
assistance systems are also cut off - risk of
loss of control of the vehicle!
Check that the parking brake is correctly
applied, particularly on sloping ground.
When leaving the vehicle, keep the key in
your possession and lock the vehicle.
Energy economy mode
After the engine has stopped (position 1. Stop),
for a maximum combined duration of 40 minutes,
you can still use functions such as the audio and
telematics system, courtesy lamps or dipped
beam headlamps.
For more information on Energy
economy mode, refer to the
corresponding section.
Key left in
When the driver's door is opened, a
message is displayed, accompanied by an
audible signal, if the key has been left in the
ignition switch in position 1.
If the key has been left in the ignition switch
in position 2, the ignition will be switched off
automatically after one hour.
To switch the ignition back on, turn the key to
position 1, then back to position 2.
Starting/Switching off the
engine with Keyless Entry
and Start
The electronic key must be present in the
passenger compartment.
The electronic key is also detected in the
boot.
If the electronic key is not detected, a
message is displayed.
Move the electronic key so that the engine
can be started or switched off.
If there is still a problem, refer to the "Key
not detected - Back-up starting or Back-up
switch-off" section.
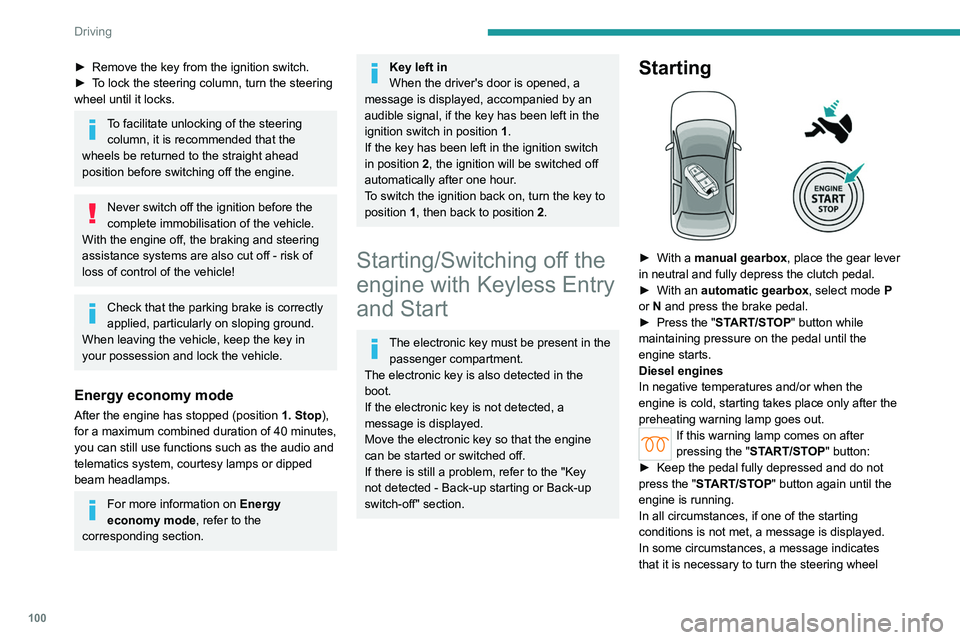
Starting
► With a manual gearbox, place the gear lever
in neutral and fully depress the clutch pedal.
►
With an
automatic gearbox, select mode P
or
N and press the brake pedal.
►
Press the "
START/STOP" button while
maintaining pressure on the pedal until the
engine starts.
Diesel engines
In negative temperatures and/or when the
engine is cold, starting takes place only after the
preheating warning lamp goes out.
If this warning lamp comes on after
pressing the " START/STOP" button:
►
Keep the pedal fully depressed and do not
press the "
START/STOP" button again until the
engine is running.
In all circumstances, if one of the starting
conditions is not met, a message is displayed.
In some circumstances, a message indicates
that it is necessary to turn the steering wheel
Page 128 of 260
126
Driving
Deselecting the system
► Press successively on 1-ASSIST until OFF
mode is displayed on the instrument panel.
►
After a few seconds, cruise control mode
is deselected.
The Driving aids mini-view
disappears.
Messages and alerts
The actual order of display of the messages or alerts may be different.
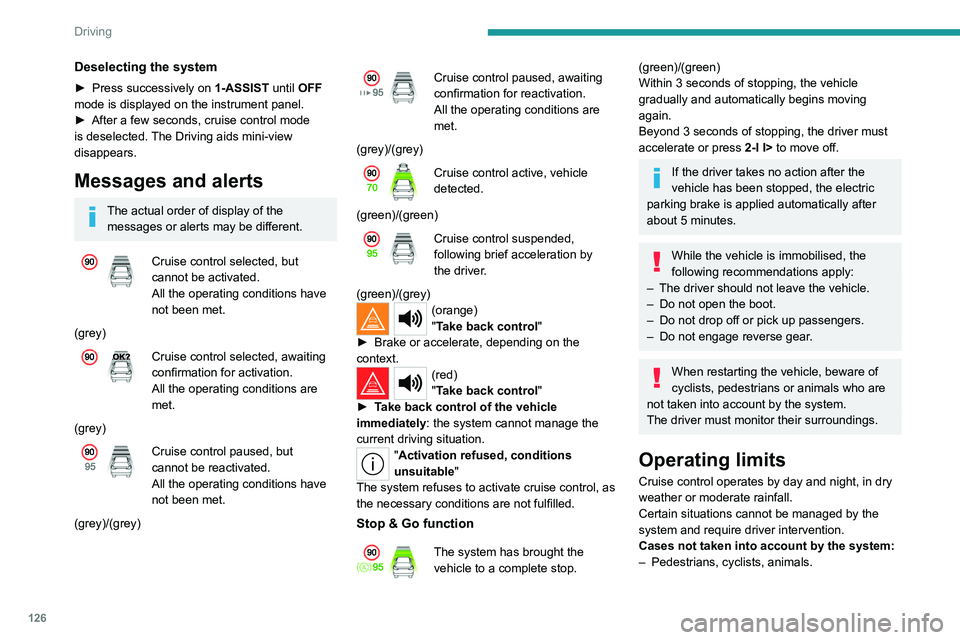
Cruise control selected, but
cannot be activated.
All the operating conditions have
not been met.
(grey)
Cruise control selected, awaiting
confirmation for activation.
All the operating conditions are
met.
(grey)
Cruise control paused, but
cannot be reactivated.
All the operating conditions have
not been met.
(grey)/(grey)
Cruise control paused, awaiting
confirmation for reactivation.
All the operating conditions are
met.
(grey)/(grey)
Cruise control active, vehicle
detected.
(green)/(green)
Cruise control suspended,
following brief acceleration by
the driver.
(green)/(grey)
(orange)
"Take back control"
►
Brake or accelerate, depending on the
context.
(red)
"Take back control"
►
T
ake back control of the vehicle
immediately: the system cannot manage the
current driving situation.
"Activation refused, conditions
unsuitable "
The system refuses to activate cruise control, as
the necessary conditions are not fulfilled.
Stop & Go function
The system has brought the
vehicle to a complete stop.
(green)/(green)
Within 3 seconds of stopping, the vehicle
gradually and automatically begins moving
again.
Beyond 3 seconds of stopping, the driver must
accelerate or press 2-I I> to move off.
If the driver takes no action after the
vehicle has been stopped, the electric
parking brake is applied automatically after
about 5 minutes.
While the vehicle is immobilised, the
following recommendations apply:
–
The driver should not leave the vehicle.
–
Do not open the boot.
–
Do not drop off or pick up passengers.
–
Do not engage reverse gear
.
When restarting the vehicle, beware of
cyclists, pedestrians or animals who are
not taken into account by the system.
The driver must monitor their surroundings.
Operating limits
Cruise control operates by day and night, in dry
weather or moderate rainfall.
Certain situations cannot be managed by the
system and require driver intervention.
Cases not taken into account by the system:
–
Pedestrians, cyclists, animals.
Page 146 of 260

144
Driving
Visual assistance
This supplements the audible signal, without
taking account of the vehicle's trajectory, by
displaying bars on the screen whose location
represents the distance between the obstacle
and the vehicle (white: more distant, orange:
close, red: very close).
When the obstacle is very close, the "Danger"
symbol is displayed on the screen.
Front parking sensors
Supplementing the rear parking sensors, the
front parking sensors are triggered when an
obstacle is detected in front and the speed of the
vehicle is below 6 mph (10 km/h).
Front parking sensor operation is suspended if
the vehicle stops for more than three seconds in
forward gear, if an obstacle is no longer detected
or the vehicle speed exceeds 6
mph (10 km/h).
The sound emitted by the speaker (front or rear) locates the obstacle relative to
the vehicle, whether in front of or behind it on
its path.
Deactivation/Activation
(Depending on country of sale)
Depending on version, using the centre console
button and/or in the ADAS application on the
touch screen.
► Press this button to activate or deactivate the
function.
The indicator lamp is lit when the function is
deactivated.
It is configured in the ADAS touch screen
application.
If the function is deactivated, this indicator
lamp lights up on the instrument panel.
The system status is saved when the ignition is
switched off.
The rear parking sensors are deactivated automatically if a trailer or bicycle carrier
is connected to a towing device installed in
accordance with the Manufacturer's
recommendations.
In this case, the outline of a trailer is displayed
at the rear of the image of the vehicle.
When starting the vehicle, the graphic
and audible aids are only available after
the touch screen has started up.
Operating limits
If the boot is heavily loaded, the vehicle may tilt,
affecting distance measurements.
Malfunction
In the event of a malfunction when
changing into reverse gear, these
warning lamps light up on the instrument panel,
accompanied by the display of a message and
an audible signal (short beep).
In the event of a malfunction, this
indicator lamp flashes for approximately
10 seconds when reverse gear is engaged.
Have it checked by a PEUGEOT dealer or a
qualified workshop.
Page 155 of 260
153
Practical information
7
The rechargeable hybrid powertrain uses a voltage of between 240 V and 400 V.
This system may be hot both when the
ignition is on and after switching it off.
Comply with the warning messages shown
on the labels, particularly inside the charging
flap.
In the event of a problem
All work on or modifications to the
vehicle’s electrical system (including the
traction battery, connectors, orange cables
and other components visible from the interior
or exterior) is strictly prohibited - risk of
severe burns or potentially fatal electric shock
(short-circuit/electrocution)!
Contact a PEUGEOT dealer or a qualified
workshop.
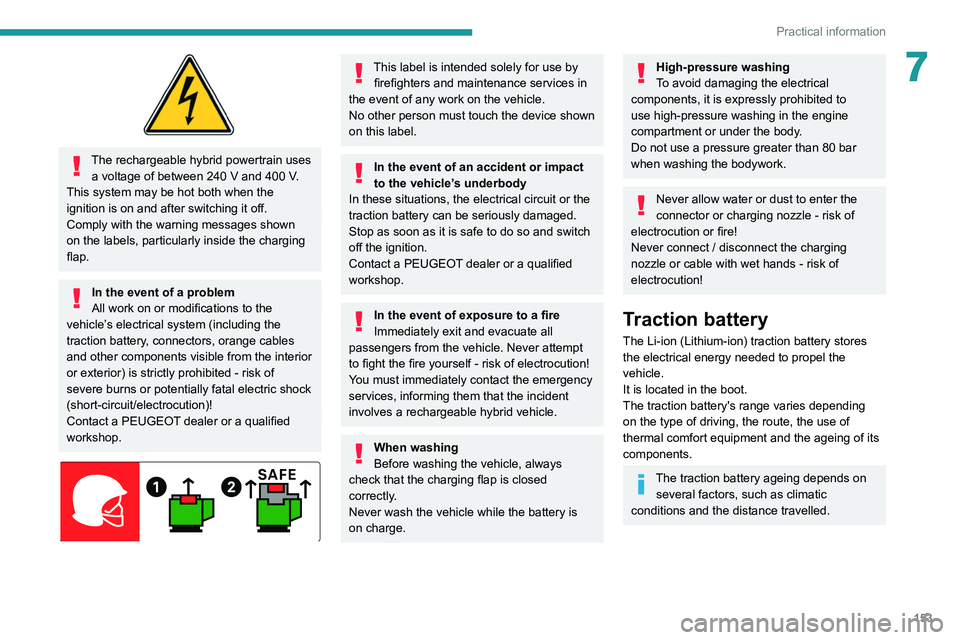
This label is intended solely for use by firefighters and maintenance services in
the event of any work on the vehicle.
No other person must touch the device shown
on this label.
In the event of an accident or impact
to the vehicle’s underbody
In these situations, the electrical
circuit or the
traction battery can be seriously damaged.
Stop as soon as it is safe to do so and switch
off the ignition.
Contact a PEUGEOT dealer or a qualified
workshop.
In the event of exposure to a fire
Immediately exit and evacuate all
passengers from the vehicle. Never attempt
to fight the fire yourself - risk of electrocution!
You must immediately contact the emergency
services, informing them that the incident
involves a rechargeable hybrid vehicle.
When washing
Before washing the vehicle, always
check that the charging flap is closed
correctly.
Never wash the vehicle while the battery is
on charge.
High-pressure washing
To avoid damaging the electrical
components, it is expressly prohibited to
use high-pressure washing in the engine
compartment or under the body.
Do not use a pressure greater than 80 bar
when washing the bodywork.
Never allow water or dust to enter the
connector or charging nozzle - risk of
electrocution or fire!
Never connect / disconnect the charging
nozzle or cable with wet hands - risk of
electrocution!
Traction battery
The Li-ion (Lithium-ion) traction battery stores
the electrical energy needed to propel the
vehicle.
It is located in the boot.
The traction battery's range varies depending
on the type of driving, the route, the use of
thermal comfort equipment and the ageing of its
components.
The traction battery ageing depends on several factors, such as climatic
conditions and the distance travelled.
Page 162 of 260
160
Practical information
the connector on the vehicle. A warning is
displayed on the instrument panel.
While charging is in progress, unlocking the
vehicle will cause the charging to stop.
If no action is taken on one of the openings
(door or boot) or on the charging nozzle, the
vehicle will lock again after 30 seconds and
charging will resume automatically.
Never work under the bonnet:
–
Some areas remain very hot, even an hour
after charging ends - risk of burns!
–
The fan may start at any time - risk of cuts
or strangulation!
After charging
Check that the charging flap is closed.
Do not leave the cable connected to the
domestic power socket - risk of short-circuit
or electrocution in the event of contact with or
immersion in water!
Charging procedure
Connection
► Before charging, check that the gear selector
is in mode P and the ignition is off, otherwise
charging is impossible.
►
Press on the rear of the charging flap to open
it and check that there are no foreign bodies on
the vehicle's charging connector
.
The light guides in the flap come on white.
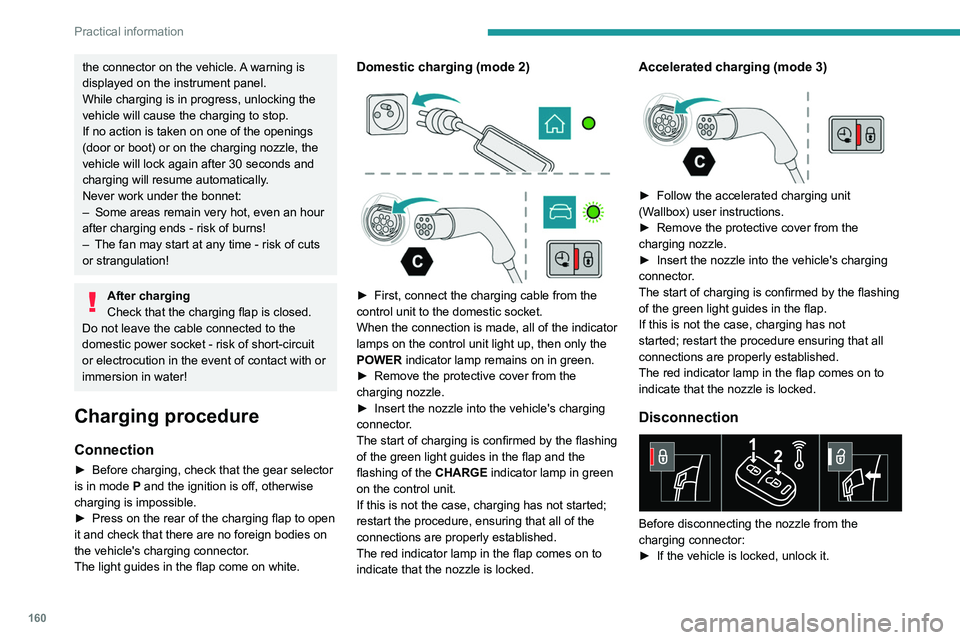
Domestic charging (mode 2)
► First, connect the charging cable from the
control unit to the domestic socket.
When the connection is made, all of the indicator
lamps on the control unit light up, then only the
POWER
indicator lamp remains on in green.
►
Remove the protective cover from the
charging nozzle.
►
Insert the nozzle into the vehicle's charging
connector
.
The start of charging is confirmed by the flashing
of the green light guides in the flap and the
flashing of the
CHARGE indicator lamp in green
on the control unit.
If this is not the case, charging has not started;
restart the procedure, ensuring that all of the
connections are properly established.
The red indicator lamp in the flap comes on to
indicate that the nozzle is locked.
Accelerated charging (mode 3)
► Follow the accelerated charging unit
(W allbox) user instructions.
►
Remove the protective cover from the
charging nozzle.
►
Insert the nozzle into the vehicle's charging
connector
.
The start of charging is confirmed by the flashing
of the green light guides in the flap.
If this is not the case, charging has not
started; restart the procedure ensuring that all
connections are properly established.
The red indicator lamp in the flap comes on to
indicate that the nozzle is locked.
Disconnection
Before disconnecting the nozzle from the
charging connector:
►
If the vehicle is locked, unlock it.
Page 181 of 260
179
In the event of a breakdown
8Warning triangle
This reflective and dismantlable device is to be
installed on the side of the road when a vehicle
is broken down or damaged.
Before getting out of the vehicle
Turn on the hazard warning lamps, then
put on the safety vest to assemble and install
the triangle.
Storage
Hatchback
A compartment is provided in the storage box,
located under the boot carpet.
SW
A compartment is provided in the interior trim of
the tailgate.
Assembling and placing the triangle
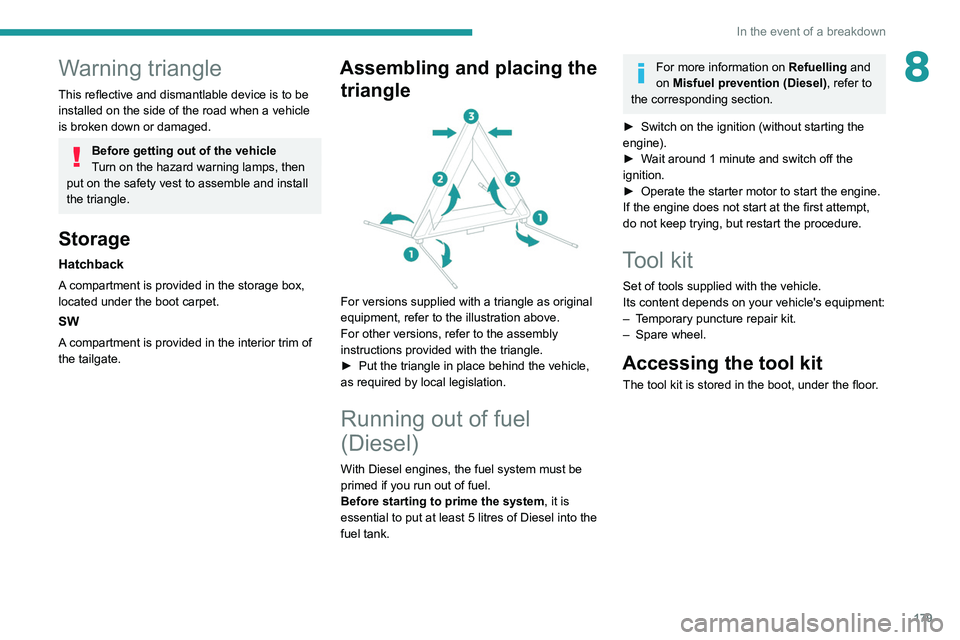
For versions supplied with a triangle as original
equipment, refer to the illustration above.
For other versions, refer to the assembly
instructions provided with the triangle.
►
Put the triangle in place behind the vehicle,
as required by local legislation.
Running out of fuel
(Diesel)
With Diesel engines, the fuel system must be
primed if you run out of fuel.
Before starting to prime the system, it is
essential to put at least 5 litres of Diesel into the
fuel tank.
For more information on Refuelling and
on Misfuel prevention (Diesel), refer to
the corresponding section.
►
Switch on the ignition (without starting the
engine).
►
W
ait around 1 minute and switch off the
ignition.
►
Operate the starter motor to start the engine.
If the engine does not start at the first attempt,
do not keep trying, but restart the procedure.
Tool kit
Set of tools supplied with the vehicle.
Its content depends on your vehicle's equipment:
–
T
emporary puncture repair kit.
–
Spare wheel.
Accessing the tool kit
The tool kit is stored in the boot, under the floor.
Page 182 of 260
180
In the event of a breakdown
Hatchback
SW
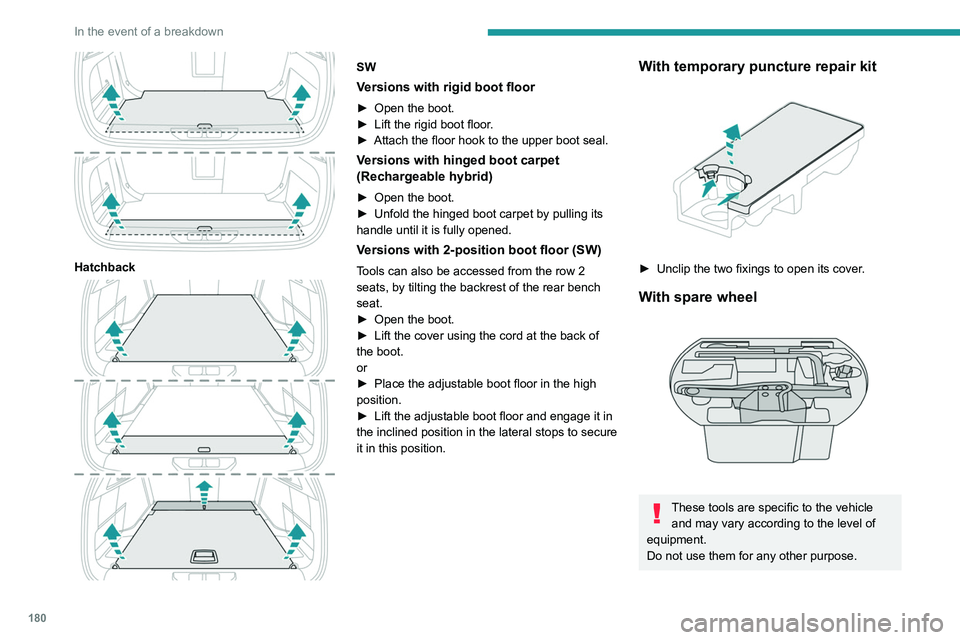
Versions with rigid boot floor
► Open the boot.
► Lift the rigid boot floor .
►
Attach the floor hook to the upper boot seal.
Versions with hinged boot carpet
(Rechargeable hybrid)
► Open the boot.
► Unfold the hinged boot carpet by pulling its
handle until it is fully opened.
Versions with 2-position boot floor (SW)
Tools can also be accessed from the row 2
seats, by tilting the backrest of the rear bench
seat.
►
Open the boot.
►
Lift the cover using the cord at the back of
the boot.
or
►
Place the adjustable boot floor in the high
position.
►
Lift the adjustable boot floor and engage it in
the inclined position in the lateral stops to secure
it in this position.
With temporary puncture repair kit
► Unclip the two fixings to open its cover .
With spare wheel
These tools are specific to the vehicle
and may vary according to the level of
equipment.
Do not use them for any other purpose.
Page 186 of 260
184
In the event of a breakdown
Spare wheel
Scan the QR Code on page 3 to view
explanatory videos.
For more information on the Tool kit,
refer to the corresponding section.
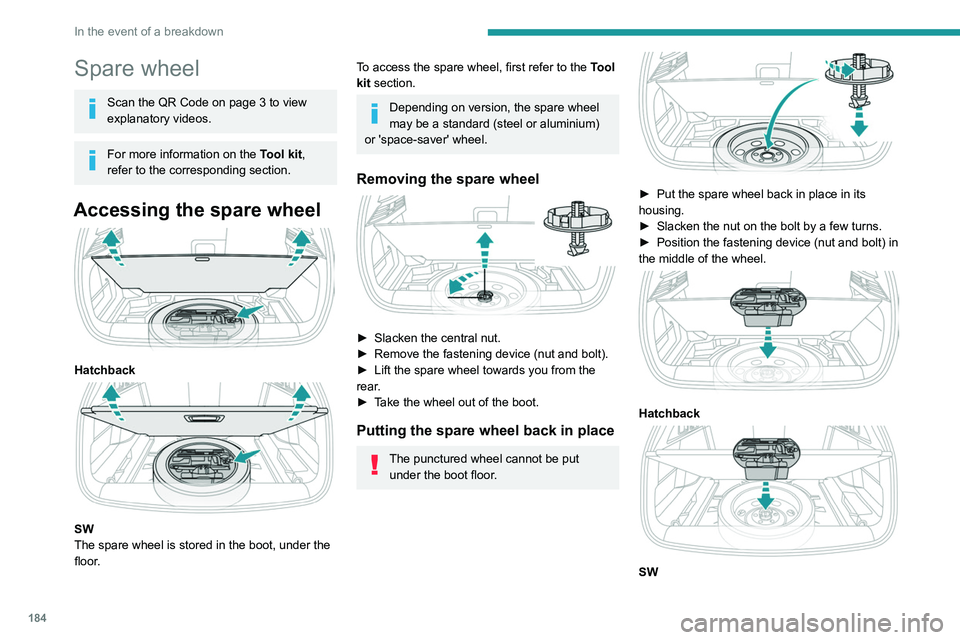
Accessing the spare wheel
Hatchback
SW
The spare wheel is stored in the boot, under the
floor.
To access the spare wheel, first refer to the Tool
kit section.
Depending on version, the spare wheel
may be a standard (steel or aluminium)
or 'space-saver' wheel.
Removing the spare wheel
► Slacken the central nut.
► Remove the fastening device (nut and bolt).
►
Lift the spare wheel towards you from the
rear
.
►
T
ake the wheel out of the boot.
Putting the spare wheel back in place
The punctured wheel cannot be put under the boot floor.
► Put the spare wheel back in place in its
housing.
►
Slacken the nut on the bolt by a few turns.
►
Position the fastening device (nut and bolt) in
the middle of the wheel.
Hatchback
SW