2022 PEUGEOT 308 change time
[x] Cancel search: change timePage 134 of 260

132
Driving
– Or when the driver is already using Drive
Assist Plus, the vehicle suggests selecting the
system upon arriving at an eligible road by
pressing the OK
button.
Activation/Deactivation
► Activate the direction indicator on the side
corresponding to the lane change, whether or
not passing the resistance point of the lighting
control stalk.
The driver can regain control of the vehicle at
any time:
–
by deactivating the direction indicator if the
vehicle has not yet crossed the line.
–
by firmly holding the steering wheel.
–
by acting on the pedals.
For more information on the Direction
indicators
, refer to the corresponding section.
Operating conditions
– Eligible roads: roads with separate
carriageways with prohibited access for
pedestrians and cyclists. –
The line separating the lanes must be clear
enough to be identified by the system.
–
The position and speed of other vehicles must
enable the system to safely change lanes.
–
Drive
Assist 2.0 activated.
–
Lane positioning assist activated.
–
V
ehicle speed between 43 and 112 mph (70
and 180 km/h).
Authorised lane change request
When operating the direction indicator, if the
necessary conditions are met, the message
"OK?" is displayed on the instrument panel,
accompanied by an audible signal.
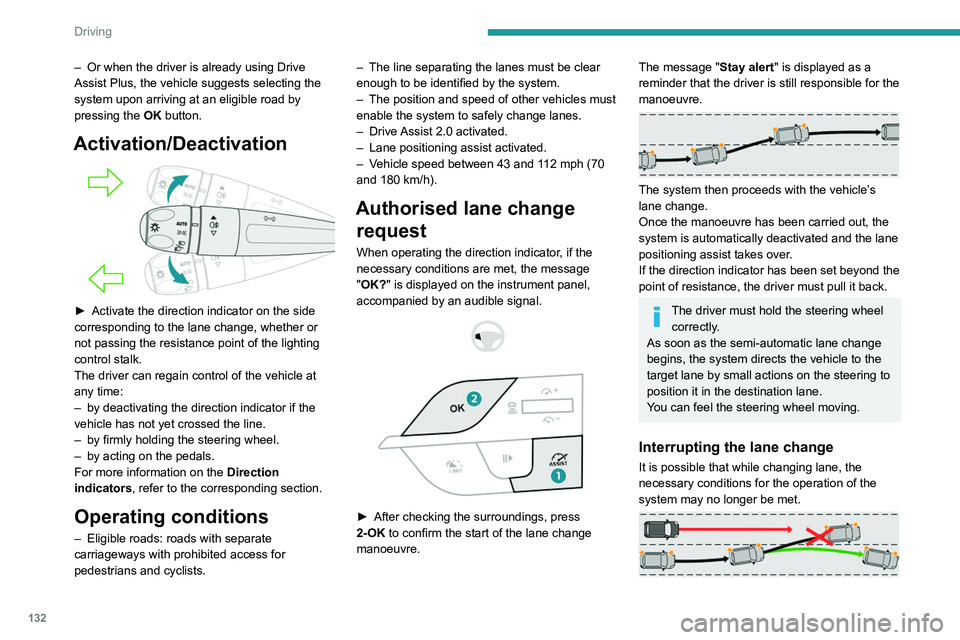
► After checking the surroundings, press
2-OK to confirm the start of the lane change
manoeuvre.
The message "Stay alert" is displayed as a
reminder that the driver is still responsible for the
manoeuvre.
The system then proceeds with the vehicle’s
lane change.
Once the manoeuvre has been carried out, the
system is automatically deactivated and the lane
positioning assist takes over.
If the direction indicator has been set beyond the
point of resistance, the driver must pull it back.
The driver must hold the steering wheel correctly.
As soon as the semi-automatic lane change
begins, the system directs the vehicle to the
target lane by small actions on the steering to
position it in the destination lane.
You can feel the steering wheel moving.
Interrupting the lane change
It is possible that while changing lane, the
necessary conditions for the operation of the
system
may no longer be met.
Page 141 of 260

139
Driving
6break after two hours of driving at a speed above
43 mph (70 km/h).
This alert is issued via the display of a message
encouraging the driver to take a break,
accompanied by an audible signal.
If the driver does not follow this advice, the alert
is repeated hourly until the vehicle is stopped.
The system resets itself if one of the following
conditions is met:
–
With the engine running, the vehicle has been
stationary for more than 15 minutes.
–
The ignition has been switched off for a few
minutes.
–
The driver's seat belt is unfastened and their
door is opened.
As soon as the speed of the vehicle drops below 43 mph (70 km/h), the
system goes into standby.
Driving time starts being counted again once
the speed reaches above 43
mph (70 km/h).
Driver Attention Warning by
Camera
The system assesses the driver's level of alertness, fatigue and distraction by
identifying trajectory changes in relation to the
lane markings.
To do this, the system uses a camera, placed on
the upper part of the windscreen.
This system is particularly suited to fast roads
(speed higher than 43 mph (70
km/h)).
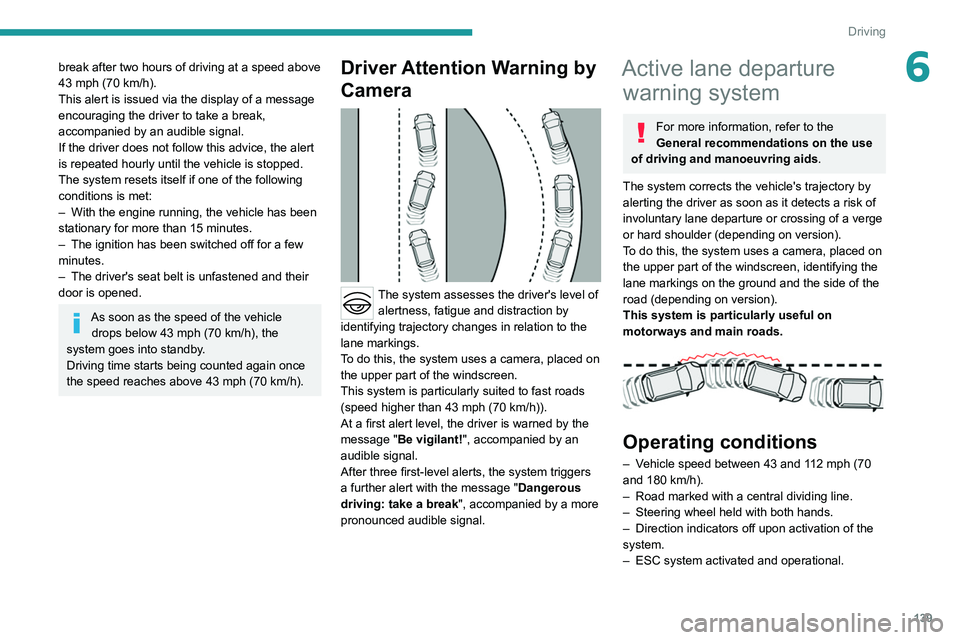
At a first alert level, the driver is warned by the
message "Be vigilant!", accompanied by an
audible signal.
After three first-level alerts, the system triggers
a further alert with the message " Dangerous
driving: take a break", accompanied by a more
pronounced audible signal.
Active lane departure warning system
For more information, refer to the
General recommendations on the use
of driving and manoeuvring aids .
The system corrects the vehicle's trajectory by
alerting the driver as soon as it detects a risk of
involuntary
lane departure or crossing of a verge
or hard shoulder (depending on version).
To do this, the system uses a camera, placed on
the upper part of the windscreen, identifying the
lane markings on the ground and the side of the
road (depending on version).
This system is particularly useful on
motorways and main roads.
Operating conditions
– Vehicle speed between 43 and 112 mph (70
and 180 km/h).
–
Road marked with a central dividing line.
–
Steering wheel held with both hands.
–
Direction indicators off upon activation of the
system.
–
ESC system activated and operational.
Page 145 of 260

143
Driving
6certain types of paint could interfere with the
operation of the radars.
Malfunction
If the event of a malfunction, this warning
lamp lights up on the instrument panel,
accompanied by the display of a message.
Have it checked by a PEUGEOT dealer or a
qualified workshop.
The system may be temporarily disturbed by certain weather conditions (e.g. heavy
rain, hail or extreme temperature changes).
In particular, driving on a wet road or going
from a dry to a wet area can cause false
alerts (e.g.
presence of a cloud of water
droplets in the blind spot interpreted as a
vehicle).
In bad or wintry weather, ensure that
the
radars are not covered by mud, ice or
snow.
Take care not to cover the warning zone in
the door mirrors, or the detection zones on
the rear bumper, with adhesive labels or
other objects; they may hamper the correct
operation of the system.
Parking sensors
For more information, refer to the
General recommendations on the use
of driving and manoeuvring aids .
This system detects and signals the proximity of
obstacles (e.g.
pedestrian, vehicle, tree, barrier)
using sensors located in the bumper.
Rear parking sensors
► Engage reverse gear to start the system
(confirmed by an audible signal).
The system is switched off when reverse gear is
disengaged.
Audible assistance
The system signals the presence of obstacles
which are both within the sensors’ detection zone
and in the vehicle path defined by the direction of
the steering wheel.
Depending on version, in the example shown,
only the obstacles present in the shaded area
will be signalled by the audible assistance.
The proximity information is given by an
intermittent audible signal, the frequency of
which increases as the vehicle approaches the
obstacle.
When the distance between the vehicle and
the obstacle becomes less than about thirty
centimetres, the audible signal becomes
continuous.
The sound emitted by the speaker (right or
left) indicates the side on which the obstacle is
located.
Adjusting the audible signalPressing this button opens the
window for adjusting the volume
of the audible signal.
Page 147 of 260

145
Driving
6Visiopark 1
For more information, refer to the
General recommendations on the use
of driving and manoeuvring aids .
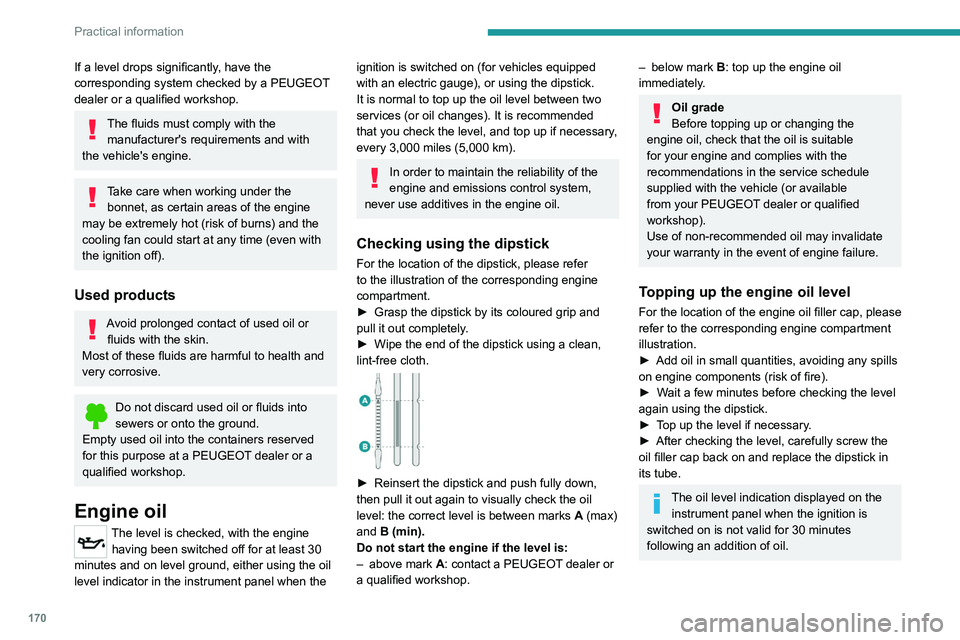
When reverse gear is engaged, with the engine
running, this system displays views of the
vehicle's close surroundings
on the touch screen
using a camera located at the rear of the vehicle.
The screen is divided into 3 parts with a side
menu, a contextual view and a view from above
the vehicle in its close surroundings.
The parking sensors supplement the information
in the view from above the vehicle.
Different contextual views are available:
–
Automatic zoom view
.
–
Standard view
.
–
Panoramic view
.
Depending on the context, the system chooses
the best view to display (standard or automatic
zoom). The view type can be changed at any time
during the manoeuvre.
The system status is not saved when the ignition
is switched off.
Operating principle
Using the camera, the vehicle's close
surroundings are recorded during low speed
manoeuvres.
An image from above the vehicle in its close
surroundings is created in real time (on the side
of the screen), as the vehicle progresses.
This view makes it easier to align the vehicle
when parking and to perceive nearby obstacles.
It is automatically deleted if the vehicle remains
stationary for too long.
An additional jet is fitted above the number plate to clean the reversing camera (depending on
version).
►
The washing of the reversing camera is
triggered by operating the rear screenwash.
Settings
In the side menu, this menu allows you to
carry out the following operations:
–
adjust the volume of the audible signal.
–
adjust the brightness.
–
adjust the contrast.
Activation/Deactivation
To activate the camera, engage reverse gear.
The system is deactivated:
–
when changing out of reverse gear
.
–
by pressing the cross in the top left-hand
corner of the touch screen.
Automatic zoom view
The rear camera records the vehicle's
surroundings during the manoeuvre in order to
create a view from above the rear of the vehicle
in its close surroundings, allowing the vehicle to
be manoeuvred around nearby obstacles.
Using the sensors located on the rear bumper,
the automatic zoom view is displayed when
approaching an obstacle at the red line (less
than 30 cm) during the manoeuvre.
This view is only available automatically.
Page 148 of 260

146
Driving
Obstacles may appear further away than
they actually are.
It is important to monitor the sides of the
vehicle during the manoeuvre, using the
mirrors.
Parking sensors also provide additional
information about the area around the vehicle.
Standard view
The area behind the vehicle is displayed on the
screen.
The blue lines 1 represent the width of your
vehicle, with the mirrors unfolded; their direction
changes according to the position of the steering
wheel.
The red line 2 represents a distance of 30
cm
from the rear bumper; the two blue lines 3 and 4
represent 1
m and 2 m, respectively.
This view is available automatically or by
selection in the side menu.
Panoramic view
The panoramic view allows you to leave, in
reverse, a parking space by anticipating the
arrival of vehicles, pedestrians or cyclists.
This view is not recommended for carrying out a
complete manoeuvre.
This view is only available by selection in the
side menu.
Visiopark 2
For more information, refer to the
General recommendations on the use
of driving and manoeuvring aids .
This system allows you to view your vehicle's
close surroundings
on the touch screen using
cameras, located at the front and rear of the
vehicle, as well as under the door mirrors.
The screen is divided into 4 parts with two side
menus, a contextual view and a view from above
the vehicle in its close surroundings.
The parking sensors supplement the information
in the view from above the vehicle.
Depending on the view angle chosen in the
left-hand side menu, the system provides
specific visual assistance in particular driving
conditions, such as entering a blind intersection
or manoeuvring in areas with reduced visibility.
Different contextual views are available for the
rear or for the front:
–
Automatic zoom view
.
–
Standard view
.
–
Panoramic view
.
Depending on the context, the system chooses
the best view to display (standard or automatic
zoom).
The view type can be changed at any time
during the manoeuvre.
The system status is not saved when the ignition
is switched off.
Page 151 of 260

149
Driving
6Operating principle
When an approaching obstacle is detected, the
symbol 1 or 2 flashes on the touch screen, in the
Parking sensors view or in the various contextual
views of the Visiopark 1 or Visiopark 2 functions
(depending on version).
The symbol is complemented by an audible
signal when the vehicle is reversing.
An obstacle is approaching in the blind spot on the rear right-hand/
left-hand side or on both sides of the vehicle.
In the event of a malfunction of these functions
or of the touch screen, or if the driver deactivates
the views from these functions on the touch
screen, detection of an approaching obstacle
is still indicated by the audible signal when the
vehicle is reversing.
Activation/Deactivation
It is configured in the ADAS touch screen
application.
The system's status is saved when the ignition is
switched off.
Operating limits
The system may not work in the following cases:
– T owing a trailer.
–
Using a bicycle carrier on a towing device.
–
Extreme temperature changes.
–
If the rear bumper is damaged.
–
Accumulation or
projection of external
elements (e.g.
mud, ice, snow), application of
stickers.
It is possible that warnings are not given,
are given too late or seem unjustified.
Consequently, always stay in control of your
vehicle and be prepared to react at any time
to avoid an accident.
If the rear bumper is to be repainted,
contact a PEUGEOT dealer or a qualified
workshop; certain types of paint could
interfere with the operation of the radars.
Malfunction
In the event of a malfunction when
engaging reverse gear, during reversing
or if the driver attempts to activate the system,
this warning lamp lights up on the instrument panel, accompanied by the display of a message
and an audible signal.
Have it checked by a PEUGEOT dealer or a
qualified workshop.
Page 172 of 260

170
Practical information
If a level drops significantly, have the
corresponding system checked by a PEUGEOT
dealer or a qualified workshop.
The fluids must comply with the manufacturer's requirements and with
the vehicle's engine.
Take care when working under the bonnet, as certain areas of the engine
may be extremely hot (risk of burns) and the
cooling fan could start at any time (even with
the ignition off).
Used products
Avoid prolonged contact of used oil or fluids with the skin.
Most of these fluids are harmful to health and
very corrosive.
Do not discard used oil or fluids into
sewers or onto the ground.
Empty used oil into the containers reserved
for this purpose at a PEUGEOT dealer or a
qualified workshop.
Engine oil
The level is checked, with the engine having been switched off for at least 30
minutes and on level ground, either using the oil
level indicator in the instrument panel when the
ignition is switched on (for vehicles equipped
with an electric gauge), or using the dipstick.
It is normal to top up the oil level between two
services (or oil changes). It is recommended
that you check the level, and top up if necessary,
every 3,000 miles (5,000 km).
In order to maintain the reliability of the
engine and emissions control system,
never use additives in the engine oil.
Checking using the dipstick
For the location of the dipstick, please refer
to the illustration of the corresponding engine
compartment.
►
Grasp the dipstick by its coloured grip and
pull it out completely
.
►
Wipe the end of the dipstick using a clean,
lint-free cloth.
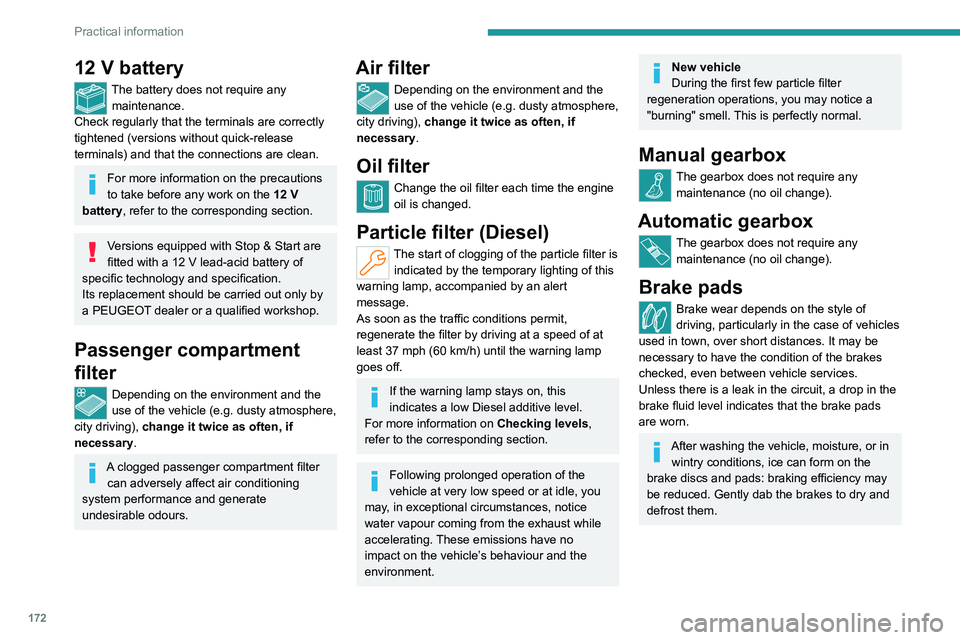
► Reinsert the dipstick and push fully down,
then pull it out again to visually check the oil
level: the correct level is between marks A
(max)
and B (min).
Do not start the engine if the level is:
–
above mark
A: contact a PEUGEOT dealer or
a qualified workshop.
– below mark B : top up the engine oil
immediately.
Oil grade
Before topping up or changing the
engine oil, check that the oil is suitable
for your engine and complies with the
recommendations in the service schedule
supplied with the vehicle (or available
from your PEUGEOT dealer or qualified
workshop).
Use of non-recommended oil may invalidate
your warranty in the event of engine failure.
Topping up the engine oil level
For the location of the engine oil filler cap, please
refer to the corresponding engine compartment
illustration.
►
Add oil in small quantities, avoiding any spills
on engine components (risk of fire).
►
W
ait a few minutes before checking the level
again using the dipstick.
►
T
op up the level if necessary.
►
After checking the level, carefully screw the
oil filler cap back on
and replace the dipstick in
its tube.
The oil level indication displayed on the instrument panel when the ignition is
switched on is not valid for 30 minutes
following an addition of oil.
Page 174 of 260

172
Practical information
12 V battery
The battery does not require any maintenance.
Check regularly that the terminals are correctly
tightened (versions without quick-release
terminals) and that the connections are clean.
For more information on the precautions
to take before any work on the 12 V
battery, refer to the corresponding section.
Versions equipped with Stop & Start are
fitted with a 12 V lead-acid battery of
specific technology and specification.
Its replacement should be carried out only by
a PEUGEOT dealer or a qualified workshop.
Passenger compartment
filter
Depending on the environment and the
use of the vehicle (e.g. dusty atmosphere,
city driving), change it twice as often, if
necessary .
A clogged passenger compartment filter
can adversely affect air conditioning
system performance and generate
undesirable odours.
Air filter
Depending on the environment and the
use of the vehicle (e.g. dusty atmosphere,
city driving), change it twice as often, if
necessary .
Oil filter
Change the oil filter each time the engine
oil is changed.
Particle filter (Diesel)
The start of clogging of the particle filter is
indicated by the temporary lighting of this
warning lamp, accompanied by an alert
message.
As soon as the traffic conditions permit,
regenerate the filter by driving at a speed of at
least 37
mph (60 km/h) until the warning lamp
goes off.
If the warning lamp stays on, this
indicates a low Diesel additive level.
For more information on Checking levels,
refer to the corresponding section.
Following prolonged operation of the
vehicle at very low speed or at idle, you
may, in exceptional circumstances, notice
water vapour coming from the exhaust while
accelerating. These emissions have no
impact on the vehicle’s behaviour and the
environment.
New vehicle
During the first few particle filter
regeneration operations, you may notice a
"burning" smell. This is perfectly normal.
Manual gearbox
The gearbox does not require any maintenance (no oil change).
Automatic gearbox
The gearbox does not require any maintenance (no oil change).
Brake pads
Brake wear depends on the style of
driving, particularly in the case of vehicles
used in town, over short distances. It may be
necessary to have the condition of the brakes
checked, even between vehicle services.
Unless there is a leak in the circuit, a drop in the
brake fluid level indicates that the brake pads
are worn.
After washing the vehicle, moisture, or in wintry conditions, ice can form on the
brake discs and pads: braking efficiency may
be reduced. Gently dab the brakes to dry and
defrost them.