2022 PEUGEOT 308 change time
[x] Cancel search: change timePage 73 of 260
71
Lighting and visibility
4
This system is a driving aid.The driver remains responsible for
the vehicle's lighting, its correct use in the
prevailing light, visibility and traffic conditions,
and for compliance with driving and vehicle
regulations.
The system becomes operational when the vehicle exceeds 16 mph (25 km/h).
When the speed falls below 9 mph (15 km/h),
the function is no longer operational.
Activation/Deactivation
It is configured in the Settings > Vehicle
touch screen application.
The state of the system is stored when the
ignition is switched off.
When the system detects thick fog, it
temporarily deactivates the function.
Operation
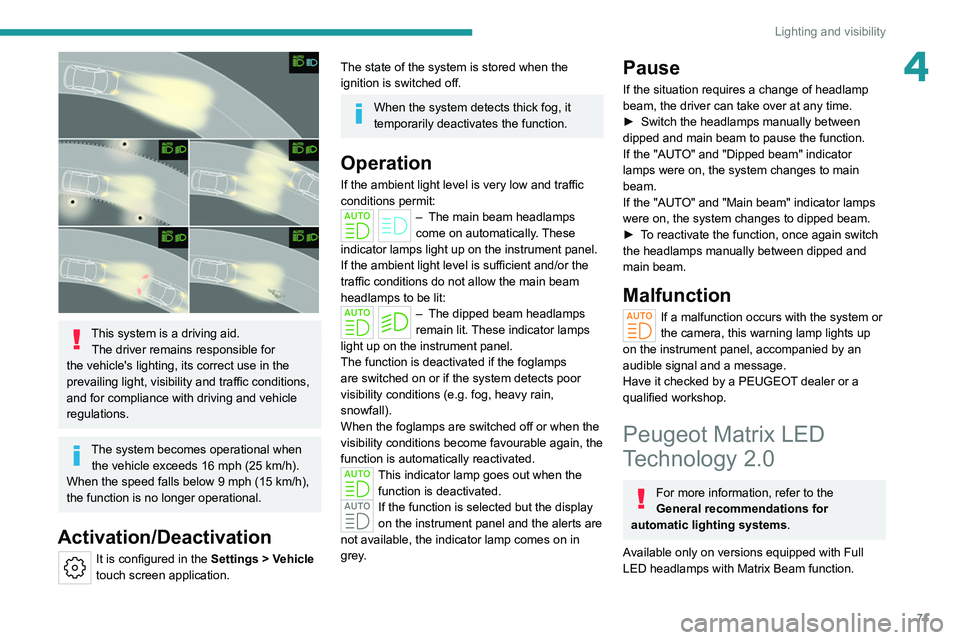
If the ambient light level is very low and traffic
conditions permit:
– The main beam headla mps
come on automatically. These
indicator lamps light up on the instrument panel.
If the ambient light level is sufficient and/or the
traffic conditions do not allow the main beam
headlamps to be lit:
– The dipped beam head lamps
remain lit. These indicator lamps
light up on the instrument panel.
The function is deactivated if the foglamps
are switched on or if the system detects poor
visibility conditions (e.g.
fog, heavy rain,
snowfall).
When the foglamps are switched off or when the
visibility conditions become favourable again, the
function is automatically reactivated.
This indicator lamp goes out when the function is deactivated.
If the function is selected but the display
on the instrument panel and the alerts are
not available, the indicator lamp comes on in
grey.
Pause
If the situation requires a change of headlamp
beam, the driver can take over at any time.
►
Switch the headlamps manually between
dipped and main beam to pause the function.
If the "AUT
O" and "Dipped beam" indicator
lamps were on, the system changes to main
beam.
If the "AUTO" and "Main beam" indicator
lamps
were on, the system changes to dipped beam.
►
T
o reactivate the function, once again switch
the headlamps manually between dipped and
main beam.
Malfunction
If a malfunction occurs with the system or
the camera, this warning lamp lights up
on the instrument panel, accompanied by an
audible signal and a message.
Have it checked by a PEUGEOT dealer or a
qualified workshop.
Peugeot Matrix LED
Technology 2.0
For more information, refer to the
General recommendations for
automatic lighting systems.
Available only on versions equipped with Full
LED headlamps with
Matrix Beam function.
Page 75 of 260

73
Lighting and visibility
4inside of the vehicle to switch to the dipped
beams.
Exiting an illuminated area
The lamp segments gradually light up from the
inside to the outside of the vehicle to restore the
main beams.
Pause
If the situation requires a change of headlamp
beam, the driver can take over at any time.
►
Switch the dipped/main beam headlamps
manually to pause the function.
The lighting system changes to "Automatic
illumination of lamps" mode.
►
T
o reactivate the function, manually switch
the dipped/main beam headlamps again.
Malfunction
If a malfunction occurs with the adaptive
headlamp lighting or the camera, this
warning lamp is displayed on the instrument
panel, accompanied by an audible signal and a
message.
Have it checked by a PEUGEOT dealer or a
qualified workshop.
Do not cover the rain/sunshine sensor
located at the top centre of the
windscreen behind the interior rear view
mirror; the associated functions would no
longer be controlled.
Wiper control stalk
Before operating the wipers in wintry
conditions, clear any snow, ice or frost
from the windscreen and around the wiper
arms and blades.
Do not operate the wipers on a dry
windscreen. In extremely hot or cold
weather, check that the wiper blades are not
stuck to the windscreen before operating the
wipers.
After using an automatic car wash, you may temporarily notice abnormal noises
and poorer wiping performance.
You do not
need to replace the wiper blades.
With intermittent wipers
With AUTO wiping
Windscreen wipers
► To select the wiping speed: raise or lower the
stalk to the desired position.
Fast wiping (heavy rain)
Normal wiping (moderate rain)
Intermittent wipers
or
Automatic wipers
Switching off
Manual
After the ignition has been switched off,
the wipers may move slightly at the foot
of the windscreen.
Page 88 of 260
86
Safety
– not show signs of tearing or fraying.
– not be changed or modified, in order to
avoid affecting its performance.
Recommendations for children
Use a suitable child seat if the passenger
is less than 12 years old or shorter than 1.5
metres.
Never use the same seat belt to secure more
than one child.
Never carry a child on your lap.
For more information on Child seats, refer to
the corresponding section.
Maintenance
In accordance with current safety
regulations, for all work on your vehicle's
seat belts, contact a qualified workshop with
the skills and equipment needed, which a
PEUGEOT dealer is able to provide.
Have the seat belts checked regularly by a
PEUGEOT dealer or a qualified workshop,
particularly if the straps show signs of
damage.
Clean the seat belt straps with soapy water or
a textile cleaning product, sold by PEUGEOT
dealers.
Airbags
General information
System designed to help improve the safety
of the occupants sitting in the front seats and
the rear outer seats, in the event of a violent
collision. The airbags supplement the action
of the seat belts equipped with a force limiting
system.
Electronic detectors record and analyse the
front and side impacts sustained in the impact
detection zones:
–
In the event of violent impact, the airbags
deploy instantly and help better protect the
occupants of the vehicle; immediately after the
impact, the airbags deflate rapidly in order not
to hinder the visibility or the possible exit of the
occupants.
–
In the event of a slight impact, a rear impact
and under certain rollover conditions, the airbags
may not deploy; only the seat belt helps to
protect you in these situations.
The seriousness of the impact depends on the
nature of the obstacle and the speed of the
vehicle at the moment of collision.
The airbags do not operate when the
ignition is switched off.
This equipment will only deploy once. If a
second impact occurs (during the same or a
subsequent accident), the airbag will not be
deployed again.
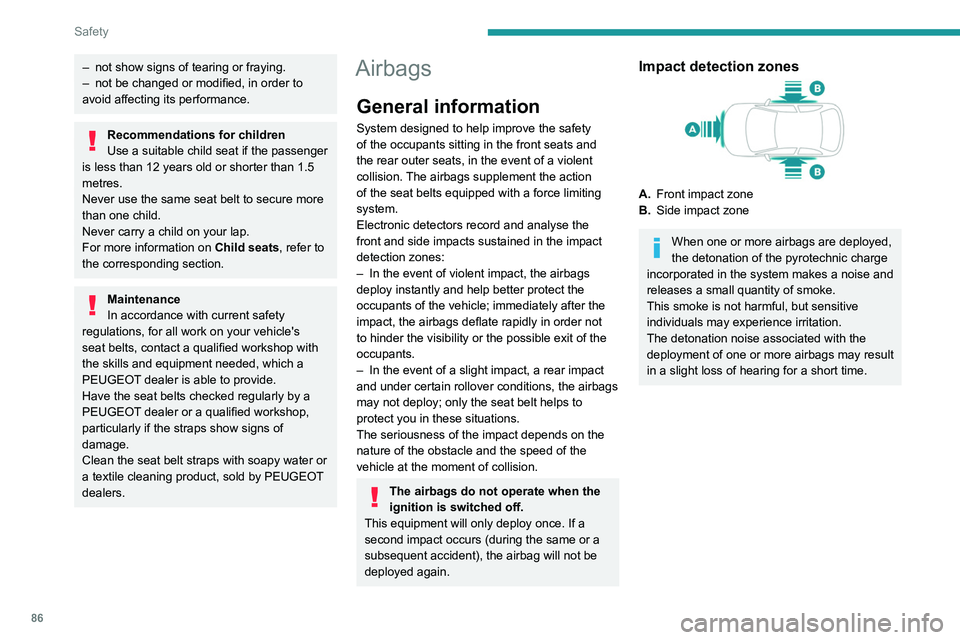
Impact detection zones
A. Front impact zone
B. Side impact zone
When one or more airbags are deployed,
the detonation of the pyrotechnic charge
incorporated in the system makes a noise and
releases a small quantity of smoke.
This smoke is not harmful, but sensitive
individuals may experience irritation.
The detonation noise associated with the
deployment of one or more airbags may result
in a slight loss of hearing for a short time.
Page 103 of 260
101
Driving
6while pressing the "START/STOP" button to
assist unlocking of the steering column.
Petrol engines
With Petrol engines, after a cold start,
pre-heating the catalytic converter can cause
noticeable engine vibrations, for anything up
to 2 minutes (accelerated idle speed).
If the engine stalls, release the clutch
pedal and fully depress it again, the
engine will restart automatically.
Starting rechargeable hybrid
vehicles
► Fully depress the brake pedal and press
the START/STOP button for approximately 2
seconds.
► Keep you r foot on the pedal until this
indicator lamp comes on, indicating the
activation of the rechargeable hybrid system
(confirmed by an audible signal).
To exit Park mode, wait for the READY indicator lamp to come on.
By default, the system starts in Electric mode.
Depending on certain parameters (battery
charge level or outside temperature), the system
determines whether it is necessary to start the
petrol engine.
It is possible to change the driving mode at any
time using the mode selector.
When the vehicle starts in electric mode,
it makes no noise.
Pay particular attention to pedestrians and
cyclists who may not hear the vehicle coming
despite the pedestrian horn.
Switching off
► Deactivate cruise control alone or Drive
Assist Plus (depending on version).
►
Immobilise the vehicle using the parking
brake.
►
With a
manual gearbox, ideally put the gear
lever into neutral.
►
With an
automatic gearbox, ideally select
mode
P or N.
►
Press the "
START/STOP" button.
►
For rechargeable hybrid vehicles, before
leaving the vehicle, check that the READY
indicator lamp is switched off.
The automatic gearbox locks in mode P.
In some circumstances, it is necessary to turn
the steering wheel to lock the steering column.
If the vehicle is not immobilised, the
engine will not stop.
With the engine off, the braking and
steering assistance systems are also cut
off - risk of loss of control of the vehicle!
Never leave your vehicle with the
electronic key still inside.
Switching on the ignition
without starting the engine
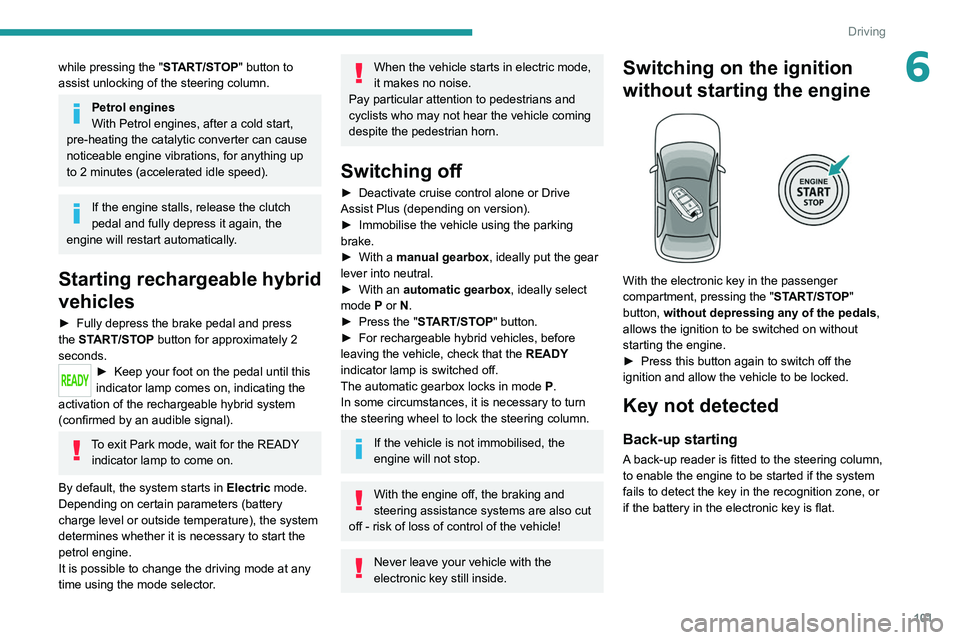
With the electronic key in the passenger
compartment, pressing the " START/STOP"
button, without depressing any of the pedals ,
allows the ignition to be switched on without
starting the engine.
►
Press this button again to switch off the
ignition and allow the vehicle to be locked.
Key not detected
Back-up starting
A back-up reader is fitted to the steering column,
to enable the engine to be started if the system
fails to detect the key in the recognition zone, or
if the battery in the electronic key is flat.
Page 108 of 260
106
Driving
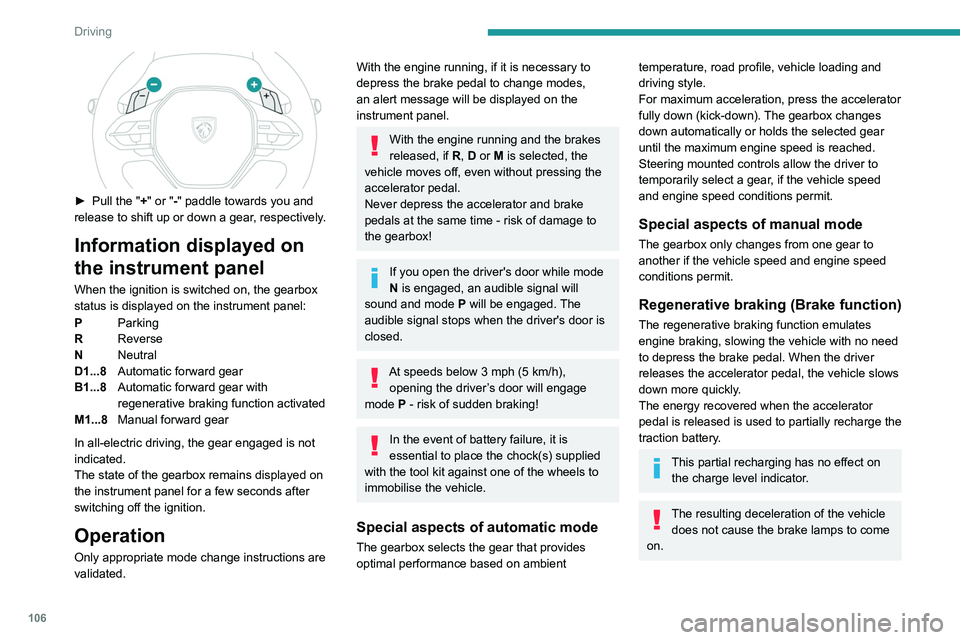
► Pull the "+" or "-" paddle towards you and
release to shift up or down a gear, respectively.
Information displayed on
the instrument panel
When the ignition is switched on, the gearbox
status is displayed on the instrument panel:
P Parking
R Reverse
N Neutral
D1...8 Automatic forward gear
B1...8 Automatic forward gear with
regenerative braking function activated
M1...8 Manual forward gear
In all-electric driving, the gear engaged is not
indicated.
The state of the gearbox remains displayed on
the instrument panel for a few seconds after
switching off the ignition.
Operation
Only appropriate mode change instructions are
validated.
With the engine running, if it is necessary to
depress the brake pedal to change modes,
an alert message will be displayed on the
instrument panel.
With the engine running and the brakes
released, if R, D or M is selected, the
vehicle moves off, even without pressing the
accelerator pedal.
Never depress the accelerator and brake
pedals at the same time - risk of damage to
the gearbox!
If you open the driver's door while mode
N is engaged, an audible signal will
sound and mode P will be engaged. The
audible signal stops when the driver's door is
closed.
At speeds below 3 mph (5 km/h),
opening the driver ’s door will engage
mode P
- risk of sudden braking!
In the event of battery failure, it is
essential to place the chock(s) supplied
with the tool kit against one of the wheels to
immobilise the vehicle.
Special aspects of automatic mode
The gearbox selects the gear that provides
optimal performance based on ambient
temperature, road profile, vehicle loading and
driving style.
For maximum acceleration, press the accelerator
fully down (kick-down). The gearbox changes
down automatically or holds the selected gear
until the maximum engine speed is reached.
Steering mounted controls allow the driver to
temporarily select a gear, if the vehicle speed
and engine speed conditions permit.
Special aspects of manual mode
The gearbox only changes from one gear to
another if the vehicle speed and engine speed
conditions permit.
Regenerative braking (Brake function)
The regenerative braking function emulates
engine braking, slowing the vehicle with no need
to depress the brake pedal. When the driver
releases the accelerator pedal, the vehicle slows
down more quickly.
The energy recovered when the accelerator
pedal is released is used to partially recharge the
traction battery.
This partial recharging has no effect on the charge level indicator.
The resulting deceleration of the vehicle does not cause the brake lamps to come
on.
Page 114 of 260

11 2
Driving
must be reinitialised every time the tyre
pressures are adjusted or a wheel changed.
It takes the last values
stored during
the
reinitialisation request into account. It is
therefore essential that the tyre pressure is
correct during the operation. This operation is
the driver’s responsibility.
The tyre under-inflation detection cannot, in any circumstances, replace the need
for vigilance on the part of the driver.
This system does not avoid the need to
regularly check the tyre pressures (including
the spare wheel), especially before a long
journey.
Driving with under-inflated tyres, particularly
in adverse conditions (heavy load, high
speed, long journey):
–
worsens road-holding.
–
lengthens braking distances.
–
causes premature wear of the tyres.
–
increases energy consumption.
The inflation pressures defined for the vehicle can be found on the tyre pressure
label.
For more information on the Identification
markings, refer to the corresponding section.
Checking tyre pressures
This check should be done monthly
when the tyres are "cold" (vehicle stopped for
1 hour or after a journey of less than 6 miles
(10 km) at moderate speeds).
Otherwise, add 0.3 bar to the pressures
shown on the label.
Snow chains
The system does not have to be
reinitialised after fitting or removing snow
chains.
Under-inflation alert
This is signalled by the fixed illumination of this warning lamp, accompanied by an
audible signal and, depending on equipment, the
display of a message.
►
Reduce speed immediately
, avoid excessive
steering movements and avoid sudden braking.
►
Stop the vehicle as soon as it is safe to do
so.
The loss of pressure detected may not always cause visible deformation of the
tyre.
Do not rely on just a visual check.
►
Using a compressor
, such as the one in
the temporary puncture repair kit, check the
pressures of all four tyres when cold.
►
If it is not possible to carry out this check
immediately
, drive carefully at reduced speed.
►
In the event of a puncture, use the
temporary puncture repair kit or the spare wheel
(depending on equipment).
Driving too slowly may not ensure
optimum monitoring.
The alert is not immediately triggered in the
event of a sudden loss of pressure or tyre
blow-out. This is because analysis of the
values read by the wheel's speed sensors
can take several minutes.
The alert may be delayed at speeds below
25 mph (40 km/h), or when adopting a sporty
driving mode.
The alert is kept active until the system is reinitialised.
Reinitialisation
► The system must be reinitialised after any
adjustment to the pressure of one or more tyres,
and after changing one or more wheels.
Before reinitialising the system, make
sure that the pressures of the four tyres
are correct for the conditions of use of the
vehicle and conform to the values written on
the tyre pressure label.
Check the pressures of the four tyres before
performing the reinitialisation.
The system does not advise if a pressure is
incorrect at the time of reinitialisation.
With the vehicle stationary, the system
can be reinitialised in the
Settings>Vehicle touch screen application.
►
Then select
Safety > Tyre Pressure Setup .
Page 121 of 260
11 9
Driving
6Speed limiter
For more information, refer to the
General recommendations on the use
of driving and manoeuvring aids .
This system prevents the vehicle from
exceeding the speed programmed by the
driver (speed setting).
The speed limiter is switched on manually.
The minimum speed setting is 19 mph (30
km/h).
The speed setting remains in the system
memory when the ignition is switched off.
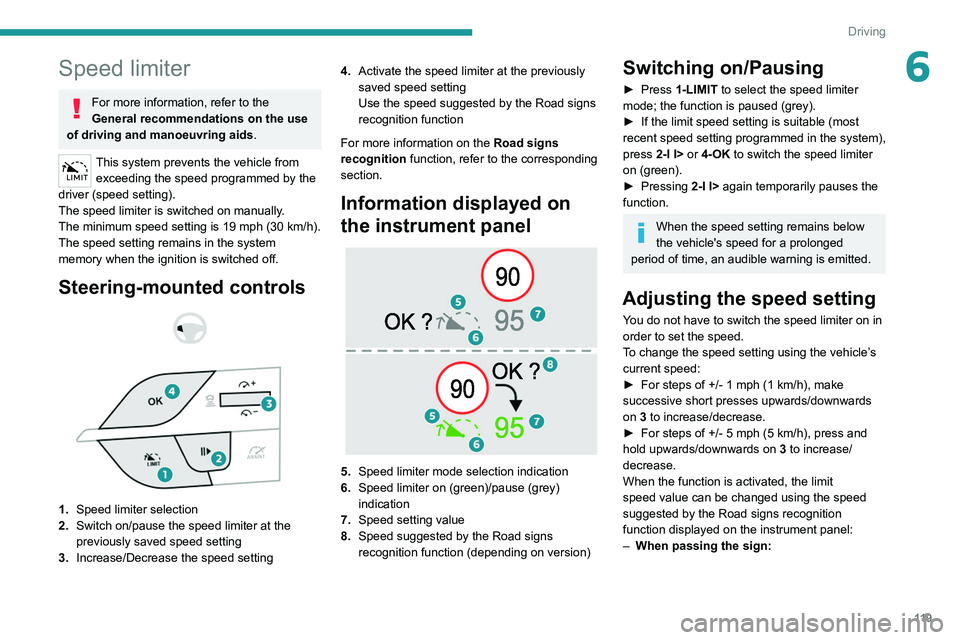
Steering-mounted controls
1. Speed limiter selection
2. Switch on/pause the speed limiter at the
previously saved speed setting
3. Increase/Decrease the speed setting 4.
Activate the speed limiter at the previously
saved speed setting
Use the speed suggested by the Road signs
recognition function
For more information on the Road signs
recognition
function, refer to the corresponding
section.
Information displayed on
the instrument panel
5. Speed limiter mode selection indication
6. Speed limiter on (green)/pause (grey)
indication
7. Speed setting value
8. Speed suggested by the Road signs
recognition function (depending on version)
Switching on/Pausing
► Press 1-LIMIT to select the speed limiter
mode; the function is paused (grey).
►
If the limit speed setting is suitable (most
recent speed setting programmed in the system),
press
2-I I> or 4-OK to switch the speed limiter
on (green).
►
Pressing
2-I I> again temporarily pauses the
function.
When the speed setting remains below
the vehicle's speed for a prolonged
period of time, an audible warning is emitted.
Adjusting the speed setting
You do not have to switch the speed limiter on in
order to set the speed.
To change the speed setting using the vehicle’s
current speed:
►
For steps of +/- 1 mph (1 km/h), make
successive short presses upwards/downwards
on
3 to increase/decrease.
►
For steps of +/- 5 mph (5
km/h), press and
hold upwards/downwards on 3 to increase/
decrease.
When the function is activated, the limit
speed value can be changed using the speed
suggested by the Road signs recognition
function displayed on the instrument panel:
–
When passing the sign:
Page 130 of 260
128
Driving
The system identifies the edges of the traffic lane
and steers the vehicle to keep it inside this lane
and maintain the lateral position chosen by the
driver.
To do this, the system uses a camera placed on
the upper part of the windscreen.
This system is particularly suited to driving on
motorways and main roads.
Activation/Deactivation
The Lane positioning assist system is
automatically activated, after selecting Drive
Assist Plus mode.
For more information on the Drive Assist Plus
system, refer to the corresponding section.
The selection is confirmed by the display of the
symbols on the instrument panel, representing
the steering wheel and the side lines.
The colour of the symbols depends on the
operating state of the system:
(grey)
One or more operating conditions is not
met; the system is paused.
(green)
All operating conditions are met; the
system is active.
(orange)
System malfunction.
If the driver no longer wishes to use the system
for some time, they can deactivate it by pressing
the ASSIST button again (confirmed by the
Driving aids mini-view disappearing from the
instrument panel).
The system status is saved when the ignition is switched off.
Operating conditions
– Adaptive cruise control active.
– ESC system operational.
–
ASR system activated.
–
No trailer detected.
–
No 'space-saver' spare wheel in use.
–
V
ehicle not subject to strong lateral
acceleration.
–
Direction indicators off upon activation of the
system.
Cruise control
The driver must hold the steering wheel properly.
When cruise control is activated, the symbols are
displayed in green: with small steering inputs,
the system steers the vehicle and keeps it in the
position chosen by the driver in the traffic lane.
This position is not necessarily the centre of the
lane.
You can feel the steering wheel moving.
At any time, the driver can change the position of
the vehicle by intervening on the steering wheel
and maintaining the position until the system has
taken it into account. If the chosen position is too
off-centre, an automatic re-centering manoeuvre
can occur. The system adjusts to the newly
defined position.
Pausing/Suspending the
system
The driver must act promptly if they believe that the traffic conditions or the
state of the road surface require their
intervention, by moving the steering wheel to
temporarily suspend system operation. Any
action on the brake pedal that causes the
Adaptive cruise control
system to be paused
will also cause the system to be paused.
If the system detects that the driver is not
holding the wheel firmly enough, it
triggers a series of gradual alerts and then
deactivates itself if there is no response from
the driver.
If the function is suspended due to the
prolonged release of the force holding
the steering wheel, the system must be
reactivated by pressing the ASSIST button
again.
Automatic suspension
Suspension of the system is accompanied by a
specific audible signal.
–
T
riggering of the ESC system.
–
Insufficient lane detection. In this case, the
Active lane departure warning system function
can take over
, and the system will reactivate