2022 PEUGEOT 301 fuel pump
[x] Cancel search: fuel pumpPage 70 of 148

68
Practical information
► Take care to select the pump that delivers the
correct fuel type for the vehicle's engine (see a
reminder label on the inside of the filler flap).
►
Open the filler cap by turning it a 1/4 turn to
the left.
► Remove the filler cap and hang it on its
carrier (on the filler flap).
►
Introduce the filler nozzle and push it in as
far as possible before starting to refuel (risk of
blowback).
►
Fill the tank.
Do not continue past the 3rd cut-off of the
nozzle; as this may cause malfunctions.
►
Push the filler flap to close it.
The vehicle is fitted with a catalytic converter, a
device which helps to reduce the level of harmful
emissions in the exhaust gases.
For petrol engines, you must use unleaded
fuel.
The filler neck is narrower, allowing only
unleaded petrol nozzles to be introduced.
If you have put in the wrong fuel for
the vehicle, you must have the fuel
tank drained and filled with the correct fuel
before starting the engine.
Misfuel prevention (Diesel)
(Depending on country of sale.)
This mechanical device prevents filling the tank
of a Diesel vehicle with petrol.
Located in the filler neck, the misfuel prevention
device is visible when the filler cap is removed.
Operation
When a petrol filler nozzle is introduced into the
fuel filler neck of a Diesel vehicle, it comes into
contact with the flap. The system remains closed
and prevents filling.
Do not persist but introduce a Diesel type
filler nozzle.
The misfuel prevention device does not prevent filling with a jerrycan, regardless
of the fuel type.
Travelling abroad
As Diesel fuel pump nozzles may be
different in other countries, the presence
of the misfuel prevention device may make
refuelling impossible.
Before travelling abroad, it is advisable to
check with a PEUGEOT dealer if the vehicle
is suitable for the distribution equipment of the
countries visited.
Snow chains
In wintry conditions, snow chains improve
traction as well as the behaviour of the vehicle
when braking.
Snow chains must be fitted only to the
front wheels. They must never be fitted to
"space-saver" type spare wheels.
Page 74 of 148

72
Practical information
Opening
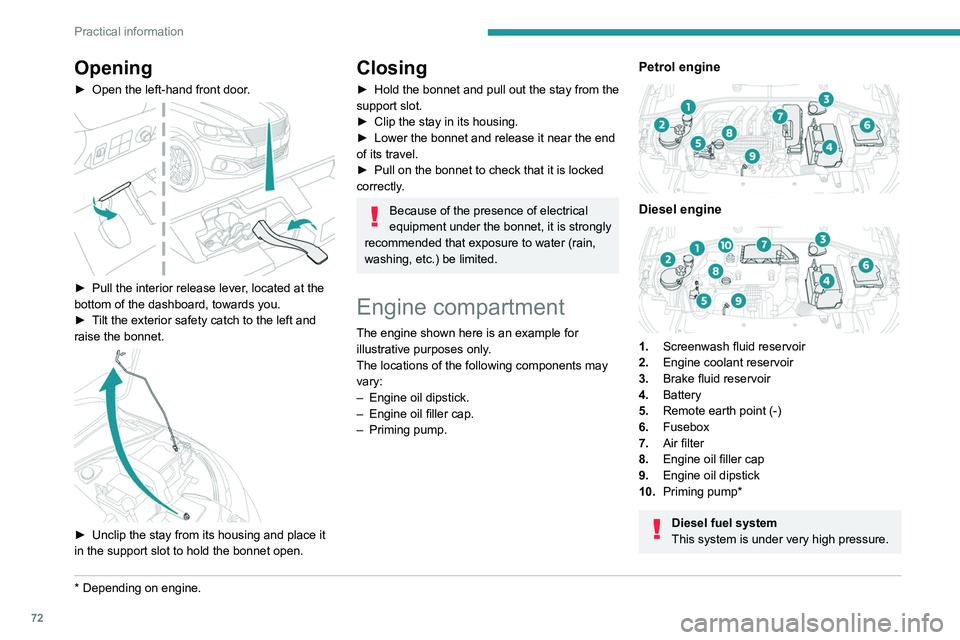
► Open the left-hand front door.
► Pull the interior release lever, located at the
bottom of the dashboard, towards you.
►
T
ilt the exterior safety catch to the left and
raise the bonnet.
► Unclip the stay from its housing and place it
in the support slot to hold the bonnet open.
* Depending on engine.
Closing
► Hold the bonnet and pull out the stay from the
support slot.
►
Clip the stay in its housing.
►
Lower the bonnet and release it near the end
of its travel.
►
Pull on the bonnet to check that it is locked
correctly
.
Because of the presence of electrical
equipment under the bonnet, it is strongly
recommended that exposure to water (rain,
washing, etc.) be limited.
Engine compartment
The engine shown here is an example for
illustrative purposes only.
The locations of the following components may
vary:
–
Engine oil dipstick.
–
Engine oil filler cap.
–
Priming pump.
Petrol engine
Diesel engine
1. Screenwash fluid reservoir
2. Engine coolant reservoir
3. Brake fluid reservoir
4. Battery
5. Remote earth point (-)
6. Fusebox
7. Air filter
8. Engine oil filler cap
9. Engine oil dipstick
10. Priming pump*
Diesel fuel system
This system is under very high pressure.
Page 76 of 148

74
Practical information
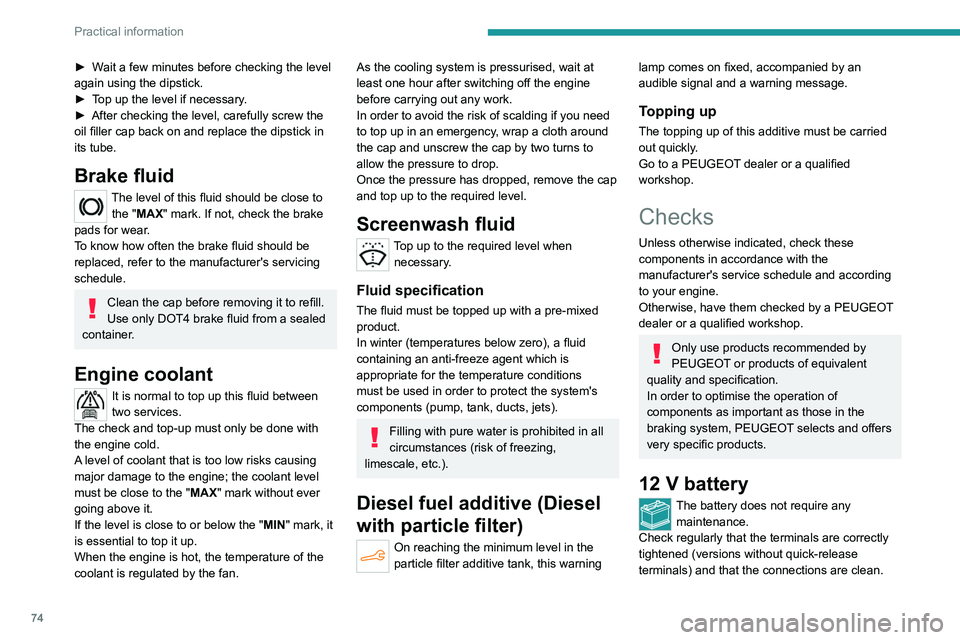
► Wait a few minutes before checking the level
again using the dipstick.
►
T
op up the level if necessary.
►
After checking the level, carefully screw the
oil filler cap back on
and replace the dipstick in
its tube.
Brake fluid
The level of this fluid should be close to
the "MAX" mark. If not, check the brake
pads for wear.
To know how often the brake fluid should be
replaced, refer to the manufacturer's servicing
schedule.
Clean the cap before removing it to refill.
Use only DOT4 brake fluid from a sealed
container.
Engine coolant
It is normal to top up this fluid between
two services.
The check and top-up must only be done with
the engine cold.
A level of coolant that is too low risks causing
major damage to the engine; the coolant level
must be close to the "MAX" mark without ever
going above it.
If the level is close to or below the " MIN" mark, it
is essential to top it up.
When the engine is hot, the temperature of the
coolant is regulated by the fan.
As the cooling system is pressurised, wait at
least one hour after switching off the engine
before carrying out any work.
In order to avoid the risk of scalding if you need
to top up in an emergency, wrap a cloth around
the cap and unscrew the cap by two turns to
allow the pressure to drop.
Once the pressure has dropped, remove the cap
and top up to the required level.
Screenwash fluid
Top up to the required level when necessary.
Fluid specification
The fluid must be topped up with a pre-mixed
product.
In winter (temperatures below zero), a fluid
containing an anti-freeze agent which is
appropriate for the temperature conditions
must be used in order to protect the system's
components (pump, tank, ducts, jets).
Filling with pure water is prohibited in all
circumstances (risk of freezing,
limescale, etc.).
Diesel fuel additive (Diesel
with particle filter)
On reaching the minimum level in the
particle filter additive tank, this warning
lamp comes on fixed, accompanied by an
audible signal and a warning message.
Topping up
The topping up of this additive must be carried
out quickly.
Go to a PEUGEOT dealer or a qualified
workshop.
Checks
Unless otherwise indicated, check these
components in accordance with the
manufacturer's service schedule and according
to your engine.
Otherwise, have them checked by a PEUGEOT
dealer or a qualified workshop.
Only use products recommended by
PEUGEOT or products of equivalent
quality and specification.
In order to optimise the operation of
components as important as those in the
braking system, PEUGEOT selects and offers
very specific products.
12 V battery
The battery does not require any maintenance.
Check regularly that the terminals are correctly
tightened (versions without quick-release
terminals) and that the connections are clean.
Page 81 of 148

79
In the event of a breakdown
8Warning triangle
This reflective and dismantable device is to be
installed on the side of the road when a vehicle
is broken down or damaged.
Before getting out of the vehicle
Turn on the hazard warning lamps, then
put on the safety vest to assemble and install
the triangle.
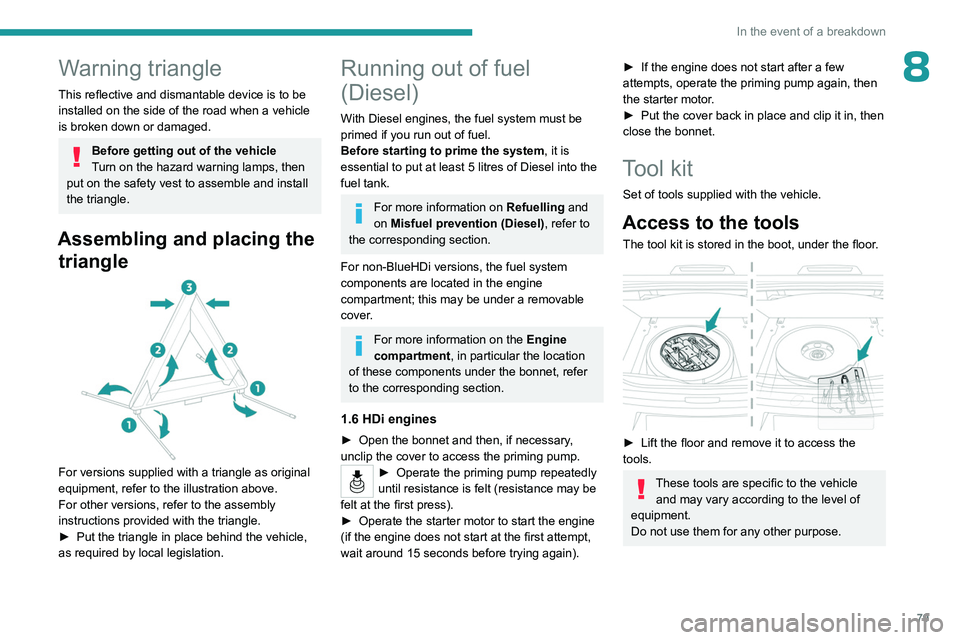
Assembling and placing the triangle
For versions supplied with a triangle as original
equipment, refer to the illustration above.
For other versions, refer to the assembly
instructions provided with the triangle.
►
Put the triangle in place behind the vehicle,
as required by local legislation.
Running out of fuel
(Diesel)
With Diesel engines, the fuel system must be
primed if you run out of fuel.
Before starting to prime the system, it is
essential to put at least 5 litres of Diesel into the
fuel tank.
For more information on Refuelling and
on Misfuel prevention (Diesel), refer to
the corresponding section.
For non-BlueHDi versions, the fuel system
components are located in the engine
compartment; this may be under a removable
cover.
For more information on the Engine
compartment, in particular the location
of these components under the bonnet, refer
to the corresponding section.
1.6 HDi engines
► Open the bonnet and then, if necessary ,
unclip the cover to access the priming pump.
► Operate the priming pump repeatedly
until resistance is felt (resistance may be
felt at the first press).
►
Operate the starter motor to start the engine
(if the engine does not start at the first attempt,
wait around 15 seconds before trying again).
► If the engine does not start after a few
attempts, operate the priming pump again, then
the starter motor
.
►
Put the cover back in place and clip it in, then
close the bonnet.
Tool kit
Set of tools supplied with the vehicle.
Access to the tools
The tool kit is stored in the boot, under the floor.
► Lift the floor and remove it to access the
tools.
These tools are specific to the vehicle and may vary according to the level of
equipment.
Do not use them for any other purpose.
Page 128 of 148

126
Alphabetical index
ISOFIX mountings 45, 47
J
Jack 79–80
Jump starting
89
K
Key 15–17
Key, electronic
15
Key with remote control
15, 51
Kit, hands-free
102, 116
Kit, temporary puncture repair
79
Klaxon
36
L
Labels, identification 96
Leather (care)
78
LEDs - Light-emitting diodes
32, 84
Level, brake fluid
74
Level, Diesel additive
74–75
Level, engine coolant
74
Level, engine oil
73
Levels and checks
72–74
Level, screenwash fluid
33, 74
Light-emitting diodes - LEDs
32, 84
Lighting, exterior
31
Lighting, guide-me home 32
Lighting, interior
30
Loading
70–71
Load reduction mode
69
Locating your vehicle
16
Locking
16
Locking from the inside
16
Locking the doors
16–17
M
Maintenance (advice) 76
Maintenance, routine
61, 74
Manoeuvring aids (recommendations)
60
Map reading lamps
30
Markings, identification
96
Mat
61
Menu
11 5
Menu, main
99
Menus (audio)
11 0 – 111
Mirror, rear view
24
Mirrors, door
23–24, 28
Misfuel prevention
68
Mountings, ISOFIX
45, 47
MP3 CD
100
N
Number plate lamps 87
O
Obstacle detection 64
Oil change
73
Oil consumption
73
Oil, engine
73
On-board tools
79
Opening the bonnet
71–72
Opening the boot
15, 18–19
Opening the doors
15, 18
P
Pads, brake 75
Paint
77, 96
Paint colour code
96
Parking brake
52, 75
Parking sensors, audible and visual
64
Plates, identification
96
Player, Apple®
11 4
Player, MP3 CD
100
Player, USB
100, 113
Port, USB
29, 100–101, 113, 115
Pressures, tyres
76, 97
Pre-tensioning (seat belts)
38
Priming pump
79
Priming the fuel system
79
Profiles
11 8
Protecting children
40–47
Puncture
80