2022 PEUGEOT 301 window
[x] Cancel search: windowPage 4 of 148

2
Contents
■
Overview
■
Eco-driving
1Dashboard instrumentsInstrument panel 7
Warning and indicator lamps 7
Indicators 10
Distance recorders 11
Setting the date and time 12
Trip computer 12
2AccessRemote control / Key 15
Central locking 16
Back-up procedures 17
Doors 18
Boot 18
Alarm 19
Electric windows 20
3Ease of use and comfortFront seats 21
Rear bench seat 22
Steering wheel adjustment 23
Mirrors 23
Heating and Ventilation 24
Air conditioning, manual (without
display screen)
25
Electronic air conditioning (with
display screen)
26
Front demisting - defrosting 27
Demisting/de-icing the rear screen and/or
the door mirrors 28
Interior fittings 28
Courtesy lamps 30
4Lighting and visibilityExterior lighting control stalk 31
Direction indicators 32
Headlamp beam height adjustment 33
Wiper control stalk 33
Changing a wiper blade 34
5SafetyGeneral safety recommendations 35
Hazard warning lamps 35
Horn 36
Electronic stability control (ESC) 36
Seat belts 37
Airbags 39
Child seats 41
Deactivating the front passenger airbag 43
ISOFIX child seats 45
Child lock 48
6DrivingDriving recommendations 49
Starting-switching off the engine 51
Parking brake 52
Hill start assist 52
5-speed manual gearbox 53
6-speed manual gearbox 53
6-speed automatic gearbox 54
Gear shift indicator 56
Stop & Start 56
Tyre under-inflation detection 58
Driving and manoeuvring aids - General
recommendations
60
Speed limiter 61
Cruise control - Specific recommendations 62
Cruise control 63
Rear parking sensors 64
Reversing Camera 65
7Practical informationCompatibility of fuels 67
Refuelling 67
Misfuel prevention (Diesel) 68
Snow chains 68
Energy economy mode 69
Towing device 69
Very cold climate screen 70
Roof bars 70
Bonnet 71
Engine compartment 72
Checking levels 73
Checks 74
Free-wheeling 76
Advice on care and maintenance 76
8In the event of a breakdownWarning triangle 79
Running out of fuel (Diesel) 79
Tool kit 79
Spare wheel 80
Changing a bulb 83
Fuses 87
12 V battery 88
Page 6 of 148

4
Overview
Presentation
These illustrations and descriptions are intended
as a guide. The presence and location of some
components varies according to the version, trim
level and country of sale.
Instruments and controls
1.Bonnet release
2. Dashboard fuses
3. Horn
4. Instrument panel
5. Audio and telematics systems
6. Warning lamp display for seat belts and front
passenger airbag
Courtesy lamps
Rear view mirror 7.
Emergency warning lamps
Locking/unlocking from the inside
8. Adjusting the date/time
9. Heating, ventilation
Manual air conditioning (without display
screen)
Electronic air conditioning (with display
screen)
Front demisting/defrosting
Rear screen demisting/defrosting
Heated windscreen
10. Manual gearbox
Automatic gearbox (EAT6)
Gear shift indicator
11 . USB socket
12 V accessory socket / Cigar lighter
12. Parking brake
13. Electric windows deactivation
Steering-mounted controls
1.External lighting/direction indicators control
stalk
Voice recognition activation button 2.
Speed Limiter/Cruise Control
3. Audio system setting controls
4. Wiper/screenwash/trip computer control stalk
Side control bar
1.Manual headlamp beam height adjustment
2. DSC/ASR systems
3. Stop & Start
4. Boot lid opening
5. Alarm
6. Door mirrors adjustment
Labels
"Lighting and visibility - Exterior lighting
control stalk" and "In the event of a
breakdown - Changing a bulb" sections:
"Safety - Child seats - Deactivating the front
passenger airbag" section:
Page 8 of 148

6
Eco-driving
Eco-driving
Eco-driving refers to a range of everyday
practices that allow the motorist to optimise
the vehicle's energy consumption (fuel and/or
electricity) and CO
2 emissions.
Optimise your use of the gearbox
With a manual gearbox, move off gently and
change up promptly. While accelerating, change
up early.
With an automatic gearbox, favour automatic
mode. Do not depress the accelerator pedal
heavily or suddenly.
The gear shift indicator prompts you to engage
the most suitable gear. Whenever this indication
is displayed on the instrument panel, follow it
straight away.
With an automatic gearbox, this indicator
appears only in manual mode.
Drive smoothly
Maintain a safe distance between vehicles, use
engine braking rather than the brake pedal and
press the accelerator gradually. These practices
help to save on energy consumption, reduce
CO
2 emissions and decrease general traffic
noise.
When the traffic is flowing smoothly, select the
cruise control.
Control the use of electrical equipment
Before moving off, if the passenger compartment
is too warm, ventilate it by opening the windows
and air vents before using the air conditioning.
At speeds above 31
mph (50 km/h), close the
windows and leave the air vents open.
Consider using equipment that can help keep
the temperature in the passenger compartment
down (e.g.
sunroof blind, window blinds).
Unless automatically regulated, switch off the air
conditioning as soon as the desired temperature
has been reached.
Switch off the demisting and defrosting functions,
if they are not managed automatically.
Switch off the heated seat as soon as possible.
Adapt your use of the headlamps and/or
foglamps to the level of visibility, in accordance
with current legislation in the country in which
you are driving.
Avoid running the engine before moving off,
particularly in winter (other than in severe wintry
conditions: temperature below -23°C). The
vehicle will warm up much faster while driving.
As a passenger, avoid connecting your
multimedia devices (e.g.
film, music, video
game) to help reduce the consumption of energy.
Disconnect all portable devices before leaving
the vehicle.
Limit the causes of excess consumption
Spread loads throughout the vehicle. Place the
heaviest items in the boot as close as possible to
the rear seats. Limit the loads carried in the vehicle and
minimise wind resistance (e.g.
roof bars, roof
rack, bicycle carrier, trailer). Preferably, use a
roof box.
Remove roof bars and roof racks after use.
At the end of winter, remove snow tyres and refit
summer tyres.
Comply with the servicing instructions
Check tyre pressures regularly, with the tyres
cold, referring to the label in the door aperture on
the driver's side.
Carry out this check in particular:
–
before a long journey
.
–
at each change of season.
–
after a long period out of use.
Do not forget the spare wheel and, where
applicable, the tyres on your trailer or caravan.
Have your vehicle serviced regularly (e.g.
engine
oil, oil filter, air filter, passenger compartment
filter, etc.). Observe the schedule of operations in
the manufacturer's service schedule.
With a BlueHDi Diesel engine, if the SCR system
has a fault, your vehicle will emit pollution. Visit
a PEUGEOT dealer or a qualified workshop
as soon as possible to restore your vehicle's
nitrogen oxide emissions to legal levels.
When filling the fuel tank, do not continue after
the third cut-out of the nozzle, to avoid overflow.
You will only see the fuel consumption of your
new vehicle settle down to a consistent average
after the first 1,900 miles (3,000 kilometres).
Page 15 of 148
13
Dashboard instruments
1Reset
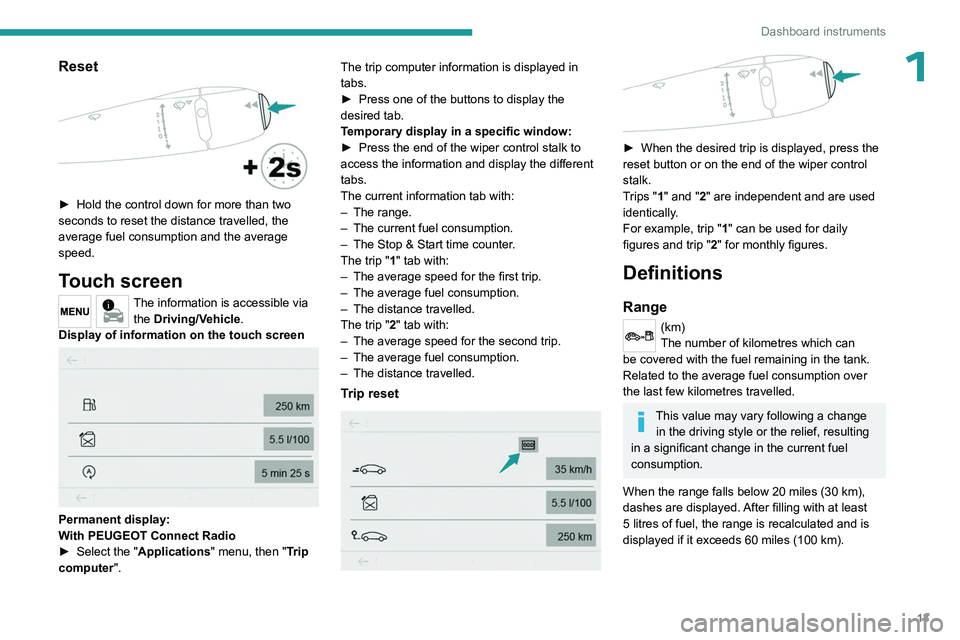
► Hold the control down for more than two
seconds to reset the distance travelled, the
average fuel consumption and the average
speed.
Touch screen
The information is accessible via the Driving/Vehicle.
Display of information on the touch screen
Permanent display:
With PEUGEOT Connect Radio
►
Select the "
Applications" menu, then "Trip
computer". The trip computer information is displayed in
tabs.
►
Press one of the buttons to display the
desired tab.
T
emporary display in a specific window:
►
Press the end of the wiper control stalk to
access the information and display the different
tabs.
The current information tab with:
–
The range.
–
The current fuel consumption.
–
The Stop & Start time counter
.
The trip "1" tab with:
–
The average speed for the first trip.
–
The average fuel consumption.
–
The distance travelled.
The trip "
2" tab with:
–
The average speed for the second trip.
–
The average fuel consumption.
–
The distance travelled.
Trip reset
► When the desired trip is displayed, press the
reset button or on the end of the wiper control
stalk.
T
rips "1" and "2" are independent and are used
identically.
For example, trip "1" can be used for daily
figures and trip " 2" for monthly figures.
Definitions
Range
(km)
The number of kilometres which can
be covered with the fuel remaining in the tank.
Related to the average fuel consumption over
the last few kilometres travelled.
This value may vary following a change in the driving style or the relief, resulting
in a significant change in the current fuel
consumption.
When the range falls below 20 miles (30 km),
dashes are displayed. After filling with at least
5 litres of fuel, the range is recalculated and is
displayed if it exceeds 60 miles (100 km).
Page 22 of 148
20
Access
The alarm is deactivated: the indicator lamp goes off.
Triggering of the alarm
This is indicated by sounding of the siren and
flashing of the direction indicators for thirty
seconds.
When the vehicle is unlocked using the
remote control, rapid flashing of the
indicator lamp informs you that the alarm was
triggered during your absence. Upon ignition,
this flashing stops immediately.
Locking the vehicle without
activating the alarm
► Lock the vehicle using the key .
Failure of the remote control
To deactivate the monitoring functions:
►
Unlock the vehicle using the key .
►
Open the door; this sets off the alarm.
►
Switch on the ignition; this stops the alarm.
Malfunction
When the ignition is switched on, the fixed
lighting of the red indicator lamp in the button
indicates a system malfunction.
Have it checked by a PEUGEOT dealer or a
qualified workshop.
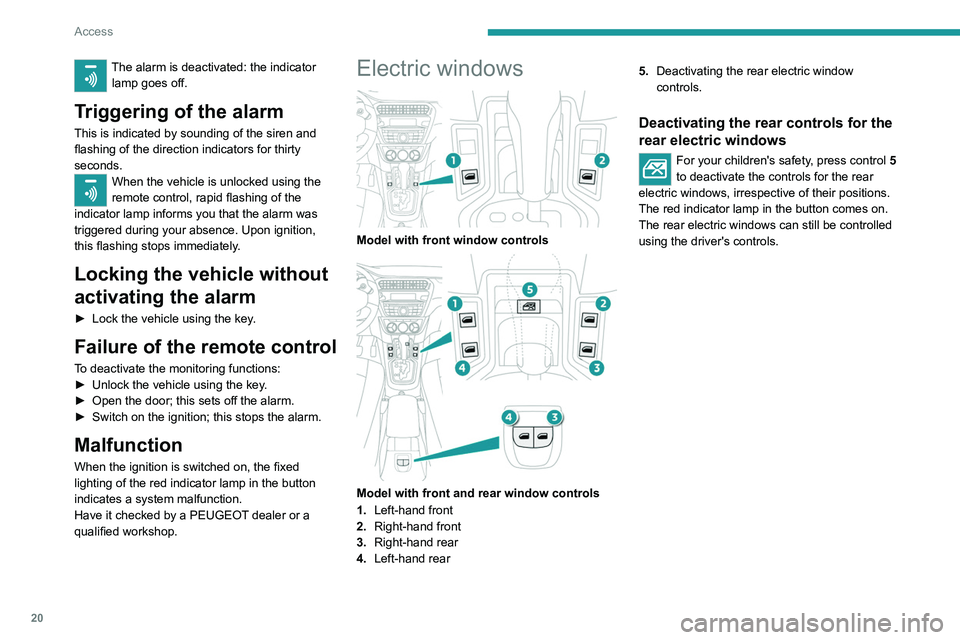
Electric windows
Model with front window controls
Model with front and rear window controls
1. Left-hand front
2. Right-hand front
3. Right-hand rear
4. Left-hand rear 5.
Deactivating the rear electric window
controls.
Deactivating the rear controls for the
rear electric windows
For your children's safety, press control 5
to deactivate the controls for the rear
electric windows, irrespective of their positions.
The red indicator lamp in the button comes on.
The rear electric windows can still be controlled
using the driver's controls.
Page 27 of 148

25
Ease of use and comfort
3water underneath the vehicle. This is perfectly
normal.
Servicing the ventilation and air
conditioning system
►
Ensure that the passenger compartment
filter is in good condition and have the filter
elements replaced regularly
.
We recommend using a composite passenger
compartment filter. Its specific active additive
helps protect against polluting gases and bad
smells.
►
T
o ensure correct operation of the
air conditioning system, have it checked
according to the recommendations in the
Manufacturer’s service schedule.
Stop & Start
The heating and air conditioning systems
only operate when the engine is running.
Temporarily deactivate the Stop & Start
system to maintain a comfortable temperature
in the passenger compartment.
For more information on the Stop &
Start
system, refer to the corresponding
section.
Air conditioning, manual (without display screen)
This system operates only with the engine
running.
1. Temperature
2. Air flow
3. Air distribution
4. Air intake
/ Air recirculation
5. Air conditioning
Temperature
► Turn the dial 1 from blue (cold) to red (hot) to
adjust the temperature to your liking.
Air flow
► Turn the dial 2 to obtain a comfortable air
flow.
Deactivation
If you put the air flow control in the 0 position, the
temperature is no longer controlled.
A slight flow of air can still be felt, resulting from
the forward movement of the vehicle.
Air distribution
Windscreen and side windows.
Windscreen, side windows and footwells.
Footwells.
Central and side air vents, footwells.
Central and side air vents.
The air distribution can be adapted by placing
the dial 3 to an intermediate notch or by closing
the air vents.
Air intake/Air recirculation
Recirculation of the interior air isolates the
passenger compartment from exterior odours
and fumes.
Return to exterior air intake as soon as possible
to avoid deterioration of the air quality and the
formation of mist.
► Move manual co ntrol 4 to the left for
the "Recirculation of interior air" position.
► Move manual co ntrol 4 to the right to
return to the "Exterior air intake" position.
Air conditioning
The air conditioning is designed to operate
efficiently in all seasons, with the windows
closed.
It allows you:
Page 29 of 148
27
Ease of use and comfort
3• windscreen and side windows (demisting or
defrosting),
•
the windscreen, side windows and air vents,
•
the windscreen, side windows, air vents and
footwells,
•
the windscreen, side windows and footwells,
•
the footwells,
•
the air vents and footwells,
•
the air vents.
Air flow
► Press one of the buttons 2 to increase/
decrease the air flow.
The air flow bars light up/go off gradually.
Deactivating the system
► Press the "small fan" button 2 until all the
bars in the display are off.
This action deactivates all functions of the air
conditioning system.
Temperature is no longer regulated. A slight flow
of air can still be felt, resulting from the forward
movement of the vehicle.
Pressing the "small fan" button 2 again
reactivates the system.
Avoid driving for long periods with the system deactivated (risk of misting and
deterioration of air quality).
Front demist - defrost
These markings on the control panel indicate the control positions for rapid
demisting or defrosting of the windscreen and
side windows.
With the manual air
conditioning system
(without screen)
► Put the temperature and air flow
controls to the dedicated marked position.
► Put the air intake control to the
"Exterior air intake" position (manual
control moved to the right).
► Put the air distribution control to the
"Windscreen" position.
► Switch on the air conditioning by
pressing the appropriate button; the
lighting of the associated control comes on.
With the electronic air
conditioning system (with
screen)
► Press this button to activate/deactivate
the system.
The lighting of the indicator lamp in the button
indicates that the system is activated.
With Stop & Start, when demisting has
been activated, STOP mode is not
available.
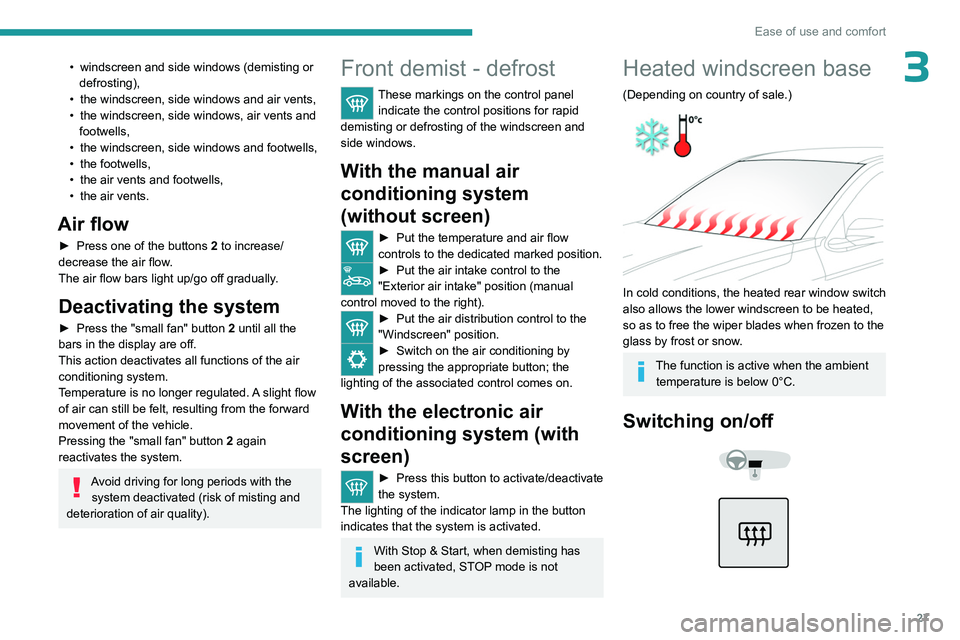
Heated windscreen base
(Depending on country of sale.)
In cold conditions, the heated rear window switch
also allows the lower windscreen to be heated,
so as to free the wiper blades when frozen to the
glass by frost or snow.
The function is active when the ambient temperature is below 0°C.
Switching on/off
Page 44 of 148
42
Safety
the passenger seat is adjustable, move it
forwards if necessary.
Remove the head restraint before
installing a child seat with a backrest on a
passenger seat.
Ensure that the head restraint is stored or
attached securely to prevent it from being
thrown around the vehicle in the event of
sharp braking. Refit the head restraint once
the child seat has been removed.
Installing a booster seat
The chest part of the seat belt must be
positioned on the child's shoulder without
touching the neck.
Ensure that the lap part of the seat belt
passes correctly over the child's thighs.
Use a booster seat with a backrest, equipped
with a belt guide at shoulder level.
Additional protections
To prevent accidental opening of the
doors and rear windows, use the "Child lock".
Take care not to open the rear windows by
more than one third.
To protect young children from the sun's rays,
fit side blinds on the rear windows.
As a safety measure, do not leave:
–
A
child alone and unsupervised inside a
vehicle.
–
A
child or an animal in a vehicle which is
exposed to the sun, with the windows closed.
– The keys within reach of children inside the
vehicle.
Child seat at the rear
Forward-facing or rearward-facing
► Move the vehicle's front seat forward and
straighten the backrest so that the legs of the
child in the forward-facing or rearward-facing
child seat itself do not touch the vehicle's front
seat.
►
Check that the backrest of the forward-facing
child seat is as close as possible to the backrest
of the vehicle's rear seat, and ideally in contact
with it.
Centre rear seat
A child seat with a support leg must never be
installed on the centre rear passenger seat .
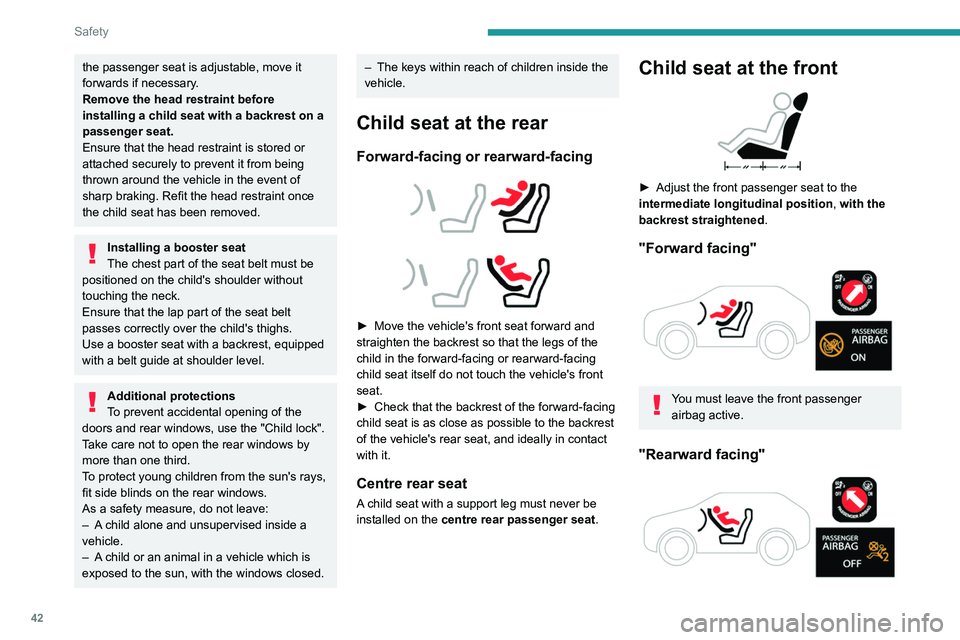
Child seat at the front
► Adjust the front passenger seat to the
intermediate longitudinal position ,
with the
backrest straightened .
"Forward facing"
You must leave the front passenger
airbag active.
"Rearward facing"