2022 PEUGEOT 301 spare wheel
[x] Cancel search: spare wheelPage 4 of 148

2
Contents
■
Overview
■
Eco-driving
1Dashboard instrumentsInstrument panel 7
Warning and indicator lamps 7
Indicators 10
Distance recorders 11
Setting the date and time 12
Trip computer 12
2AccessRemote control / Key 15
Central locking 16
Back-up procedures 17
Doors 18
Boot 18
Alarm 19
Electric windows 20
3Ease of use and comfortFront seats 21
Rear bench seat 22
Steering wheel adjustment 23
Mirrors 23
Heating and Ventilation 24
Air conditioning, manual (without
display screen)
25
Electronic air conditioning (with
display screen)
26
Front demisting - defrosting 27
Demisting/de-icing the rear screen and/or
the door mirrors 28
Interior fittings 28
Courtesy lamps 30
4Lighting and visibilityExterior lighting control stalk 31
Direction indicators 32
Headlamp beam height adjustment 33
Wiper control stalk 33
Changing a wiper blade 34
5SafetyGeneral safety recommendations 35
Hazard warning lamps 35
Horn 36
Electronic stability control (ESC) 36
Seat belts 37
Airbags 39
Child seats 41
Deactivating the front passenger airbag 43
ISOFIX child seats 45
Child lock 48
6DrivingDriving recommendations 49
Starting-switching off the engine 51
Parking brake 52
Hill start assist 52
5-speed manual gearbox 53
6-speed manual gearbox 53
6-speed automatic gearbox 54
Gear shift indicator 56
Stop & Start 56
Tyre under-inflation detection 58
Driving and manoeuvring aids - General
recommendations
60
Speed limiter 61
Cruise control - Specific recommendations 62
Cruise control 63
Rear parking sensors 64
Reversing Camera 65
7Practical informationCompatibility of fuels 67
Refuelling 67
Misfuel prevention (Diesel) 68
Snow chains 68
Energy economy mode 69
Towing device 69
Very cold climate screen 70
Roof bars 70
Bonnet 71
Engine compartment 72
Checking levels 73
Checks 74
Free-wheeling 76
Advice on care and maintenance 76
8In the event of a breakdownWarning triangle 79
Running out of fuel (Diesel) 79
Tool kit 79
Spare wheel 80
Changing a bulb 83
Fuses 87
12 V battery 88
Page 7 of 148

5
Overview
"Safety - ISOFIX mountings" section:
i-SizeTOP TETHER
"Driving - Stop & Start" section:
"Driving - Tyre under-inflation detection"
section:
"Practical information - Compatibility of
fuels" section:
"Practical information - Bonnet" section:
"In the event of a breakdown - Spare wheel"
section:
"In the event of a breakdown - 12 V battery/
Accessory batteries" section:
24V12V+
Page 8 of 148

6
Eco-driving
Eco-driving
Eco-driving refers to a range of everyday
practices that allow the motorist to optimise
the vehicle's energy consumption (fuel and/or
electricity) and CO
2 emissions.
Optimise your use of the gearbox
With a manual gearbox, move off gently and
change up promptly. While accelerating, change
up early.
With an automatic gearbox, favour automatic
mode. Do not depress the accelerator pedal
heavily or suddenly.
The gear shift indicator prompts you to engage
the most suitable gear. Whenever this indication
is displayed on the instrument panel, follow it
straight away.
With an automatic gearbox, this indicator
appears only in manual mode.
Drive smoothly
Maintain a safe distance between vehicles, use
engine braking rather than the brake pedal and
press the accelerator gradually. These practices
help to save on energy consumption, reduce
CO
2 emissions and decrease general traffic
noise.
When the traffic is flowing smoothly, select the
cruise control.
Control the use of electrical equipment
Before moving off, if the passenger compartment
is too warm, ventilate it by opening the windows
and air vents before using the air conditioning.
At speeds above 31
mph (50 km/h), close the
windows and leave the air vents open.
Consider using equipment that can help keep
the temperature in the passenger compartment
down (e.g.
sunroof blind, window blinds).
Unless automatically regulated, switch off the air
conditioning as soon as the desired temperature
has been reached.
Switch off the demisting and defrosting functions,
if they are not managed automatically.
Switch off the heated seat as soon as possible.
Adapt your use of the headlamps and/or
foglamps to the level of visibility, in accordance
with current legislation in the country in which
you are driving.
Avoid running the engine before moving off,
particularly in winter (other than in severe wintry
conditions: temperature below -23°C). The
vehicle will warm up much faster while driving.
As a passenger, avoid connecting your
multimedia devices (e.g.
film, music, video
game) to help reduce the consumption of energy.
Disconnect all portable devices before leaving
the vehicle.
Limit the causes of excess consumption
Spread loads throughout the vehicle. Place the
heaviest items in the boot as close as possible to
the rear seats. Limit the loads carried in the vehicle and
minimise wind resistance (e.g.
roof bars, roof
rack, bicycle carrier, trailer). Preferably, use a
roof box.
Remove roof bars and roof racks after use.
At the end of winter, remove snow tyres and refit
summer tyres.
Comply with the servicing instructions
Check tyre pressures regularly, with the tyres
cold, referring to the label in the door aperture on
the driver's side.
Carry out this check in particular:
–
before a long journey
.
–
at each change of season.
–
after a long period out of use.
Do not forget the spare wheel and, where
applicable, the tyres on your trailer or caravan.
Have your vehicle serviced regularly (e.g.
engine
oil, oil filter, air filter, passenger compartment
filter, etc.). Observe the schedule of operations in
the manufacturer's service schedule.
With a BlueHDi Diesel engine, if the SCR system
has a fault, your vehicle will emit pollution. Visit
a PEUGEOT dealer or a qualified workshop
as soon as possible to restore your vehicle's
nitrogen oxide emissions to legal levels.
When filling the fuel tank, do not continue after
the third cut-out of the nozzle, to avoid overflow.
You will only see the fuel consumption of your
new vehicle settle down to a consistent average
after the first 1,900 miles (3,000 kilometres).
Page 60 of 148

58
Driving
After the engine has restarted, STOP mode is not available until the vehicle
has reached a speed of 5 mph (8
km/h).
During parking manoeuvres, STOP mode
is not available for a few seconds after
coming out of reverse gear or turning the
steering wheel.
Restarting the engine (START mode)
The engine automatically restarts as soon as the
driver indicates the intention of moving off again:
With a manual gearbox: with the clutch pedal
fully depressed.
With an automatic gearbox:
–
With the selector in mode
D or M: with the
brake pedal released.
–
With the selector in mode
N and the brake
pedal released: with the selector at D or M.
–
With the selector in mode
P and the brake
pedal depressed: with the selector at R, N, D
or M.
–
With reverse gear engaged.
Special cases
The engine will restart automatically if the
conditions for operation are met again and in the
following case:
–
Some specific conditions (braking assistance,
air conditioning setting, etc.).
In these cases, this indicator lamp flashes
for a few seconds, then goes off.
Malfunctions
In the event of a system malfunction, the
warning lamp in this button flashes for a
moment, then illuminates continuously.
Have it checked by a PEUGEOT dealer or a
qualified workshop.
The vehicle stalls in STOP mode
All of the instrument panel warning lamps come
on if there is a fault.
►
Switch off the ignition then start the engine
again.
12 V battery
The Stop & Start system requires a
12 V battery of specific technology and
specification.
All work must be carried out only by a
PEUGEOT
dealer or a qualified workshop
Tyre under-inflation detection
This system alerts the driver if one or more tyres
suffer a drop in pressure.
The alert is raised when the vehicle is moving,
not when stationary.
It compares the information given by the wheel
speed sensors with reference values, which
must be reinitialised every time the tyre
pressures are adjusted or a wheel changed.
It takes into account the last values stored
during the reinitialisation request. It is therefore
essential that the tyre pressure is correct during
the operation. This operation is the driver’s
responsibility.
The tyre under-inflation detection cannot, in any circumstances, replace the need
for vigilance on the part of the driver.
This system does not avoid the need to
regularly check the tyre pressures (including
the spare wheel), especially before a long
journey.
Driving with under-inflated tyres, particularly
in adverse conditions (heavy load, high
speed, long journey):
–
worsens road-holding.
–
lengthens braking distances.
–
causes premature wear of the tyres.
–
increases energy consumption.
The inflation pressures defined for the vehicle can be found on the tyre pressure
label.
For more information on the Identification
markings, refer to the corresponding section.
Checking tyre pressures
This check should be done monthly
when the tyres are "cold" (vehicle stopped for
1 hour or after a journey of less than 6 miles
(10
km) at moderate speeds).
Page 61 of 148

59
Driving
6Otherwise, add 0.3 bar to the pressures
shown on the label.
Snow chains
The system does not have to be
reinitialised after fitting or removing snow
chains.
Under-inflation alert
This is signalled by the fixed illumination of this warning lamp, accompanied by an
audible signal and the display of a message.
►
Reduce speed immediately
, avoid excessive
steering movements and avoid sudden braking.
►
Stop the vehicle as soon as it is safe to do
so.
The loss of pressure detected may not always cause visible deformation of the
tyre.
Do not rely on just a visual check.
►
Using a compressor
, such as the one in
the temporary puncture repair kit, check the
pressures of all four tyres when cold.
►
If it is not possible to carry out this check
immediately
, drive carefully at reduced speed.
►
In the event of a puncture, use the
temporary puncture repair kit or the spare wheel
(depending on equipment).
Driving too slowly may not ensure
optimum monitoring.
The alert is not immediately triggered in the
event of a sudden loss of pressure or tyre
blow-out. This is because analysis of the
values read by the wheel's speed sensors
can take several minutes.
The alert may be delayed at speeds below
25 mph (40 km/h), or when adopting a sporty
driving mode.
The alert is kept active until the system is reinitialised.
Reinitialisation
► The system must be reinitialised after any
adjustment to the pressure of one or more tyres,
and after changing one or more wheels.
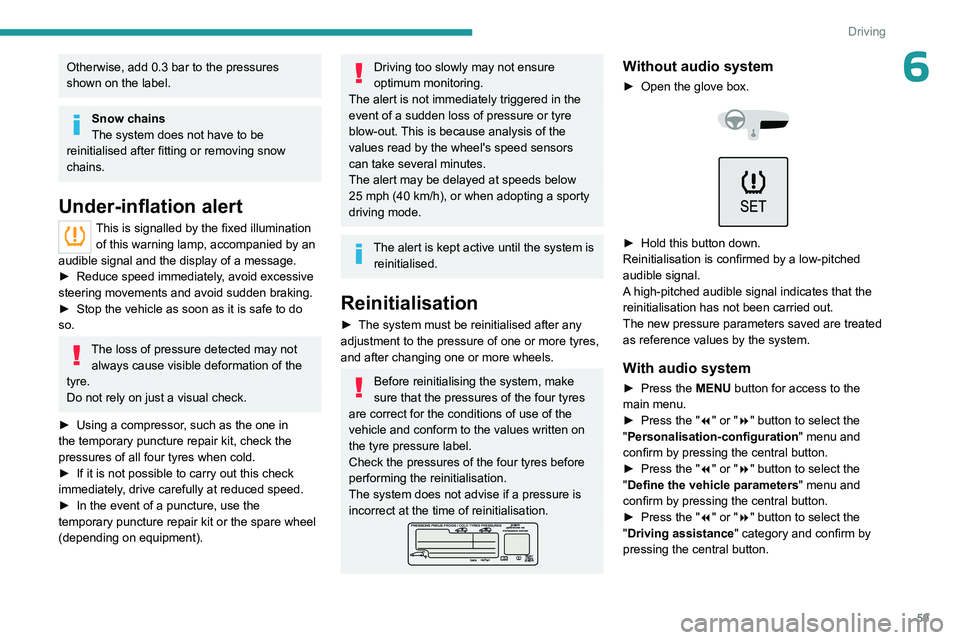
Before reinitialising the system, make
sure that the pressures of the four tyres
are correct for the conditions of use of the
vehicle and conform to the values written on
the tyre pressure label.
Check the pressures of the four tyres before
performing the reinitialisation.
The system does not advise if a pressure is
incorrect at the time of reinitialisation.
Without audio system
► Open the glove box.
► Hold this button down.
Reinitialisation is confirmed by a low-pitched
audible signal.
A
high-pitched audible signal indicates that the
reinitialisation has not been carried out.
The new pressure parameters saved are treated
as reference values by the system.
With audio system
► Press the MENU button for access to the
main menu.
►
Press the "
7" or "8" button to select the
"Personalisation-configuration " menu and
confirm by pressing the central button.
►
Press the "
7" or "8" button to select the
"Define the vehicle parameters " menu and
confirm by pressing the central button.
►
Press the "
7" or "8" button to select the
"Driving assistance" category and confirm by
pressing the central button.
Page 62 of 148

60
Driving
► Press the "7" or "8" button to select "Tyre
pressures" , then "Reinitialisation ", then
confirm by pressing the central button.
A message confirms the reinitialisation.
With touch screen
The request to reinitialise the system is made in the
Driving/Vehicle menu.
Malfunction
In the event of a malfunction,
these warning lamps light up on
the instrument panel.
A message appears, accompanied by an audible
signal.
In this case, the tyre under-inflation monitoring
function is no longer performed.
Have it checked by a PEUGEOT dealer or a
qualified workshop.
Non-standard or 'space-saver' spare
wheel
The use of this type of spare wheel may
suspend tyre pressure monitoring.
In this case, the malfunction warning lamp
comes on and disappears once the wheel
has been replaced by one of uniform size (the
same as the others), the pressure readjusted
and the
reinitialisation carried out.
Driving and manoeuvring
aids - General
recommendations
Driving and manoeuvring aids cannot, in
any circumstances, replace the need for
vigilance on the part of the driver.
The driver must comply with the Highway
Code, must remain in control of the vehicle in
all circumstances and must be able to retake
control of it at all times. The driver must adapt
the speed to climatic conditions, traffic and
the state of the road.
It is the driver's responsibility to constantly
monitor traffic conditions, assess the distance
and relative speed of other vehicles, and
anticipate their manoeuvres before using the
direction indicator and changing lanes.
These systems do not make it possible to
exceed the laws of physics.
Driving aids
You should hold the steering wheel with
both hands, always use the door and interior
mirrors, always leave your feet close to the
pedals and take a break every 2 hours.
Manoeuvring aids
The driver must always check the
surroundings of the vehicle before and during
the whole manoeuvre, in particular using the
mirrors.
Other cameras
The images from the camera(s)
displayed on the touch screen or on the
instrument panel may be distorted by the
terrain.
In the presence of areas in shade, or in
conditions of bright sunlight or inadequate
lighting, the image may be darkened and with
lower contrast.
Obstacles may appear further away than they
actually are.
Sensors
The operation of the sensors, as well as
any associated functions, may be disrupted
by noise pollution such as that emitted by
noisy vehicles and machinery (e.g. lorries,
pneumatic drills), by the accumulation of
snow or dead leaves on the road or in the
event of damaged bumpers and mirrors.
When reverse gear is engaged, an audible
signal (long beep) indicates that the sensors
may be dirty.
A front or rear impact to the vehicle can
upset the sensors’ settings, which is not
always detected by the system: distance
measurements may be distorted.
Page 65 of 148

63
Driving
6– When using a ‘space-saver’ type spare
wheel.
–
When using snow chains, non-slip covers
or studded tyres.
Cruise control
For more information, refer to the
General recommendations on the use
of driving and manoeuvring aids and the
Specific recommendations on cruise
control.
This system automatically maintains the vehicle’s speed at the value programmed
by the driver (speed setting), without the use of
the accelerator pedal.
Cruise control is switched on manually.
It requires a minimum vehicle speed of 25 mph
(40
km/h).
With a manual gearbox, fourth gear must be
engaged.
With an automatic gearbox, mode
D
or second
gear or higher in mode
M
must be engaged.
Cruise control remains active after
changing gear on engines fitted with a
manual gearbox and the Stop & Start
function.
Switching off the ignition cancels any
speed setting.
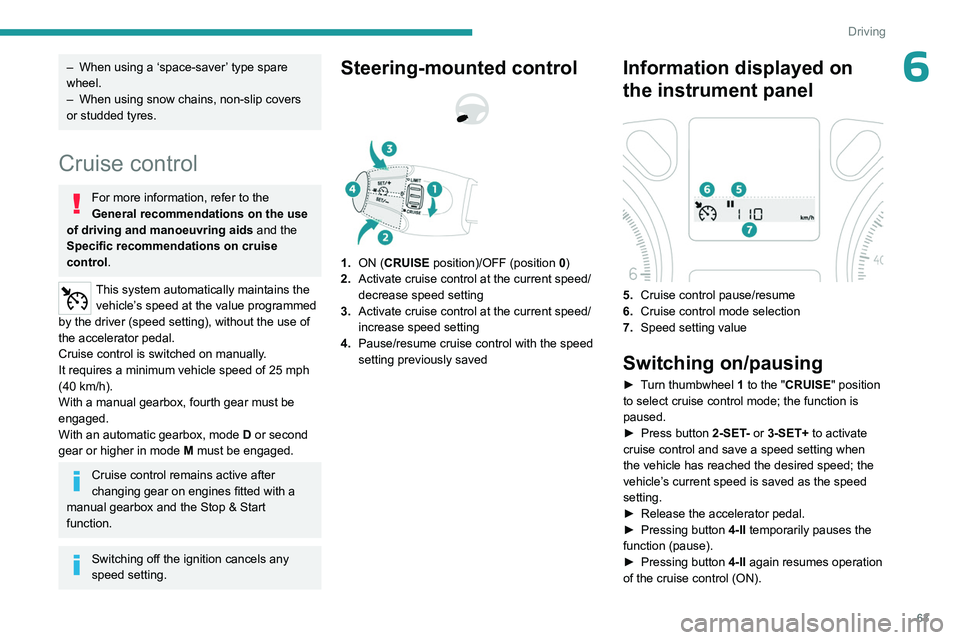
Steering-mounted control
1. ON (CRUISE position)/OFF (position 0)
2. Activate cruise control at the current speed/
decrease speed setting
3. Activate cruise control at the current speed/
increase speed setting
4. Pause/resume cruise control with the speed
setting previously saved
Information displayed on
the instrument panel
5.Cruise control pause/resume
6. Cruise control mode selection
7. Speed setting value
Switching on/pausing
► Turn thumbwheel 1 to the "CRUISE" position
to select cruise control mode; the function is
paused.
►
Press button
2-SET- or 3-SET+ to activate
cruise control and save a speed setting when
the vehicle has reached the desired speed; the
vehicle’s current speed is saved as the speed
setting.
►
Release the accelerator pedal.
►
Pressing button 4-II
temporarily pauses the
function (pause).
►
Pressing button 4-II
again resumes operation
of the cruise control (ON).
Page 70 of 148

68
Practical information
► Take care to select the pump that delivers the
correct fuel type for the vehicle's engine (see a
reminder label on the inside of the filler flap).
►
Open the filler cap by turning it a 1/4 turn to
the left.
► Remove the filler cap and hang it on its
carrier (on the filler flap).
►
Introduce the filler nozzle and push it in as
far as possible before starting to refuel (risk of
blowback).
►
Fill the tank.
Do not continue past the 3rd cut-off of the
nozzle; as this may cause malfunctions.
►
Push the filler flap to close it.
The vehicle is fitted with a catalytic converter, a
device which helps to reduce the level of harmful
emissions in the exhaust gases.
For petrol engines, you must use unleaded
fuel.
The filler neck is narrower, allowing only
unleaded petrol nozzles to be introduced.
If you have put in the wrong fuel for
the vehicle, you must have the fuel
tank drained and filled with the correct fuel
before starting the engine.
Misfuel prevention (Diesel)
(Depending on country of sale.)
This mechanical device prevents filling the tank
of a Diesel vehicle with petrol.
Located in the filler neck, the misfuel prevention
device is visible when the filler cap is removed.
Operation
When a petrol filler nozzle is introduced into the
fuel filler neck of a Diesel vehicle, it comes into
contact with the flap. The system remains closed
and prevents filling.
Do not persist but introduce a Diesel type
filler nozzle.
The misfuel prevention device does not prevent filling with a jerrycan, regardless
of the fuel type.
Travelling abroad
As Diesel fuel pump nozzles may be
different in other countries, the presence
of the misfuel prevention device may make
refuelling impossible.
Before travelling abroad, it is advisable to
check with a PEUGEOT dealer if the vehicle
is suitable for the distribution equipment of the
countries visited.
Snow chains
In wintry conditions, snow chains improve
traction as well as the behaviour of the vehicle
when braking.
Snow chains must be fitted only to the
front wheels. They must never be fitted to
"space-saver" type spare wheels.