2022 NISSAN TITAN lock
[x] Cancel search: lockPage 316 of 635
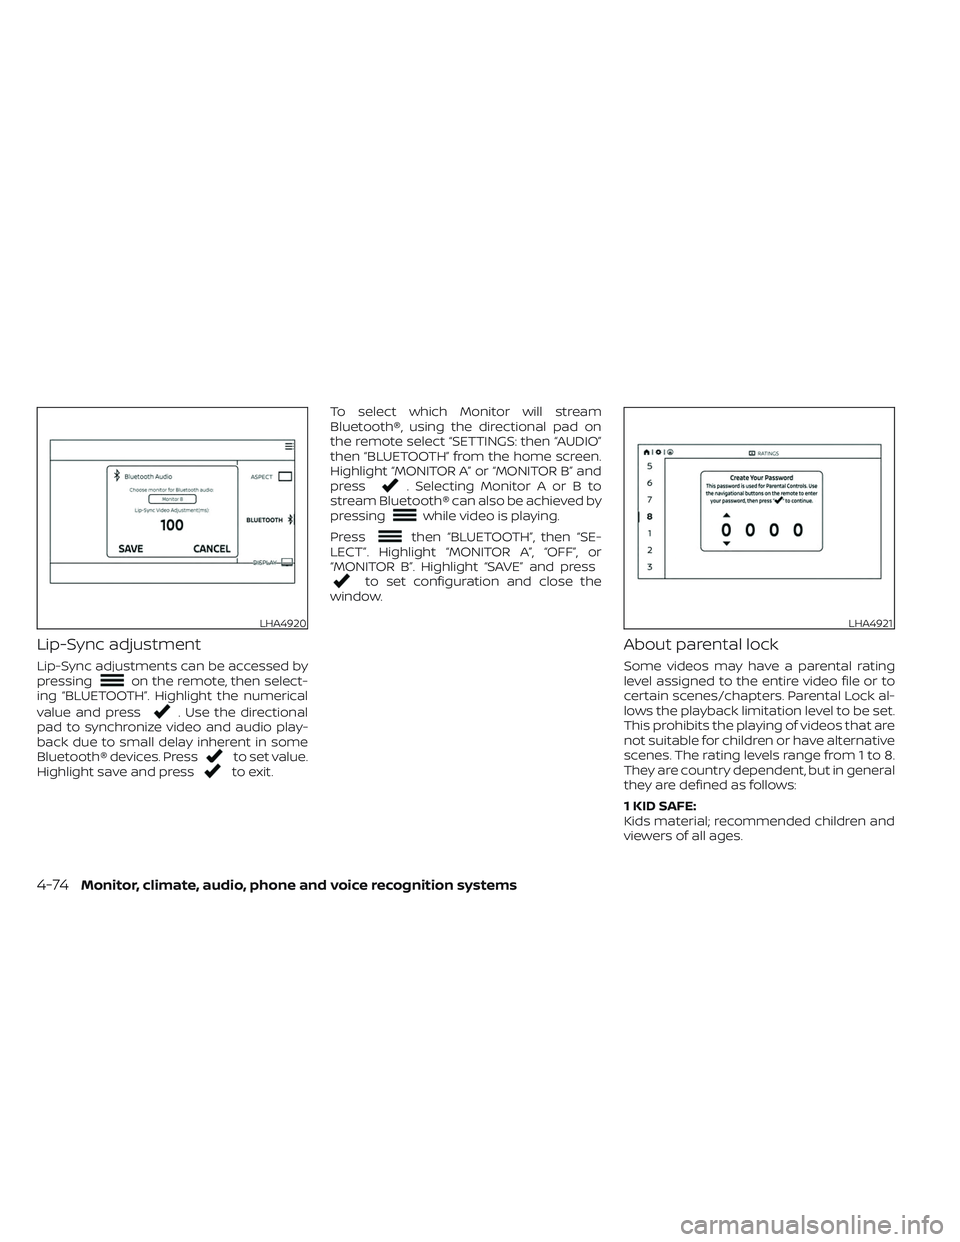
Lip-Sync adjustment
Lip-Sync adjustments can be accessed by
pressingon the remote, then select-
ing “BLUETOOTH”. Highlight the numerical
value and press
. Use the directional
pad to synchronize video and audio play-
back due to small delay inherent in some
Bluetooth® devices. Press
to set value.
Highlight save and pressto exit. To select which Monitor will stream
Bluetooth®, using the directional pad on
the remote select “SETTINGS: then “AUDIO”
then “BLUETOOTH” from the home screen.
Highlight “MONITOR A” or “MONITOR B” and
press
. Selecting Monitor A or B to
stream Bluetooth® can also be achieved by
pressing
while video is playing.
Press
then “BLUETOOTH”, then “SE-
LECT”. Highlight “MONITOR A”, “OFF”, or
“MONITOR B”. Highlight “SAVE” and press
to set configuration and close the
window.
About parental lock
Some videos may have a parental rating
level assigned to the entire video file or to
certain scenes/chapters. Parental Lock al-
lows the playback limitation level to be set.
This prohibits the playing of videos that are
not suitable for children or have alternative
scenes. The rating levels range from 1 to 8.
They are country dependent, but in general
they are defined as follows:
1 KID SAFE:
Kids material; recommended children and
viewers of all ages.
LHA4920LHA4921
4-74Monitor, climate, audio, phone and voice recognition systems
Page 317 of 635
2G:
General Audience; recommended for all
ages.
3PG:
Parental Guidance suggested.
4 PG-13:
Unsuitable for children under age 13.
5/6 PGR/R:
Parental Guidance/Restricted content not
suitable for children under the age of 17.
7 NC-17 :
No children under age 17.
8 Adult:
Mature content; should be viewed only by
an adult due to graphic sexual material,
violence, or language.
Changing parental lock
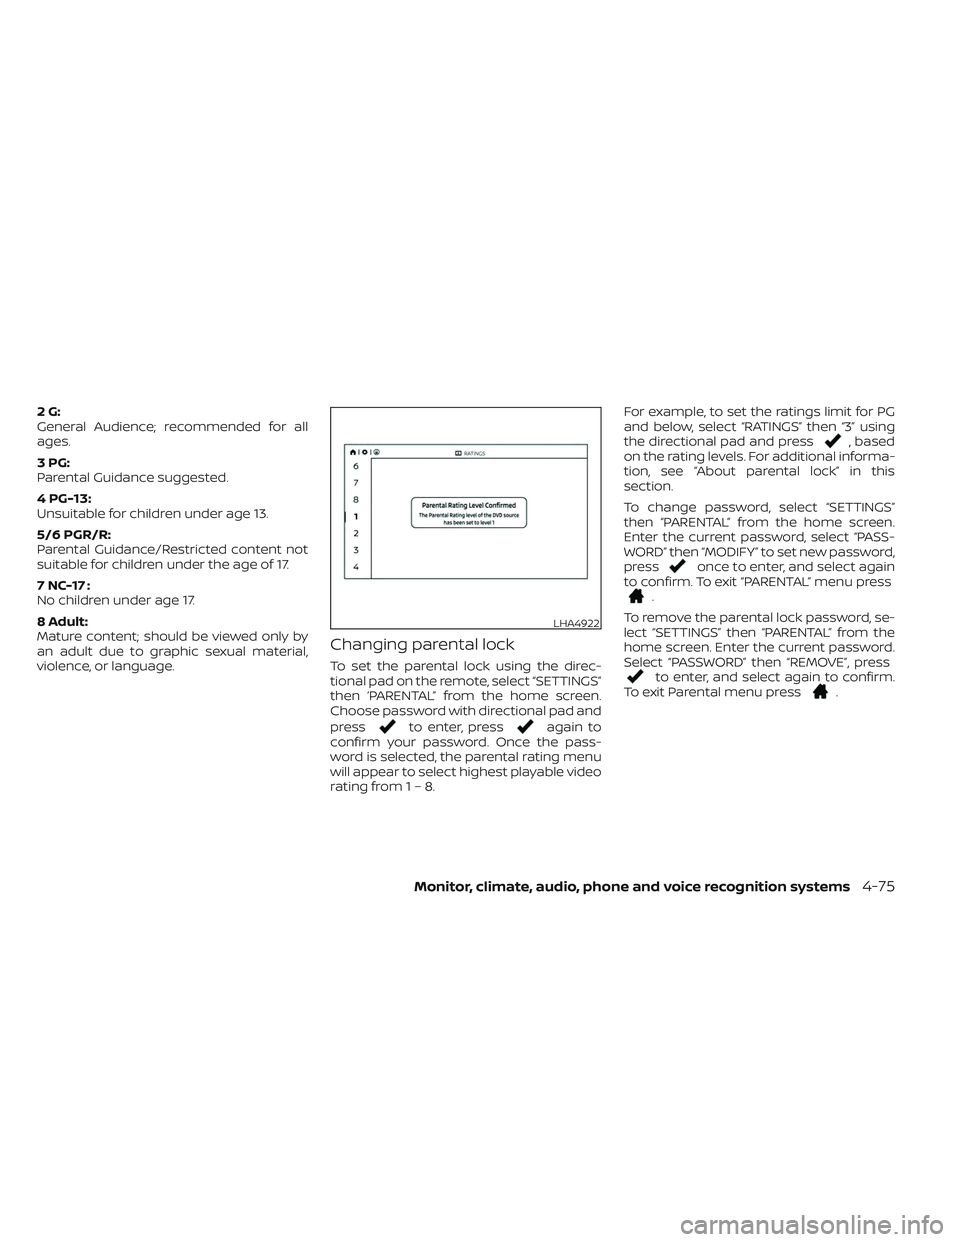
To set the parental lock using the direc-
tional pad on the remote, select “SETTINGS”
then ‘PARENTAL” from the home screen.
Choose password with directional pad and
press
to enter, pressagain to
confirm your password. Once the pass-
word is selected, the parental rating menu
will appear to select highest playable video
rating from1–8. For example, to set the ratings limit for PG
and below, select “RATINGS” then “3” using
the directional pad and press
, based
on the rating levels. For additional informa-
tion, see “About parental lock” in this
section.
To change password, select “SETTINGS”
then “PARENTAL” from the home screen.
Enter the current password, select “PASS-
WORD” then “MODIFY” to set new password,
press
once to enter, and select again
to confirm. To exit “PARENTAL” menu press
.
To remove the parental lock password, se-
lect “SETTINGS” then “PARENTAL” from the
home screen. Enter the current password.
Select “PASSWORD” then “REMOVE”, press
to enter, and select again to confirm.
To exit Parental menu press.
LHA4922
Monitor, climate, audio, phone and voice recognition systems4-75
Page 318 of 635

TROUBLESHOOTING
SymptomRemedy
Monitor does not power on Verif y the vehicle is in the ON or ACC position.
Verif y the battery is installed correctly in the remote control.
Verif y the in-line fuse protection is good. Refer to the RSI system installation instructions for vehicle-specific fuse location.
Monitor front panel controls
flash red For further diagnosis, it is recommended that you visit a NISSAN dealer.
System frozen - will not
respond Sof t reset the system by pressing and holding the power button on the top of the driver side monitor for 5 seconds.
Hard reset the system by turning the ignition off, then back on.
No picture Check that the signal source is connected.
Check the menu source setting. Match your monitor mode with the source correctly.
No sound or distorted sound Make sure that the external media device is connected properly, and all cables are securely inserted into the appropriate jacks.
Verif y that the batteries in the headphones are fresh.
If you are using the wireless headphones, make sure you turn on the power and select the correct monitor (A or B).
Verif y the volume is turned up on headphones and the system.
Verif y nothing is blocking the path between the monitor IR sensor and headphones.
When placing the headphones on your head, make sure to observe the Lef t and Right orientation.
The headphones must be oriented correctly (facing forward) to receive the audio signal.
Monitor feels warm When the monitor is in use for a long period of time, the surface will be warm. This is normal.
A Parental Setting message
is displayed, prohibiting
movie playback Enter the 4-digit Parental Password using the remote and then press
.
For additional information, see “Changing parental lock” (P. 4-75).
Cannot connect mobile
device to the internal RSI
Wi-Fi network Check to make sure Wi-Fi is enabled on the mobile device.
Check to make sure RSI is set to Access Point mode.
Check to make sure the correct password is used. For additional information, see “Using Wi-Fi” (P. 4-68).
Cannot connect RSI system
to an external Wi-Fi network Check to make sure RSI is set to Client Mode. Check to make sure the correct password is used.
For additional information, see “Using Wi-Fi” (P. 4-68).
4-76Monitor, climate, audio, phone and voice recognition systems
Page 329 of 635
Intelligent Driver Alertness (I-DA)
system limitations......................... 5-105
Break-in schedule ............................. 5-105
Fuel efficient driving tips .......................5-106
Increasing fuel economy ......................5-107
Using 4–Wheel Drive (4WD) (if so equipped) ....5-107
Transfer case shif ting procedures ..........5-108
Electronic locking rear differential (E-Lock)
system (if so equipped) ........................ 5-113
Eco Drive Report (if so equipped) ..............5-114
Parking/parking on hills .......................5-115
Power steering ................................ 5-116
Brake system .................................. 5-117
Brake precautions ........................... 5-117
Anti-lock Braking System (ABS) ..............5-117
Brake Assist ................................ 5-118
Active Brake Limited Slip (ABLS) system .......5-119
Vehicle Dynamic Control (VDC) system ........5-120 Brake force distribution
....................5-121
Hill descent control system (if so equipped) . . . 5-122
Hill start assist system ........................5-123
Front and rear sonar system (if so equipped) . . 5-124 System operation .......................... 5-125
How to enable/disable the sonar
system ..................................... 5-127
Sonar limitations ........................... 5-128
System maintenance ......................5-128
Cold weather driving .......................... 5-129
Freeing a frozen door lock ..................5-129
Antifreeze .................................. 5-129
Battery..................................... 5-129
Draining of coolant water ..................5-129
Tire equipment ............................. 5-129
Special winter equipment ..................5-130
Driving on snow or ice ......................5-130
Page 339 of 635

WARNING
Do not operate the push-button igni-
tion switch while driving the vehicle ex-
cept in an emergency. (The engine will
stop when the ignition switch is pushed
three consecutive times in quick suc-
cession or the ignition switch is pushed
and held for more than 2 seconds.) If
the engine stops while the vehicle is
being driven, this could lead to a crash
and serious injury. When the ignition switch is pushed without
depressing the brake pedal, the ignition
switch position will illuminate as follows:
Push center:
• Once to change to ACC.
• Two times to change to ON.
• Three times to return to OFF.
The ignition switch will automatically re-
turn to the LOCK position when any door is
either opened or closed with the switch in
the OFF position.
The ignition lock is designed so that the
ignition switch position cannot be placed
in the OFF position until the shif t lever is
moved to the P (Park) position.
When the ignition switch cannot be pushed
toward the OFF position, proceed as fol-
lows:
1. Move the shif t lever into the P (Park)
position.
2. Push the ignition switch. The ignition switch position will change to the ON
position.
3. Push the ignition switch again to the OFF position. The shif t lever can be moved from the P
(Park) position if the ignition switch is in
the ON position and the brake pedal is
depressed.
If the battery of the vehicle is discharged,
the push-button ignition switch cannot
be moved from the LOCK position.
Some indicators and warnings for opera-
tion are displayed in the meter. For addi-
tional information, see “Vehicle information
display warnings and indicators” (P. 2-32).
LSD2014
PUSH-BUTTON IGNITION SWITCH
Starting and driving5-13
Page 340 of 635
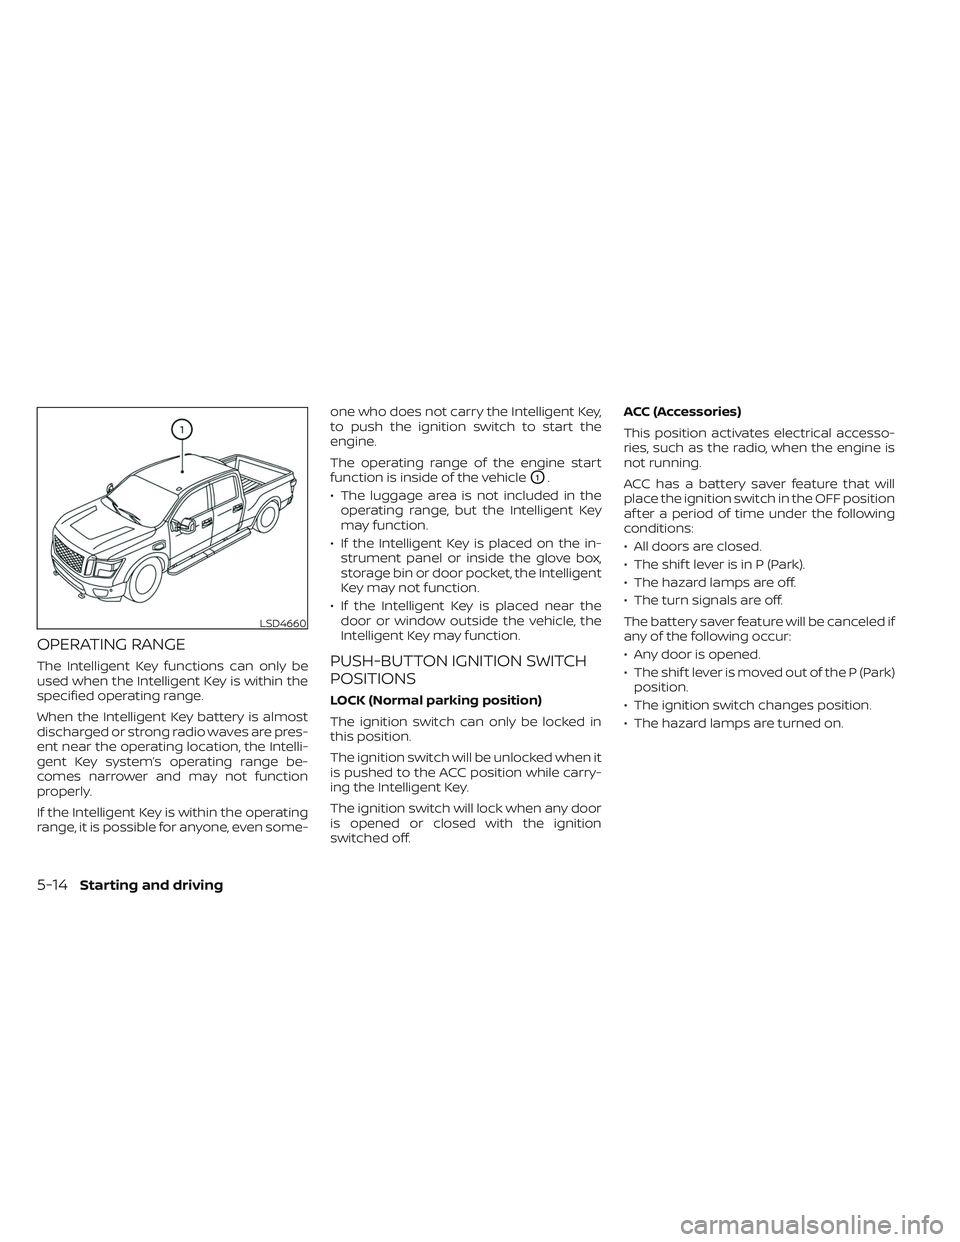
OPERATING RANGE
The Intelligent Key functions can only be
used when the Intelligent Key is within the
specified operating range.
When the Intelligent Key battery is almost
discharged or strong radio waves are pres-
ent near the operating location, the Intelli-
gent Key system’s operating range be-
comes narrower and may not function
properly.
If the Intelligent Key is within the operating
range, it is possible for anyone, even some-one who does not carry the Intelligent Key,
to push the ignition switch to start the
engine.
The operating range of the engine start
function is inside of the vehicle
O1.
• The luggage area is not included in the operating range, but the Intelligent Key
may function.
• If the Intelligent Key is placed on the in- strument panel or inside the glove box,
storage bin or door pocket, the Intelligent
Key may not function.
• If the Intelligent Key is placed near the door or window outside the vehicle, the
Intelligent Key may function.
PUSH-BUTTON IGNITION SWITCH
POSITIONS
LOCK (Normal parking position)
The ignition switch can only be locked in
this position.
The ignition switch will be unlocked when it
is pushed to the ACC position while carry-
ing the Intelligent Key.
The ignition switch will lock when any door
is opened or closed with the ignition
switched off. ACC (Accessories)
This position activates electrical accesso-
ries, such as the radio, when the engine is
not running.
ACC has a battery saver feature that will
place the ignition switch in the OFF position
af ter a period of time under the following
conditions:
• All doors are closed.
• The shif t lever is in P (Park).
• The hazard lamps are off.
• The turn signals are off.
The battery saver feature will be canceled if
any of the following occur:
• Any door is opened.
• The shif t lever is moved out of the P (Park)
position.
• The ignition switch changes position.
• The hazard lamps are turned on.
LSD4660
5-14Starting and driving
Page 342 of 635
Af ter step 3 is performed, when the igni-
tion switch is pushed without depress-
ing the brake pedal, the ignition switch
position will change to the ON position.
4. Push the ignition switch while depress- ing the brake pedal within 10 seconds
af ter the chime sounds. The engine will
start.
NOTE:
• When the ignition switch is pushed tothe ON position or the engine is started
by the above procedure, the Intelligent
Key battery discharge indicator ap-
pears in the vehicle information dis-
play even when the Intelligent Key is
inside the vehicle. This is not a mal-
function. To turn off the Intelligent Key
battery discharge indicator, touch the
ignition switch with the Intelligent Key
again.
• If the Intelligent Key battery discharge indicator appears, replace the battery
as soon as possible. For additional in-
formation, see “Battery replacement”
(P. 8-27).
NISSAN VEHICLE IMMOBILIZER
SYSTEM
The NISSAN Vehicle Immobilizer System
will not allow the engine to start without
the use of the registered key.
If the engine fails to start using a registered
key (for example, when interference is
caused by another registered key, an auto-
mated toll road device or automatic pay-
ment device on the key ring), restart the
engine using the following procedures:
1. Leave the ignition switch in the ON posi- tion for approximately 5 seconds.
2. Place the ignition switch in the OFF or LOCK position, and wait approximately
10 seconds.
3. Repeat steps 1 and 2.
4. Restart the engine while holding the de- vice (which may have caused the inter-
ference) separate from the registered
key.
If the no start condition re-occurs, NISSAN
recommends placing the registered key on
a separate key ring to avoid interference
from other devices. • Make sure the area around the vehicle is
clear.
• Check fluid levels such as engine oil, cool- ant, brake fluid and windshield-washer
fluid as frequently as possible, or at least
whenever you refuel.
• Check that all windows and lights are clean.
• Visually inspect tires for their appearance and condition. Also check tires for proper
inflation.
• Check that all doors are closed.
• Position seat and adjust head restraints/headrests.
• Adjust inside and outside mirrors.
• Fasten seat belts and ask all passengers to do likewise.
• Check the operation of warning lights when the ignition switch is placed in the
ON position. For additional information,
see “Warning lights, indicator lights and
audible reminders” (P. 2-12).
BEFORE STARTING THE ENGINE
5-16Starting and driving
Page 343 of 635
1. Apply the parking brake.
2. Move the shif t lever to P (Park) or N (Neu-tral). P (Park) is recommended.
The starter is designed not to operate
unless the shif t lever is in either P
(Park) or N (Neutral).
3. Push the ignition switch to the ON posi- tion. Depress the brake pedal and push
the ignition switch to start the engine.
To start the engine immediately, push
and release the ignition switch while de-
pressing the brake pedal with the igni-
tion switch in any position.
• If the engine is very hard to start in extremely cold weather or when re-
starting, depress the accelerator
pedal a little (approximately 1/3 to the
floor) and while holding, crank the en-
gine. Release the accelerator pedal
when the engine starts.
• If the engine is very hard to start be- cause it is flooded, depress the accel-
erator pedal all the way to the floor
and hold it. Push the ignition switch to
the ON position to start cranking the
engine. Af ter 5 or 6 seconds, stop
cranking by pushing the ignition
switch to the LOCK position. Af ter
cranking the engine, release the accel- erator pedal. Crank the engine with
your foot off the accelerator pedal by
depressing the brake pedal and push-
ing the ignition switch to start the en-
gine. If the engine starts, but fails to
run, repeat the above procedure.
CAUTION
Do not operate the starter for more
than 15 seconds at a time. If the engine
does not start, push the ignition switch
to the OFF position and wait 10 seconds
before cranking again, otherwise the
starter could be damaged.
4. Warm-up
Allow the engine to idle for at least 30
seconds af ter starting. Do not race the
engine while warming it up. Drive at a
moderate speed for a short distance
first, especially in cold weather. In cold
weather, keep the engine running for a
minimum of 2 to 3 minutes before shut-
ting it off. Starting and stopping the en-
gine over a short period of time may
make the vehicle more difficult to start.
5. To stop the engine, move the shif t lever to the P (Park) position and push the
ignition switch to the OFF position. In preparation for the next engine start, the
engine may have a slightly delayed shutoff
af ter placing the ignition switch in the OFF
position, depending on the driving
conditions.
NOTE:
Care should be taken to avoid situa-
tions that can lead to potential battery
discharge and potential no-start con-
ditions such as:
1. Installation or extended use of elec-
tronic accessories that consume bat-
tery power when the engine is not
running (phone chargers, GPS, DVD
players, etc.).
2. The vehicle is not driven regularly and/or only driven short distances.
In these cases, the battery may need to
be charged to maintain battery health.
STARTING THE ENGINE
Starting and driving5-17