Page 152 of 630
463
Features of your vehicle
Electric chromatic mirror (ECM) (if equipped)
The electric rearview mirror automat-
ically controls the glare from the
headlights of the vehicles behind you
in nighttime or low light driving condi-
tions. The sensor mounted in the mir-
ror senses the light level around the
vehicle and automatically controls
the headlight glare from the vehicles
behind you.
When the engine is running, the
glare is automatically controlled by
the sensor mounted in the rearview
mirror.
Whenever the shift lever is shifted
into reverse (R), the mirror will auto-
matically go to the brightest setting in
order to improve the drivers view
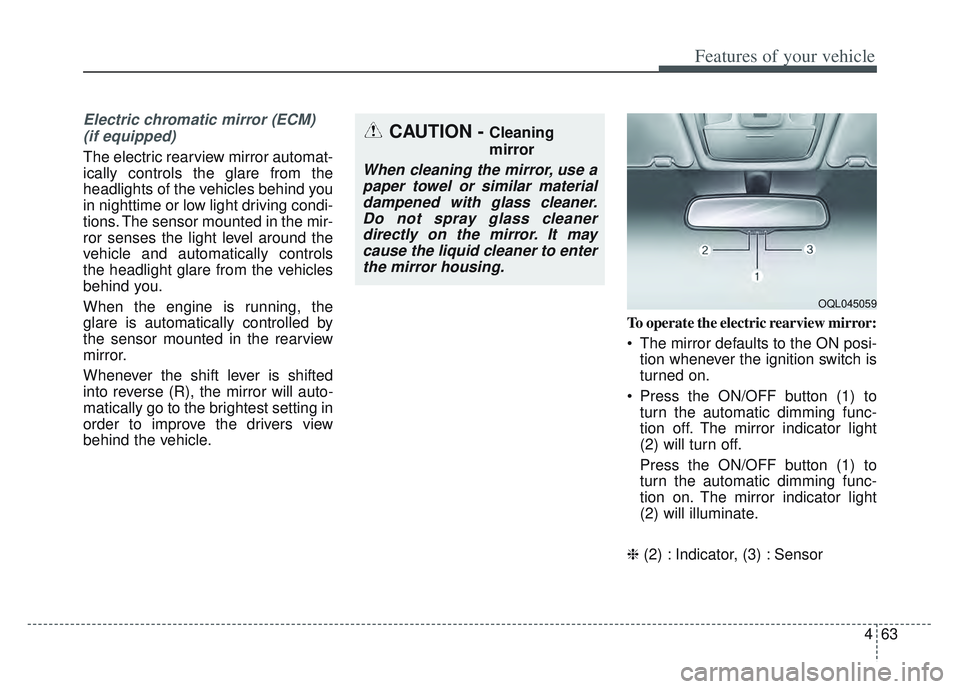
behind the vehicle. To operate the electric rearview mirror:
The mirror defaults to the ON posi-
tion whenever the ignition switch is
turned on.
Press the ON/OFF button (1) to turn the automatic dimming func-
tion off. The mirror indicator light
(2) will turn off.
Press the ON/OFF button (1) to
turn the automatic dimming func-
tion on. The mirror indicator light
(2) will illuminate.
❈ (2) : Indicator, (3) : Sensor
CAUTION - Cleaning
mirror
When cleaning the mirror, use a
paper towel or similar materialdampened with glass cleaner.Do not spray glass cleanerdirectly on the mirror. It maycause the liquid cleaner to enterthe mirror housing.
OQL045059
Page 167 of 630
Features of your vehicle
78
4
Folding the outside rearview mirror
(if equipped)
Electric type
The outside rearview mirror can be
folded or unfolded by pressing the
switch when the ignition switch is
ACC or ON position as below.
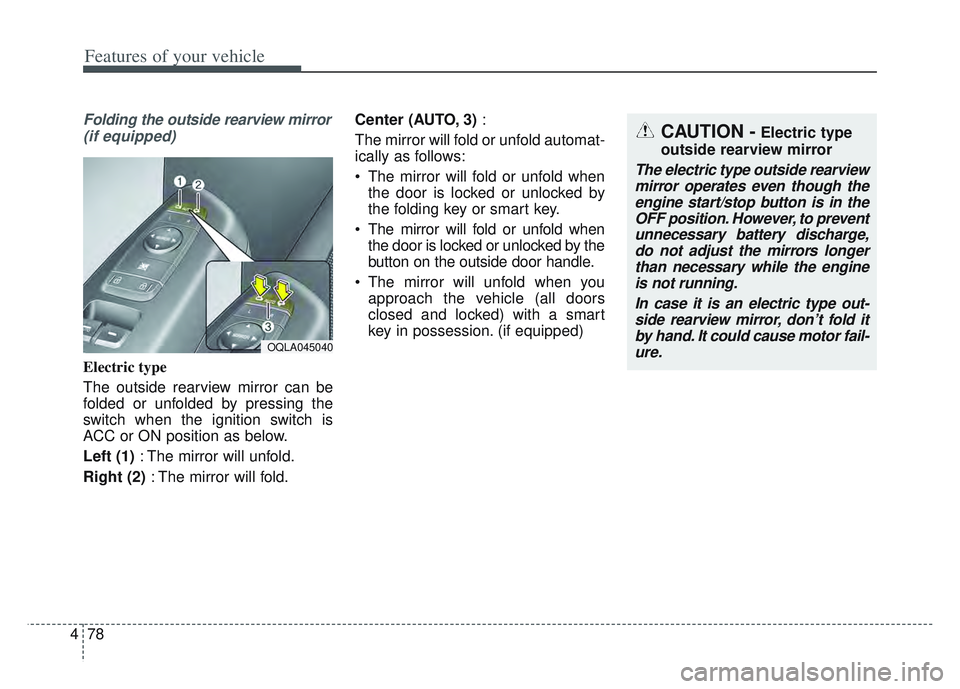
Left (1) : The mirror will unfold.
Right (2) : The mirror will fold. Center (AUTO, 3)
:
The mirror will fold or unfold automat-
ically as follows:
The mirror will fold or unfold when the door is locked or unlocked by
the folding key or smart key.
The mirror will fold or unfold when the door is locked or unlocked by the
button on the outside door handle.
The mirror will unfold when you approach the vehicle (all doors
closed and locked) with a smart
key in possession. (if equipped)
OQLA045040
CAUTION -Electric type
outside rearview mirror
The electric type outside rearview mirror operates even though theengine start/stop button is in theOFF position. However, to preventunnecessary battery discharge,do not adjust the mirrors longerthan necessary while the engineis not running.
In case it is an electric type out-side rearview mirror, don’t fold itby hand. It could cause motor fail-ure.
Page 169 of 630
Features of your vehicle
80
4
INSTRUMENT CLUSTER
1. Tachometer
2. Speedometer
3. Engine coolant temperature gauge
4. Fuel gauge
5. LCD display
6. Warning and indicator lights
OQL048192N/OQL048193N
■ ■
Type A
❈The actual cluster in the vehicle may differ
from the illustration.
For more details, refer to the "Gauges" in
this chapter.
■ ■ Type B
Page 170 of 630
481
Features of your vehicle
Instrument Cluster Control
Adjusting Instrument ClusterIllumination
The brightness of the instrument
panel illumination is changed by
pressing the illumination control button
(“+” or “-”) when the ignition switch or
Engine Start/Stop button is ON, or the
taillights are turned on. If you hold the illumination control
button (“+” or “-”), the brightness
will be changed continuously.
If the brightness reaches to the maximum or minimum level, an
alarm will sound.
LCD Display Control
The LCD display modes can be
changed by using the control buttons
on the steering wheel.
(1) : MODE button for change the LCD MODES
(2) / : MOVE scroll switch for select the items
(3) OK : SET/RESET button for set the items or reset the items
❈ For the LCD modes, refer to “LCD
Display” in this chapter.OQL048062L
OQL048061L
OUM048452L
Page 171 of 630
Features of your vehicle
82
4
Gauges
Speedometer
The speedometer indicates the
speed of the vehicle and is calibrated
in miles per hour (mph) and/or kilo-
meters per hour (km/h).
Tachometer
The tachometer indicates the
approximate number of engine revo-
lutions per minute (rpm).
Use the tachometer to select the cor-
rect shift points and to prevent lug-
ging and/or over-revving the engine.
Engine Coolant Temperature
Gauge
This gauge indicates the tempera-
ture of the engine coolant when the
ignition switch or Engine Start/Stop
button is ON.
If the gauge pointer moves beyond
the normal range area toward the "H"
position, it indicates overheating that
may damage the engine.
Do not continue driving with an over-
heated engine. If your vehicle over-
heats, refer to “If the Engine
Overheats” in chapter 6.
OQL048184L
CAUTION - Red zone
Do not operate the engine with-in the tachometer's RED ZONE.This may cause severe enginedamage.
OQL048183L
OQL048230L
Page 172 of 630
483
Features of your vehicle
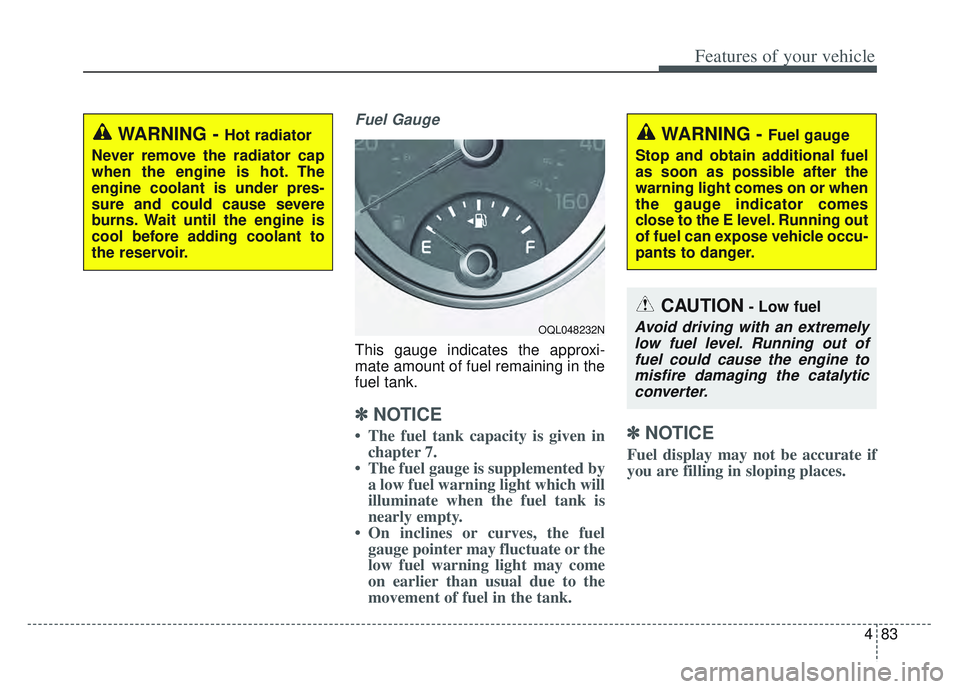
Fuel Gauge
This gauge indicates the approxi-
mate amount of fuel remaining in the
fuel tank.
✽ ✽NOTICE
• The fuel tank capacity is given in
chapter 7.
• The fuel gauge is supplemented by a low fuel warning light which will
illuminate when the fuel tank is
nearly empty.
• On inclines or curves, the fuel gauge pointer may fluctuate or the
low fuel warning light may come
on earlier than usual due to the
movement of fuel in the tank.✽ ✽ NOTICE
Fuel display may not be accurate if
you are filling in sloping places.
WARNING - Hot radiator
Never remove the radiator cap
when the engine is hot. The
engine coolant is under pres-
sure and could cause severe
burns. Wait until the engine is
cool before adding coolant to
the reservoir.
OQL048232N
WARNING - Fuel gauge
Stop and obtain additional fuel
as soon as possible after the
warning light comes on or when
the gauge indicator comes
close to the E level. Running out
of fuel can expose vehicle occu-
pants to danger.
CAUTION- Low fuel
Avoid driving with an extremely low fuel level. Running out offuel could cause the engine tomisfire damaging the catalyticconverter.
Page 177 of 630
Features of your vehicle
88
4
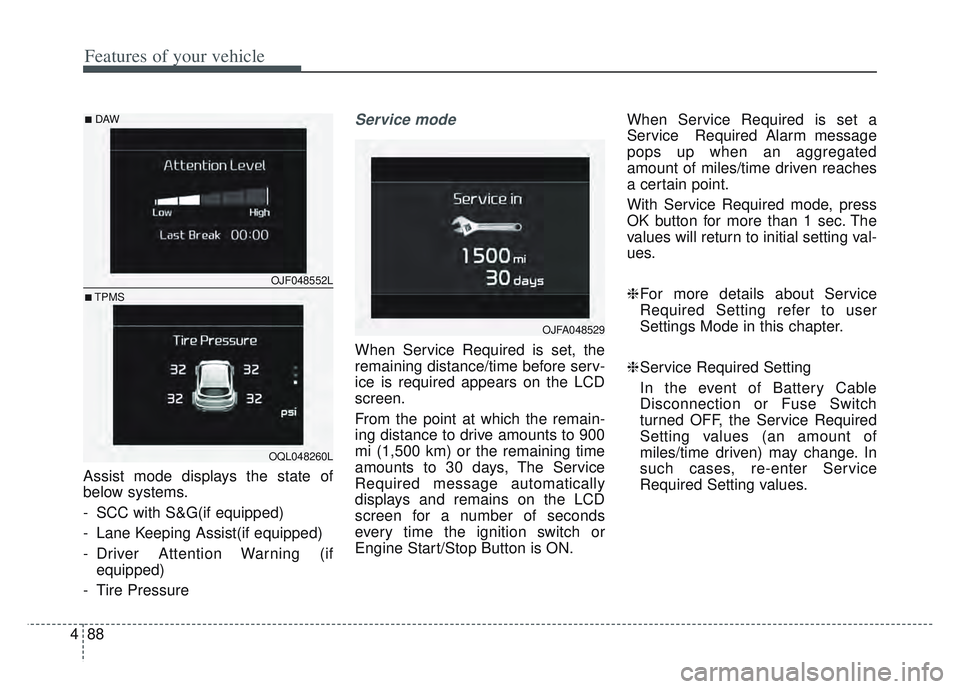
Assist mode displays the state of
below systems.
- SCC with S&G(if equipped)
- Lane Keeping Assist(if equipped)
- Driver Attention Warning (if
equipped)
- Tire Pressure
Service mode
When Service Required is set, the
remaining distance/time before serv-
ice is required appears on the LCD
screen.
From the point at which the remain-
ing distance to drive amounts to 900
mi (1,500 km) or the remaining time
amounts to 30 days, The Service
Required message automatically
displays and remains on the LCD
screen for a number of seconds
every time the ignition switch or
Engine Start/Stop Button is ON. When Service Required is set a
Service Required Alarm message
pops up when an aggregated
amount of miles/time driven reaches
a certain point.
With Service Required mode, press
OK button for more than 1 sec. The
values will return to initial setting val-
ues.
❈
For more details about Service
Required Setting refer to user
Settings Mode in this chapter.
❈ Service Required Setting
In the event of Battery Cable
Disconnection or Fuse Switch
turned OFF, the Service Required
Setting values (an amount of
miles/time driven) may change. In
such cases, re-enter Service
Required Setting values.
OJFA048529
OJF048552L
OQL048260L
■DAW
■TPMS
Page 180 of 630
491
Features of your vehicle
Door
• Auto Lock :- Enable on Speed : All doors willbe automatically locked when the
vehicle speed exceeds 9.3 mph
(15 km/h).
- Enable on Shift (if equipped with Automatic transmission) : All
doors will be automatically locked
if the transmission shift lever is
shifted from the P (Park) position
to the R (Reverse), N (Neutral), or
D (Drive) position. (With the
Engine ON, it is activated.)
Auto Unlock : - Disable : The auto door unlockoperation will be canceled.
- Vehicle Off/On key out : All doors will be automatically unlocked
when the ignition key is removed
from the ignition switch or the
Engine Start/Stop button is set to
the OFF position. - On shift to P (if equipped with
Automatic transmission) : All
doors will be automatically
unlocked if the automatic trans-
mission shift lever is shifted to the
P (Park) position. (With the
Engine ON, it is activated.)
Two Press Unlock (if equipped) : - If this item is checked, the twopress unlock will be activated.
Press the door unlock button
once to unlock the driver's door,
and press the button once more
within 4 seconds to unlock the
rest of the doors.
Power Liftgate (if equipped) : - If this item is checked, the powerliftgate function will be activated.
❈ For more details, refer to “Power
Liftgate” in this chapter.
Smart Liftgate (if equipped) : - If this item is checked, the smartliftgate function will be activated.
❈ For more details, refer to “Smart
Liftgate” in this chapter. Lights
One Touch Turn Signal :
- Off: The one touch turn signalfunction will be deactivated.
- 3, 5, 7 Flashes : The lane change signals will blink 3, 5 or 7 times
when the turn signal lever is
moved slightly.
❈ For more details, refer to “Lighting”
in this chapter.
Headlight Delay : - If this item is checked, the headlamp delay function will be acti-
vated.
❈ For more details, refer to “Lighting”
in this chapter.