Page 188 of 684

Features of your vehicle
50 4
(Continued)
• When abnormality is detected in
the electric power steering system,
to prevent a deadly accident, the
steering assist function will stop.
At this time, the warning light
turns on or blinks on the cluster.
The steering wheel may become
difficult to control or operate.
Have your vehicle checked imme-
diately, after moving the vehicle to
a safe zone.
• When the charging system warning
light comes on due to low voltage
(when the alternator or battery
does not operate normally or mal-
function), the steering wheel may
require increased steering effort.
• If the vehicle needs to be jump
started due to battery discharge,
the steering wheel may not function
normally. This is a temporary situ-
ation caused by low battery volt-
age. It will be solved once the bat-
tery is charged. Check for normal
steering function by turning the
steering wheel slowly before driv-
ing the vehicle.Tilt and telescopic steering
Tilt and telescopic steering allows
you to adjust the steering wheel
before you drive. You can also raise it
to give your legs more space when
you get on or off the vehicle.
The steering wheel should be posi-
tioned so that it is comfortable for
you to drive, while permitting you to
see the instrument panel warning
lights and gauges.
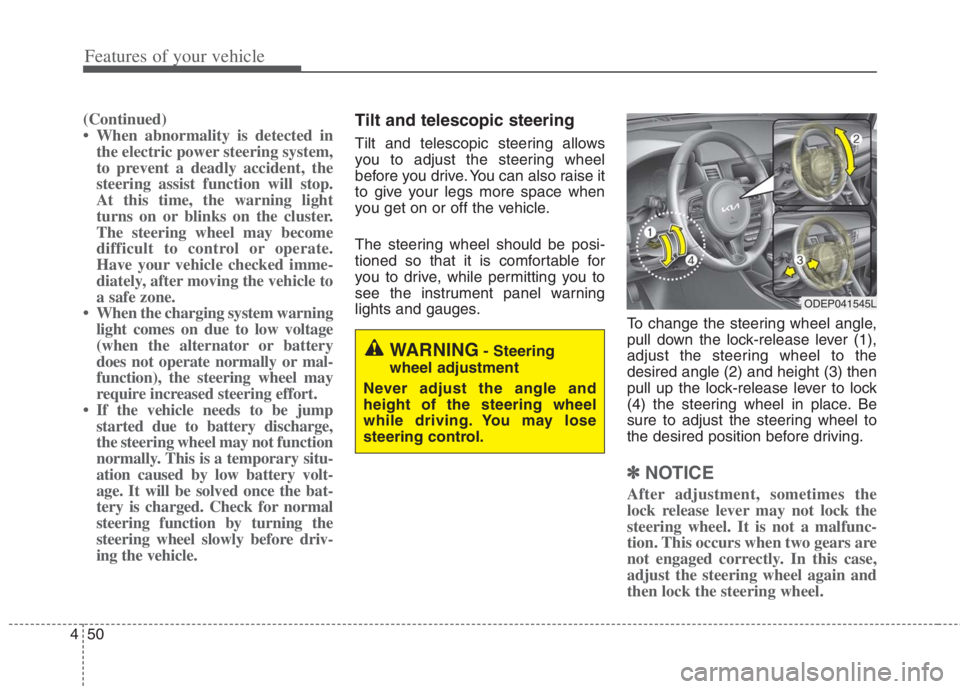
To change the steering wheel angle,
pull down the lock-release lever (1),
adjust the steering wheel to the
desired angle (2) and height (3) then
pull up the lock-release lever to lock
(4) the steering wheel in place. Be
sure to adjust the steering wheel to
the desired position before driving.
✽ ✽
NOTICE
After adjustment, sometimes the
lock release lever may not lock the
steering wheel. It is not a malfunc-
tion. This occurs when two gears are
not engaged correctly. In this case,
adjust the steering wheel again and
then lock the steering wheel.
WARNING- Steering
wheel adjustment
Never adjust the angle and
height of the steering wheel
while driving. You may lose
steering control.
ODEP041545L
Page 204 of 684

Features of your vehicle
66 4
Folding the outside rearview mirror
Electric type (if equipped)
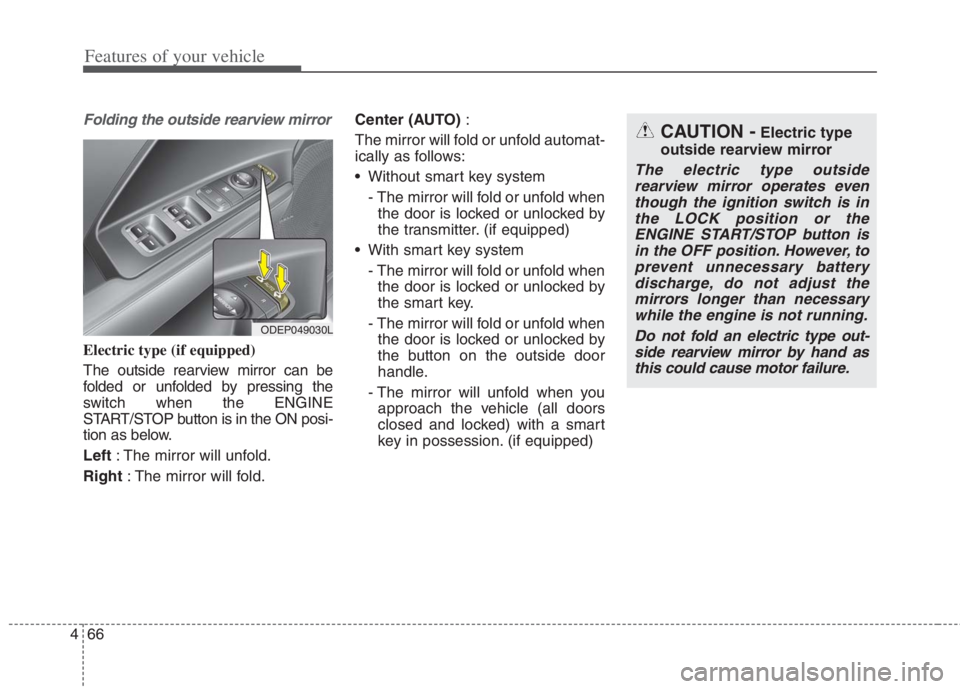
The outside rearview mirror can be
folded or unfolded by pressing the
switch when the ENGINE
START/STOP button is in the ON posi-
tion as below.
Left : The mirror will unfold.
Right : The mirror will fold.Center (AUTO):
The mirror will fold or unfold automat-
ically as follows:
Without smart key system
- The mirror will fold or unfold when
the door is locked or unlocked by
the transmitter. (if equipped)
With smart key system
- The mirror will fold or unfold when
the door is locked or unlocked by
the smart key.
- The mirror will fold or unfold when
the door is locked or unlocked by
the button on the outside door
handle.
- The mirror will unfold when you
approach the vehicle (all doors
closed and locked) with a smart
key in possession. (if equipped)
ODEP049030L
CAUTION -Electric type
outside rearview mirror
The electric type outside
rearview mirror operates even
though the ignition switch is in
the LOCK position or the
ENGINE START/STOP button is
in the OFF position. However, to
prevent unnecessary battery
discharge, do not adjust the
mirrors longer than necessary
while the engine is not running.
Do not fold an electric type out-
side rearview mirror by hand as
this could cause motor failure.
Page 206 of 684
Features of your vehicle
68 4
INSTRUMENT CLUSTER
1. Hybrid system gauge
2. Fuel gauge
3. Speedometer
4. Warning and indicator lights
5. LCD display
6. Battery SOC (State of Charge) gauge
7. Distance To Empty
ODEP049100C/ODEP049538C
■ ■
Type A for Hybrid
❈For more details, refer to the “Gauges” in
this chapter.
■ ■
Type B for Hybrid
❈The actual cluster and contents of the LCD display in the vehicle may differ from the illustration.
Page 207 of 684
469
Features of your vehicle
1. Hybrid system gauge
2. Fuel gauge
3. Speedometer
4. Warning and indicator lights
5. LCD display
6. Battery SOC (State of Charge) gauge
7. Distance To Empty
ODEP049182C/ODEP049183C
■ ■
Type A for Plug-in Hybrid
❈For more details, refer to the “Gauges” in
this chapter.
■ ■
Type B for Plug-in Hybrid
❈The actual cluster and contents of the LCD display in the vehicle may differ from the illustration.
Page 210 of 684

Features of your vehicle
72 4
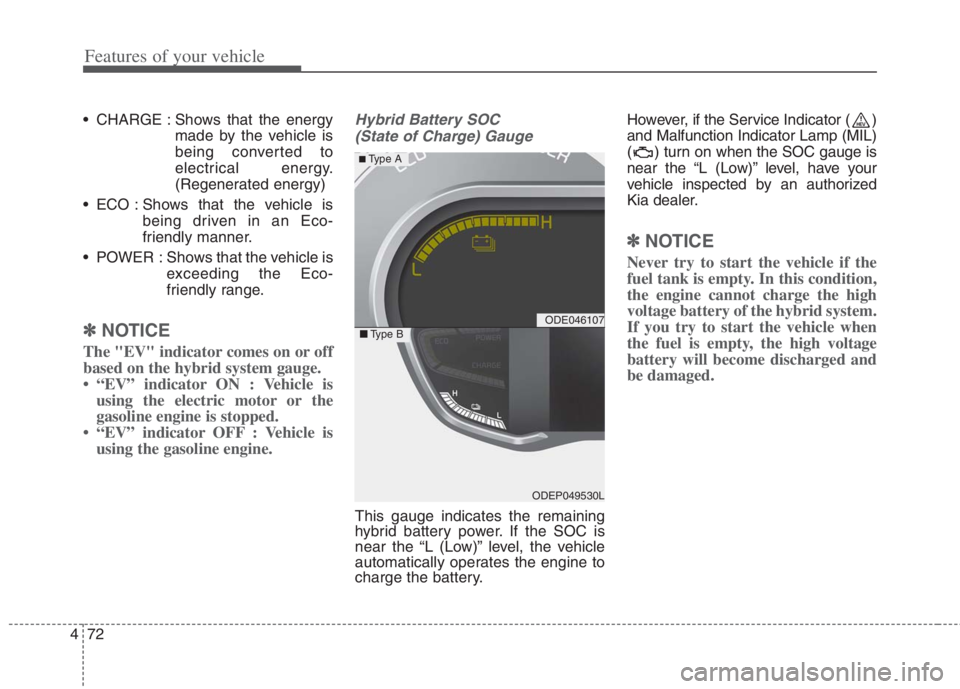
CHARGE : Shows that the energy
made by the vehicle is
being converted to
electrical energy.
(Regenerated energy)
ECO : Shows that the vehicle is
being driven in an Eco-
friendly manner.
POWER : Shows that the vehicle is
exceeding the Eco-
friendly range.
✽ ✽
NOTICE
The "EV" indicator comes on or off
based on the hybrid system gauge.
• “EV” indicator ON : Vehicle is
using the electric motor or the
gasoline engine is stopped.
• “EV” indicator OFF : Vehicle is
using the gasoline engine.
Hybrid Battery SOC
(State of Charge) Gauge
This gauge indicates the remaining
hybrid battery power. If the SOC is
near the “L (Low)” level, the vehicle
automatically operates the engine to
charge the battery.However, if the Service Indicator ( )
and Malfunction Indicator Lamp (MIL)
( ) turn on when the SOC gauge is
near the “L (Low)” level, have your
vehicle inspected by an authorized
Kia dealer.
✽ ✽
NOTICE
Never try to start the vehicle if the
fuel tank is empty. In this condition,
the engine cannot charge the high
voltage battery of the hybrid system.
If you try to start the vehicle when
the fuel is empty, the high voltage
battery will become discharged and
be damaged.
ODE046107
ODEP049530L
■Type B
■ Type A
Page 211 of 684
473
Features of your vehicle
Plug-in hybrid mode indicator
: The high-voltage
(hybrid) battery is used
to drive the vehicle.
: The AUTO mode will
be automatically
selected from either
from Electric (CD)
mode or Hybrid (CS)
mode by the system
according to the driv-
ing condition.
:The high-voltage
(hybrid) battery and
gasoline engine is
used to drive the vehi-
cle.
A corresponding message is displayed
to indicate the selected mode.
Fuel Gauge
This gauge indicates the approxi-
mate amount of fuel remaining in the
fuel tank.
ODE046108
ODEP049188L
■Type B
■ Type A
ODEP049550L
ODEP049548L
ODEP049549L
ODEP049189L/ODEP049541L/ODEP049190L
Page 213 of 684

475
Features of your vehicle
If the estimated distance is below 1
km (1 mi.), the trip computer will
display “----” as distance to empty.
If the level of the remaining fuel is
more than three-quarters, more
than 3 liters (0.8 gallons) of fuel
must be refilled for the fuel gauge
to change. In other cases, more
than 6 liters (1.6 gallons) of fuel
must be refilled for the vehicle to
change the fuel gauge.✽ ✽
NOTICE
• If the vehicle is not on level ground
or the battery power has been
interrupted, the distance to empty
function may not operate correct-
ly.
• The distance to empty may differ
from the actual driving distance as
it is an estimate of the available
driving distance.
• The fuel economy and distance to
empty may vary significantly
based on driving conditions, driv-
ing habits, and condition of the
vehicle.
Odometer
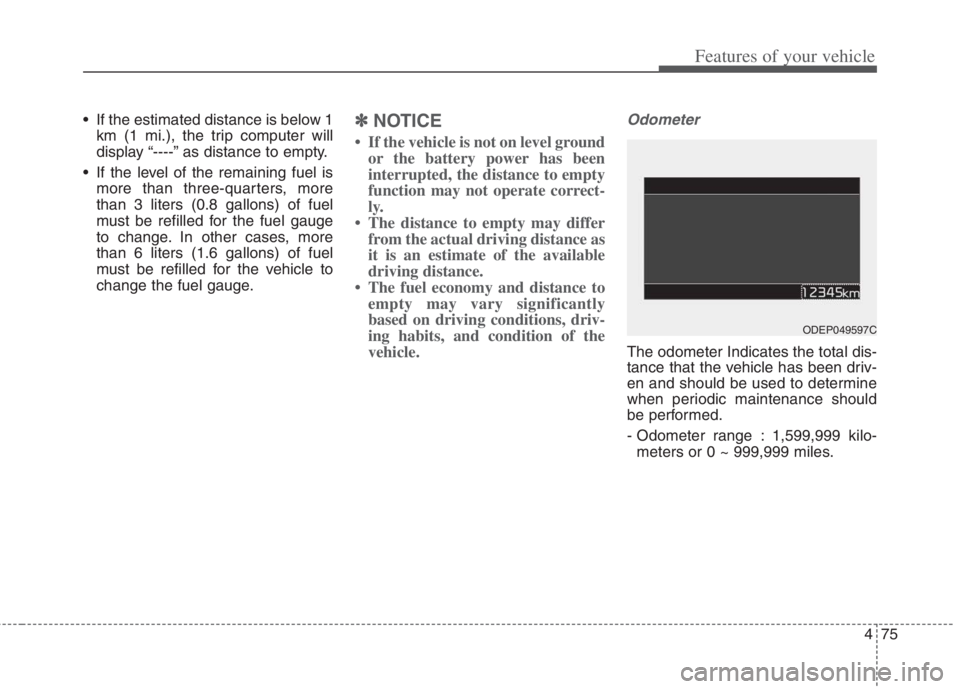
The odometer Indicates the total dis-
tance that the vehicle has been driv-
en and should be used to determine
when periodic maintenance should
be performed.
- Odometer range : 1,599,999 kilo-
meters or 0 ~ 999,999 miles.
ODEP049597C
Page 226 of 684
Features of your vehicle
88 4
ItemsExplanation
Enable Service IntervalIf this item is checked, the Service Interval function will be activated.
Adjust IntervalIf the service interval menu is activated, you may adjust the time and distance.
ResetTo reset the service interval function.
6. Service Interval (if equipped)
✽
✽
NOTICE
To use the service interval menu, consult an authorized Kia dealer.
If the service interval is activated and the time and distance is adjusted, messages are displayed in the following sit-
uations each time the vehicle is turned on.
- Service in: Displayed to inform the driver the remaining mileage and days to service.
- Service required: Displayed when the mileage and days to service has been reached or passed.
If any of the following conditions occur, the mileage and number of days to service may be incorrect.
- The battery cable is disconnected.
- The battery is discharged.
- The fuse switch is turned off.