Page 609 of 684

767
Maintenance
Instrument panel (Driver’s side fuse panel) (Hybrid)
Fuse NameFuse ratingCircuit Protected
MODULE 510A
Electro Chromic Mirror, Audio/Video & Navigation Head Unit, Audio, Shift Lever Indicator, Air Conditioner
Control Module, Rear Seat Warmer Control Module, Front Air Ventilation Seat Control Module, Front Seat
Warmer Control Module, Head Lamp Leveling Device Actuator LH/RH, Crash Pad Switch, AMP (Amplifier),
Keyboard, OBD
MODULE 410ALane Keeping Assist Control Module, Crash Pad Switch, Blind-Spot Collision Warning (BCW) Radar Left
Handle side/Right Handle side, EPB, VESS
INTERIOR
LAMP10AFront Vanity Lamp LH/RH, Room Lamp, Overhead Console Lamp, Luggage Lamp, Mood Lamp, Wireless
Charger, Rain sensor, Driver warning switch
A/BAG15APassenger Occupant Detection Sensor, ACU
IG 125AEngine Room Junction Block (Fuse - DCT4, HPCU2, ACTIVE HYDRAULIC BOOSTER3, ECU3)
CLUSTER10AInstrument Cluster
MODULE 310ABCM (Body Control Module), DCT (Dual Clutch Transmission) Shift Lever, Stop Lamp Switch, Driver Door
Module, Passenger Door Module
MEMORY 27.5AActive Air Flap Unit, VESS
MODULE 810AActive Air Flap Unit, Electric Water Pump (Engine), Engine Room Junction Block (Battery C/Fan Relay),
BMS (Battery Management System) Control Module
A/BAG IND7.5AAir Conditioner Control Module, Instrument Cluster
START7.5A[With Smart Key/With Immobilizer] Inhibitor Switch
Page 613 of 684

771
Maintenance
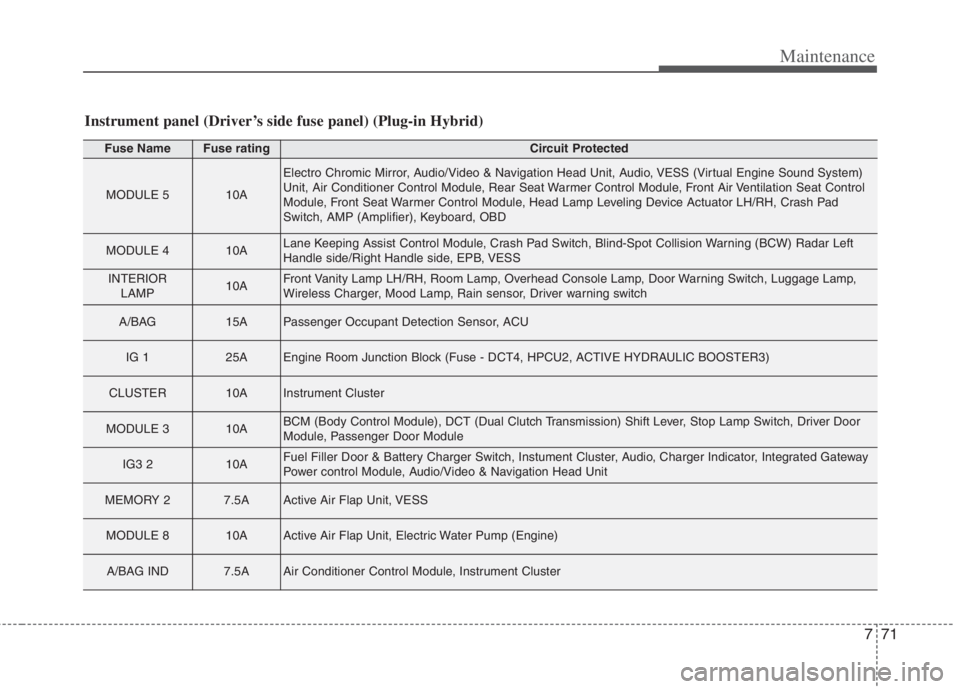
Instrument panel (Driver’s side fuse panel) (Plug-in Hybrid)
Fuse NameFuse ratingCircuit Protected
MODULE 510A
Electro Chromic Mirror, Audio/Video & Navigation Head Unit, Audio, VESS (Virtual Engine Sound System)
Unit, Air Conditioner Control Module, Rear Seat Warmer Control Module, Front Air Ventilation Seat Control
Module, Front Seat Warmer Control Module, Head Lamp Leveling Device Actuator LH/RH, Crash Pad
Switch, AMP (Amplifier), Keyboard, OBD
MODULE 410ALane Keeping Assist Control Module, Crash Pad Switch, Blind-Spot Collision Warning (BCW) Radar Left
Handle side/Right Handle side, EPB, VESS
INTERIOR
LAMP10AFront Vanity Lamp LH/RH, Room Lamp, Overhead Console Lamp, Door Warning Switch, Luggage Lamp,
Wireless Charger, Mood Lamp, Rain sensor, Driver warning switch
A/BAG15APassenger Occupant Detection Sensor, ACU
IG 125AEngine Room Junction Block (Fuse - DCT4, HPCU2, ACTIVE HYDRAULIC BOOSTER3)
CLUSTER10AInstrument Cluster
MODULE 310ABCM (Body Control Module), DCT (Dual Clutch Transmission) Shift Lever, Stop Lamp Switch, Driver Door
Module, Passenger Door Module
IG3 210AFuel Filler Door & Battery Charger Switch, Instument Cluster, Audio, Charger Indicator, Integrated Gateway
Power control Module, Audio/Video & Navigation Head Unit
MEMORY 27.5AActive Air Flap Unit, VESS
MODULE 810AActive Air Flap Unit, Electric Water Pump (Engine)
A/BAG IND7.5AAir Conditioner Control Module, Instrument Cluster
Page 629 of 684

787
Maintenance
LIGHT BULBS
Bulb replacement precaution
Please keep extra bulbs on hand
with appropriate wattage ratings in
case of emergencies.
Refer to “Bulb Wattage” in chapter 8.
When changing lamps, first turn off
the engine at a safe place, firmly
apply the parking brake and detach
the battery’s negative (-) terminal.
Use only bulbs of the specified
wattage.✽ ✽
NOTICE
• If the light bulb or lamp connector
is removed while the lamp is still
on, the fuse box's electronic sys-
tem may log it as a malfunction.
Therefore, a lamp malfunction
incident may be recorded as a
Diagnostic Trouble Code (DTC) in
the fuse box.
• It is normal for an operating lamp
to flicker momentarily. This is due
to a stabilization function of the
vehicle’s electronic control device.
If the lamp lights up normally
after momentarily blinking, then
it is functioning as normal.
However, if the lamp continues to
flicker several times or turns off
completely, there may be an error
in the vehicle’s electronic control
device. Please have the vehicle
checked by an authorized Kia
dealer immediately.
✽ ✽
NOTICE
We recommend that the headlight
aiming be adjusted by an authorized
Kia dealer after an accident or after
the headlight assembly is reinstalled.
WARNING- Working on
the lights
Prior to working on the light,
firmly apply the parking brake,
ensure that the engine
start/stop button is in OFF posi-
tion and turn off the lights to
avoid sudden movement of the
vehicle and burning your fingers
or receiving an electric shock.
CAUTION -Light replace-
ment
Be sure to replace the burned-
out bulb with one of the same
wattage rating. Otherwise, it
may cause damage to the fuse
or electric wiring system.
CAUTION -Headlamp
Lens
To prevent damage, do not
clean the headlamp lens with
chemical solvents or strong
detergents.
Page 633 of 684
791
Maintenance
Headlamp (High/Low beam)
(Bulb type) bulb replacement
(Headlamp type A)
1. Open the hood.
2. Remove the headlamp bulb cover
by turning it counterclockwise.
3. Disconnect the headlamp bulb
socket-connector.
4. Remove the bulb-socket from the
headlamp assembly by turning the
bulb-socket counterclockwise until
the tabs on the bulb-socket align
with the slots on the headlamp
assembly.5. Install a new bulb-socket assem-
bly in the headlamp assembly by
aligning the tabs on the bulb-sock-
et with the slots in the headlamp
assembly. Push the bulb-socket
into the headlamp assembly and
turn the bulb-socket clockwise.
6. Install the headlamp bulb cover by
turning it clockwise.
Headlamp bulb
ODE076035
OQL075058
WARNING- Halogen
bulbs
Halogen bulbs contain pres-
surized gas that will produce
flying pieces of glass if broken.
(Continued)
Page 644 of 684
Maintenance
102 7
Map lamp (LED type) bulb
replacement
If the map lamp (LED type) (1) does
not operate, have the vehicle
checked by an authorized Kia dealer.
The LED lamp cannot be replaced
as a single component because it is
an integrated unit. The LED lamp has
to be replaced with the unit.
A skilled technician should check or
repair the map lamp (LED type), for it
may damage related parts of the
vehicle.
Vanity mirror lamp (Bulb type)
bulb replacement 1. Using a flat-blade screwdriver,
gently pry the lamp assembly from
interior.
2. Remove the bulb by pulling it
straight out.
3. Install a new bulb in the socket.
4. Install the lamp assembly to interior.
OQM076063
CAUTION
Be careful not to dirty or dam-
age the lens, lens tab, and plas-
tic housings.
ODE076048
WARNING
Prior to working on the Interior
lamps, ensure that the “OFF”
button is depressed to avoid
burning your fingers or receiv-
ing an electric shock.
Page 645 of 684
7103
Maintenance
Room lamp (Bulb type) bulb
replacement1. Using a flat-blade screwdriver,
gently pry the lens cover from
lamp housing.
2. Remove the bulb by pulling it
straight out.
3. Install a new bulb in the socket.
4. Align the lens cover tabs with the
lamp housing notches and snap
the lens into place.Room lamp (LED type) bulb
replacement
If the room lamp (LED type) (1) does
not operate, have the vehicle
checked by an authorized Kia dealer.
The LED lamp cannot be replaced
as a single component because it is
an integrated unit. The LED lamp has
to be replaced with the unit.
A skilled technician should check or
repair the room lamp (LED type), for
it may damage related parts of the
vehicle.
WARNING
Prior to working on the Interior
lamps, ensure that the “OFF”
button is depressed to avoid
burning your fingers or receiv-
ing an electric shock.
ODE076049
CAUTION
Be careful not to dirty or dam-
age the lens, lens tab, and plas-
tic housings.
ODEP077070
Page 647 of 684

7105
Maintenance
APPEARANCE CARE
Exterior care
Exterior general caution
It is very important to follow the label
directions when using any chemical
cleaner or polish. Read all warning
and caution statements that appear
on the label.
✽ ✽
NOTICE
If you park the vehicle around a
stainless signboard or windshield
building etc., the plastic exterior
trim (bumper, spoiler, garnish,
lamp, outside mirror etc.) may be
damaged by reflected sunlight from
the external structure. To avoid
damaging the plastic exterior trim,
park the vehicle away from the
areas where the reflected light may
occur or use a vehicle cover
(Depending on the vehicle, the type
of exterior trim applied such as
spoiler may differ).
Finish maintenance
Washing
To help protect your vehicle’s finish
from rust and deterioration, wash it
thoroughly and frequently at least
once a month with lukewarm or cold
water.
If you use your vehicle for off-road
driving, you should wash it after each
off-road trip. Pay special attention to
the removal of any accumulation of
salt, dirt, mud, and other foreign mate-
rials. Make sure the drain holes in the
lower edges of the doors and rocker
panels are kept clear and clean.
Insects, tar, tree sap, bird droppings,
industrial pollution and similar
deposits can damage your vehicle’s
finish if not removed immediately.
Even prompt washing with plain water
may not completely remove all these
deposits. A mild soap, safe for use on
painted surfaces, may be used.
After washing, rinse the vehicle thor-
oughly with lukewarm or cold water.
Do not allow soap to dry on the finish.After washing the vehicle, test the
brakes while driving slowly to see if
they have been affected by water. If
braking performance is impaired, dry
the brakes by applying them lightly
while maintaining a slow forward
speed.
Page 651 of 684

7109
Maintenance
Aluminum wheel maintenance
The aluminum wheels are coated with
a clear protective finish.
Do not use any abrasive cleaner,
polishing compound, solvent, or wire
brushes on aluminum wheels. They
may scratch the finish.
Clean the wheel when it has cooled.
Use only a mild soap or neutral
detergent, and rinse thoroughly with
water. Also, be sure to clean the
wheels after driving on salted roads.
This helps prevent corrosion.
Avoid washing the wheels with high-
speed vehicle wash brushes.
Do not use any alkaline or acid
detergents It may damage and cor-
rode the aluminum wheels coated
with a clear protective finish.
Corrosion protection
Protecting your vehicle from corrosion
By using the most advanced design
and construction practices to combat
corrosion, we produce vehicles of
the highest quality. However, this is
only part of the job. To achieve the
long-term corrosion resistance your
vehicle can deliver, the owner's
cooperation and assistance is also
required.
Common causes of corrosion
The most common causes of corro-
sion on your vehicle are:
Road salt, dirt and moisture that is
allowed to accumulate underneath
the vehicle.
Removal of paint or protective
coatings by stones, gravel, abra-
sion or minor scrapes and dents
which leave unprotected metal
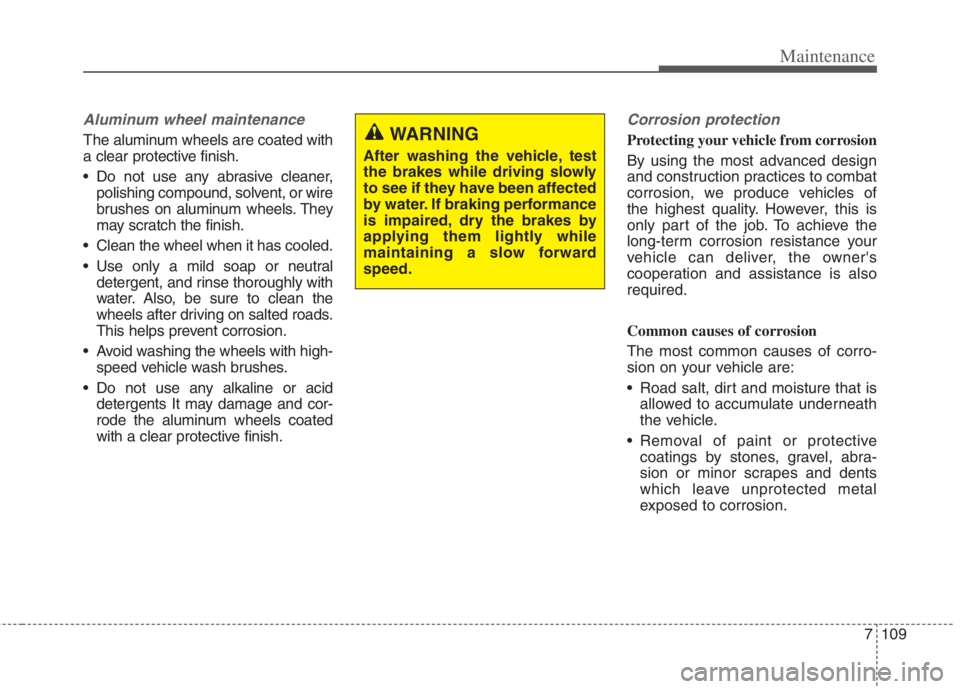
exposed to corrosion.WARNING
After washing the vehicle, test
the brakes while driving slowly
to see if they have been affected
by water. If braking performance
is impaired, dry the brakes by
applying them lightly while
maintaining a slow forward
speed.