2022 HYUNDAI KONA EV fuse
[x] Cancel search: fusePage 38 of 548

01
1-33
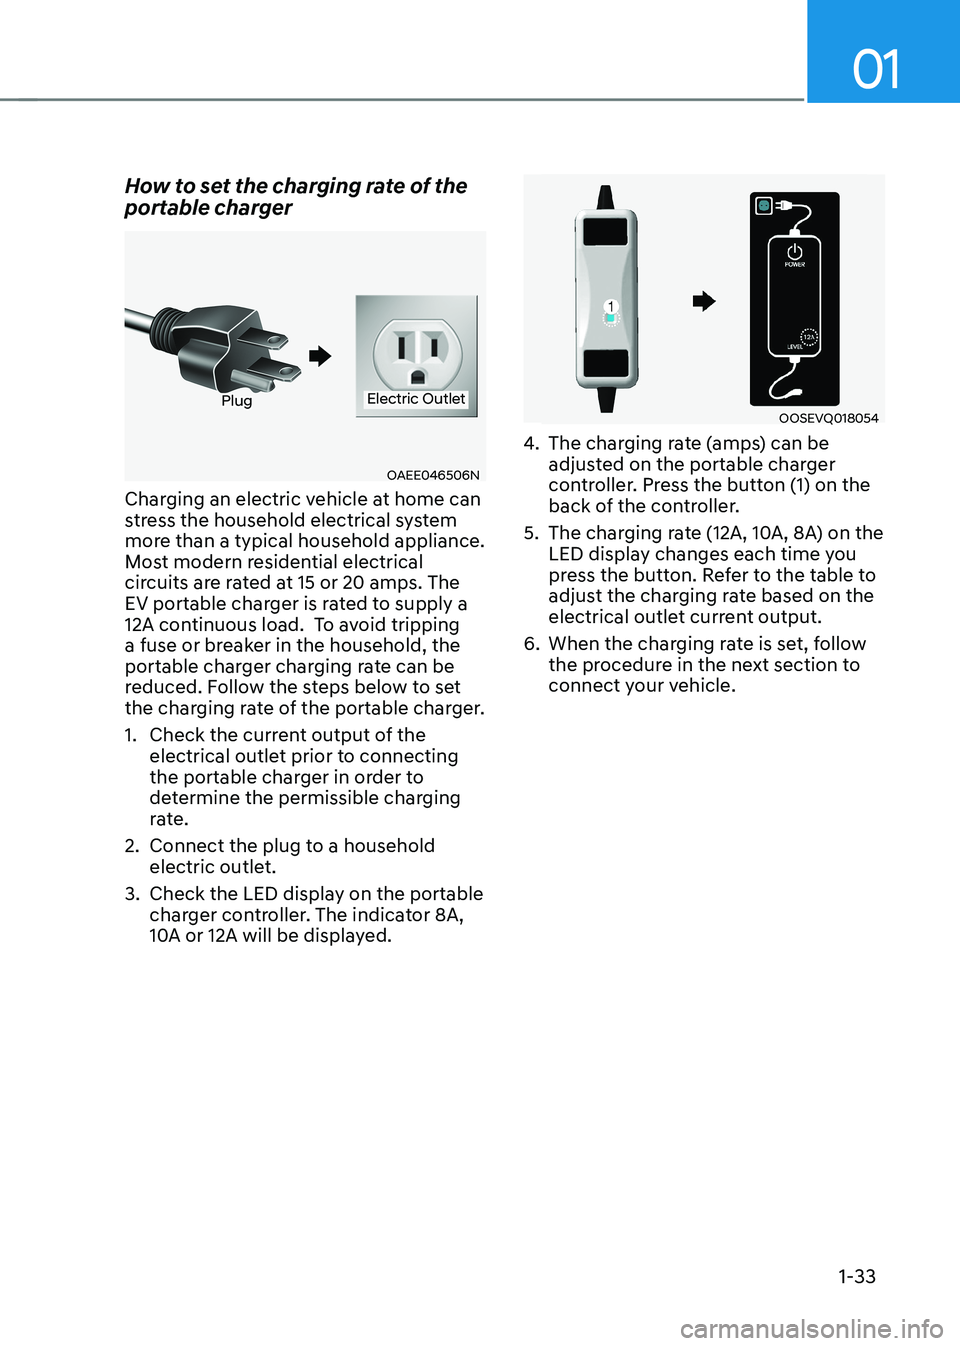
How to set the charging rate of the
portable charger
OAEE046506N
PlugElectric Outlet
Charging an electric vehicle at home can
stress the household electrical system
more than a typical household appliance.
Most modern residential electrical
circuits are rated at 15 or 20 amps. The
EV portable charger is rated to supply a
12A continuous load. To avoid tripping
a fuse or breaker in the household, the
portable charger charging rate can be
reduced. Follow the steps below to set
the charging rate of the portable charger.
1. Check the current output of the electrical outlet prior to connecting
the portable charger in order to
determine the permissible charging
rate.
2. Connect the plug to a household electric outlet.
3. Check the LED display on the portable charger controller. The indicator 8A,
10A or 12A will be displayed.OOSEVQ018054
4. The charging rate (amps) can be
adjusted on the portable charger
controller. Press the button (1) on the
back of the controller.
5. The charging rate (12A, 10A, 8A) on the LED display changes each time you
press the button. Refer to the table to
adjust the charging rate based on the
electrical outlet current output.
6. When the charging rate is set, follow the procedure in the next section to
connect your vehicle.
Page 39 of 548

Foreword / Electric Vehicle System Overview
1-34
à Example for setting the ICCB charge level
The example is only for reference and may vary according to the surrounding
environment.
Outlet current ICCB charge level Control box display window
14-16A 12A
OOSEVQ018055
13-12A
10A
11-10A 8A
CAUTION
Please make sure that charge level selection matches the capacity of your circuit
breaker to avoid blown fuse.
Page 69 of 548

2-4
Vehicle information
1. Door lock/unlock button ........................5-11
2. Outside rearview mirror
folding switch .......................................... 5-32
3. Outside rearview mirror control switch ..5-31
4. Central door lock switch .......................5-12
5. Power window lock switch ..................5-36
6. Power window switches ......................5-33
7. Instrument panel illumination control
switch ...................................................... 4-38. Parking Safety button
..........................7-126
9. Head-up display button .......................5-47
10. AUTO/LOCK mode selection button .....1-21
11. ESC OFF button .................................... 6-32
12. Hood release lever .................................5-41
13. Fuse box ................................................ 9-37
14. Steering wheel tilt/telescope lever ......5-17
15. Steering wheel ....................................... 5-16
16. Seat .......................................................... 3-3
intErior ovErviEw (i)
„„Left-hand drive type
The actual shape may differ from the illustration.
OOSEV011003N
Page 71 of 548

2-6
Vehicle informationMotor coMpartMent
The actual motor compartment in the vehicle may differ from the illustration.
OOSEV078001
1. Coolant reservoir .................................... 9-11
2. Brake fluid reservoir ..............................9-12
3. Fuse box ................................................. 9-414.
Battery (12 volt) ..................................... 9-18
5. Coolant reservoir cap .............................9-11
6. Windshield washer fluid reservoir ........9-13
Page 161 of 548

Instrument cluster
4-18
Check BRAKE SWITCH fuse
This warning message is displayed if the
brake switch fuse is disconnected.
You need to replace the fuse with a new
one before starting the vehicle.
If that is not possible, you can start
the vehicle by pressing the START/
STOP button for 10 seconds in the ACC position.
Shift to P to start vehicle
This warning message is displayed if you
try to start the vehicle without shifting to
the P (Park) position.
Low washer fluid (if equipped)
This warning message is displayed if
the washer fluid level in the reservoir is
nearly empty.
Have the washer fluid reservoir refilled.
12V battery discharging due to
additional electrical devices
This warning message is displayed if the
12V battery discharge is detected due to
use of unauthorized electrical/electronic
devices. Some vehicle functions will not
be able to use and the 12V battery may
discharge. If the message continues
to appear even though the external
electrical/electronic device is removed,
we recommend that the vehicle be
inspected by an authorized HYUNDAI
dealer.
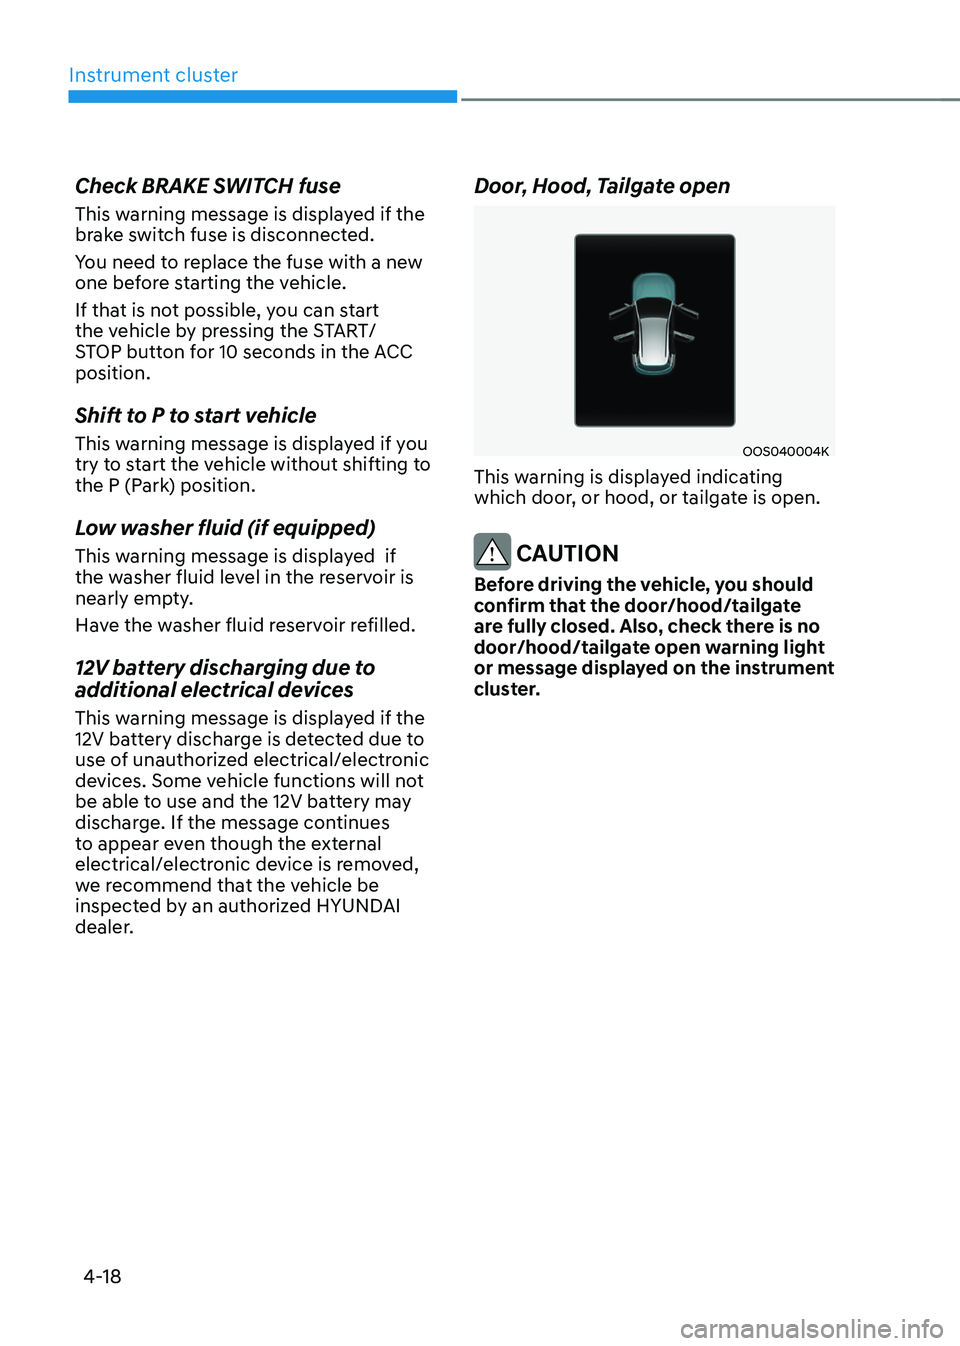
Door, Hood, Tailgate open
OOS040004K
This warning is displayed indicating
which door, or hood, or tailgate is open.
CAUTION
Before driving the vehicle, you should
confirm that the door/hood/tailgate
are fully closed. Also, check there is no
door/hood/tailgate open warning light
or message displayed on the instrument
cluster.
Page 163 of 548

Instrument cluster
4-20
Turn on FUSE SWITCH
OPDE046119
This warning message is displayed if
the fuse switch located on the fuse box
under the steering wheel is OFF.
You should turn the fuse switch on.
For more details, refer to “Fuses” in
chapter 9.
Heated Steering Wheel turned off (if equipped)
This message is displayed if you turn off
the heated steering wheel.
For more details, refer to “Heated
Steering Wheel” in chapter 5.
Check headlight (if equipped)
This warning message is displayed if the
headlamps are not operating properly. A
headlamp bulb may need to be replaced.
Information
Make sure to replace the burned out bulb with a new one of the same wattage rating. Check High Beam Assist (HBA)
system (if equipped)
This warning message is displayed if
there is a problem with High Beam
Assist. We recommend that you have
the vehicle inspected by an authorized
HYUNDAI dealer.
For more information, refer to “High
Beam Assist (HBA)” in chapter 5.
Check Forward Safety system (if equipped)
This warning message is displayed if
there is a malfunction with Forward
Collision-Avoidance Assist. We
recommend that you have the vehicle
inspected by an authorized HYUNDAI
dealer.
For more details, refer to “Forward
Collision-Avoidance Assist (FCA)” in
chapter 7.
Check Driver Attention Warning
(DAW) system (if equipped)
This warning message is displayed
if there is a problem with the Driver
Attention Warning.
We recommend that you have the
vehicle inspected by an authorized
HYUNDAI dealer.
For more information, refer to “Driver
Attention Warning (DAW)” in chapter 7.
Check Lane Keeping Assist (LKA)
system (if equipped)
This warning message is displayed if
there is a problem with Lane Keeping
Assist. We recommend that you have
the vehicle inspected by an authorized
HYUNDAI dealer.
For more information, refer to “Lane
Keeping Assist (LKA)” in chapter 7.
Page 220 of 548

Convenient features
5-36
NOTICE
Do not install any accessories on the
windows. The automatic reverse
feature may not operate.
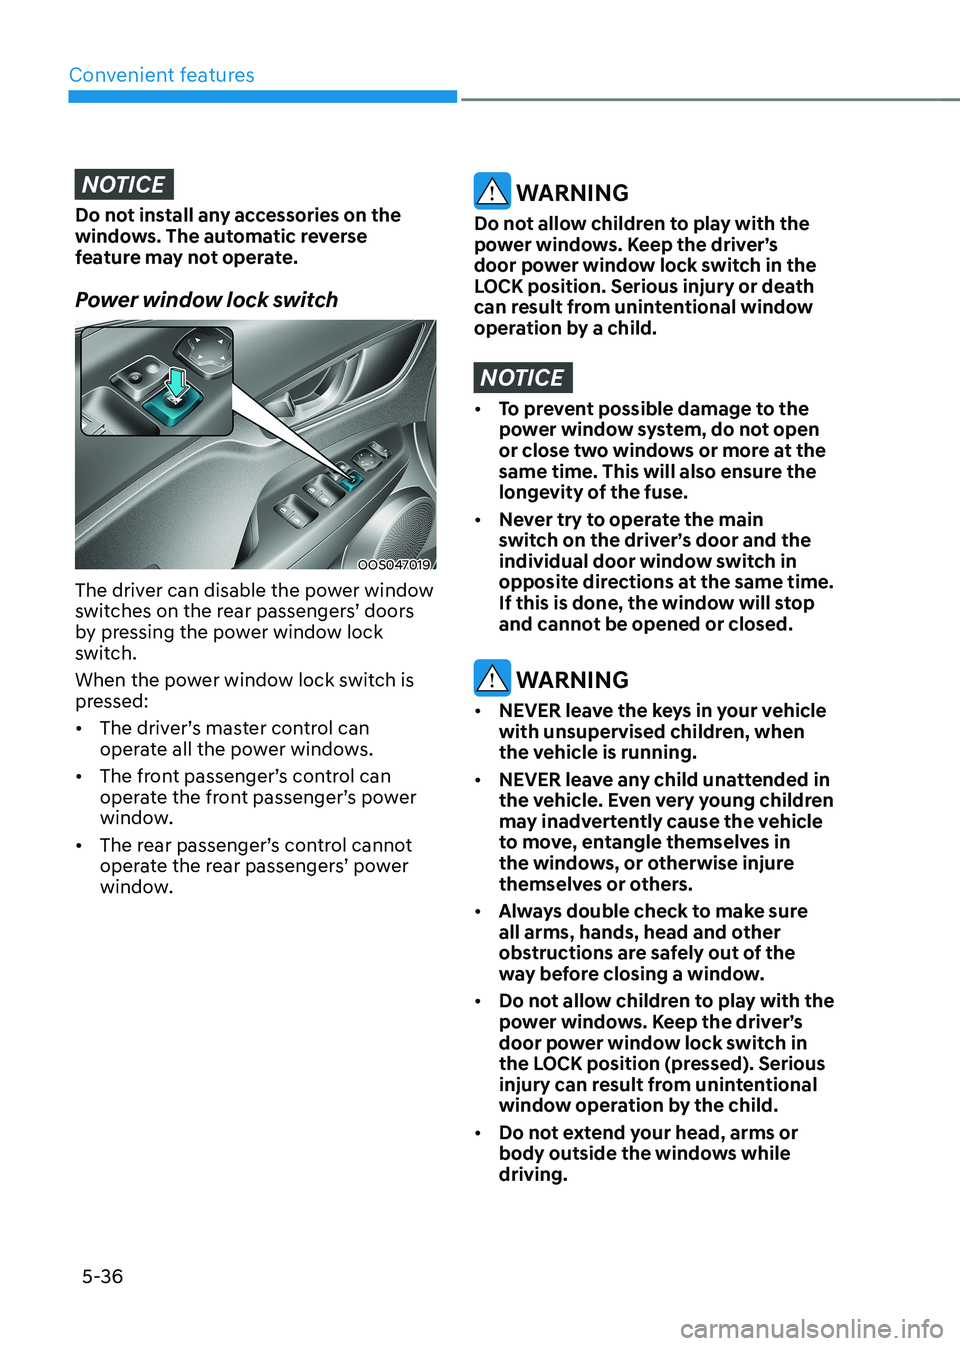
Power window lock switch
OOS047019
The driver can disable the power window
switches on the rear passengers’ doors
by pressing the power window lock
switch.
When the power window lock switch is
pressed: • The driver’s master control can
operate all the power windows.
• The front passenger’s control can
operate the front passenger’s power
window.
• The rear passenger’s control cannot
operate the rear passengers’ power
window.
WARNING
Do not allow children to play with the
power windows. Keep the driver’s
door power window lock switch in the
LOCK position. Serious injury or death
can result from unintentional window
operation by a child.
NOTICE
• To prevent possible damage to the
power window system, do not open
or close two windows or more at the
same time. This will also ensure the
longevity of the fuse.
• Never try to operate the main
switch on the driver’s door and the
individual door window switch in
opposite directions at the same time.
If this is done, the window will stop
and cannot be opened or closed.
WARNING
• NEVER leave the keys in your vehicle
with unsupervised children, when
the vehicle is running.
• NEVER leave any child unattended in
the vehicle. Even very young children
may inadvertently cause the vehicle
to move, entangle themselves in
the windows, or otherwise injure
themselves or others.
• Always double check to make sure
all arms, hands, head and other
obstructions are safely out of the
way before closing a window.
• Do not allow children to play with the
power windows. Keep the driver’s
door power window lock switch in
the LOCK position (pressed). Serious
injury can result from unintentional
window operation by the child.
• Do not extend your head, arms or
body outside the windows while driving.
Page 223 of 548

05
5-39
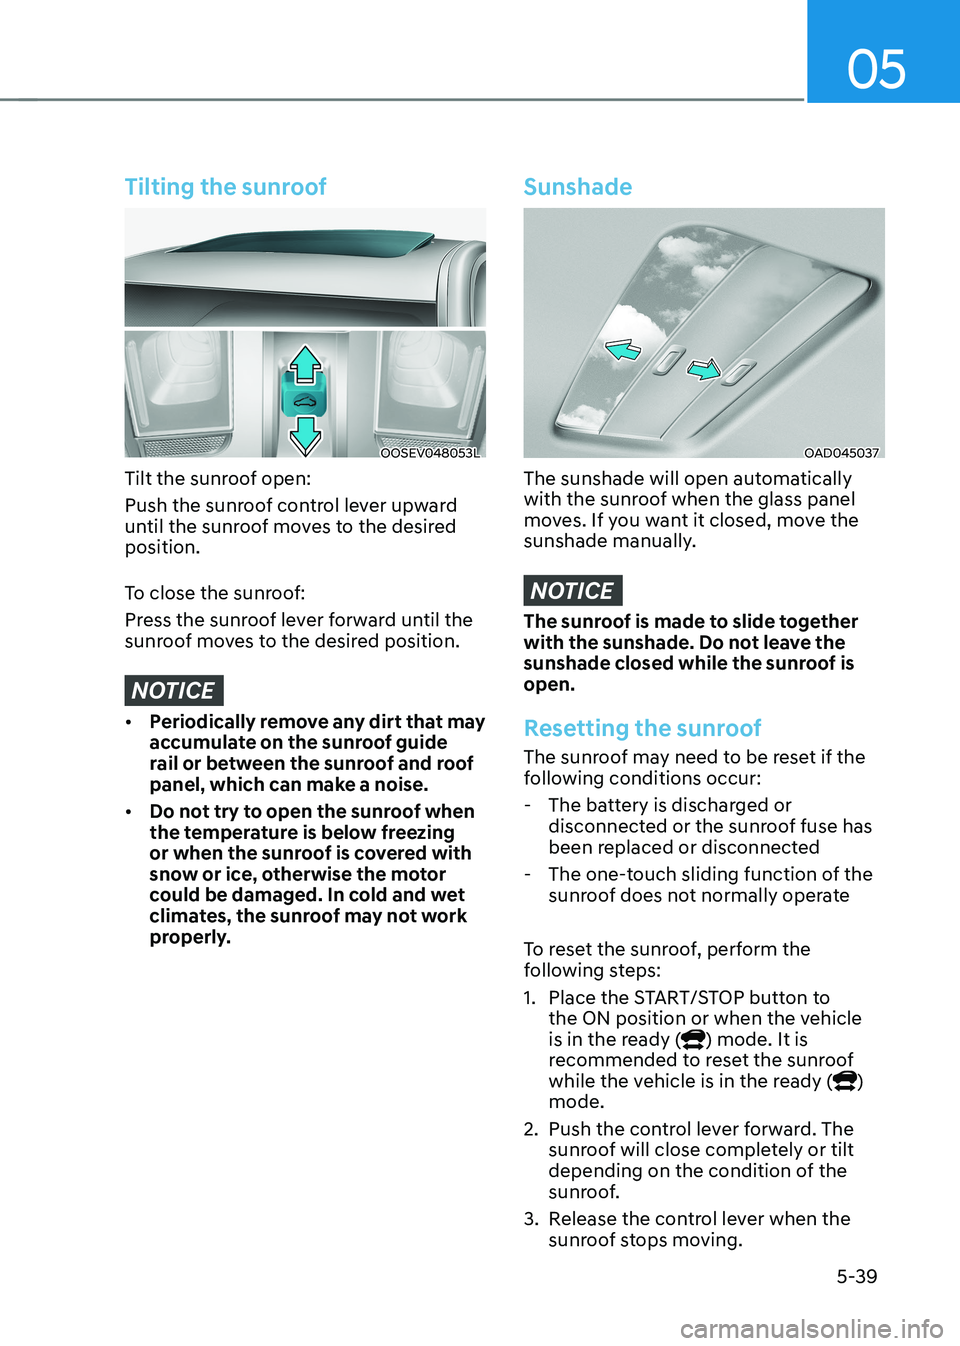
Tilting the sunroof
OOSEV048053L
Tilt the sunroof open:
Push the sunroof control lever upward
until the sunroof moves to the desired position.
To close the sunroof:
Press the sunroof lever forward until the
sunroof moves to the desired position.
NOTICE
• Periodically remove any dirt that may
accumulate on the sunroof guide
rail or between the sunroof and roof
panel, which can make a noise.
• Do not try to open the sunroof when
the temperature is below freezing
or when the sunroof is covered with
snow or ice, otherwise the motor
could be damaged. In cold and wet
climates, the sunroof may not work
properly.
Sunshade
OAD045037
The sunshade will open automatically
with the sunroof when the glass panel
moves. If you want it closed, move the
sunshade manually.
NOTICE
The sunroof is made to slide together
with the sunshade. Do not leave the
sunshade closed while the sunroof is open.
Resetting the sunroof
The sunroof may need to be reset if the
following conditions occur:
- The battery is discharged or disconnected or the sunroof fuse has
been replaced or disconnected
- The one-touch sliding function of the sunroof does not normally operate
To reset the sunroof, perform the
following steps:
1. Place the START/STOP button to the ON position or when the vehicle
is in the ready (
) mode. It is
recommended to reset the sunroof
while the vehicle is in the ready (
)
mode.
2. Push the control lever forward. The sunroof will close completely or tilt
depending on the condition of the
sunroof.
3. Release the control lever when the sunroof stops moving.