Page 35 of 548
Foreword / Electric Vehicle System Overview
1-30
NOTICE
In high ambient temperature conditions
like during summer months, the A/C
system may be operating during
EV battery charging. You may hear
additional noises generated from the
operation of the A/C compressor and
cooling fan. This is a normal condition.
Information
Note that the vehicle cannot be shifted out
of P (Park) when the vehicle is charging.OOSEV040489L
8. After charging has started, the estimated charging time is displayed
on the instrument cluster for about 1
minute.
If you open the driver seat door while
charging, the estimated charging time
is also displayed on the instrument
cluster for about 1 minute.
Information
Depending on the condition and durability
of the high voltage battery, charger
specifications, and ambient temperature,
the time required for charging the battery
may vary.
Page 37 of 548
Foreword / Electric Vehicle System Overview
1-32
How to Disconnect DC Charger
1. Refer to the instructions on the on-
screen display of the DC charging
station before disconnecting the
charging connector from the vehicle.
Once charging is stopped, remove the
charging connector.
OOSEV010015L
2. Make sure to re-install the charging port dust cover(s) before closing the
charging door.
3. The charging door must be fully closed before driving the vehicle.
Portable Charge
„„Portable Charger
OOSEVQ018047L
(1) Code and Plug (Code set)
(2) Control Box
(3) Charging Cable and Charging Connector
A portable charger that is used for Level
1 charging on a standard wall outlet is
stored in the vehicle rear cargo area.
Level 1 charging can be used when Level
2 AC charging or Level 3 DC fast charging
is not available.
Page 38 of 548

01
1-33
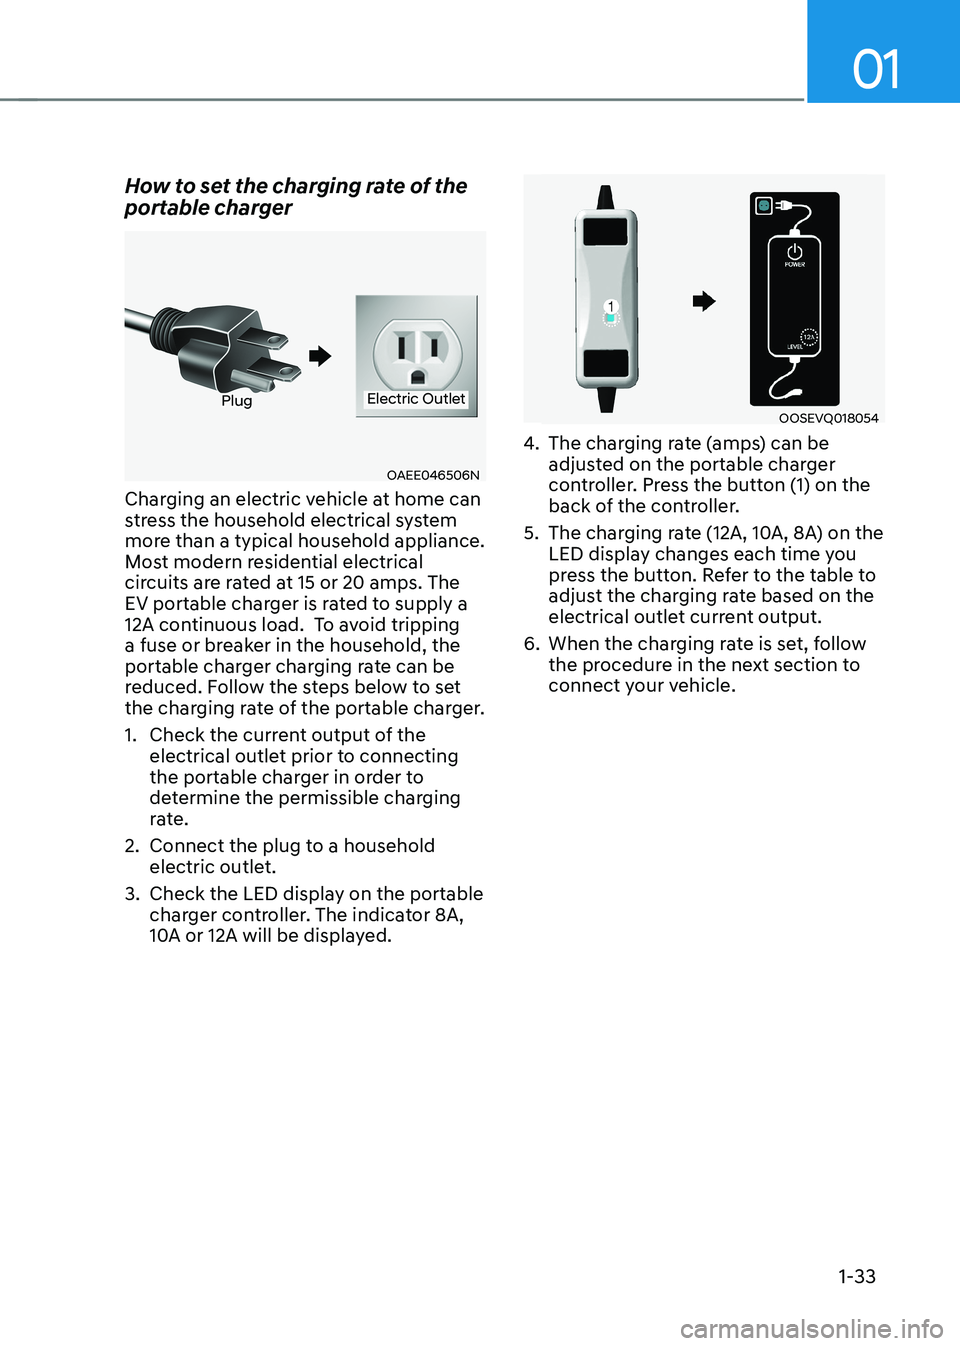
How to set the charging rate of the
portable charger
OAEE046506N
PlugElectric Outlet
Charging an electric vehicle at home can
stress the household electrical system
more than a typical household appliance.
Most modern residential electrical
circuits are rated at 15 or 20 amps. The
EV portable charger is rated to supply a
12A continuous load. To avoid tripping
a fuse or breaker in the household, the
portable charger charging rate can be
reduced. Follow the steps below to set
the charging rate of the portable charger.
1. Check the current output of the electrical outlet prior to connecting
the portable charger in order to
determine the permissible charging
rate.
2. Connect the plug to a household electric outlet.
3. Check the LED display on the portable charger controller. The indicator 8A,
10A or 12A will be displayed.OOSEVQ018054
4. The charging rate (amps) can be
adjusted on the portable charger
controller. Press the button (1) on the
back of the controller.
5. The charging rate (12A, 10A, 8A) on the LED display changes each time you
press the button. Refer to the table to
adjust the charging rate based on the
electrical outlet current output.
6. When the charging rate is set, follow the procedure in the next section to
connect your vehicle.
Page 39 of 548
Foreword / Electric Vehicle System Overview
1-34
à Example for setting the ICCB charge level
The example is only for reference and may vary according to the surrounding
environment.
Outlet current ICCB charge level Control box display window
14-16A 12A
OOSEVQ018055
13-12A
10A
11-10A 8A
CAUTION
Please make sure that charge level selection matches the capacity of your circuit
breaker to avoid blown fuse.
Page 42 of 548
01
1-37
OOSEV040133L
11. After charging has started, the estimated charging time is displayed
on the instrument cluster for about 1
minute.
If you open the driver seat door while
charging, the estimated charging time
is also displayed on the instrument
cluster for about 1 minute. When
scheduled charging or scheduled
air conditioner/heater is set, the
estimated charging time is displayed
as “--” .
Information
Depending on the condition and durability
of the high voltage battery, charger
specifications, and ambient temperature,
the time required for charging the battery
may vary.
Page 49 of 548

Foreword / Electric Vehicle System Overview
1-44
EV Charging - trOUBlEShOOting
EV Charging Troubleshooting - Steps to Consider
If the vehicle fails to charge after being plugged in to a charging station or if plugged in
when using the portable charger, check the following:
1. Verify the charge mode is set to immediate. (i.e. confirm that scheduled charging is turned OFF)
2. Check the operation status of the charging station or the portable charger.
3. Check to see if there are any warning messages in the LCD cluster. Refer to “LCD Display Messages” in this section.
4. If there is an error message on the charging station display screen, there may be
a problem with the charging station. Try to charge the vehicle with a different
charging station.
5. If the vehicle fails to charge with different charging station equipment, there may be a problem with the vehicle. Contact an authorized HYUNDAI dealer for inspection.
6. If charging fails and the service warning light (
) is lit in the cluster,
Contact an authorized HYUNDAI dealer.
Page 51 of 548

Foreword / Electric Vehicle System Overview
1-46
Virtual Engine Sound System
The Virtual Engine Sound System
generates engine sound for pedestrians
to hear vehicle sound because there is
no sound while the Electric Vehicle (EV)
is operating. • If the vehicle is in the ready (
)
mode and the gear is not in P (Park),
the VESS will be operated.
• When the gear is shifted to R
(Reverse), an additional warning
sound will be heard.
CAUTION
• The vehicle is much quieter while
driving than a conventional gasoline-
powered vehicle. Be aware of your
surroundings and always drive safely.
• After you park the vehicle or while
you are waiting at a traffic light,
check whether there are children or
obstacles around the vehicle.
• Check if there is something behind
the vehicle when driving in reverse.
Pedestrians may not hear the sound
of the vehicle.
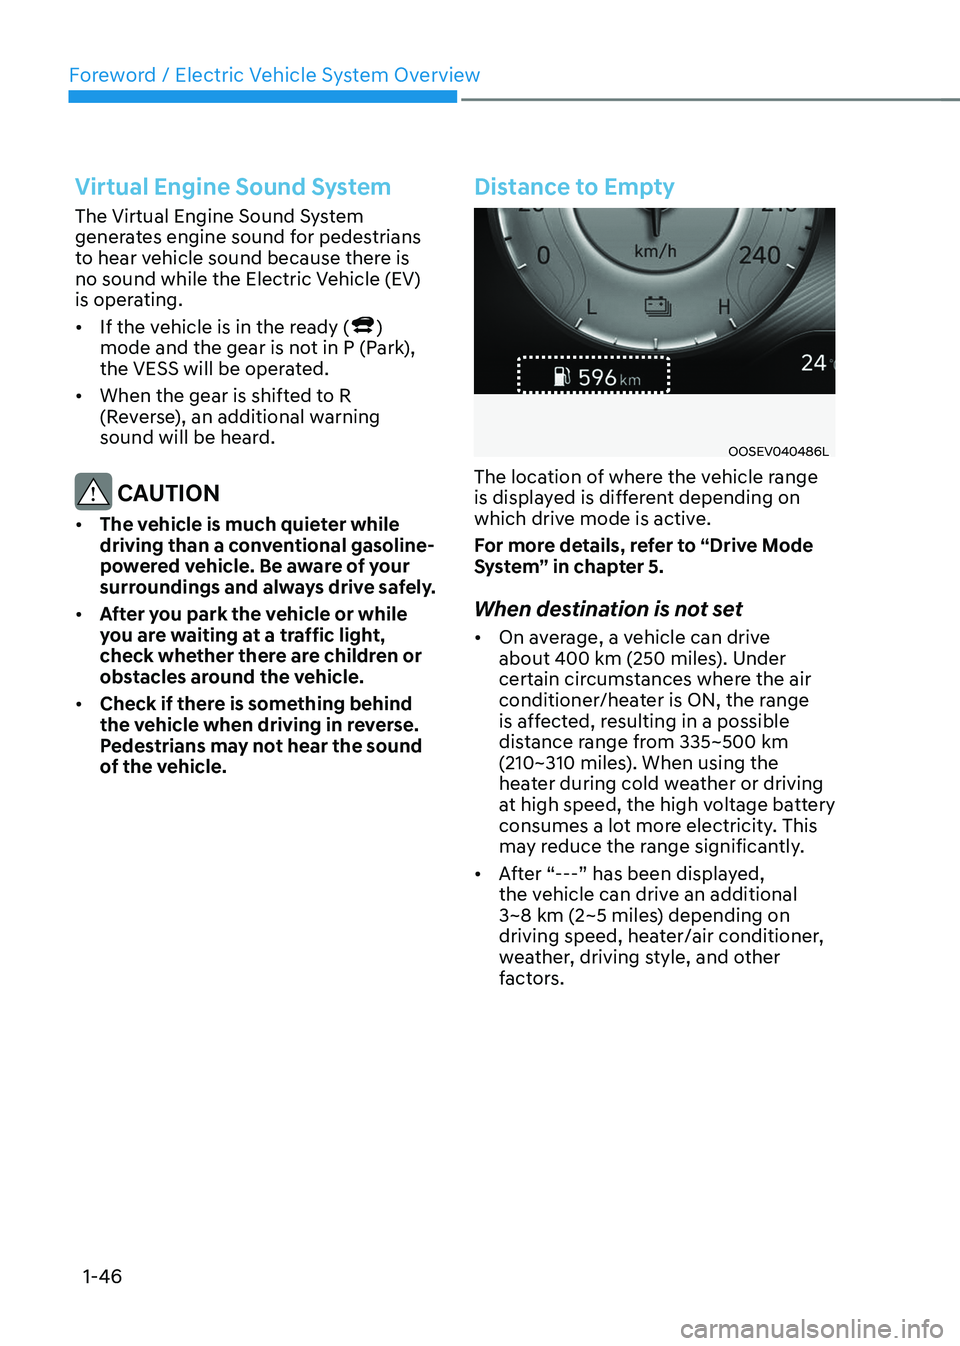
Distance to Empty
OOSEV040486L
The location of where the vehicle range
is displayed is different depending on
which drive mode is active.
For more details, refer to “Drive Mode
System” in chapter 5.
When destination is not set • On average, a vehicle can drive
about 400 km (250 miles). Under
certain circumstances where the air
conditioner/heater is ON, the range
is affected, resulting in a possible
distance range from 335~500 km
(210~310 miles). When using the
heater during cold weather or driving
at high speed, the high voltage battery
consumes a lot more electricity. This
may reduce the range significantly.
• After “---” has been displayed,
the vehicle can drive an additional
3~8 km (2~5 miles) depending on
driving speed, heater/air conditioner,
weather, driving style, and other
factors.
Page 52 of 548

01
1-47
•
The range that is displayed on the
instrument cluster after completing
a recharge may vary significantly
depending on previous driving
patterns.
When the previous driving patterns
include aggressive or high speed
driving (e.g. predominantly highway
miles, etc.), the estimated range on
the next full charge will be lower than normal.
When the previous driving patterns
are predominantly mild or economical
(e.g. city driving), the estimated
range on the next full charge will be
increased.
• Calculated range may depend on
many factors such as the charge
amount of the high voltage battery,
weather, temperature, durability of
the battery, geographical features,
and driving style.
• Natural degradation may occur with
the high voltage battery depending
on the number of years the vehicle
is used. This may reduce the vehicle
range.
Navigation - When a Destination is
Set
When a destination is set using the
vehicle navigation system (if equipped),
the vehicle range may change. The
vehicle range is recalculated using the
destination route information. While
driving, the range may vary based on
traffic conditions, driving pattern and
vehicle settings, etc.
Tips for Improving Range When
Using the Climate Control
System
• Operating the climate control system
consumes electrical energy from
the EV battery. Continuous use may
reduce the vehicle range.
When using the climate control
system, it is recommended to set
the control to 22°C (72°F) AUTO. The
climate control system has been
optimized to operate at this setting for
maximum comfort and efficiency.
• When possible, use the DRIVER ONLY
feature on the climate control system.
This will discontinue airflow to the
passenger side and reduces climate
control power consumption.
Tips for Improving Range While Driving
• Depress and hold the accelerator
pedal to maintain speed and drive
economically.
• Gradually depress and release the
accelerator pedal when accelerating
or decelerating.
• Always maintain specified tire
pressures.
• Do not use unnecessary electrical
components while driving.
• Do not load unnecessary items in the
vehicle.
• Do not mount parts that may increase
air resistance.