2022 HYUNDAI ELANTRA HYBRID radio
[x] Cancel search: radioPage 2 of 529
Introduction
F2Your HYUNDAI should not be modified in any way. Such modifications may
adversely affect the performance, safety or durability of your HYUNDAI
and may, in addition, violate conditions of the limited warranties covering
the vehicle. Certain modifications may also be in violation of regulations
established by the Department of Transportation and other government
agencies in your country.
Your vehicle is equipped with electronic fuel injection and other electronic
components. It is possible for an improperly installed/adjusted two-way radio
or cellular telephone to adversely affect electronic systems. For this reason,
have you carefully followed the radio manufacturer’s instructions or consult
your HYUNDAI dealer for precautionary measures or special instructions if you
choose to install one of these devices.
CAUTION: MODIFICATIONS TO YOUR HYUNDAI
TWO-WAY RADIO OR CELLULAR
TELEPHONE INSTALLATION
This manual includes information titled as DANGER, WARNING, CAUTION and
NOTICE.
These titles indicate the following:
DANGER
DANGER indicates a hazardous situation which, if not avoided, will result in
death or serious injury.
WARNING
WARNING indicates a hazardous situation which, if not avoided, could result
in death or serious injury.
CAUTION
CAUTION indicates a hazardous situation which, if not avoided, could result
in minor or moderate injury.
NOTICE
NOTICE indicates a situation which, if not avoided, could result in vehicle damage.
SAFETY AND VEHICLE DAMAGE WARNING
Page 88 of 529

Seats & Safety System
3-46
Occupant Classification System
(OCS)
OCN7030070N
Your vehicle is equipped with an
Occupant Classification System (OCS) in
the front passenger’s seat.
Main components of the Occupant
Classification System • A detection device located within the
front passenger seat cushion.
• Electronic system to help determine
whether the passenger air bag
systems should be activated or
deactivated.
• An indicator light located on the
instrument panel which illuminates
the words “PASSENGER AIR BAG OFF”
indicating the front passenger air bag
system is deactivated.
• The instrument panel air bag indicator
light is interconnected with the OCS.
The OCS is designed to help detect
the presence of a properly-seated
front passenger and determine if the
passenger’s front air bag should be
enabled (may inflate) or not.
The purpose is to help reduce the risk
of injury or death from an inflating air
bag to certain front passenger seat
occupants, such as children, by requiring
the air bag to be automatically turned
OFF. For example, if a child restraint of the
type specified in the regulations is on the
seat, the occupant classification sensor
can detect it and cause the air bag to
turn OFF.
Front passenger seat adult occupants
who are properly seated and wearing the
seat belt properly, should not cause the
passenger air bag to be automatically
turned OFF. For small adults it may be
turned OFF, however, if the occupant
does not sit in the seat properly (for
example, by not sitting upright, by sitting
on the edge of the seat, or by otherwise
being out of position), this could cause
the sensor to turn the air bag OFF.
You will find the “PASSENGER AIR BAG
OFF” indicator on the overhead console.
This system detects the conditions 1-4
in the following table and activates or
deactivates the front passenger air bag based on these conditions.
Always be sure that you and all vehicle
occupants are seated properly and
wearing the seat belt properly for the
most effective protection by the air bag
and the seat belt.
The OCS may not function properly if the
passenger takes actions which can affect
the classification system. These include: •
Failing to sit in an upright position.
• Leaning against the door or center console.
• Sitting towards the sides of the front
of the seat.
• Putting their legs on the dashboard or
resting them on other locations which
reduce the passenger weight on the
front seat.
• Wearing the seat belt improperly.
• Reclining the seatback.
• Wearing a thick cloth like ski wear or
hip protection wear.
• Putting an additional thick cushion on
the seat.
• Putting electrical devices (for
example, notebook, satellite radio) on
the seat with inverter charging.
Page 91 of 529

03
3-49
OLMB033104•
NEVER lean on the door or center console or sit on
one side of the front passenger seat.
ODH035900K •
Do not sit on the passenger seat wearing heavily
padded clothes such as ski wear and hip protector.
ODH035901K •
Do not use car seat accessories such as thick blankets
and cushions which cover up the car seat surface.
OHI038161 •
Do not place electronic devices such as laptops, DVD
player, or conductive materials such as water bottles
on the passenger seat.
• Do not use electronic devices such as laptops and
satellite radios which use inverter chargers.
OHI038162 •
If large quantity of liquid has been spilled on the
passenger seat, the air bag warning light may
illuminate or malfunction.
Therefore, make sure the seat has been completely
dried before driving the vehicle.
• Do not place sharp objects on the front passenger seat. These may damage the
occupant detection system, if they puncture the seat cushion.
• Do not place any items under the front passenger seat.
• When changing or replacing the seat or seat cover, use original items only.
The OCS has been developed based on using original HYUNDAI car seats only.
Altering or changing the authentic parts may result in system malfunction and
increase risk of injury when in collision. Any of the above could interfere with the
proper operation of the OCS sensor thereby increasing the risk of an injury in an
accident.
Page 150 of 529
5
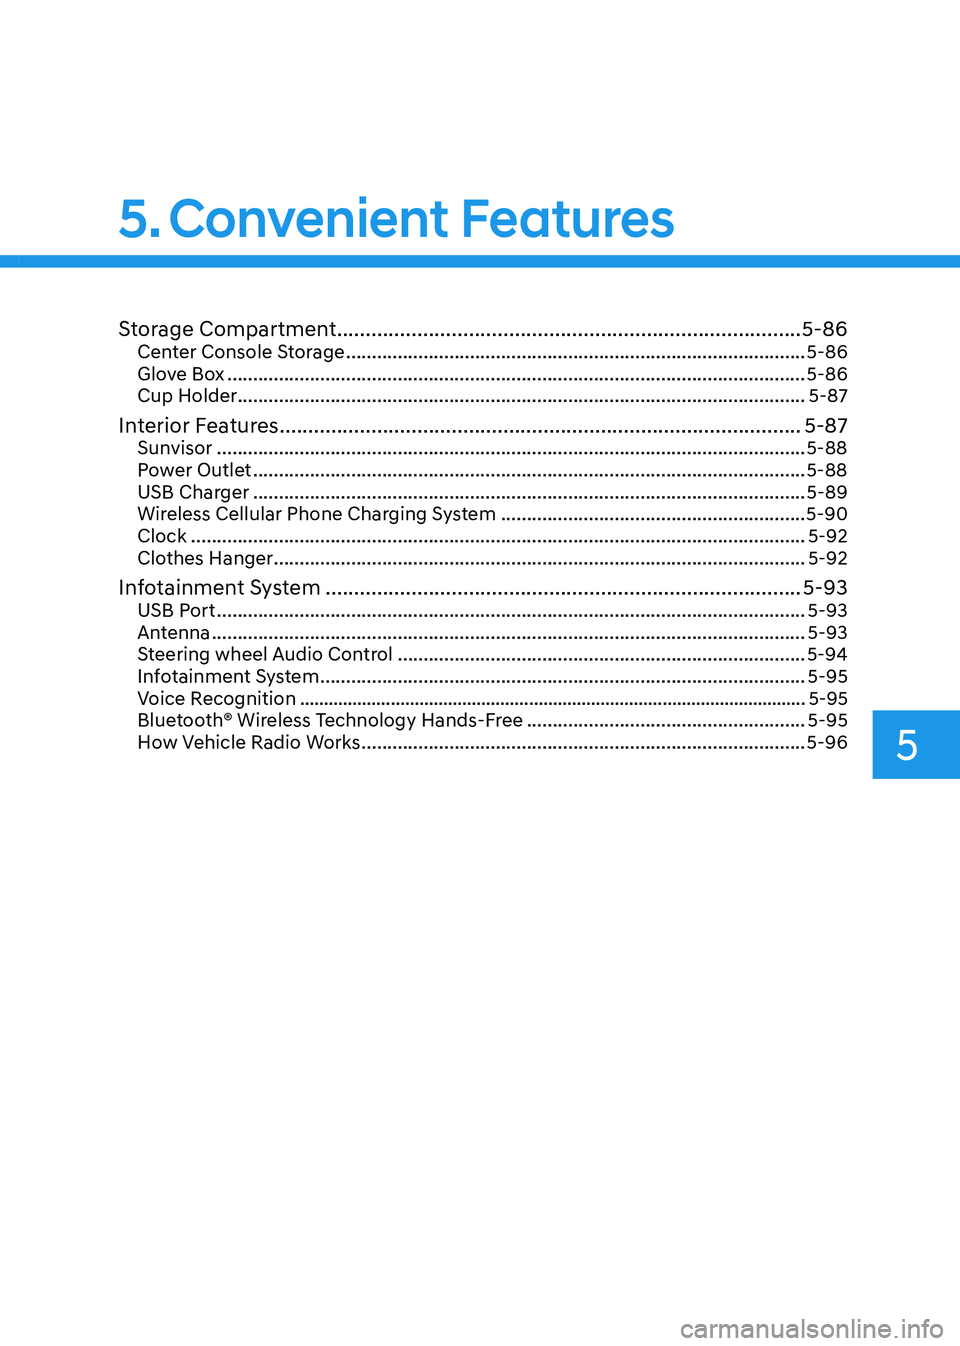
Storage Compartment ................................................................................. 5-86
Center Console Storage ......................................................................................... 5-86
Glove Box ................................................................................................................ 5-86
Cup Holder .............................................................................................................. 5-87
Interior Features ........................................................................................... 5-87
Sunvisor .................................................................................................................. 5-88
Power Outlet ........................................................................................................... 5-88
USB Charger ........................................................................................................... 5-89
Wireless Cellular Phone Charging System ...........................................................5-90
Clock ....................................................................................................................... 5-92
Clothes Hanger ....................................................................................................... 5-92
Infotainment System ................................................................................... 5-93
USB Port .................................................................................................................. 5-93
Antenna ................................................................................................................... 5-93
Steering wheel Audio Control ............................................................................... 5-94
Infotainment System .............................................................................................. 5-95
Voice Recognition .......................................................................................................... 5-95
Bluetooth® Wireless Technology Hands-Free ......................................................5-95
How Vehicle Radio Works ...................................................................................... 5-96
5. Convenient Features
Page 152 of 529
05
5-5
Trunk unlocking
To unlock the trunk :
1. Press and hold the Trunk Unlock button (3) on the remote key for more than one second.
2. The hazard warning lights will blink two times and the trunk will be
unlocked.
3. Once the trunk is opened and then closed, the trunk will automatically lock.
Information
The word “HOLD” is written on the
button to inform you that you must press
and hold the button for more than one second.
Panic button
Press and hold the Panic button (4) for
more than one second. The horn sounds
and hazard warning lights flash for about 30 seconds.
To cancel the panic mode, press any
button on the remote key.
Start-up
For information, refer to the “Key
Ignition Switch” section in chapter 6.
NOTICE
To prevent damaging the remote key: • Keep the remote key away from
water or any liquid and fire. Internal
circuits may malfunction if the inside
of the remote key gets damp (from
liquids or moisture) or if it is heated.
This can exclude the remote key from
being covered under warranty.
• Avoid dropping or throwing the
remote key.
• Protect the remote key from extreme
temperatures. Mechanical key
OIG046004
If the remote key does not operate
normally, you can lock or unlock the
driver’s door by using the mechanical
key.
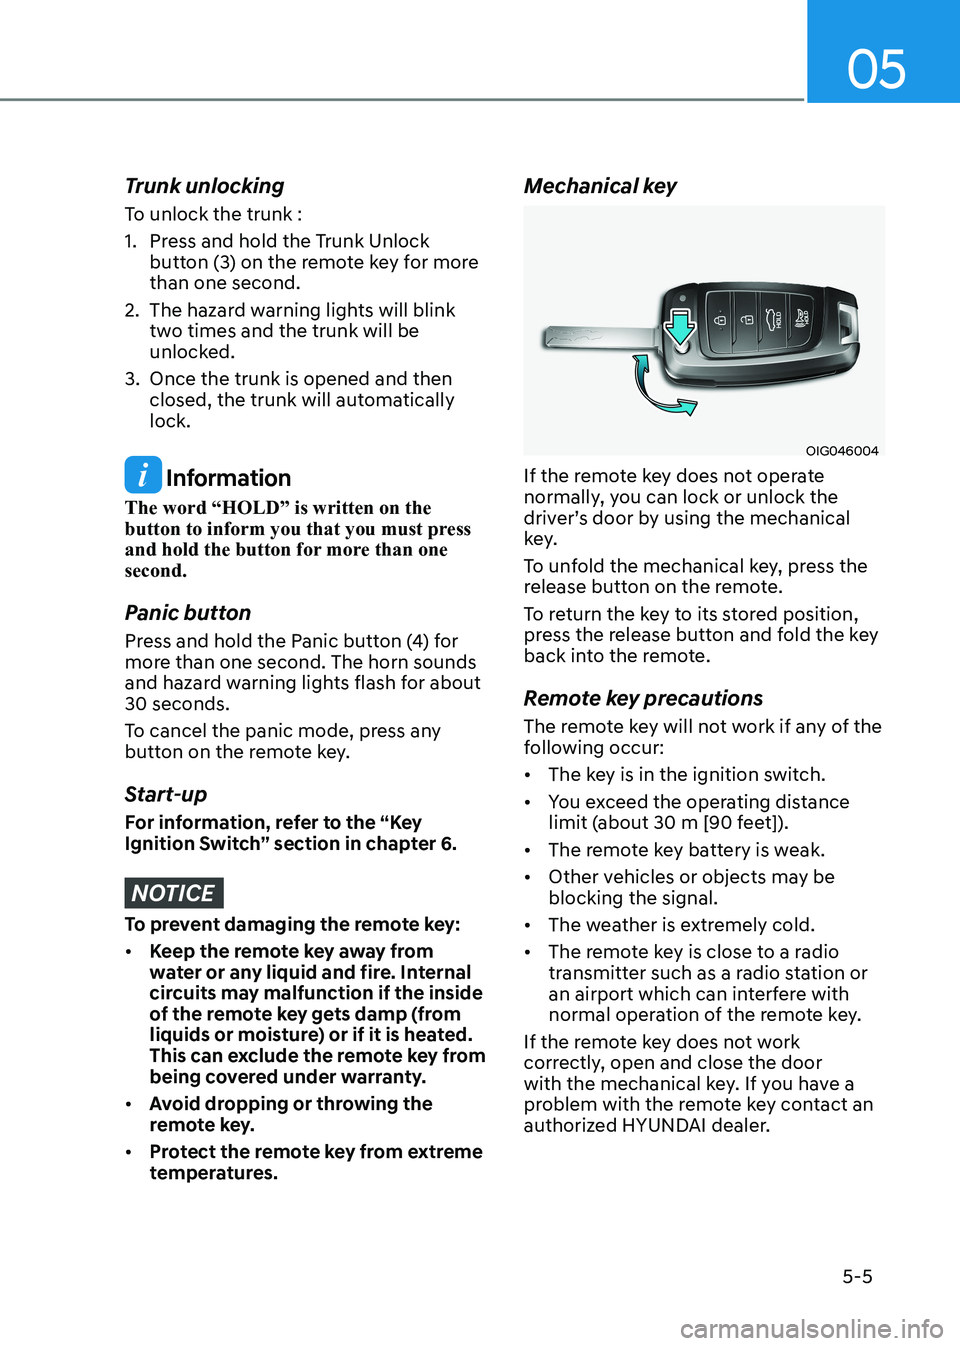
To unfold the mechanical key, press the
release button on the remote.
To return the key to its stored position,
press the release button and fold the key
back into the remote.
Remote key precautions
The remote key will not work if any of the
following occur: • The key is in the ignition switch.
• You exceed the operating distance
limit (about 30 m [90 feet]).
• The remote key battery is weak.
• Other vehicles or objects may be blocking the signal.
• The weather is extremely cold.
• The remote key is close to a radio
transmitter such as a radio station or
an airport which can interfere with
normal operation of the remote key.
If the remote key does not work
correctly, open and close the door
with the mechanical key. If you have a
problem with the remote key contact an
authorized HYUNDAI dealer.
Page 159 of 529
Convenient Features
5-12
Mechanical key
If the Smart Key does not operate
normally, you can lock or unlock the
driver’s door by using the mechanical
key.
OCN7050008
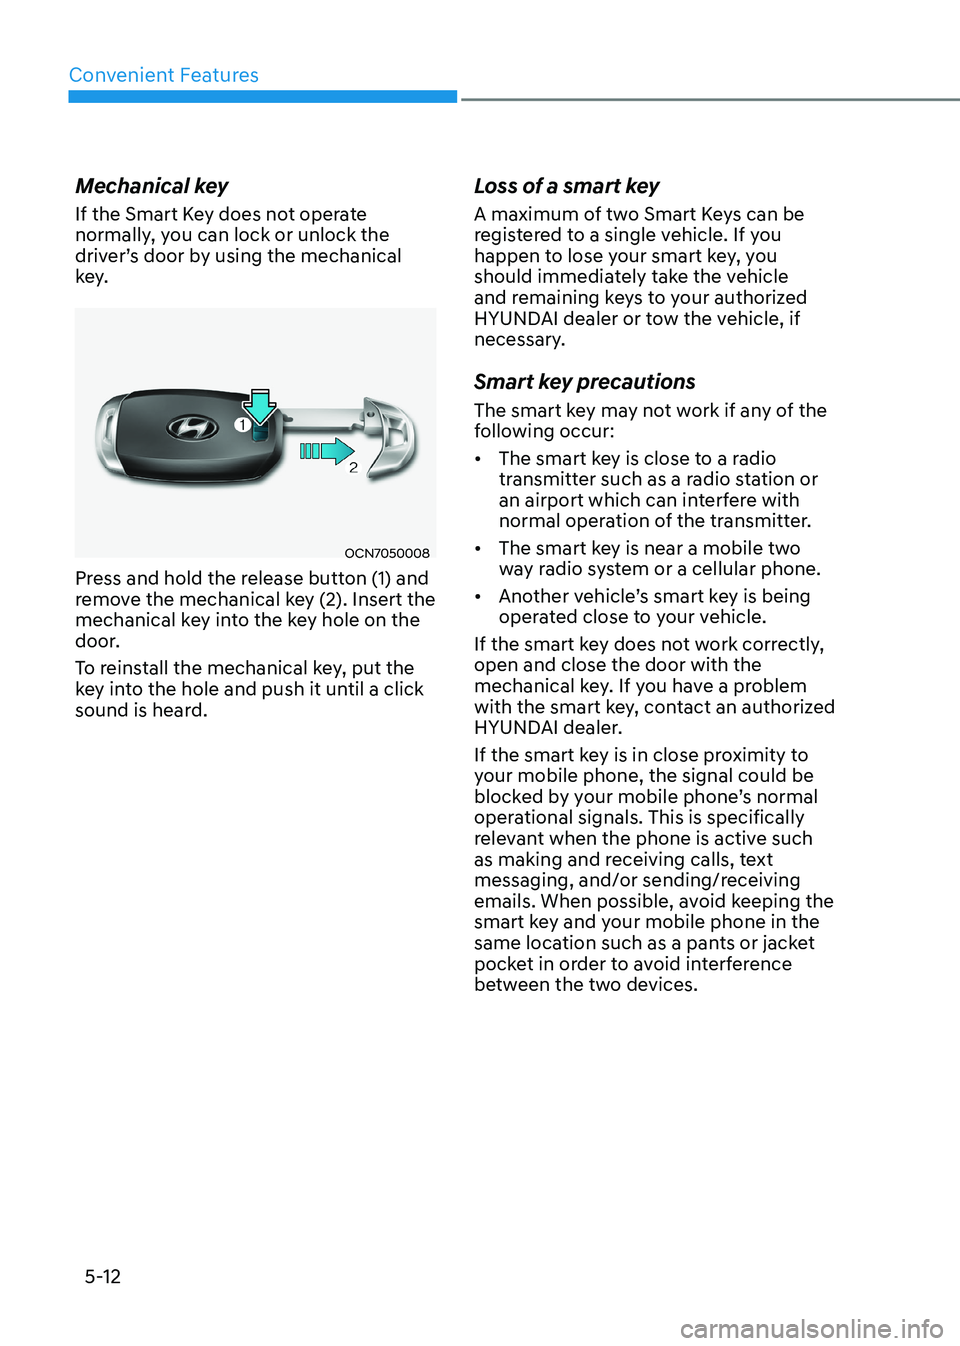
Press and hold the release button (1) and
remove the mechanical key (2). Insert the
mechanical key into the key hole on the
door.
To reinstall the mechanical key, put the
key into the hole and push it until a click
sound is heard. Loss of a smart key
A maximum of two Smart Keys can be
registered to a single vehicle. If you
happen to lose your smart key, you
should immediately take the vehicle
and remaining keys to your authorized
HYUNDAI dealer or tow the vehicle, if
necessary.
Smart key precautions
The smart key may not work if any of the
following occur: •
The smart key is close to a radio
transmitter such as a radio station or
an airport which can interfere with
normal operation of the transmitter.
• The smart key is near a mobile two
way radio system or a cellular phone.
• Another vehicle’s smart key is being
operated close to your vehicle.
If the smart key does not work correctly, open and close the door with the
mechanical key. If you have a problem
with the smart key, contact an authorized
HYUNDAI dealer.
If the smart key is in close proximity to
your mobile phone, the signal could be
blocked by your mobile phone’s normal
operational signals. This is specifically
relevant when the phone is active such
as making and receiving calls, text
messaging, and/or sending/receiving
emails. When possible, avoid keeping the
smart key and your mobile phone in the
same location such as a pants or jacket
pocket in order to avoid interference
between the two devices.
Page 178 of 529

05
5-31
Electrochromic mirror (ECM) with
HomeLink® system (if equipped)
OCN7050084N
Your vehicle may be equipped with
a Gentex Automatic-Dimming Mirror
with an Integrated HomeLink® Wireless
Control System.
During nighttime driving, this feature
will automatically detect and reduce
rearview mirror glare. The HomeLink®
Universal Transceiver allows you to
activate your garage door(s), electric
gate, home lighting, etc.
(1) HomeLink Channel 1
(2) HomeLink Channel 2
(3) HomeLink Channel 3
(4) Garage Door Opener Status Indicator : Closing or Closed
(5) HomeLink Operation Indicator
(6) Garage Door Opener Status Indicator : Opening or Opened
(7) HomeLink User Interface Indicator
Automatic-Dimming Night Vision Safety™ (NVS ®
) Mirror (if equipped)
The NVS® Mirror automatically reduces
glare by monitoring light levels in the
front and the rear of the vehicle. Any
object that obstructs either light sensor
will degrade the automatic dimming
control feature.
For more information regarding NVS®
mirrors and other applications, please
refer to the Gentex website:
www.gentex.com
Your mirror will automatically dim
upon detecting glare from the vehicles
traveling behind you.
The mirror defaults to the ON position
each time the vehicle is started. Integrated HomeLink ®
Wireless Control
System
The HomeLink® Wireless Control System
can replace up to three hand-held
radio-frequency (RF) transmitters with
a single built-in device. This innovative
feature will learn the radio frequency
codes of most current transmitters to
operate devices such as gate operators,
garage door openers, entry door locks,
security systems, even home lighting.
Both standard and rolling code-equipped
transmitters can be programmed by
following the outlined procedures.
Additional HomeLink® information can
be found at: www.homelink.com, www.
youtube.com/HomeLinkGentex or by
calling 1-800-355-3515.
Retain the original transmitter of the
RF device you are programming for use
in other vehicles as well as for future
HomeLink® programming. It is also
suggested that upon the sale of the
vehicle, the programmed HomeLink®
buttons be erased for security purposes.
Page 179 of 529
Convenient Features
5-32
WARNING
Before programming HomeLink® to a
garage door opener or gate operator,
make sure people and objects are out
of the way of the device to prevent
potential harm or damage. Do not
use the HomeLink® with any garage
door opener that lacks the safety
stop and reverse features required by
federal safety standards (this includes
any garage door opener model
manufactured before April 1, 1982).
A garage door that cannot detect an
object - signaling the door to stop
and reverse does not meet current
federal safety standards.Using a garage
door opener without these features
increases the risk of serious injury or
death.
Programming HomeLink ®
Please note the following:
• When programming a garage door opener, it is advised to park the
vehicle outside of the garage.
• It is recommended that a new battery be placed in the hand-held transmitter
of the device being programmed to
HomeLink® for quicker training and
accurate transmission of the radio-
frequency signal.
• Some vehicles may require the Engine Start/Stop button to be in the
ACC (or “Accessories”) position for
programming and/or operation of
HomeLink®.
• In the event that there are still programming difficulties or questions
after following the programming steps
listed below, contact HomeLink® at:
www.homelink.com, www.youtube.
com/HomeLinkGentex or by calling
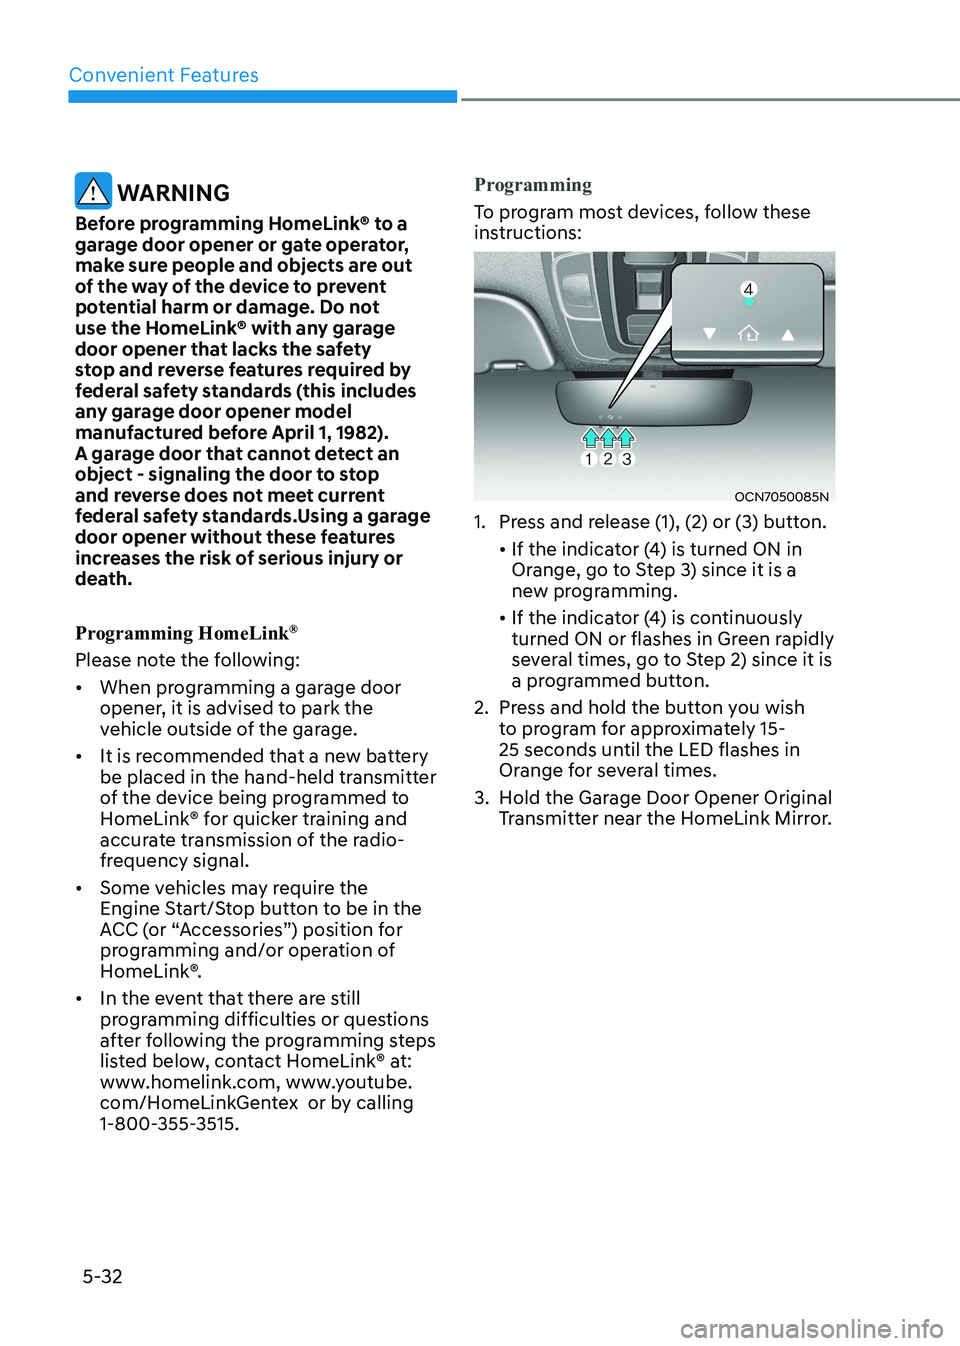
1-800-355-3515.Programming
To program most devices, follow these
instructions:
OCN7050085N
1. Press and release (1), (2) or (3) button.
• If the indicator (4) is turned ON in Orange, go to Step 3) since it is a
new programming.
• If the indicator (4) is continuously turned ON or flashes in Green rapidly
several times, go to Step 2) since it is
a programmed button.
2. Press and hold the button you wish to program for approximately 15-
25 seconds until the LED flashes in
Orange for several times.
3. Hold the Garage Door Opener Original Transmitter near the HomeLink Mirror.