2022 FORD F-650/750 fuel
[x] Cancel search: fuelPage 124 of 379

As the diesel exhaust fluid level
nears empty, the warning
symbol displays and a series of
tones and messages starting at 500 mi
(800 km) remaining before diesel exhaust
fluid is depleted. The warning symbol and
messages continue until you refill the
diesel exhaust fluid tank.
Continued driving without refilling results
in the following actions as required by the
California Air Resources Board (CARB) and
the U.S. Environmental Protection Agency
(EPA):
• Within a preset distance to empty,
speed is limited upon vehicle restart.
Prior to this occurring a message
appears in the information display.
• Further vehicle operation without
refilling the diesel exhaust fluid tank
causes the engine to enter an idle-only
condition. This only occurs upon vehicle
refueling or at an extended idle. A
message indicates the required actions
to resume normal operation. It is
required to add a minimum of
1.0 gal
(3.8 L) of diesel exhaust fluid to the
tank to exit the idle-only condition, but
your vehicle is still in the speed-limiting
mode until you refill the tank
completely.
Note: For either vehicle speed limiting or
idle-only condition, normal vehicle operation
resumes when you refill the diesel exhaust
fluid tank.
Note: When filling the diesel exhaust fluid
tank from empty, there may be a short delay
before detecting the increased level of fluid.
The increased level detection must occur
before your vehicle returns to full power. Diesel Exhaust Fluid Guidelines
and Information
•
Use only diesel exhaust fluid that
carries the American Petroleum
Institute (API) certified diesel exhaust
fluid trademark or ISO 22241.
• Do not put diesel exhaust fluid in the
diesel fuel tank. If this happens, do not
switch the ignition on. Drain the fuel
tank as soon as possible.
• Do not overfill the diesel exhaust fluid
tank.
• Diesel exhaust fluid is corrosive.
• Do not re-use the diesel exhaust fluid
container once it is emptied.
• Avoid spilling diesel exhaust fluid on
painted surfaces, carpeting or plastic
components. Immediately wipe away
any diesel exhaust fluid that has spilled
with a damp cloth and water. If it has
already crystallized, use warm water
and a sponge.
• Store diesel exhaust fluid out of direct
sunlight and in temperatures between
23°F (-5°C) and 68°F (20°C).
• Diesel exhaust fluid freezes below 12°F
(-11°C)
.
• Do not store the diesel exhaust fluid
bottle in your vehicle. If it leaks it could
cause damage to interior components
or release an ammonia odor inside your
vehicle.
• Diesel exhaust fluid is non-flammable,
non-toxic, colorless and water-soluble
liquid.
• The system has a diesel exhaust fluid
quality sensor. Dilution of diesel
exhaust fluid or use of any other liquid
in the SCR system leads to a diesel
exhaust fluid system fault, eventually
leading to the vehicle only operating in
idle-only mode.
121
2022 F650750 (TBC) , enUSA, Edition date: 202010, Second-Printing Engine Emission ControlE163176
Page 125 of 379

•
Do not dilute diesel exhaust fluid with
water or any other liquid.
• An ammonia odor may be smelled
when the cap is removed or during
refill. Refill diesel exhaust fluid in a well
ventilated area.
Typical Diesel Exhaust Fluid Usage
When Using the Power Take Off (PTO) Continuous PTO use—Minimal PTO use
0–7,800 mi (0– 12,550 km)
Contaminated Diesel Exhaust
Fluid or Inoperative Selective
Catalytic Reduction System
Selective catalytic reduction systems are
sensitive to contamination of the diesel
exhaust fluid. Maintaining the purity of the
fluid is important to avoid system
malfunctions. Do not add fuel or any
additive to the diesel exhaust fluid tank. If
you remove or drain the diesel exhaust fluid
tank, do not use the same fluid to refill the
tank. The system has a sensor to monitor
fluid quality. A warning lamp illuminates and
a message appears in the
information display if the system
becomes contaminated or inoperative. Continued driving without replacing diesel
exhaust fluid or having the selective
catalytic reduction system repaired results
in the following actions as required by the
California Air Resources Board (CARB) and
U.S. Environmental Protection Agency
(EPA):
•
Within a preset distance to empty,
speed is limited upon vehicle restart.
Prior to this occurring a message
appears in the information display.
• Further vehicle operation without
replacing contaminated diesel exhaust
fluid causes the engine to enter an
idle-only condition. This only occurs
upon vehicle refueling, vehicle idling in
park for 1 hour, or engine shutdown for
10 minutes or more and is indicated by
a message in the information display
indicating required actions to resume
normal operation.
Note: For vehicle speed limiting or idle-only
condition, normal vehicle operation resumes
when you repair the contaminated system.
To service a contaminated or inoperative
system, see an authorized dealer.
DIESEL PARTICULATE FILTER
(IF EQUIPPED)
Your vehicle has a diesel particulate filter.
The diesel particulate filter is an inline filter
in the exhaust system that reduces carbon
emissions by trapping exhaust particles
before they reach the tailpipe. The diesel
particulate filter looks similar to a
traditional exhaust catalyst, except larger,
and is part of the exhaust system under
your vehicle. The filter couples to a diesel
oxidation catalyst that reduces the amount
of harmful exhaust emitted from the
tailpipe. As soot gathers in the system, it
begins to restrict the filter. Periodically, you
need to clean the soot that gathers inside
the filter. You can clean the soot in two
different ways, passive regeneration and
122
2022 F650750 (TBC) , enUSA, Edition date: 202010, Second-Printing Engine Emission ControlE163176
Page 128 of 379

Before you start operator commanded
regeneration, do the following:
•
Shift into park (P) or if you have an
RNDM selector shift into neutral (N)
and apply the parking and or air brake,
on stable, level ground.
• Park your vehicle outside of any
structure.
• Park your vehicle 10– 15 ft (3–5 m)
away from any obstructions and away
from materials that can easily combust
or melt, for example paper, leaves,
petroleum products, fuels, plastics and
other dry organic material.
• Make sure there is a minimum of 1/8
tank of fuel.
• Make sure all fluids are at proper levels.
How to Start Operator Commanded
Regeneration WARNING:
Stay clear of the
exhaust tailpipe during regeneration. Hot
exhaust gases can burn you badly.
Note: You cannot use the operator
commanded regeneration until the diesel
particulate filter load percentage has
reached 100%. The diesel particulate filter
load percentage fluctuates up and down
when driving your vehicle due to active and
passive regenerations.
Note: During the use of operator
commanded regeneration, you may observe
a light amount of white smoke. This is
normal. You may not be able to use
operator commanded
regeneration if the service engine
soon warning lamp appears in the
information display Information Display Procedure
Start your vehicle engine and when it has
reached the normal operating temperature,
arrow through the display to get to the
Diesel Particulate Filter Status on the
Truck Info tab. Exhaust Filter XX%/FULL
displays. Operator commanded
regeneration can only be initiated when
FULL
See Information Display Control
(page 52). If a message advising that the
exhaust filter is full appears in the
information display, press and hold the OK
button to initiate Exhaust Cleaning. If
successful, a second prompt appears
regarding exhaust position required to
initiate operator commanded regeneration.
Be sure to understand each prompt. If you
are not sure what is being asked by each
prompt, contact an authorized dealer. If
the exhaust system meets the position
requirements then press and hold the OK
button to fully activate the Operator
Commanded Regeneration. The display
confirms the operation has started and
when it has finished.
You can also drive to clean the filter. When the system is at the point
of oversaturation, the service
engine warning lamp illuminates
and a message appears in the information
display. You cannot initiate filter cleaning.
You must have your vehicle checked as
soon as possible.
Once operator commanded regeneration
starts, engine speed increases to
approximately 1600 rpm and the cooling
fan speed increases. You will hear a
change in audible sound due to engine
speed and cooling fan speed increases.
It is not necessary to open the hood on the
engine compartment. Once operator
commanded regeneration completes, the
engine speed returns to normal idling. The
exhaust system remains very hot for
several minutes even after regeneration is
125
2022 F650750 (TBC) , enUSA, Edition date: 202010, Second-Printing Engine Emission Control
Page 131 of 379

AUTOMATIC TRANSMISSION
WARNING: Apply the parking
brake, shift into park (P), switch the
ignition off and remove the key before
you leave your vehicle. Failure to follow
this instruction could result in personal
injury or death.
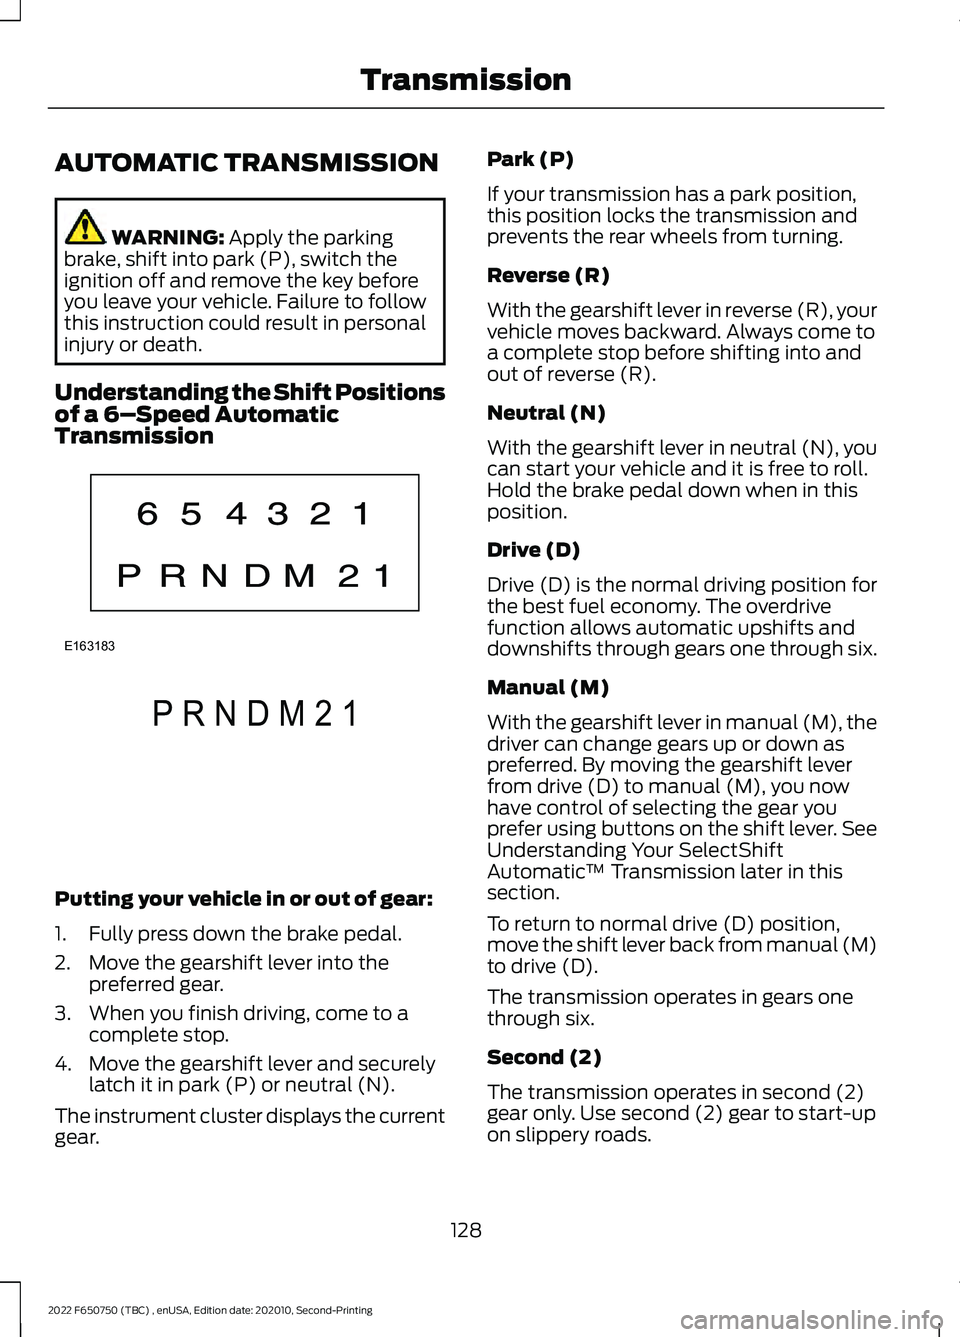
Understanding the Shift Positions
of a 6– Speed Automatic
Transmission Putting your vehicle in or out of gear:
1. Fully press down the brake pedal.
2. Move the gearshift lever into the
preferred gear.
3. When you finish driving, come to a complete stop.
4. Move the gearshift lever and securely latch it in park (P) or neutral (N).
The instrument cluster displays the current
gear. Park (P)
If your transmission has a park position,
this position locks the transmission and
prevents the rear wheels from turning.
Reverse (R)
With the gearshift lever in reverse (R), your
vehicle moves backward. Always come to
a complete stop before shifting into and
out of reverse (R).
Neutral (N)
With the gearshift lever in neutral (N), you
can start your vehicle and it is free to roll.
Hold the brake pedal down when in this
position.
Drive (D)
Drive (D) is the normal driving position for
the best fuel economy. The overdrive
function allows automatic upshifts and
downshifts through gears one through six.
Manual (M)
With the gearshift lever in manual (M), the
driver can change gears up or down as
preferred. By moving the gearshift lever
from drive (D) to manual (M), you now
have control of selecting the gear you
prefer using buttons on the shift lever. See
Understanding Your SelectShift
Automatic
™ Transmission later in this
section.
To return to normal drive (D) position,
move the shift lever back from manual (M)
to drive (D).
The transmission operates in gears one
through six.
Second (2)
The transmission operates in second (2)
gear only. Use second (2) gear to start-up
on slippery roads.
128
2022 F650750 (TBC) , enUSA, Edition date: 202010, Second-Printing TransmissionE163183 P R N D M 2 1E307627
Page 133 of 379

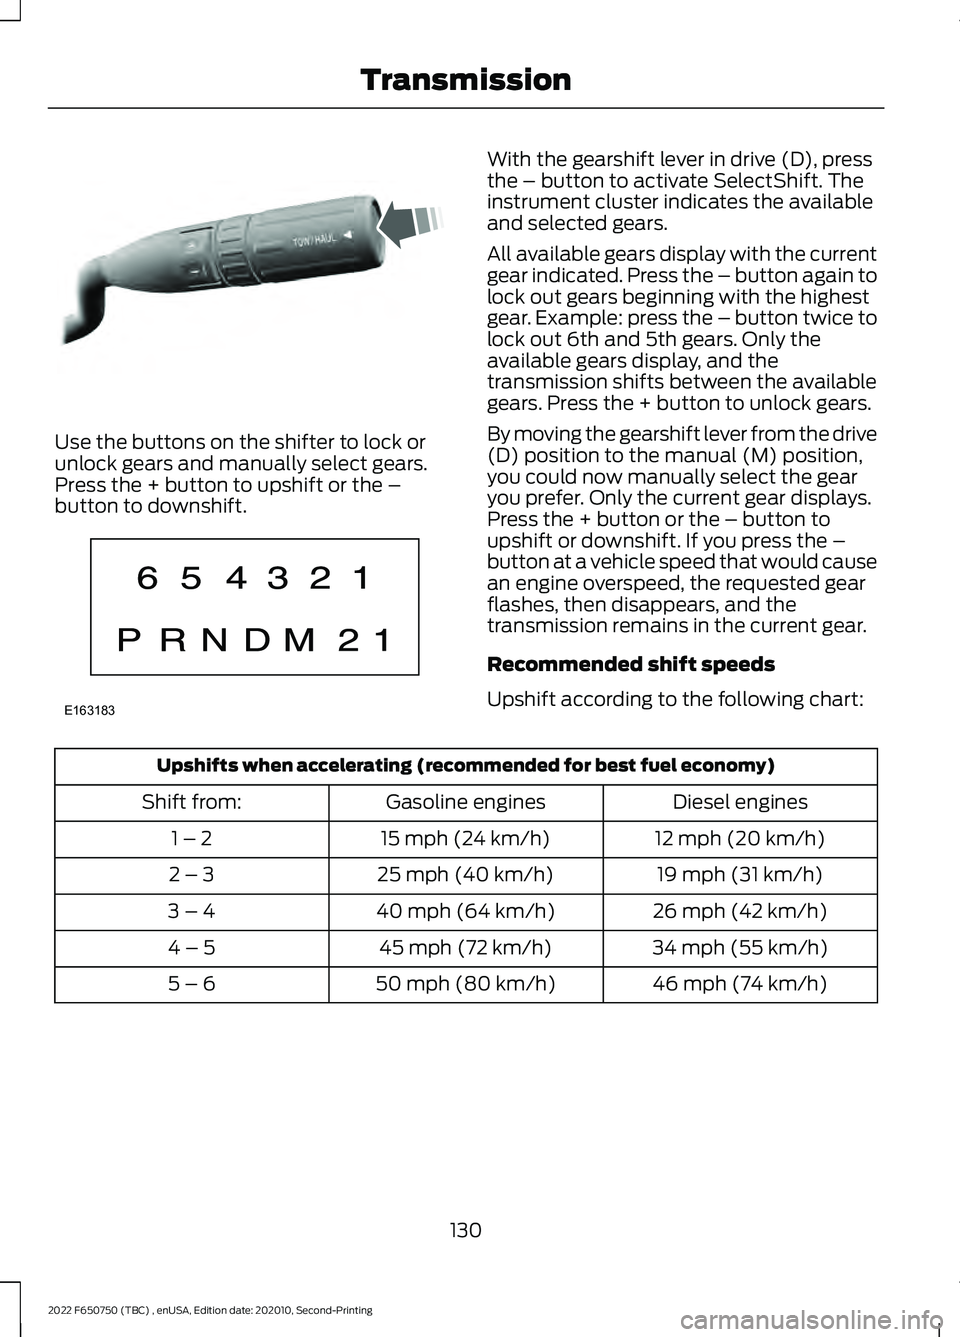
Use the buttons on the shifter to lock or
unlock gears and manually select gears.
Press the + button to upshift or the –
button to downshift. With the gearshift lever in drive (D), press
the – button to activate SelectShift. The
instrument cluster indicates the available
and selected gears.
All available gears display with the current
gear indicated. Press the – button again to
lock out gears beginning with the highest
gear. Example: press the – button twice to
lock out 6th and 5th gears. Only the
available gears display, and the
transmission shifts between the available
gears. Press the + button to unlock gears.
By moving the gearshift lever from the drive
(D) position to the manual (M) position,
you could now manually select the gear
you prefer. Only the current gear displays.
Press the + button or the – button to
upshift or downshift. If you press the –
button at a vehicle speed that would cause
an engine overspeed, the requested gear
flashes, then disappears, and the
transmission remains in the current gear.
Recommended shift speeds
Upshift according to the following chart:
Upshifts when accelerating (recommended for best fuel economy)
Diesel engines
Gasoline engines
Shift from:
12 mph (20 km/h)
15 mph (24 km/h)
1 – 2
19 mph (31 km/h)
25 mph (40 km/h)
2 – 3
26 mph (42 km/h)
40 mph (64 km/h)
3 – 4
34 mph (55 km/h)
45 mph (72 km/h)
4 – 5
46 mph (74 km/h)
50 mph (80 km/h)
5 – 6
130
2022 F650750 (TBC) , enUSA, Edition date: 202010, Second-Printing TransmissionE318028 E163183
Page 134 of 379

To prevent the engine from running at too
low an RPM, which could cause it to stall,
SelectShift still makes some downshifts
if it has determined that you have not
downshifted in time. Although SelectShift
makes some downshifts for you, it still
allows you to downshift at any time if the
SelectShift determines that there is no
damage to the engine from over-revving.
SelectShift does not automatically upshift,
even if the engine is approaching the RPM
limit. Shift manually by pressing the +
button.
Note:
Engine damage could occur if you rev
the engine excessively and hold it without
shifting.
Progressive Range Selection - PRS
(If Equipped)
Progressive Range Selection gives you the
ability to lockout gears from the automatic
shifting range. This could provide you with
an improved driving experience, for
example, in slippery conditions or when
experiencing a steep slope.
With the gearshift lever in drive (D), press
the – button to activate progressive range
selection. The instrument cluster indicates
the available and selected gears.
All available gears display with the current
gear indicated. Press the – button again to
lock out gears beginning with the highest
gear. Example: press the – button twice to
lock out 6th and 5th gears. Only the
available gears display, and the
transmission shifts between the available
gears. Press the + button to unlock gears
to allow the transmission to shift to higher
gears. The transmission shifts within the
gear range you select. Automatic Transmission at a stop
(If Equipped)
Your transmission could reduce the load
on the engine when the vehicle stops, and
the gear selector is in drive (D) to reduce
fuel consumption and emissions. The
transmission resumes operation when you
release the brake. This feature activates
when the transmission is sufficiently
warmed, and the vehicle is on a level slope.
Automatic Transmission Adaptive
Learning
This feature could increase durability and
provide consistent shift feel over the life
of your vehicle. A new vehicle or
transmission may have firm shifts, soft
shifts, or both. This is normal and does not
affect the function or durability of the
transmission. Over time, the adaptive
learning process fully updates transmission
operation.
Brake-Shift Interlock
WARNING: Do not drive your
vehicle until you verify that the
stoplamps are working. WARNING:
When doing this
procedure, you need to take the
transmission out of park (P) which
means your vehicle can roll freely. To
avoid unwanted vehicle movement,
always fully apply the parking brake prior
to doing this procedure. Use wheels
chocks if appropriate. WARNING:
If the parking brake is
fully released, but the brake warning
lamp remains illuminated, the brakes
may not be working properly. Have your
vehicle checked as soon as possible.
131
2022 F650750 (TBC) , enUSA, Edition date: 202010, Second-Printing Transmission
Page 138 of 379

Servicing a Vehicle with an
Electronic Locking Differential
Turn the engine off and raise all drive
wheels of the locker differential axle to
prevent your vehicle from moving when
servicing the wheels, tires or brakes. Axles
equipped with a driver-controlled
differential deliver power to both wheels
even when only one wheel is on the ground.
WARNING: Failure to raise all drive
wheels with this type of differential could
cause the vehicle to move unexpectedly,
resulting in property damage, personal
injury or death.
2-SPEED REAR AXLE (IF EQUIPPED) WARNING: Never shift a
two-speed axle when descending a
steep grade as this may cause loss of
vehicle control and result in personal
injury.
Note: Do not shift between ranges when
the speed control is on.
A two-speed rear axle allows the driver to
select a low range for greater pulling power
and a high range for greater road speed
and fuel economy. You can also use these
ranges to provide extra steps between
transmission shifts when driving on steep
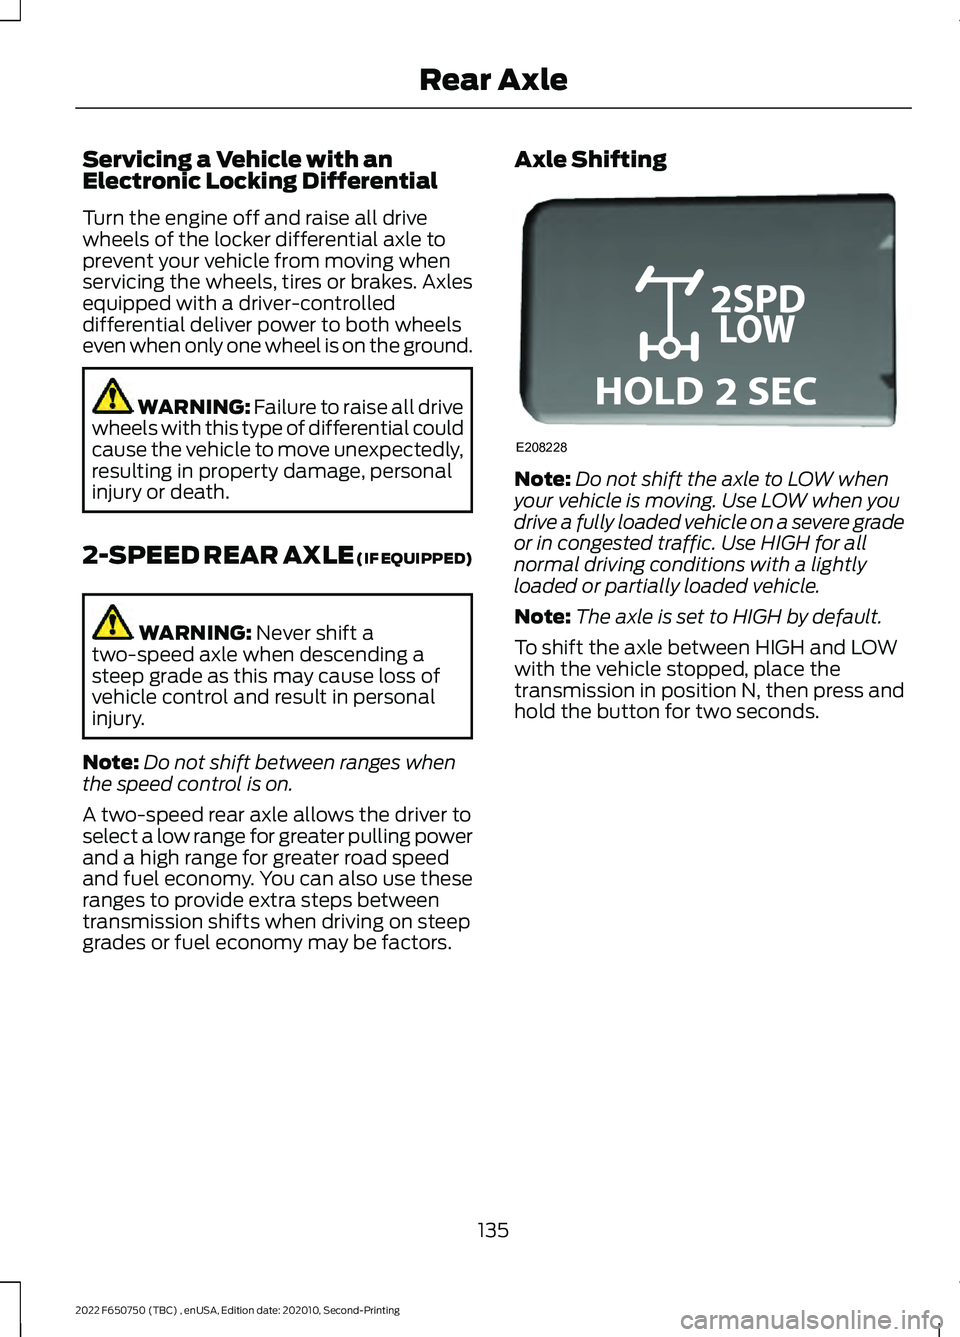
grades or fuel economy may be factors. Axle Shifting Note:
Do not shift the axle to LOW when
your vehicle is moving. Use LOW when you
drive a fully loaded vehicle on a severe grade
or in congested traffic. Use HIGH for all
normal driving conditions with a lightly
loaded or partially loaded vehicle.
Note: The axle is set to HIGH by default.
To shift the axle between HIGH and LOW
with the vehicle stopped, place the
transmission in position N, then press and
hold the button for two seconds.
135
2022 F650750 (TBC) , enUSA, Edition date: 202010, Second-Printing Rear AxleE208228
Page 141 of 379

Push the palm release lever (A) on the
parking brake handle (B) and push down
as far as possible to release the brake.
Driving with the parking brake on causes
the brakes to wear out quickly and reduces
fuel economy.
We recommend you not use the parking
brake to stop a moving vehicle. However,
if the normal brakes fail, you can use the
parking brake to stop your vehicle in an
emergency. Since the parking brake only
applies retardation to the rear wheels, the
vehicle's stopping distance increases
greatly and the handling of your vehicle is
adversely affected.
Releasing Spring Manually
WARNING: Do not attempt to
disassemble the parking brake air
chamber under any circumstances as
this may cause serious injury. WARNING:
Block the wheels to
help prevent the vehicle from moving. WARNING:
Unexpected and
possibly sudden vehicle movement may
occur if you do not take these
precautions.
If you release hydraulic pressure from the
spring brake chamber, the power spring
applies the brake. If the hydraulic pressure
can be re-established, you must release
the spring brake in order to move your
vehicle. Air Brakes
(If Equipped) WARNING:
This control is for
parking only. Do not leave the vehicle
unattended after setting the parking
brake without placing the transmission
in park (P). We recommend using wheel
chocks for hilly or off-road
circumstances.
If the service brakes fail to operate while
your vehicle is moving, you can make an
emergency stop with the parking brake.
Since the parking brake only applies
stopping power to the rear wheels, your
vehicle ’s stopping distance greatly
increases and the handling of your vehicle
is adversely affected. Make repairs
immediately to an inoperative air brake
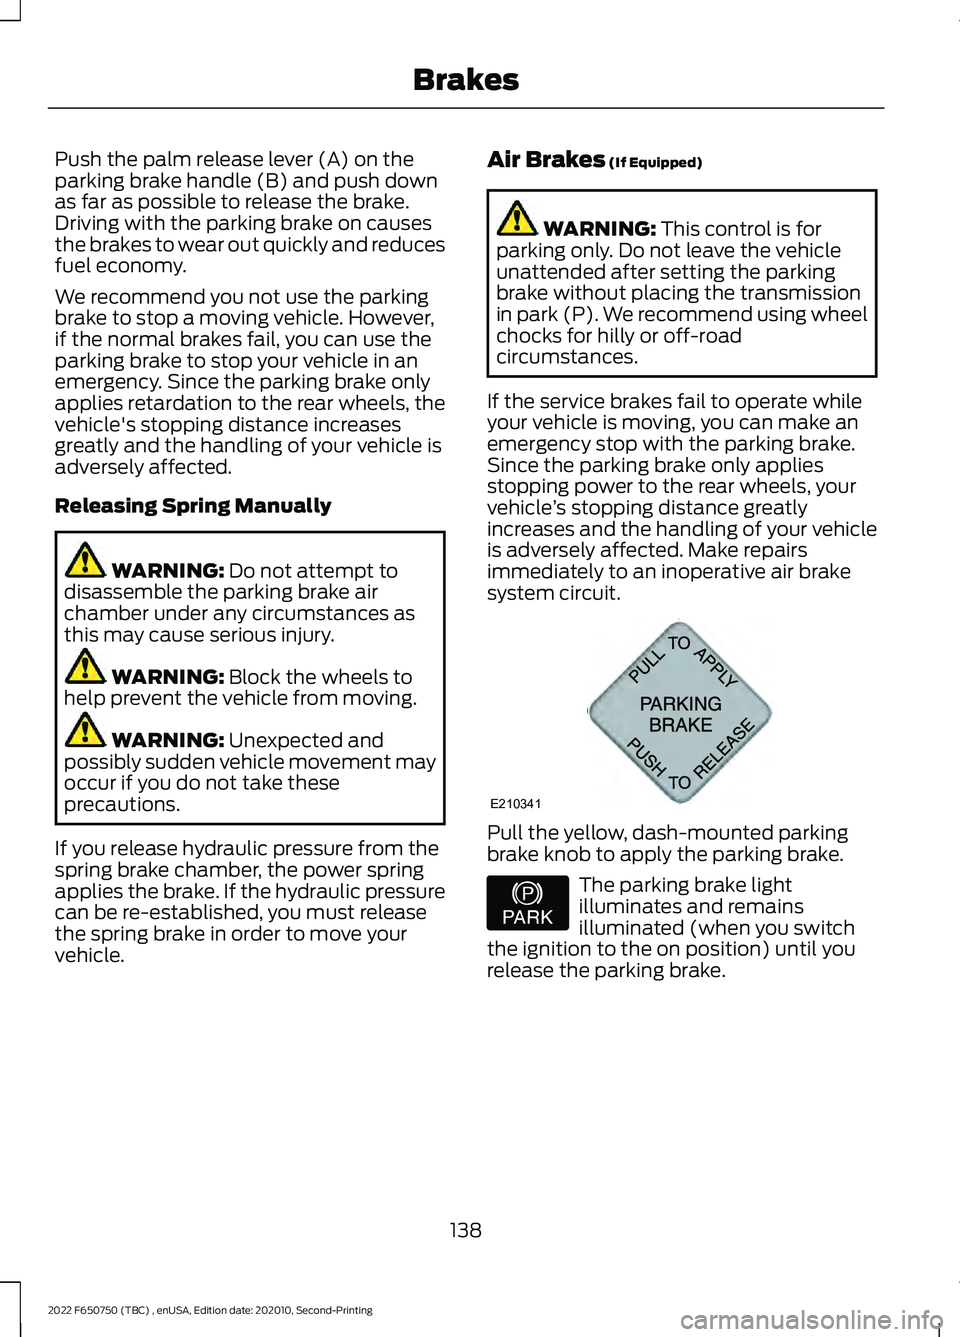
system circuit. Pull the yellow, dash-mounted parking
brake knob to apply the parking brake.
The parking brake light
illuminates and remains
illuminated (when you switch
the ignition to the on position) until you
release the parking brake.
138
2022 F650750 (TBC) , enUSA, Edition date: 202010, Second-Printing BrakesE210341 E208810