2022 CHRYSLER PACIFICA panel
[x] Cancel search: panelPage 296 of 384
294IN CASE OF EMERGENCY
8. After the tire reaches the
recommended pressure, lower the
vehicle with the jack as described in
the Jack Instructions section in this
manual.
9. Remove the speed limit label
sticker from the Portable Air
Compressor and place it on the
center of the steering wheel.
10. Return the Portable Air Compressor to the foam tray and secure it with the strap. Store
the foam tray in the cargo area.
RETURN INFLATABLE SPARE TIRE
To return Inflatable Spare Tire to its storage
location.
1. Return the Jack.
2. Deflate the spare tire. Use the Tire Service Kit or Portable Air Compressor and push the
deflation button to do this step. See the
Portable Air Compressor in this section for
additional information. The inflatable spare
tire will return to its original shape.
3. Install the inflatable spare tire back into its original stowage location and position facing
outward.
4. Install the foam tray with wrench and funnel installed.
5. Install and tighten the wing nut by hand.
6. Install the Tire Service Kit or Portable Air Compressor (if equipped) and tighten the
strap.
7. Install access panel door.
TIRE SERVICE KIT — IF EQUIPPED
Use this QR code to access your
digital experience.
Your vehicle may be equipped
with a Tire Service Kit. Small
punctures up to 1/4 inch (6 mm)
in the tire tread can be sealed with
Tire Service Kit. Foreign objects
(e.g., screws or nails) should not be removed from
the tire. Tire Service Kit can be used in outside
temperatures down to approximately -4°F (-20°C).
This kit will provide a temporary tire seal, allowing
you to drive your vehicle up to 100 miles (160 km)
with a maximum speed of 50 mph (80 km/h).
Tire Service Kit Storage
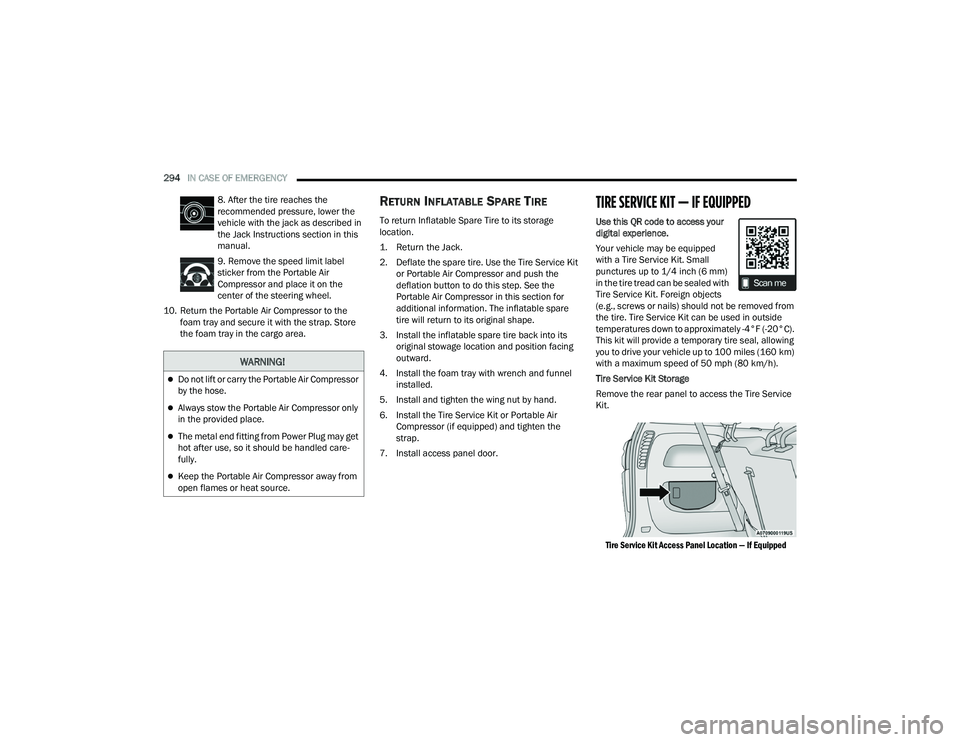
Remove the rear panel to access the Tire Service
Kit.
Tire Service Kit Access Panel Location — If Equipped
WARNING!
Do not lift or carry the Portable Air Compressor
by the hose.
Always stow the Portable Air Compressor only
in the provided place.
The metal end fitting from Power Plug may get
hot after use, so it should be handled care -
fully.
Keep the Portable Air Compressor away from
open flames or heat source.
22_RUP_OM_EN_USC_t.book Page 294
Page 306 of 384
304IN CASE OF EMERGENCY
MANUAL PARK RELEASE
To move the vehicle in cases where the
transmission will not shift out of PARK (P) (such as
a depleted battery), a Manual Park Release is
available.
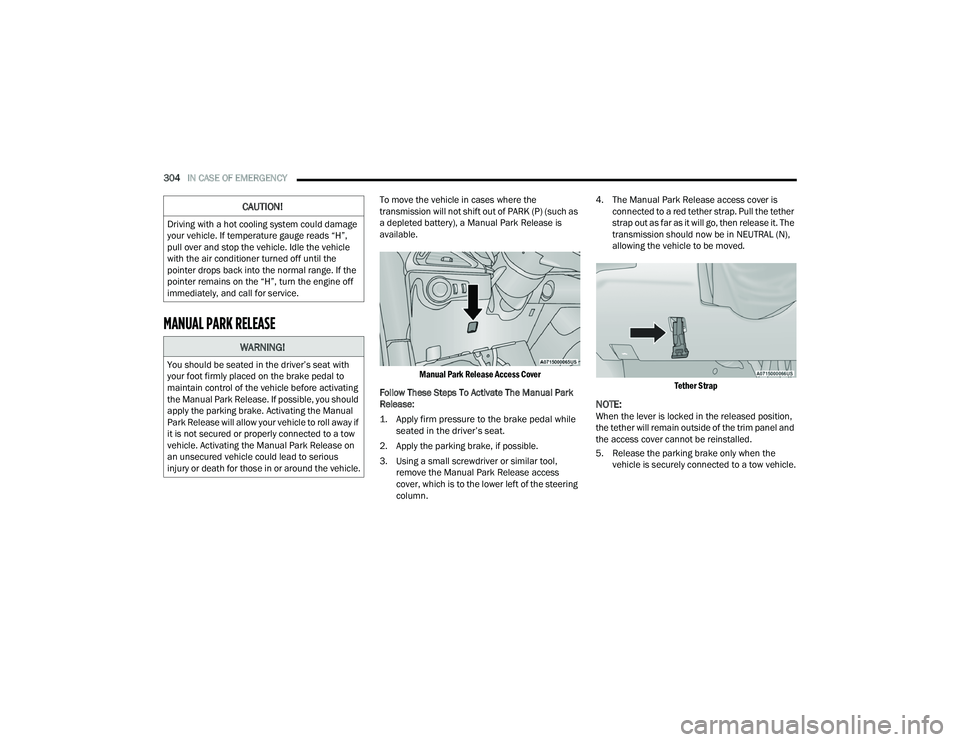
Manual Park Release Access Cover
Follow These Steps To Activate The Manual Park
Release:
1. Apply firm pressure to the brake pedal while seated in the driver’s seat.
2. Apply the parking brake, if possible.
3. Using a small screwdriver or similar tool, remove the Manual Park Release access
cover, which is to the lower left of the steering
column. 4. The Manual Park Release access cover is
connected to a red tether strap. Pull the tether
strap out as far as it will go, then release it. The
transmission should now be in NEUTRAL (N),
allowing the vehicle to be moved.
Tether Strap
NOTE:When the lever is locked in the released position,
the tether will remain outside of the trim panel and
the access cover cannot be reinstalled.
5. Release the parking brake only when the vehicle is securely connected to a tow vehicle.
CAUTION!
Driving with a hot cooling system could damage
your vehicle. If temperature gauge reads “H”,
pull over and stop the vehicle. Idle the vehicle
with the air conditioner turned off until the
pointer drops back into the normal range. If the
pointer remains on the “H”, turn the engine off
immediately, and call for service.
WARNING!
You should be seated in the driver’s seat with
your foot firmly placed on the brake pedal to
maintain control of the vehicle before activating
the Manual Park Release. If possible, you should
apply the parking brake. Activating the Manual
Park Release will allow your vehicle to roll away if
it is not secured or properly connected to a tow
vehicle. Activating the Manual Park Release on
an unsecured vehicle could lead to serious
injury or death for those in or around the vehicle.
22_RUP_OM_EN_USC_t.book Page 304
Page 359 of 384
SERVICING AND MAINTENANCE357
STORING THE VEHICLE
If you are storing your vehicle for more than three
weeks, we recommend that you take the following
steps to minimize the drain on your vehicle's
battery:
Disconnect the negative cable from battery.
Any time you store your vehicle or keep it out of
service (i.e., vacation) for two weeks or more,
run the air conditioning system at idle for about
five minutes in the fresh air and high blower
setting. This will ensure adequate system lubri-
cation to minimize the possibility of compressor
damage when the system is started again.
BODYWORK
PROTECTION FROM ATMOSPHERIC
A
GENTS
Vehicle body care requirements vary according to
geographic locations and usage. Chemicals that
make roads passable in snow and ice and those
that are sprayed on trees and road surfaces during
other seasons are highly corrosive to the metal in
your vehicle. Outside parking, which exposes your
vehicle to airborne contaminants, road surfaces on
which the vehicle is operated, extreme hot or cold
weather and other extreme conditions will have an
adverse effect on paint, metal trim, and underbody
protection. The following maintenance recommendations will
enable you to obtain maximum benefit from the
corrosion resistance built into your vehicle.
What Causes Corrosion?
Corrosion is the result of deterioration or removal
of paint and protective coatings from your vehicle.
The most common causes are:
Road salt, dirt and moisture accumulation
Stone and gravel impact
Insects, tree sap and tar
Salt in the air near seacoast localities
Atmospheric fallout/industrial pollutants
BODY AND UNDERBODY MAINTENANCE
Cleaning Headlights
Your vehicle is equipped with plastic headlights
and fog lights that are lighter and less susceptible
to stone breakage than glass headlights.
Plastic is not as scratch resistant as glass and
therefore different lens cleaning procedures must
be followed.
To minimize the possibility of scratching the lenses
and reducing light output, avoid wiping with a dry
cloth. To remove road dirt, wash with a mild soap
solution followed by rinsing.
Do not use abrasive cleaning components,
solvents, steel wool or other aggressive material to
clean the lenses.
PRESERVING THE BODYWORK
Washing
Wash your vehicle regularly. Always wash your
vehicle in the shade using Mopar® Car Wash, or
a mild car wash soap, and rinse the panels
completely with water.
If insects, tar, or other similar deposits have
accumulated on your vehicle, use Mopar®
Super Kleen Bug and Tar Remover to remove.
Use a high quality cleaner wax, such as Mopar®
Cleaner Wax to remove road film, stains and to
protect your paint finish. Use precautions to not
scratch the paint.
Avoid using abrasive compounds and power
buffing that may diminish the gloss or thin out
the paint finish.
CAUTION!
Do not use abrasive or strong cleaning mate
-
rials such as steel wool or scouring powder
that will scratch metal and painted surfaces.
Use of power washers exceeding 1,200 psi
(8,274 kPa) can result in damage or removal
of paint and decals.
8
22_RUP_OM_EN_USC_t.book Page 357
Page 360 of 384
358SERVICING AND MAINTENANCE
Special Care
If you drive on salted or dusty roads or if you
drive near the ocean, hose off the undercarriage
at least once a month.
It is important that the drain holes in the lower
edges of the doors, rocker panels, and trunk be
kept clear and open.
If you detect any stone chips or scratches in the
paint, touch them up immediately.
If your vehicle is damaged due to a collision or
similar cause that destroys the paint and protec -
tive coating, have your vehicle repaired as soon
as possible.
If you carry special cargo such as chemicals,
fertilizers, de-icer salt, etc., be sure that such
materials are well packaged and sealed.
If a lot of driving is done on gravel roads,
consider mud or stone shields behind each
wheel.
Use Mopar® Touch Up Paint on scratches as
soon as possible. An authorized dealer has
touch up paint to match the color of your
vehicle.
INTERIORS
SEATS AND FABRIC PARTS
Use Mopar® Total Clean to clean fabric upholstery
and carpeting.
Seat Belt Maintenance
Do not bleach, dye or clean the belts with chemical
solvents or abrasive cleaners. This will weaken the
fabric.
If the belts need cleaning, use a mild soap solution
or lukewarm water. Do not remove the belts from
the vehicle to wash them. Dry with a soft cloth. Sun damage can also weaken the fabric. Replace
the belts if they appear frayed or worn or if the
buckles do not work properly.
WARNING!
Do not use volatile solvents for cleaning
purposes. Many are potentially flammable, and
if used in closed areas they may cause
respiratory harm.
WARNING!
A frayed or torn seat belt could rip apart in a
collision and leave you with no protection.
Inspect the seat belt system periodically,
checking for cuts, frays, or loose parts.
Damaged parts must be replaced immediately.
Do not disassemble or modify the seat belt
system. If your vehicle is involved in a collision,
or if you have questions regarding seat belt or
retractor conditions, take your vehicle to an
authorized FCA dealer or authorized FCA
Certified Collision Care Program facility for
inspection.
22_RUP_OM_EN_USC_t.book Page 358
Page 362 of 384
360
TECHNICAL SPECIFICATIONS
VEHICLE IDENTIFICATION NUMBER (VIN)
The VIN is on the left front corner of the instrument
panel and is visible from outside of the vehicle
through the windshield.
Vehicle Identification Number
NOTE:It is illegal to remove or alter the VIN.
BRAKE SYSTEM
Your vehicle is equipped with dual hydraulic brake
systems. If either of the two hydraulic systems lose
normal capability, the remaining system will still
function. However, there will be some loss of
overall braking effectiveness. You may notice
increased pedal travel during application, greater
pedal force required to slow or stop, and potential
activation of the Brake Warning Light.
In the event power assist is lost for any reason (i.e.,
repeated brake applications with the engine off)
the brakes will still function. However, the effort
required to brake the vehicle will be much greater
than that required with the power system
operating.
WHEEL AND TIRE TORQUE SPECIFICATIONS
Proper lug nut/bolt torque is very important to
ensure that the wheel is properly mounted to the
vehicle. Any time a wheel has been removed and
reinstalled on the vehicle, the lug nuts/bolts
should be torqued using a properly calibrated
torque wrench using a six-sided (hex) deep wall
socket.
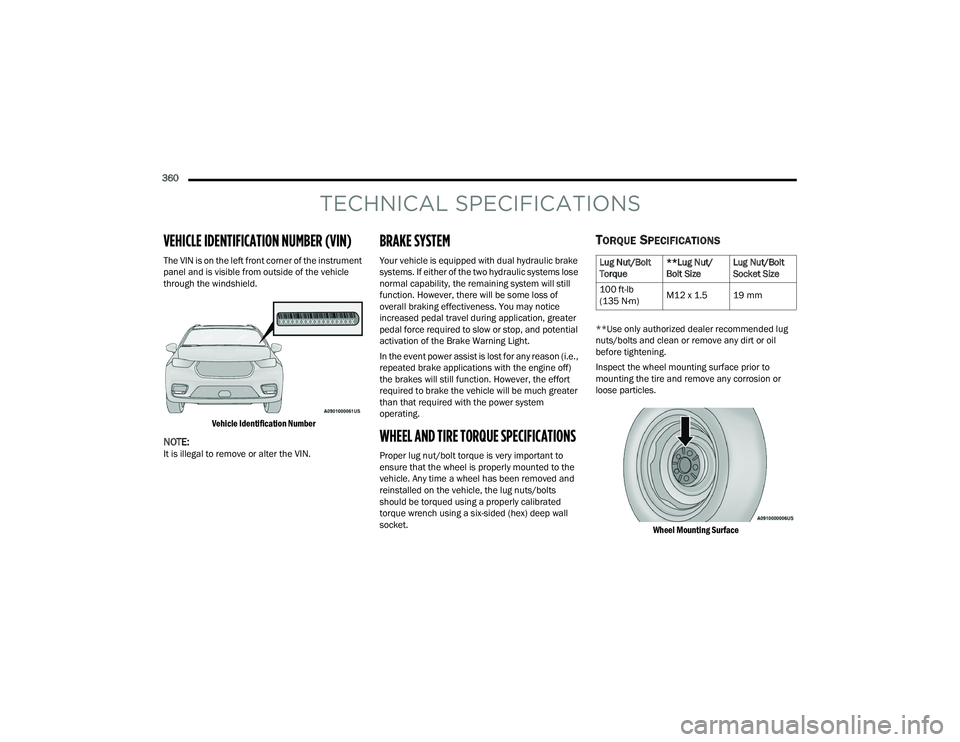
TORQUE SPECIFICATIONS
**Use only authorized dealer recommended lug
nuts/bolts and clean or remove any dirt or oil
before tightening.
Inspect the wheel mounting surface prior to
mounting the tire and remove any corrosion or
loose particles.
Wheel Mounting Surface
Lug Nut/Bolt
Torque **Lug Nut/
Bolt SizeLug Nut/Bolt
Socket Size
100 ft-lb
(135 N·m) M12 x 1.5 19 mm
22_RUP_OM_EN_USC_t.book Page 360
Page 377 of 384

375
Heated Mirrors
......................................... 57, 60Heated Seats................................................... 51Heater, Engine Block..................................... 135Hill Start Assist.............................................. 227Hitches Trailer Towing............................................ 176HomeLink (Garage Door Opener).................... 61Hood Prop........................................................ 96Hood Release.................................................. 96
I
Ignition............................................................ 18Switch......................................................... 18Indicator LightsBlue........................................................... 129Green........................................................ 127White......................................................... 128Yellow........................................................ 127Inside Rearview Mirror............................ 57, 282Instrument Cluster............................... 110, 112Display...................................................... 112Display Controls........................................ 113Menu Items............................................... 116Instrument Panel Lens Cleaning.................... 359Interior And Instrument Lights......................... 69Interior Appearance Care............................... 358
Interior Lights................................................... 69Intermittent Wipers (Delay Wipers).................. 70InverterPower.......................................................... 91
J
Jack Location................................................ 287Jack Operation.............................................. 286Jump Starting............................................... 300
K
Key Fob............................................................ 14Arm The System.......................................... 22Disarm The Alarm........................................ 22Programming Additional Key Fobs............... 16Key Fob Battery Service
(Remote Keyless Entry).................................... 15Key Fob Programming
(Remote Keyless Entry).................................... 16Keyless Enter 'n Go™....................................... 24Passive Entry............................................... 24Keys................................................................. 14Keysense...................................................... 115
L
Lane Change And Turn Signals........................65Lane Change Assist................................... 65, 68LaneSense.................................................... 166Lap/Shoulder Belts....................................... 241Latches......................................................... 281Hood............................................................96Lead Free Gasoline....................................... 361Leaks, Fluid................................................... 281Life Of Tires................................................... 349Liftgate.............................................................97Power...........................................................97Light Bulbs........................................... 281, 338Lights............................................................ 281Air Bag.................................... 121, 250, 279Anti Lock Brake System............................ 124Automatic Emergency Braking OFF........... 127Battery Saver...............................................68Brake Assist Warning................................ 227Brake Warning.......................................... 122Bulb Replacement........................... 337, 338Cruise.............................................. 127, 128Daytime Running.........................................65Dimmer Switch, Headlight...........................65Electric Power Steering Fault.................... 122
11
22_RUP_OM_EN_USC_t.book Page 375