2021 VOLVO V90 CROSS COUNTRY roof
[x] Cancel search: roofPage 6 of 683

4
Resetting center display settings138
Table of settings in the center display 139
Driver profiles 140
Selecting a driver profile 141
Changing a driver profile's name 141
Protecting a driver profile 142
Linking a remote key to a driver profile 142
Resetting driver profile settings 143
Messages in the center display 144
Handling messages in the center display 144
Handling messages saved fromthe center display 145
Head-up display *
146
Activating and deactivating the head-up display * 147
Head-up display settings *
148
Voice Control 149
Use voice recognition 150
Voice control for cellular phones 152
Voice control for radio and media 153
Voice control settings 154
LIGHTING
Lighting control and panel156
Adjusting light functions via the center display 157
Parking lights 158
Daytime running lights 158
Low beams 159
Using high beam 160
Active high beam 161
Using turn signals 162
Active Bending Lights *
162
Front fog lights/corner illumination *
163
Rear fog light 164
Brake lights 165
Emergency brake lights 165
Hazard warning flashers 165
Using home safe lighting 166
Welcome Light 166
Interior Lighting 166
Adjusting interior lighting 168
WINDOWS, GLASS AND MIRRORS
Windows, glass and mirrors 172
Pinch protection for windows and sun curtains 172
Reset procedure for pinch protection 173
Power windows 174
Operating the power windows 174
Using sun curtains *
176
Rearview/door mirrors 176
Adjusting the rearview mirror dim-ming function 177
Adjusting the door mirrors 177
Panoramic roof *
179
Operating the panoramic roof *
180
Auto closing the panoramic roof *
sun curtain 182
Wiper blades and washer fluid 183
Using the windshield wipers 183
Using the rain sensor 184
Activating and deactivating therain sensor's memory function 185
Using the windshield and head-light washers 186
Using the rear window wiper/washer 187
Using automatic rear windowwiping when backing up 188
Page 14 of 683

12
Tire sealing system556
Using the tire sealing system 557
Inflate tires with the compressor included in the tire sealing system 560
Determining the vehicle's permit-ted weight 561
LOADING, STORAGE AND PASSENGER COMPARTMENT
Passenger compartment interior
564
Tunnel console 565
Electrical outlets 566
Using the electrical outlets 567
Using the glove compartment 568
Sun visors 569
Cargo compartment 569
Loading recommendations 570
Roof loads and load carriers 571
Grocery bag holders 571
Load anchoring eyelets 572
Rear seat ski hatch 573
Installing and removing the cargo compartment cover * 573
Operating the cargo compartmentcover * 574
Installing and removing the steelcargo grid * 576
Installing and removing the cargo net *
577
MAINTENANCE AND SERVICE
Volvo's service program
582
Data transfer between vehicle and workshop over Wi-Fi 584
Download Center 585
Handling system updates viaDownload Center 585
Vehicle status 586
Scheduling service and repairs 587
Sending vehicle information to theworkshop 588
Hoisting the vehicle 589
Climate control system service 592
Replacing a windshield with head- up display * 592
Opening and closing the hood 592
Engine compartment overview 594
Engine oil 595
Checking and filling engine oil 596
Coolant 597
Refilling coolant 598
Starter battery 600
Support battery 602
Battery symbols 604
Battery recycling 604
Fuses and fuseboxes 605
Replacing fuses 605
Page 46 of 683

SAFETY
44
Safety
The vehicle is equipped with a number of safety systems that work together to helpprotect the vehicle's driver and passengers inthe event of an accident.
The vehicle is equipped with a number of sen- sors that may react in the event of an accidentand activate different safety systems, such asthe airbag system and seat belt tensioners.Depending on the specific conditions of theaccident, e.g. collisions at certain angles, over-turning or swerving, the systems react differ-ently to help provide good protection. There are also mechanical safety systems such as the Whiplash Protection System. Thevehicle is also built so that a large part of theforce of a collision is distributed to the vehi-cle's members, pillars, floor, roof and otherparts of the body. After an accident, the vehicle's safety mode may be activated if any important function inthe vehicle has been damaged.
Warning symbol in the instrument
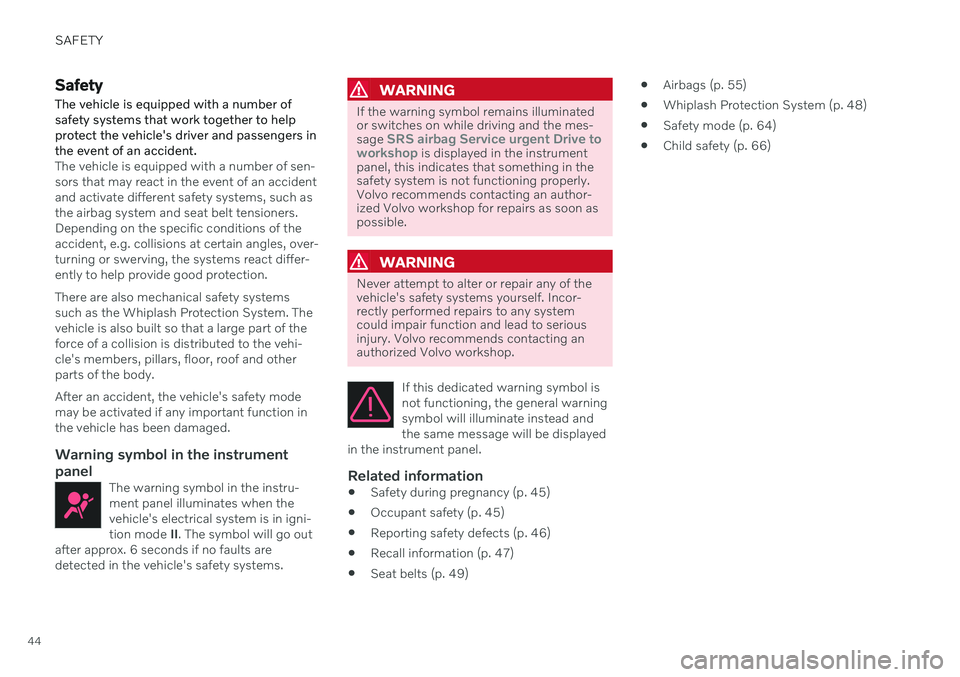
panel
The warning symbol in the instru-ment panel illuminates when thevehicle's electrical system is in igni-tion mode II. The symbol will go out
after approx. 6 seconds if no faults aredetected in the vehicle's safety systems.
WARNING
If the warning symbol remains illuminated or switches on while driving and the mes- sage
SRS airbag Service urgent Drive to
workshop is displayed in the instrument
panel, this indicates that something in the safety system is not functioning properly.Volvo recommends contacting an author-ized Volvo workshop for repairs as soon aspossible.
WARNING
Never attempt to alter or repair any of the vehicle's safety systems yourself. Incor-rectly performed repairs to any systemcould impair function and lead to seriousinjury. Volvo recommends contacting anauthorized Volvo workshop.
If this dedicated warning symbol is not functioning, the general warningsymbol will illuminate instead andthe same message will be displayed
in the instrument panel.
Related information
Safety during pregnancy (p. 45)
Occupant safety (p. 45)
Reporting safety defects (p. 46)
Recall information (p. 47)
Seat belts (p. 49)
Airbags (p. 55)
Whiplash Protection System (p. 48)
Safety mode (p. 64)
Child safety (p. 66)
Page 56 of 683

SAFETY
54
Door and seat belt reminders
This system is intended to remind occupants to buckle their seat belts and to alert thedriver if a door, hood or other opening (trunk,sunroof, etc.) is open.
Graphics in the instrument panel
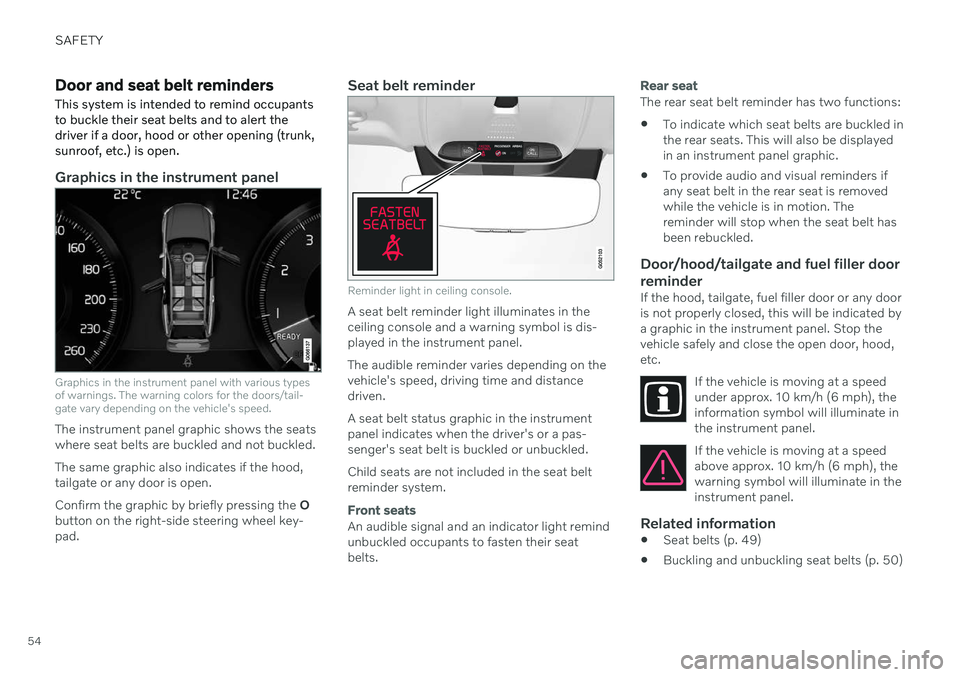
Graphics in the instrument panel with various types of warnings. The warning colors for the doors/tail-gate vary depending on the vehicle's speed.
The instrument panel graphic shows the seats where seat belts are buckled and not buckled. The same graphic also indicates if the hood, tailgate or any door is open. Confirm the graphic by briefly pressing the O
button on the right-side steering wheel key- pad.
Seat belt reminder
Reminder light in ceiling console.
A seat belt reminder light illuminates in the ceiling console and a warning symbol is dis-played in the instrument panel. The audible reminder varies depending on the vehicle's speed, driving time and distancedriven. A seat belt status graphic in the instrument panel indicates when the driver's or a pas-senger's seat belt is buckled or unbuckled. Child seats are not included in the seat belt reminder system.
Front seats
An audible signal and an indicator light remind unbuckled occupants to fasten their seatbelts.
Rear seat
The rear seat belt reminder has two functions:
To indicate which seat belts are buckled in the rear seats. This will also be displayedin an instrument panel graphic.
To provide audio and visual reminders ifany seat belt in the rear seat is removedwhile the vehicle is in motion. Thereminder will stop when the seat belt hasbeen rebuckled.
Door/hood/tailgate and fuel filler door
reminder
If the hood, tailgate, fuel filler door or any dooris not properly closed, this will be indicated bya graphic in the instrument panel. Stop thevehicle safely and close the open door, hood,etc.
If the vehicle is moving at a speedunder approx. 10 km/h (6 mph), theinformation symbol will illuminate inthe instrument panel.
If the vehicle is moving at a speed above approx. 10 km/h (6 mph), thewarning symbol will illuminate in theinstrument panel.
Related information
Seat belts (p. 49)
Buckling and unbuckling seat belts (p. 50)
Page 65 of 683

SAFETY
}}
63
WARNING
Volvo recommends contacting an author- ized Volvo workshop for repairs. Incorrectlyperformed repairs to the side airbag sys-tem could impair function and lead to seri-ous injury.
WARNING
Do not place any objects in the area between the outer edges of the seats andthe door panels, as this could impair thefunction of the side airbags. Volvo recommends only using seat covers approved by Volvo. Other seat covers couldprevent the side airbags from functioningproperly.
WARNING
The side airbag is a supplement to the seat belt. Always wear your seat belt.
Related information
Airbags (p. 55)
Inflatable curtain The inflatable curtain, Inflatable Curtain (IC), helps to prevent the driver and passengersfrom striking their heads on the inside of thevehicle during a collision.
The inflatable curtains are installed along both sides of the inside of the roof and help protectoccupants in the vehicle's outer seats.
IC
AIRBAG is embossed on the panels.
A collision of a sufficiently violent force willtrigger the sensors and the inflatable curtainwill inflate.
WARNING
Volvo recommends contacting an author- ized Volvo workshop for repair. Incorrectlyperformed repairs to the inflatable curtainsystem could impair function and lead toserious injury.
WARNING
Never hang or attach heavy objects in the handle in the ceiling. The hooks are onlyintended for lightweight garments (not forhard objects such as umbrellas). Never screw or mount anything to the vehi- cle's headlining, door pillars or side panels.This could impair the intended protectiveproperties. Volvo recommends only usingVolvo original parts that are approved forplacement in these areas.
WARNING
If objects are loaded higher than the upper edge of the side windows, leave a 10 cm(4 in.) space between the objects and thewindow. Objects placed closer to thiscould impede the function of the inflatablecurtain concealed inside the headlining.
WARNING
The inflatable curtain is a supplement to the seat belt. Always wear your seat belt.
Page 88 of 683

DISPLAYS AND VOICE CONTROL
* Option/accessory.
86
Displays and controls by the driver in a left-hand drive vehicle
The overviews show the location of the vehi- cle's displays and controls.
Steering wheel and dashboard
Parking lights, daytime running lights, low beams, high beams, turn signals, front fog lights/cornering illumination *, rear fog
light, trip computer reset
Steering wheel paddles for manual shift- ing *
Head-up display *
Instrument panel
Wipers and washers, rain sensor *
Right-side steering wheel keypad
Steering wheel adjustment
Horn
Left-side steering wheel keypad
Hood open
Display lighting, tailgate unlock/open */
close *, halogen headlight height adjust-
ment
Ceiling console
Front reading lights and courtesy lighting
Panoramic roof *
Ceiling console display ON CALL button
HomeLink ®
*
Center and tunnel console
Center display
Hazard warning flashers, defrosting, media
Gear selector
Start knob
Drive modes *
Parking brake
Auto-hold brakes
Page 153 of 683

DISPLAYS AND VOICE CONTROL
}}
* Option/accessory.151
These may include:
Wait until after the tone, and then speak in your normal voice at a normal speed.
Do not speak while the system is respond-ing (the system is unable to process com-mands during this time).
Avoid background noises in the passengercompartment by keeping doors, windows and the panoramic roof
* closed.
NOTE
Not all system languages support voice control. If a language supports voice con- trol, it is marked with a
symbol in the
list of available system languages. Read more about where the information is foundin the section on voice control settings.
Generally, the system will listen for a basic command that is then followed by moredetailed commands specifying what you wantthe system to do. To change the audio volume of the system, turn the volume knob while the voice is speak-ing. It is possible to use other buttons whilevoice commands are being given. However,because other audio is silenced during dialogwith the system, it is not possible to perform any functions connected to audio using thebuttons.
Canceling voice controlTo cancel voice control, do one of the follow-ing:
Briefly press
and say "Cancel".
Press and hold the steering wheel key- pad's voice command button
until
two audible signals are given. This cancels voice control even when the system isspeaking.
Voice control will also be canceled if you donot respond during a dialog. The system willfirst ask three times for a response and if theresponse is still not given, voice control will beautomatically canceled. To speed up communication and skip prompts from the system, press the voice control but- ton
on the steering wheel keypad. This
will interrupt the system's response and you can say the next command.
Voice command examples
1. Tap . 2.
Say "
Call [First name] [Last name]
[number category]", e.g. "Call Robyn
Smith cellular".
> The system will call the selected con- tact from the phone book. If the contact has several phone numbers (e.g. home,cell, work), the right category must alsobe given.
Commands/phrasesThe following commands can usually be usedin any situation:
"
Repeat" - repeats the most recent voice
command in the current dialog.
"
Cancel" - cancels the dialog. 19
"
Help" - initiates a help dialog. The sys-
tem responds with commands that can be used in the current situation, an instruc-tion or an example.
Commands for specific functions, such as phone and audio, are described in the sections related to that function.
19 Note that this only cancels the dialog when the system is not speaking. To do this, press and hold until you hear two beeps.
Page 169 of 683

LIGHTING
}}
* Option/accessory.167
Courtesy lighting auto switch
Reading light right side
Reading lights
The reading lights on the right and left sides are switched on and off by briefly pressing thebuttons in the ceiling console. To adjust thebrightness, press and hold the button.
Passenger compartment lighting
Briefly press the button in the ceiling console to switch on or off the footwell lighting andceiling lighting.
Courtesy lighting auto switch
Activate the auto switch by briefly pressing the AUTO button in the ceiling console. With
Auto activated, the indicator light in the buttonand the courtesy lighting come on and areturned off as follows. Courtesy lighting is switched on when:
The vehicle is unlocked
The vehicle is switched off
A side door is opened.
Courtesy lighting is switched off when: The vehicle is locked
The engine is started
A side door is closed
A side door has been open for approx. 2 minutes.
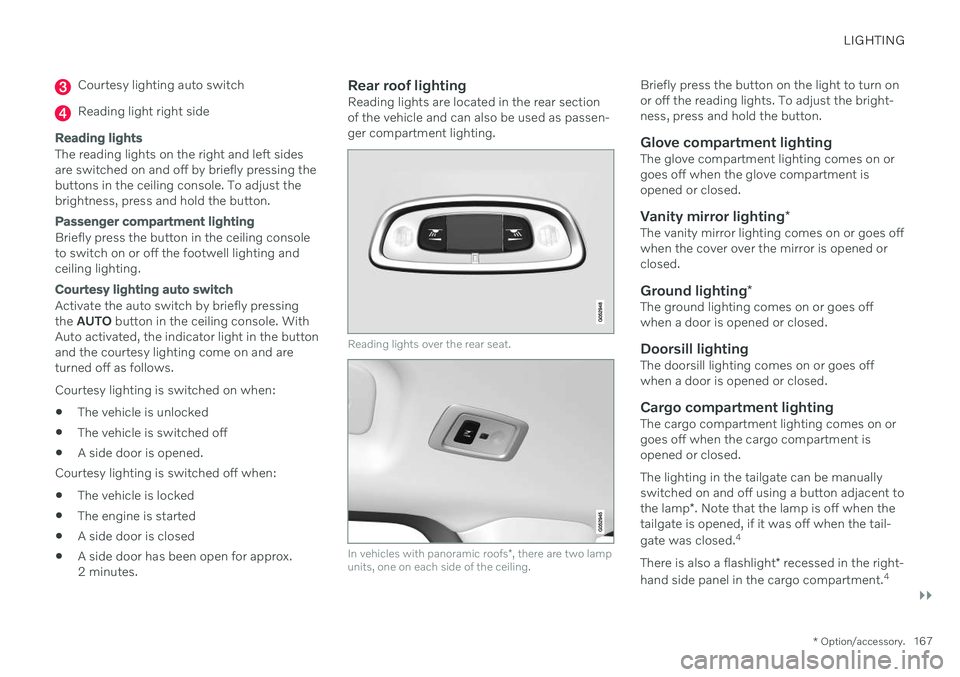
Rear roof lightingReading lights are located in the rear sectionof the vehicle and can also be used as passen-ger compartment lighting.
Reading lights over the rear seat.
In vehicles with panoramic roofs
*, there are two lamp
units, one on each side of the ceiling.
Briefly press the button on the light to turn on or off the reading lights. To adjust the bright-ness, press and hold the button.
Glove compartment lightingThe glove compartment lighting comes on orgoes off when the glove compartment isopened or closed.
Vanity mirror lighting *The vanity mirror lighting comes on or goes offwhen the cover over the mirror is opened orclosed.
Ground lighting*The ground lighting comes on or goes offwhen a door is opened or closed.
Doorsill lightingThe doorsill lighting comes on or goes offwhen a door is opened or closed.
Cargo compartment lightingThe cargo compartment lighting comes on orgoes off when the cargo compartment isopened or closed. The lighting in the tailgate can be manually switched on and off using a button adjacent to the lamp*. Note that the lamp is off when the
tailgate is opened, if it was off when the tail- gate was closed. 4
There is also a flashlight * recessed in the right-
hand side panel in the cargo compartment. 4