2021 VOLVO V90 CROSS COUNTRY change time
[x] Cancel search: change timePage 598 of 683

||
MAINTENANCE AND SERVICE
596and display messages are used to alert the driver. Some engine variants have both sys-tems. Contact a Volvo retailer for more infor-mation. Change the engine oil and oil filter according to the schedule specified in the Warranty andMaintenance Records Information booklet.Oils of a higher grade than that specified maybe used. If the vehicle is driven in adverse con-ditions, Volvo recommends using an oil with ahigher grade than that specified.
Related information
Checking and filling engine oil (p. 596)
Engine oil specifications (p. 658)
Volvo Cars support site (p. 21)
Checking and filling engine oil
The engine oil level is monitored by an elec- tronic oil level sensor.
Viewing oil level in the center display
Example of the oil level graphic in the center display
The oil level can be viewed using the elec- tronic oil level gauge in the center display oncethe vehicle has been started. The oil levelshould be checked regularly. 1. Open the
Car Status app from App view
in the center display.
2. Tap
Status to display the oil level.
NOTE
The system cannot directly detect changes when the oil is filled or drained. The vehiclemust have been driven approximately30 km (20 miles) and have been stationary5 minutes on a level surface and with theengine off before the correct oil level willbe displayed.
NOTE
If the conditions for measuring oil level are not properly fulfilled (time after engineshutdown, vehicle inclination, ambient temperature, etc.) the message
No value
available will be shown in the center dis-
play. This does not mean that anything is
wrong in the vehicle systems.
CAUTION
If this symbol is shown, the oil pressure may be too low. Stopthe vehicle as soon as possibleand have it towed to a workshop
– an authorized Volvo workshop is recom-mended.
Page 628 of 683

MAINTENANCE AND SERVICE
626
Replacing the high beam headlight bulbs The high beam bulbs in the halogen head- lights can be changed without the help of aworkshop.
Before the bulbs can be replaced, the plastic covering over the headlight must be removed.
CAUTION
Never touch the bulb glass with your bare fingers. Grease and oils from your fingersvaporize in the heat and will leave adeposit on the reflector, which may dam-age it.
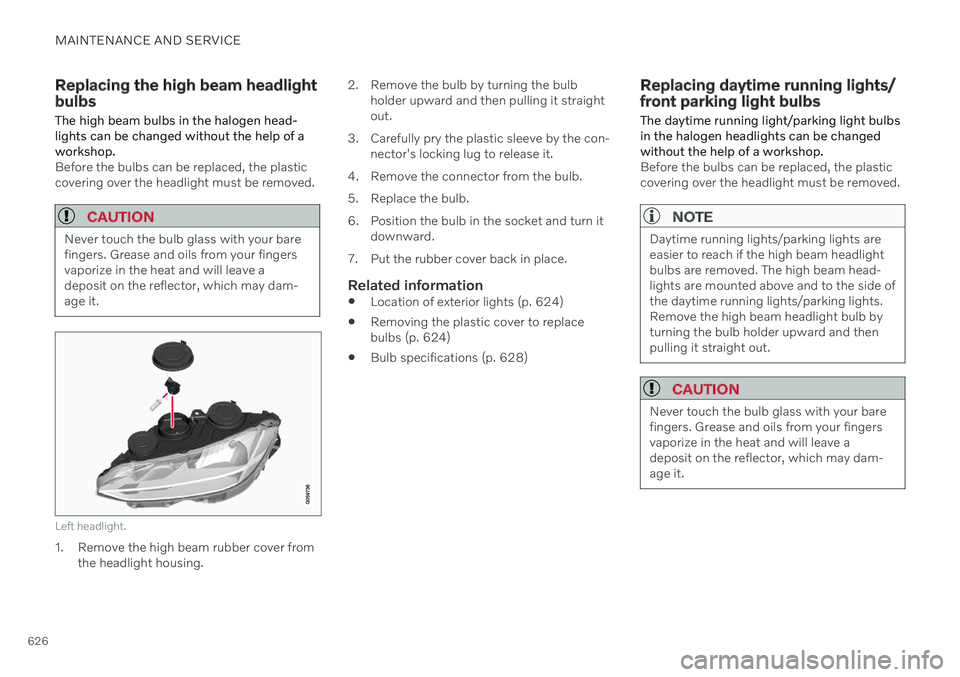
Left headlight.
1. Remove the high beam rubber cover fromthe headlight housing. 2. Remove the bulb by turning the bulb
holder upward and then pulling it straight out.
3. Carefully pry the plastic sleeve by the con- nector's locking lug to release it.
4. Remove the connector from the bulb.
5. Replace the bulb.
6. Position the bulb in the socket and turn it downward.
7. Put the rubber cover back in place.
Related information
Location of exterior lights (p. 624)
Removing the plastic cover to replace bulbs (p. 624)
Bulb specifications (p. 628)
Replacing daytime running lights/ front parking light bulbs
The daytime running light/parking light bulbs in the halogen headlights can be changedwithout the help of a workshop.
Before the bulbs can be replaced, the plastic covering over the headlight must be removed.
NOTE
Daytime running lights/parking lights are easier to reach if the high beam headlightbulbs are removed. The high beam head-lights are mounted above and to the side ofthe daytime running lights/parking lights.Remove the high beam headlight bulb byturning the bulb holder upward and thenpulling it straight out.
CAUTION
Never touch the bulb glass with your bare fingers. Grease and oils from your fingersvaporize in the heat and will leave adeposit on the reflector, which may dam-age it.
Page 629 of 683

MAINTENANCE AND SERVICE
}}
627
Left headlight.
1. Remove the daytime running light/parkinglight rubber cover from the headlight housing.
2. Pull the daytime running light/parking light bulb holder straight out.
3. Remove the bulb by pulling it straight out.
4. Replace the bulb.
5. Position the bulb holder in the socket and push it into place.
6. If the high beam bulb holder has come loose, position it in the socket and turn downward.
7. Put the rubber cover back in place.
Related information
Location of exterior lights (p. 624)
Removing the plastic cover to replacebulbs (p. 624)
Bulb specifications (p. 628)
Replacing the high beam headlight bulbs(p. 626)
Replacing front turn signal bulbs
The turn signal bulbs in the halogen head- lights can be changed without the help of aworkshop.
Before the bulbs can be replaced, the plastic covering over the headlight must be removed.
Left headlight.
1. Remove the turn signal rubber cover from the headlight housing.
2. Press the retaining catches together and pull the bulb holder straight out.
3. The bulb holder and bulb must be replaced as one unit.
4. Position the bulb holder in the socket and push it into place.
5. Put the rubber cover back in place.
Page 634 of 683

MAINTENANCE AND SERVICE
* Option/accessory.
632
Cleaning textile floor and inlay mats
Use of textile cleaner is recommended when cleaning textile mats. Clean regularly andtreat stains immediately. It is important tovacuum before using a cleaning agent.
Remove the inlay mats to clean the floor mats and inlay mats separately. Each inlay mat issecured into place with pins.
1. Remove the inlay mat by grasping the inlay mat at each pin and lifting the mat straight up.
2. Use a vacuum to remove dust and dirt.
NOTE
Do not swing or strike the inlay mats vio- lently against another object to remove dirtas this could damage the mats.
3. After vacuuming, a specially designed tex- tile cleaning agent should be used to remove stains on floor mats.
4. After cleaning, put the inlay mat back into place by pressing it in at each pin.
WARNING
Never use more than one inlay mat at a time on the driver's floor. If any othertype of floor mat is used, remove theoriginal mat from the driver's seat floorbefore driving. All types of mats mustbe securely anchored in the attach-ment points in the floor. Make sure thefloor mat does not impede the move-ment of the brake pedal or acceleratorpedal in any way, as this could be aserious safety hazard.
Volvo's floor mats are specially manu-factured for your vehicle. They must beproperly secured in the attachmentpoints in the floor to help ensure theycannot slide and become trappedunder the pedals.
Related information
Cleaning the interior (p. 628)
Cleaning the center display (p. 629)
Cleaning fabric upholstery and ceiling liner(p. 630)
Cleaning the seat belt (p. 631)
Cleaning leather upholstery
* (p. 632)
Cleaning the leather steering wheel(p. 633)
Cleaning interior plastic, metal and woodsurfaces (p. 634)
Cleaning leather upholstery
*
Use cleaning agents and car care products recommended by Volvo. Clean regularly andtreat stains immediately. It is important tovacuum before using a cleaning agent.
Volvo's leather upholstery * is treated to pro-
tect its original appearance. Over time, sun- light, grease, dirt, etc. could break down theprotective layer. This could result in scratchesand cracking. Leather upholstery * is a natural product that
changes and acquires a beautiful patina over time. Regular cleaning and treatments arerequired to preserve the qualities and color ofthe leather. Volvo offers a comprehensiveproduct, Volvo Leather Care KitWipes, forcleaning and treating leather upholstery.When used as directed, it helps preserve theleather's protective coating. For optimal results, Volvo recommends clean- ing and applying protective cream one to fourtimes a year (or more often as needed). VolvoLeather Care Kit 951 0251 and Volvo LeatherSoftener 943 7429 are available for purchaseat Volvo retailers.
Cleaning the leather upholstery1. Apply the leather cleaner to a damp sponge and squeeze it until the cleanerfoams.
Page 640 of 683

||
MAINTENANCE AND SERVICE
* Option/accessory.
638
CAUTION
The system will automatically change to P
mode if the above steps are not followed. In P mode, the wheels are locked, which
they should not be when the vehicle isbeing washed in a car wash.
NOTE
Keep in mind that if the vehicle is equipped with the keyless locking and unlocking function *, the doors and tailgate/trunk lid
may open when washing the vehicle if the remote key is within range.
Testing the brakes
WARNING
Always test the brakes after washing the vehicle, including the parking brake, toensure moisture and corrosion do notattach the brake pads and impair brakefunctionality.
Lightly depress the brake pedal from time to time when driving long distances in rain orslush. The heat from the friction will helpwarm up and dry the brake pads. Do the sameafter starting the vehicle in very damp or coldweather.
Related information
Cleaning the exterior (p. 634)
Polishing and waxing (p. 635)
Hand washing (p. 636)
High-pressure washing (p. 638)
Cleaning the wiper blades (p. 639)
Cleaning exterior plastic, rubber and trimcomponents (p. 639)
Cleaning rims (p. 640)
Corrosion protection (p. 641)
Auto-hold brakes (p. 409)
Settings for automatically activating theparking brake (p. 408)
Keyless and touch-sensitive surfaces
*
(p. 262)
High-pressure washing The vehicle should be washed as soon as it becomes dirty. The longer the dirt remains,the more difficult it will be to keep the vehicleclean. It could also lead to paint damage.Wash the vehicle in a car wash or garagewith an oil separator. Use a car washingdetergent recommended by Volvo.
If washing the vehicle with a high-pressure wash, use sweeping movements and keep thenozzle at least 30 cm (13 in.) from the vehicle.Do not spray directly onto locks.
Related information
Cleaning the exterior (p. 634)
Polishing and waxing (p. 635)
Hand washing (p. 636)
Automatic car washes (p. 637)
Cleaning the wiper blades (p. 639)
Cleaning exterior plastic, rubber and trimcomponents (p. 639)
Cleaning rims (p. 640)
Corrosion protection (p. 641)
Page 665 of 683

INDEX
663
1, 2, 3 ...
4WD 419
A
ABSanti-lock brakes 403
AC (Air conditioning) 233
Accessories and extra equipment 36 installation 37
Accessory installation warning 37
Active Bending Lights 162
Adapting driving characteristics 419
Adaptive Cruise Control 294 activating 297
auto-brake 323
change cruise control functionality 301
controls 296
deactivate 298
display 296
limitations 300
passing 318
set time interval 322
standby mode 299
stored speed 321
switching target vehicles 320
Symbols and messages 302
troubleshooting 300
WARNING 319
Adjusting the steering wheel 203
Advanced Air Cleaner 212
Airbag 55 activation/deactivation 59
driver's side 56
passenger side 56, 59
Air bag, see Airbag 55
Air conditioning 233 Air conditioning, fluid volume and grade 659
Air distribution 212 air vents 212, 214
changing 213
defrosting 226
recirculation 225
table showing options 215
Air quality 209, 211 Advanced Air Cleaner 212
allergy and asthma 210
passenger compartment filter 212
Air recirculation 225
Alarm 274 deactivating 275
Alarm about slippery road conditions 284
Alarm on hazard warning flashers 284Allergy and asthma-inducing sub-
stances 210
All Wheel Drive, AWD 419
All Wheel Drive (AWD) 419
All Wheel Drive (four-wheel drive) 419
Android Auto 496, 497, 498Antenna location 265
Apple CarPlay 492, 493, 495
Approach lighting 166
Apps 464
Assistance at risk of collision 345 activating/deactivating 346
at risk of run-off 346
during collision risks from behind 348 during collision risks from oncoming
traffic 347
limitations 349
Symbols and messages 350
Audio and media 462 Audio system HD digital radio 473 SiriusXM ®
Satellite radio 474, 475,
477
Auto-climate 224
Auto hold 409
INDEX