2021 VOLVO V90 CROSS COUNTRY tow
[x] Cancel search: towPage 443 of 683
STARTING AND DRIVING
441
NOTE
When switching to higher octane fuel or changing gasoline brands, it may be neces-sary to fill the tank more than once before adifference in engine operation is noticea-ble.
Fuel FormulationsDo not use gasoline that contains lead or man- ganese as a knock inhibitor, and do not uselead additives. Besides damaging the exhaustemission control systems on your vehicle, leadhas been strongly linked to certain forms ofcancer. Many fuels contain benzene as a solvent. Unburned benzene has been strongly linked tocertain forms of cancer. If you live in an areawhere you must fill your own gas tank, takeprecautions. These may include: standing upwind away from the filler noz-zle while refueling
refueling only at gas stations with vaporrecovery systems that fully seal the mouthof the filler neck during refueling
wearing neoprene gloves while handling afuel filler nozzle.
Use of AdditivesWith the exception of gas line antifreeze dur-ing winter months, do not add solvents, thick-eners, or other store-bought additives to yourvehicle's fuel, cooling, or lubricating systems.Overuse may damage your engine, and someof these additives contain organically volatilechemicals. Do not needlessly expose yourselfto these chemicals.
WARNING
Never carry a cell phone that is
switched
on while refueling your vehicle. If the
phone rings, this may cause a spark that could ignite gasoline fumes, resulting in fireand injury.
WARNING
Carbon monoxide is a poisonous, colorless, and odorless gas. It is present in all exhaustgases. If you ever smell exhaust fumesinside the vehicle, make sure the passengercompartment is ventilated, and immedi-ately return the vehicle to a trained andqualified Volvo service technician for cor-rection.
Demanding drivingIn demanding driving conditions, such as when towing a trailer or driving in hot weather or for prolonged periods at high altitudes, it may be a good idea to switch to a higher- octane fuel (AKI
21
91 or higher) or to switch to
another brand of gasoline in order to fully uti- lize the vehicle's engine capacity and optimizetraction.
Related information
Fuel (p. 439)
Emission controls (p. 442)
21
AKI (Anti Knock Index) is an average value of RON (Research Octane Number) and MON (Motor Octane Number) - (RON)+(MON)/2
Page 448 of 683
STARTING AND DRIVING
446
Selecting ignition mode (p. 402)
Support battery (p. 602)
Driving with a trailer
There are a number of things to consider when towing a trailer, such as the towbar, thetrailer and how the load is distributed in thetrailer.
Load-carrying capacity is determined by the vehicle's curb weight. The total weight of allpassengers and any installed accessories, e.g.towbar, reduces the vehicle's load-carryingcapacity by the corresponding amount.
Towbars used on the vehicle must beapproved for the applicable use.
Distribute the load on the trailer so thatthe weight on the towbar complies withthe specified maximum towball weight.The tongue weight is calculated as part ofthe vehicle's payload.
Increase the tire pressure to the recom-mended pressure for a full load.
The engine is subjected to more load thanusual when towing a trailer.
Towing a trailer affects the vehicle's han-dling, durability and driving economy.
Do not drive with a heavy trailer when thevehicle is very new. Wait until the mileagehas reached at least 1000 km (620 miles).
On long and steep downgrades, the vehi-cle's brakes are subjected to much moreload than usual. When manually shifting, downshift and adapt speed accordingly.
Follow applicable regulations regarding permitted speed and weight.
Drive slowly when towing a trailer up along and steep incline.
The maximum trailer weights given onlyapply to altitudes up to 1000 meters(3280 feet) above sea level. At higher alti-tudes, engine power (and thus the vehi-cle's climbing ability) is decreased due tothe reduced air density, and the maximumtrailer weight must therefore be reduced.The weight of the vehicle and trailer mustbe decreased by 10% for each additional1000 m (3280 feet) or part thereof.
Avoid driving with a trailer on inclines ofmore than 12%.
Avoid overloading and other incorrect use.
The trailer's brakes must be balanced withthe vehicle's brakes to help ensure safestops (follow applicable local regulations).
Page 449 of 683
STARTING AND DRIVING
}}
* Option/accessory.447
CAUTION
Bumper-attached trailer hitches must not be used on Volvos, nor shouldsafety chains be attached to thebumper.
Trailer hitches attaching to the vehiclerear axle must not be used.
Never connect a trailer's hydraulicbrake system directly to the vehiclebrake system, nor a trailer's lightingsystem directly to the vehicle lightingsystem. Consult your nearest author-ized Volvo retailer for correct installa-tion.
When towing a trailer, the trailer'ssafety chains or wire must be correctlyfastened to the attachment points pro-vided in the trailer hitch on the vehicle.The safety chain or wire must never befastened to or wound around the tow-ing ball.
NOTE
The optional detachable trailer hitch may not be available in all markets or on allmodels. Consult your Volvo retailer.
NOTE
Extreme weather conditions, towing a trailer, high altitude and lower fuel gradethan recommended are factors that cansignificantly increase the vehicle's fuel con-sumption.
Trailer weights
WARNING
Please adhere to the recommendations provided for trailer weight. If the recom-mendations are not followed, the vehicleand trailer may be difficult to control duringevasive maneuvers and braking.
NOTE
The specified maximum trailer weights are those permitted by Volvo. National vehicleregulations may set additional restrictionson trailer weight and speed. The trailerhitches may be certified for higher towingweights than the vehicle is permitted totow.
Self-leveling suspension
*The vehicle's self-leveling system attempts to keep the vehicle at a constant level, regardlessof load (up to the maximum permitted weight).When the vehicle is stationary, the rear end of the vehicle will be slightly lowered, which isnormal.
Driving in hilly terrain or hot weatherIn certain conditions, there is a risk of over-heating when driving with a trailer. If overheat-ing of the engine and drive system is detected,a warning symbol will illuminate in the instru-ment panel and a message will appear. The automatic transmission adapts the gear for the current load and engine speed.
Steep inclines
Do not lock the automatic transmission into a higher gear than what the engine can handle
‒
it is not always preferable to drive in highgears at low rpm.
Parking on a hill
1. Depress the brake pedal.
2. Apply the parking brake.
3. Put the gear selector in P.
4. Release the brake pedal.Put chocks behind the wheels when the vehi- cle is parked on a hill with a trailer attached.
Starting on a hill
1. Depress the brake pedal.
2. Put the gear selector in D.
3. Release the parking brake.
4. Release the brake pedal and start driving.
Page 450 of 683
||
STARTING AND DRIVING
* Option/accessory.
448
Related information
Trailer Stability Assist
* (p. 448)
Checking trailer lights (p. 449)
Towing capacity and tongue weight (p. 656)
Overheating of engine and transmission(p. 442)
Trailer Stability Assist
*
Trailer Stability Assist (TSA 23
) is part of the
ESC 24
stability system and is a function
designed to help stabilize a vehicle that is towing a trailer when the vehicle and trailerhave begun to sway. The function is addedwhen installing a towbar. Contact a Volvoretailer for more information.
Reasons for swayingA vehicle towing a trailer may begin to sway for various reasons. Normally this only occursat high speeds. However, if the trailer is over-loaded or unevenly distributed, e.g. too farback, there is a risk of swaying even at lowspeeds. Swaying may be caused by factors such as:
The vehicle and trailer are hit by a sudden, strong crosswind.
The vehicle and trailer are traveling on anuneven road or over a bump.
Sudden movements of the steering wheel.
Once swaying has begun, it can be difficult orimpossible to stop it. This makes the vehicleand trailer difficult to control and there is a riskof swerving into oncoming traffic or driving offthe road.
Trailer Stability Assist functionTrailer Stability Assist continuously monitorsthe vehicle's movements, particularly lateralmovements. If swaying is detected, the brakesare applied individually on the front wheels,which has a stabilizing effect on the vehicleand trailer. This is often enough to enable thedriver to regain control of the vehicle. If the Trailer Stability Assist function's first attempt is not adequate to stop the swayingmotion, the brakes are applied on all wheelsand engine power is temporarily reduced. Asthe swaying motion begins to decrease andthe vehicle and trailer have once againbecome stable, TSA stops regulating thebrakes/engine power and the driver regainscontrol of the vehicle.
NOTE
Trailer Stability Assist is deactivated if the driver activates ESC Sport Mode in the
center display's menu system.
Trailer Stability Assist may not intervene if the driver tries to compensate for the swayingmotion by moving the steering wheel rapidly,because the system will then not be able todetermine if it is the trailer or the driver caus-ing the swaying.
23 Trailer Stability Assist
24 Electronic Stability Control
Page 451 of 683
STARTING AND DRIVING
}}
449
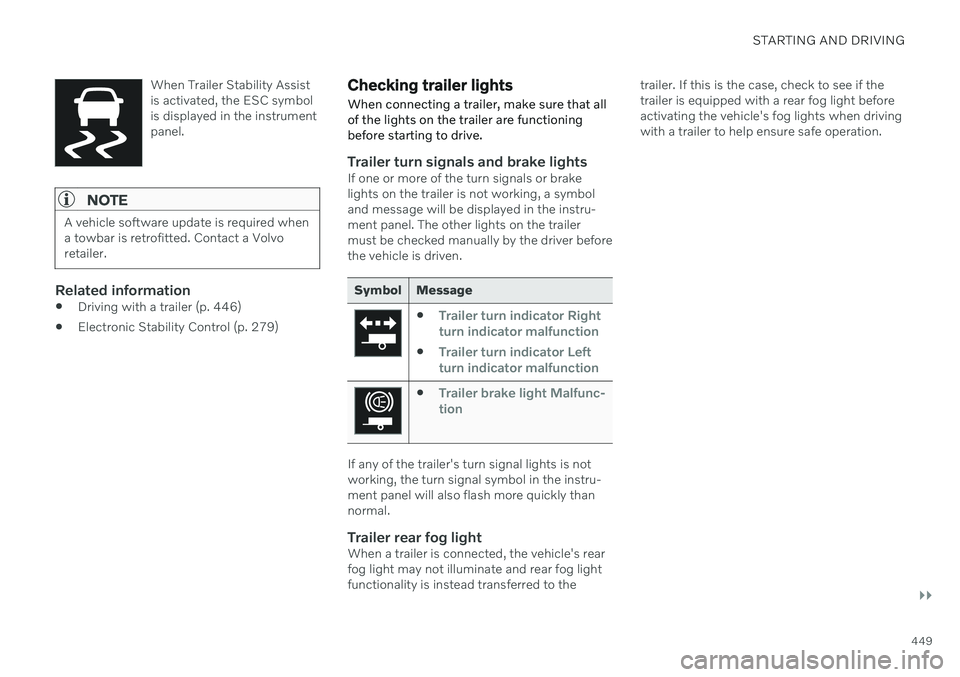
When Trailer Stability Assist is activated, the ESC symbolis displayed in the instrumentpanel.
NOTE
A vehicle software update is required when a towbar is retrofitted. Contact a Volvoretailer.
Related information
Driving with a trailer (p. 446)
Electronic Stability Control (p. 279)
Checking trailer lights
When connecting a trailer, make sure that all of the lights on the trailer are functioningbefore starting to drive.
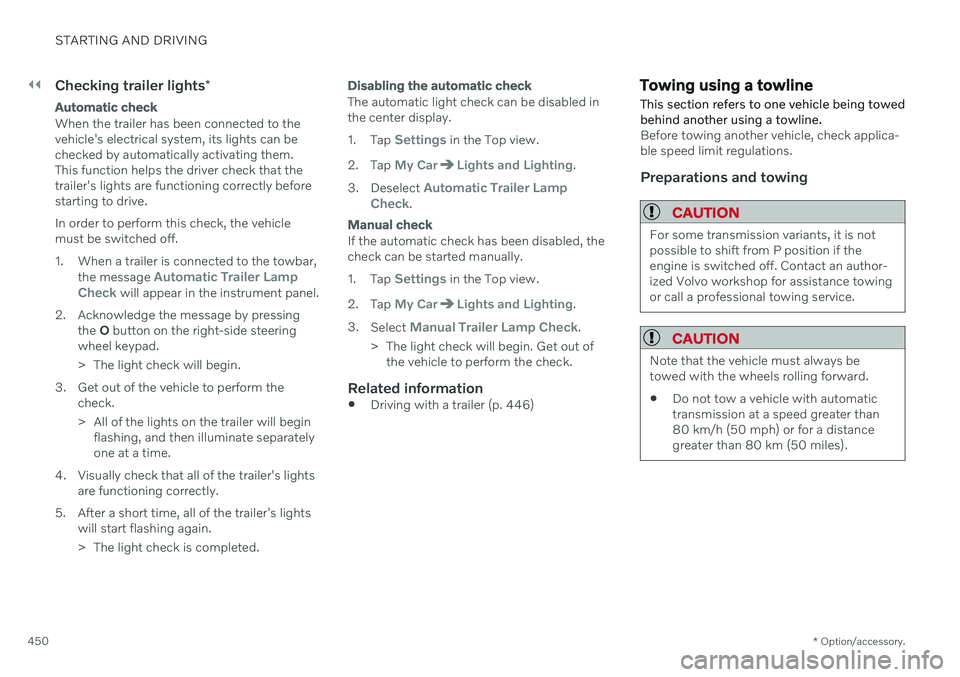
Trailer turn signals and brake lightsIf one or more of the turn signals or brake lights on the trailer is not working, a symboland message will be displayed in the instru-ment panel. The other lights on the trailermust be checked manually by the driver beforethe vehicle is driven.
Symbol Message
Trailer turn indicator Right
turn indicator malfunction
Trailer turn indicator Left
turn indicator malfunction
Trailer brake light Malfunc-
tion
If any of the trailer's turn signal lights is not working, the turn signal symbol in the instru-ment panel will also flash more quickly thannormal.
Trailer rear fog lightWhen a trailer is connected, the vehicle's rearfog light may not illuminate and rear fog lightfunctionality is instead transferred to the trailer. If this is the case, check to see if thetrailer is equipped with a rear fog light beforeactivating the vehicle's fog lights when drivingwith a trailer to help ensure safe operation.
Page 452 of 683
||
STARTING AND DRIVING
* Option/accessory.
450
Checking trailer lights *
Automatic check
When the trailer has been connected to the vehicle's electrical system, its lights can bechecked by automatically activating them.This function helps the driver check that thetrailer's lights are functioning correctly beforestarting to drive. In order to perform this check, the vehicle must be switched off.
1. When a trailer is connected to the towbar,
the message
Automatic Trailer Lamp
Check will appear in the instrument panel.
2. Acknowledge the message by pressing the O button on the right-side steering
wheel keypad.
> The light check will begin.
3. Get out of the vehicle to perform the check.
> All of the lights on the trailer will beginflashing, and then illuminate separately one at a time.
4. Visually check that all of the trailer's lights are functioning correctly.
5. After a short time, all of the trailer's lights will start flashing again.
> The light check is completed.
Disabling the automatic check
The automatic light check can be disabled in the center display. 1.Tap
Settings in the Top view.
2. Tap
My CarLights and Lighting.
3. Deselect
Automatic Trailer Lamp
Check.
Manual check
If the automatic check has been disabled, the check can be started manually. 1. Tap
Settings in the Top view.
2. Tap
My CarLights and Lighting.
3. Select
Manual Trailer Lamp Check.
> The light check will begin. Get out of the vehicle to perform the check.
Related information
Driving with a trailer (p. 446)
Towing using a towline
This section refers to one vehicle being towed behind another using a towline.
Before towing another vehicle, check applica- ble speed limit regulations.
Preparations and towing
CAUTION
For some transmission variants, it is not possible to shift from P position if theengine is switched off. Contact an author-ized Volvo workshop for assistance towingor call a professional towing service.
CAUTION
Note that the vehicle must always be towed with the wheels rolling forward.
Do not tow a vehicle with automatictransmission at a speed greater than80 km/h (50 mph) or for a distancegreater than 80 km (50 miles).
Page 453 of 683
STARTING AND DRIVING
}}
451
WARNING
Ignition mode
II must be active – all
airbags are deactivated in ignition mode I.
Always have the remote key in thevehicle when it is towed.
WARNING
The brake and steering servos do not work when the engine is off – it takesabout 5 times more pressure on the brakepedal and steering requires much moreeffort than normal.
1. Turn on the hazard warning flashers.
2. Attach the towline to the towing eyelet.
3. Put the vehicle in ignition mode II – with-
out pressing the brake pedal, turn the start knob clockwise and hold it there for about4 seconds. Release the knob, which willautomatically return to its original position.
4. Move the gear selector to neutral (N) and release the parking brake. If the battery charge level is too low, it may not be possible to release the parkingbrake. Connect an auxiliary battery to thevehicle if the battery is discharged.
> The towing vehicle can now start driv-ing. 5. Keep the towline taut when the towing
vehicle slows down by applying light pres- sure to the brake pedal. This will helpavoid jarring movements.
6. Be prepared to apply the brakes to stop the vehicle.
Jump startingDo not tow the vehicle to start the engine. Usean auxiliary battery if the start battery's chargelevel is so low that the engine cannot bestarted.
CAUTION
Attempting to tow with the engine running could result in damage to the three-waycatalytic converter.
Related information
Attaching and removing the towing eyelet (p. 451)
Hazard warning flashers (p. 165)
Recovery (p. 453)
Jump starting using another battery(p. 444)
Selecting ignition mode (p. 402)
Transmission (p. 412)
Attaching and removing the towing eyelet
Use the towing eyelet when towing. Screw the towing eyelet securely into place in thethreaded outlet behind the cover on the right-hand side of the front and rear bumpers.
NOTE
If the vehicle is equipped with a towbar, there is no rear attachment for the towingeye.
Attaching the towing eyelet
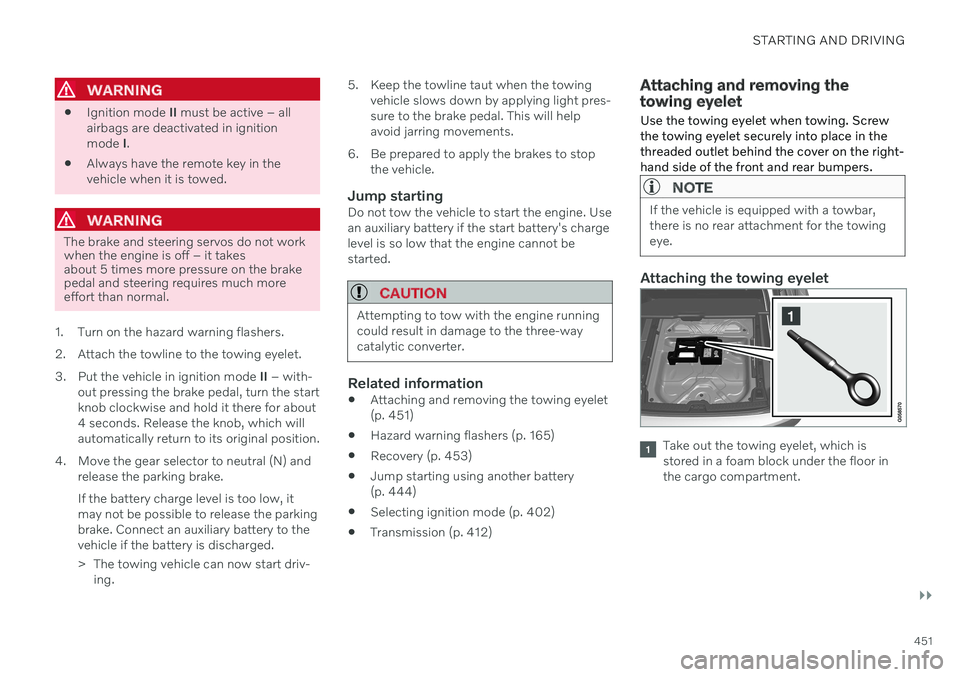
Take out the towing eyelet, which is stored in a foam block under the floor inthe cargo compartment.
Page 454 of 683
||
STARTING AND DRIVING
* Option/accessory.
452
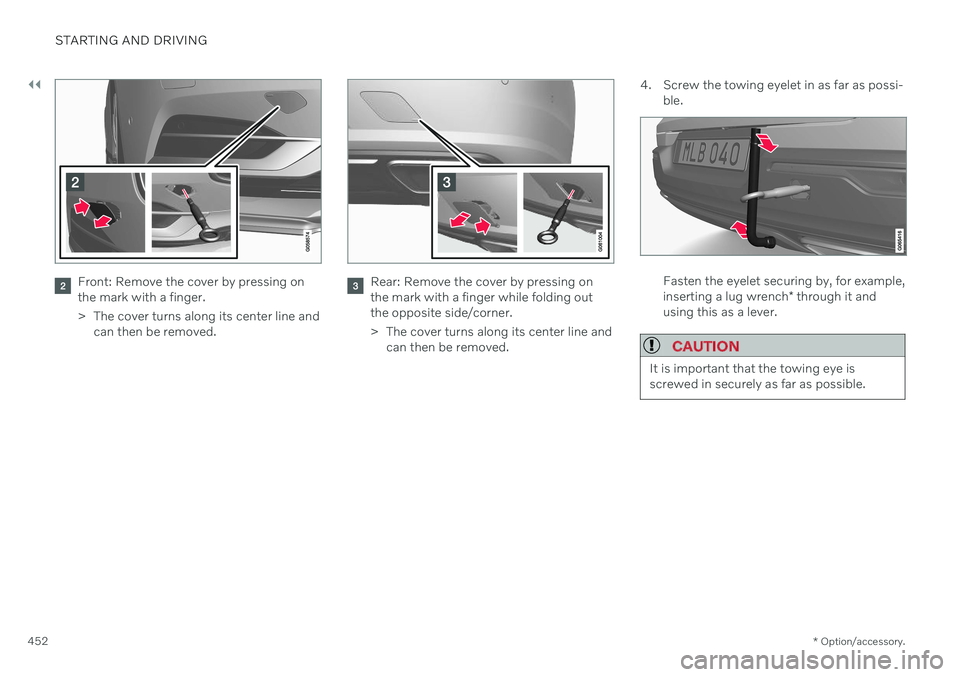
Front: Remove the cover by pressing on the mark with a finger.
> The cover turns along its center line and
can then be removed.Rear: Remove the cover by pressing on the mark with a finger while folding outthe opposite side/corner.
> The cover turns along its center line and can then be removed. 4. Screw the towing eyelet in as far as possi-
ble.Fasten the eyelet securing by, for example, inserting a lug wrench * through it and
using this as a lever.
CAUTION
It is important that the towing eye is screwed in securely as far as possible.