2021 VOLVO V90 CROSS COUNTRY wheel
[x] Cancel search: wheelPage 635 of 683
MAINTENANCE AND SERVICE
* Option/accessory.633
2. Move the sponge in circular motions to
apply the foam to the stain.
3. Dampen the stain thoroughly with the sponge. Let the sponge absorb the stain and do not rub.
4. Dry the stain using a soft towel and let the leather dry completely.
Protecting the leather upholstery1. Apply a small amount of leather protector to a cloth and then apply the protector tothe leather using light circular movements.
2. Let it dry for approximately 20 minutes. > Protecting the leather upholsterymakes it better able to withstand sun-light's harmful UV rays.
Related information
Cleaning the interior (p. 628)
Cleaning the center display (p. 629)
Cleaning fabric upholstery and ceiling liner(p. 630)
Cleaning the seat belt (p. 631)
Cleaning textile floor and inlay mats(p. 632)
Cleaning the leather steering wheel(p. 633)
Cleaning interior plastic, metal and wood surfaces (p. 634)
Cleaning the leather steering wheel
Use cleaning agents and car care products recommended by Volvo. Clean regularly andtreat stains immediately. It is important tovacuum before using a cleaning agent.
Leather needs to breathe. Never cover the leather steering wheel with a plastic protector.Volvo Leather Care Kit 951 0251 and LeatherSoftener 943 7429 are recommended forcleaning the leather steering wheel. First,remove dirt, dust, etc. with a damp sponge orcloth.
CAUTION
Sharp objects such as rings could damage the leather on the steering wheel.
Treating stains on the steering wheel:Type 1 (ink, wine, coffee, milk, sweat or blood)
–Use a soft cloth or sponge. Wipe the steering wheel using a solution of 5%ammonia. For blood stains, mix approxi-mately 2 dl (1 cup) of water with 25 g(one ounce) of salt and wipe the stain.
Type 2 (grease, oil, sauces or chocolate)
1. Same procedure as for Type 1 stains.
2. Finish by wiping the wheel with an absorbent paper or towel. Type 3
(dry dirt or dust)
1. Remove the dirt/dust using a soft brush.
2. Same procedure as for Type 1 stains.
Related information
Cleaning the interior (p. 628)
Cleaning the center display (p. 629)
Cleaning fabric upholstery and ceiling liner (p. 630)
Cleaning the seat belt (p. 631)
Cleaning textile floor and inlay mats(p. 632)
Cleaning leather upholstery
* (p. 632)
Cleaning interior plastic, metal and woodsurfaces (p. 634)
Page 636 of 683
MAINTENANCE AND SERVICE
* Option/accessory.
634
Cleaning interior plastic, metal and wood surfaces
Use cleaning agents and car care products recommended by Volvo. Clean regularly andtreat stains immediately.
A lightly dampened microfiber cloth is recom- mended for cleaning interior details and surfa-ces. These cloths are available for purchase atVolvo retailers. Never scrape or rub a stain. Never use strong stain removers.
CAUTION
Do not use solvent containing alcohol to clean the instrument panel glass.
CAUTION
Keep in mind that glossy surfaces can be easily scratched. Wipe these surfaces witha clean and dry microfiber cloth usingsmall, circular motions. If necessary, mois-ten the cloth lightly with clean water.
Related information
Cleaning the interior (p. 628)
Cleaning the center display (p. 629)
Cleaning fabric upholstery and ceiling liner (p. 630)
Cleaning the seat belt (p. 631)
Cleaning textile floor and inlay mats(p. 632)
Cleaning leather upholstery
* (p. 632)
Cleaning the leather steering wheel(p. 633)
Cleaning the exterior
The vehicle should be washed as soon as it becomes dirty. This makes the vehicle easierto clean because dirt does not attach asstrongly. It also reduces the risk of scratchesand keeps the vehicle looking new. Wash therims at a car wash or garage with an oil sepa-rator. Use a car washing detergent recom-mended by Volvo.
Related information
Cleaning the exterior (p. 634)
Polishing and waxing (p. 635)
Hand washing (p. 636)
Automatic car washes (p. 637)
High-pressure washing (p. 638)
Cleaning the wiper blades (p. 639)
Cleaning exterior plastic, rubber and trim components (p. 639)
Cleaning rims (p. 640)
Corrosion protection (p. 641)
Page 638 of 683
MAINTENANCE AND SERVICE
* Option/accessory.
636
Hand washing
The vehicle should be washed as soon as it becomes dirty. This makes the vehicle easierto clean because dirt does not attach asstrongly. It also reduces the risk of scratchesand keeps the vehicle looking new. Wash thevehicle in a car wash or garage with an oilseparator and use car washing detergent.Use cleaning agents and car care productsrecommended by Volvo.
Important to keep in mind when handwashing your vehicle
Avoid washing the vehicle in direct sun- light. This could cause the detergent orwax to dry out and become abrasive.
Remove bird droppings from paintwork assoon as possible. It contains chemicalsthat affect and discolor paintwork veryquickly. Use e.g. soft paper or a spongesoaked in lots of water. Consult an author-ized Volvo workshop for assistanceremoving discoloration.
Hose down the underbody, including thewheel housings and bumper.
Hose down the entire vehicle and removeany loose dirt, droppings etc. to reducethe risk of scratches from washing. Do notspray directly onto locks.
If necessary, use cold degreaser on heavilysoiled surfaces. Note that in such casesthe surfaces must not be hot from the sun.
Wash using a sponge, car washing deter-gent and plenty of lukewarm water. Makesure that the sponge is clean. A dirtysponge can scratch the paint.
Clean the wiper blades with lukewarmsoap solution or car washing detergent.
Dry the vehicle using a clean, soft chamoisor a squeegee. Try not to let drops ofwater dry in strong sunlight. This couldcause water drying stains that may needto be polished out.
In areas with heavy industrial emissions,more frequent washing of the vehicle'sexterior is recommended.
Tar spots from asphalt may remain evenafter washing. Use a Volvo-recommendedtar remover to remove these spots afterwashing the vehicle.
WARNING
Always entrust engine washing to a work- shop. If the engine is hot, there is a risk offire.
CAUTION
Dirty headlights do not work as well. Clean them regularly, e.g. when refueling. Do not use corrosive cleaners. Use water and a non-abrasive sponge.
NOTE
Exterior lighting such as headlights and taillights may develop temporary conden-sation on the inside of the lens. This is nor-mal. All exterior lighting is designed toresist this. Condensation is normally ven-ted out of the lamp housing once the lighthas been lit for some period of time.
CAUTION
Make sure that the panoramic roof
*
and sun shade are closed before wash- ing the vehicle.
Never use abrasive polishing agents onthe panoramic roof.
Never use wax on the rubber sealsaround the panoramic roof.
Page 639 of 683

MAINTENANCE AND SERVICE
}}
637
CAUTION
Remember to remove dirt from the drain holes in the doors and sills after washingthe vehicle.
Related information
Cleaning the exterior (p. 634)
Polishing and waxing (p. 635)
Automatic car washes (p. 637)
High-pressure washing (p. 638)
Cleaning the wiper blades (p. 639)
Cleaning exterior plastic, rubber and trim components (p. 639)
Cleaning rims (p. 640)
Corrosion protection (p. 641)
Settings for automatically activating theparking brake (p. 408)
Automatic car washes
The vehicle should be washed as soon as it becomes dirty. The longer the dirt remains,the more difficult it will be to keep the vehicleclean. It could also lead to paint damage.
Washing your vehicle in an automatic car wash is a fast and easy way to keep your vehi-cle clean, but it does not reach all areas of thevehicle. Volvo recommends washing yourvehicle by hand or supplementing automaticcar washes with a hand wash.
NOTE
Volvo recommends not washing the vehi- cle in an automatic car wash during thefirst few months; the paintwork on newvehicles takes some time to fully harden.
CAUTION
Before driving the vehicle into a car wash, deactivate the Automatic Braking whenStationary and Automatic Parking BrakeApplication functions. If the functions arenot deactivated, the brake system willseize when the vehicle is stationary and thevehicle will not be able to roll.
CAUTION
For automatic car washes in which the vehicle is pulled forward on rolling wheels:
1. Before washing the vehicle, make sure that the automatic rain sensor is deac- tivated. If it is not deactivated andinadvertently starts, the wiper armscould be damaged.
2. To help prevent damage from the auto- matic car wash machinery, make surethat the door mirrors are folded in,antennas retracted or removed, andany auxiliary lights secured.
3. Drive into the automatic car wash.
4. Turn off the "Automatic Braking when Stationary" function using the
but-
ton in the tunnel console.
5. Turn off the "Automatic Parking Brake Application" function in the center dis- play's Top view.
6. Turn off the engine by turning the start knob in the tunnel console clockwise.Hold the knob in position for at least2 seconds.
The vehicle is now ready for the automaticcar wash.
Page 640 of 683
||
MAINTENANCE AND SERVICE
* Option/accessory.
638
CAUTION
The system will automatically change to P
mode if the above steps are not followed. In P mode, the wheels are locked, which
they should not be when the vehicle isbeing washed in a car wash.
NOTE
Keep in mind that if the vehicle is equipped with the keyless locking and unlocking function *, the doors and tailgate/trunk lid
may open when washing the vehicle if the remote key is within range.
Testing the brakes
WARNING
Always test the brakes after washing the vehicle, including the parking brake, toensure moisture and corrosion do notattach the brake pads and impair brakefunctionality.
Lightly depress the brake pedal from time to time when driving long distances in rain orslush. The heat from the friction will helpwarm up and dry the brake pads. Do the sameafter starting the vehicle in very damp or coldweather.
Related information
Cleaning the exterior (p. 634)
Polishing and waxing (p. 635)
Hand washing (p. 636)
High-pressure washing (p. 638)
Cleaning the wiper blades (p. 639)
Cleaning exterior plastic, rubber and trimcomponents (p. 639)
Cleaning rims (p. 640)
Corrosion protection (p. 641)
Auto-hold brakes (p. 409)
Settings for automatically activating theparking brake (p. 408)
Keyless and touch-sensitive surfaces
*
(p. 262)
High-pressure washing The vehicle should be washed as soon as it becomes dirty. The longer the dirt remains,the more difficult it will be to keep the vehicleclean. It could also lead to paint damage.Wash the vehicle in a car wash or garagewith an oil separator. Use a car washingdetergent recommended by Volvo.
If washing the vehicle with a high-pressure wash, use sweeping movements and keep thenozzle at least 30 cm (13 in.) from the vehicle.Do not spray directly onto locks.
Related information
Cleaning the exterior (p. 634)
Polishing and waxing (p. 635)
Hand washing (p. 636)
Automatic car washes (p. 637)
Cleaning the wiper blades (p. 639)
Cleaning exterior plastic, rubber and trimcomponents (p. 639)
Cleaning rims (p. 640)
Corrosion protection (p. 641)
Page 643 of 683
MAINTENANCE AND SERVICE
641
Corrosion protection Your vehicle is constructed with protection against corrosion.
Corrosion protection for the body consists of modern metallic protective coatings on thesheet metal, a high-quality painting process,corrosion-protected and minimized metaloverlap, and shielding plastic components,abrasion protection and supplemental rustinhibitor in exposed areas. In the chassis,exposed components of the wheel suspensionare made of corrosion-resistant cast alumi-num.
Inspection and maintenanceThe corrosion protection does not normallyrequire maintenance, but keeping the vehicleclean helps reduce the risk of corrosion. Theuse of strong alkaline or acidic cleaning fluidsshould be avoided on shiny body components.Any stone chips in the paint should betouched up as soon as they are discovered.
Related information
Cleaning the exterior (p. 634)
Polishing and waxing (p. 635)
Hand washing (p. 636)
Automatic car washes (p. 637)
High-pressure washing (p. 638)
Cleaning the wiper blades (p. 639)
Cleaning exterior plastic, rubber and trimcomponents (p. 639)
Cleaning rims (p. 640)
Paintwork The paintwork consists of multiple layers. It is an important part of the vehicle's corrosionprotection and therefore needs to be checkedregularly.
The most common types of paint damage are minor stone chips, scratches and damage toe.g. the edges of fenders, doors and bumpers.To help prevent corrosion, paint damageshould be rectified immediately.
Related information
Touching up minor paint damage (p. 642)
Color codes (p. 643)
Page 655 of 683
SPECIFICATIONS
}}
653
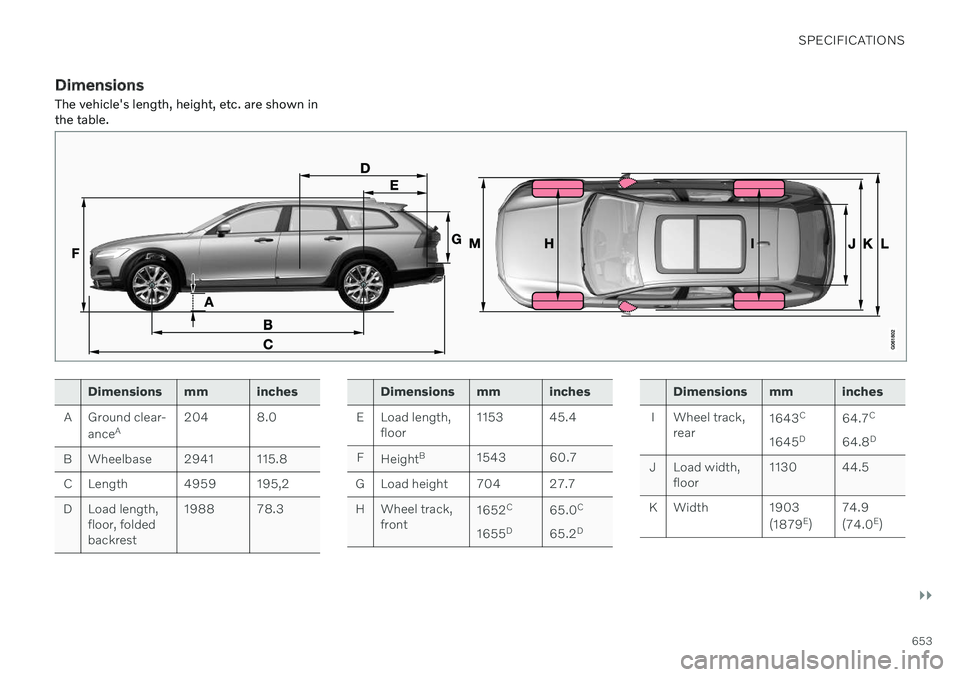
DimensionsThe vehicle's length, height, etc. are shown in the table.
Dimensions mm inches
A Ground clear- ance A 204 8.0
B Wheelbase 2941 115.8 C Length 4959 195,2
D Load length, floor, folded
backrest 1988 78.3Dimensions mm inches
E Load length, floor 1153 45.4
F Height B
1543 60.7
G Load height 704 27.7 H Wheel track, front 1652
C
1655 D 65.0
C
65.2 DDimensions mm inches
I Wheel track, rear 1643
C
1645 D 64.7
C
64.8 D
J Load width, floor 1130 44.5
K Width 1903 (1879E
) 74.9 (74.0
E
)
Page 656 of 683
||
SPECIFICATIONS
654
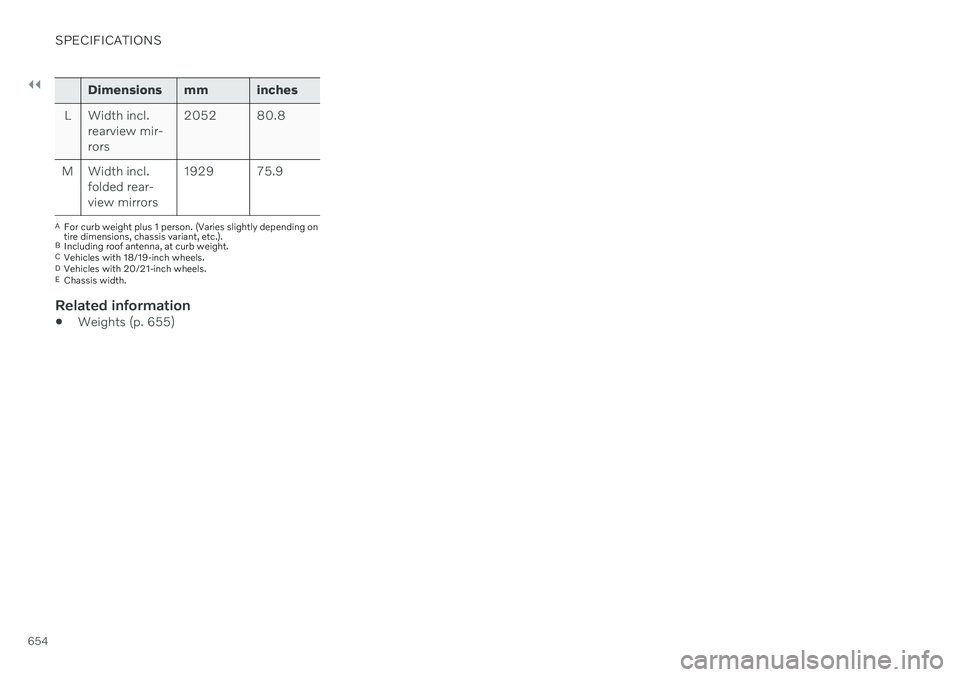
Dimensions mm inches
L Width incl. rearview mir- rors 2052 80.8
M Width incl. folded rear-view mirrors 1929 75.9
A
For curb weight plus 1 person. (Varies slightly depending on tire dimensions, chassis variant, etc.).
B Including roof antenna, at curb weight.
C Vehicles with 18/19-inch wheels.
D Vehicles with 20/21-inch wheels.
E Chassis width.
Related information
Weights (p. 655)