2021 VOLVO V90 CROSS COUNTRY wheel
[x] Cancel search: wheelPage 400 of 683

STARTING AND DRIVING
* Option/accessory.
398
Starting the vehicle
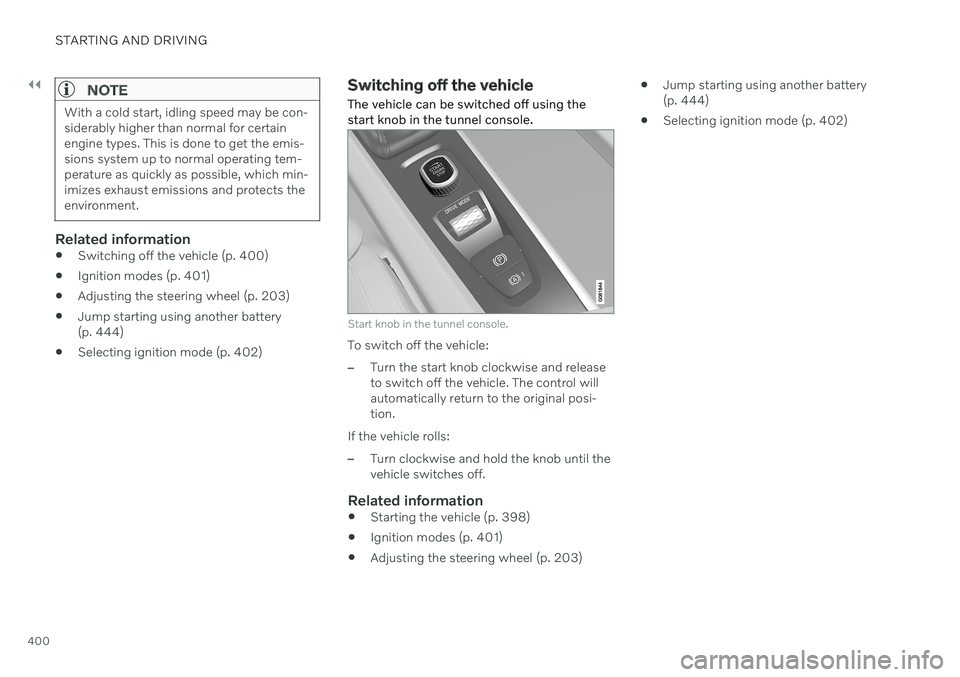
The vehicle can be started using the start knob in the tunnel console when the remotekey is in the passenger compartment.
Start knob in the tunnel console.
WARNING
Before starting:
Buckle your seat belt.
Adjust the seat, steering wheel and mirrors.
Make sure you can fully depress thebrake pedal.
The remote key is not physically used to startthe ignition because the vehicle is equippedwith the keyless Passive Start system. To start the vehicle:
1. The remote key must be inside the vehicle.
For vehicles with Passive Start, the key must be in the front section of the passen-ger compartment. With the optional key- less locking/unlocking function *, the key
can be anywhere in the vehicle.
2. Press and hold down the brake pedal 1
as
far as possible.
3. Turn the start knob clockwise and release. The control will automatically return to the original position.
WARNING
Never use more than one inlay mat at a time on the driver's floor. If any othertype of floor mat is used, remove theoriginal mat from the driver's seat floorbefore driving. All types of mats mustbe securely anchored in the attach-ment points in the floor. Make sure thefloor mat does not impede the move-ment of the brake pedal or acceleratorpedal in any way, as this could be aserious safety hazard.
Volvo's floor mats are specially manu-factured for your vehicle. They must beproperly secured in the attachmentpoints in the floor to help ensure theycannot slide and become trappedunder the pedals.
The starter motor will crank until the enginestarts or until overheating protection is trig-gered.
Error messagesIf the Vehicle key not found message is
shown in the instrument panel at start, place the remote key at the backup reader and thenmake a new start attempt.
1 If the vehicle is moving, it is only necessary to turn the start knob clockwise to start the engine.
Page 402 of 683
||
STARTING AND DRIVING
400
NOTE
With a cold start, idling speed may be con- siderably higher than normal for certainengine types. This is done to get the emis-sions system up to normal operating tem-perature as quickly as possible, which min-imizes exhaust emissions and protects theenvironment.
Related information
Switching off the vehicle (p. 400)
Ignition modes (p. 401)
Adjusting the steering wheel (p. 203)
Jump starting using another battery (p. 444)
Selecting ignition mode (p. 402)
Switching off the vehicle
The vehicle can be switched off using the start knob in the tunnel console.
Start knob in the tunnel console.
To switch off the vehicle:
–Turn the start knob clockwise and release to switch off the vehicle. The control willautomatically return to the original posi-tion.
If the vehicle rolls:
–Turn clockwise and hold the knob until the vehicle switches off.
Related information
Starting the vehicle (p. 398)
Ignition modes (p. 401)
Adjusting the steering wheel (p. 203)
Jump starting using another battery(p. 444)
Selecting ignition mode (p. 402)
Page 404 of 683
||
STARTING AND DRIVING
402
Related information
Starting the vehicle (p. 398)
Adjusting the steering wheel (p. 203)
Jump starting using another battery (p. 444)
Selecting ignition mode (p. 402)
Selecting ignition mode
The vehicle's ignition can be put in various modes (levels) to make different functionsavailable.
Selecting an ignition mode
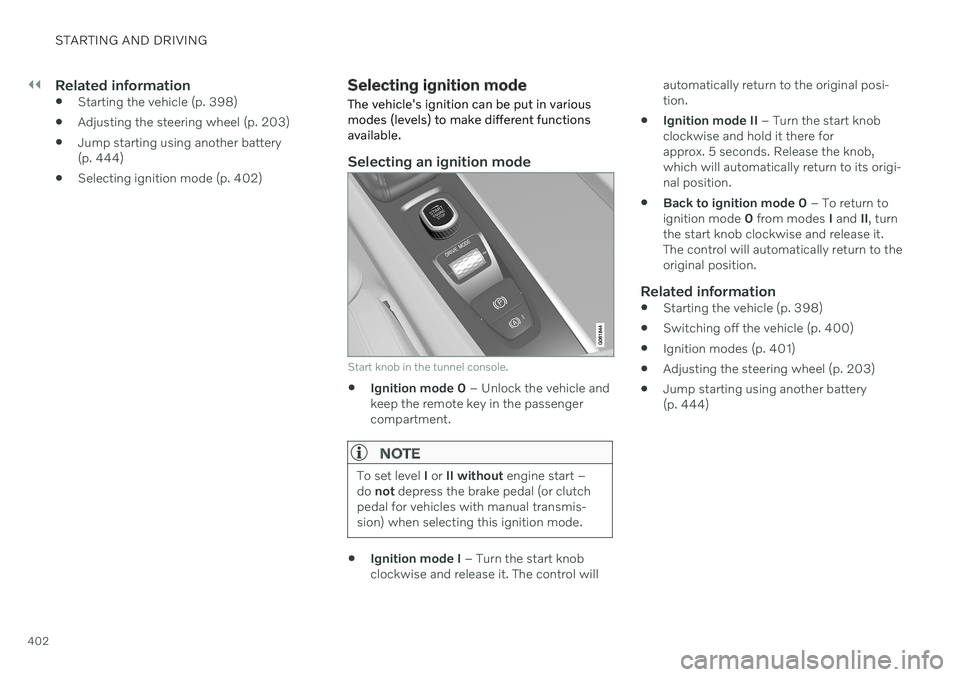
Start knob in the tunnel console.
Ignition mode 0
– Unlock the vehicle and
keep the remote key in the passenger compartment.
NOTE
To set level I or II without engine start –
do not depress the brake pedal (or clutch
pedal for vehicles with manual transmis- sion) when selecting this ignition mode.
Ignition mode I
– Turn the start knob
clockwise and release it. The control will automatically return to the original posi- tion.
Ignition mode II
– Turn the start knob
clockwise and hold it there forapprox. 5 seconds. Release the knob,which will automatically return to its origi-nal position.
Back to ignition mode 0
– To return to
ignition mode 0 from modes I and II, turn
the start knob clockwise and release it.The control will automatically return to theoriginal position.
Related information
Starting the vehicle (p. 398)
Switching off the vehicle (p. 400)
Ignition modes (p. 401)
Adjusting the steering wheel (p. 203)
Jump starting using another battery(p. 444)
Page 405 of 683
STARTING AND DRIVING
}}
403
Brake functions
The vehicle's brakes are used to reduce speed or prevent the vehicle from rolling.
In addition to the wheel brakes and parking brakes, the vehicle is also equipped with anumber of automatic brake assist functions.These systems provide assistance by e.g. thedriver not needing to depress the brake pedalat a traffic light, when starting up a hill orwhen driving down a hill. Depending on how the vehicle is equipped, the following brake assist functions may beincluded:
Auto-hold brake function at a standstill(Auto Hold)
Hill Start Assist (Hill Start Assist)
Braking assist after a collision
City Safety
Hill Descent Control (Hill Descent Control)
Related information
Brakes (p. 403)
Parking brake (p. 406)
Auto-hold brakes (p. 409)
Braking assist after a collision (p. 411)
Hill Start Assist (p. 411)
City Safety
™ (p. 331)
Hill Descent Control (p. 433)
Brakes
The brake pedal is used to apply the vehicle's regular brakes, which are part of the brakesystem.
The vehicle is equipped with two brake cir- cuits. If one brake circuit is damaged, thebrake pedal may go down further whendepressed. More pressure will then berequired from the driver for normal brakingeffect. The driver's pressure on the brake pedal is enhanced by a power braking function.
WARNING
Power braking only functions if the engine is running.
If the brake pedal is used when the engine is turned off, the pedal will feel stiffer than usualand greater pressure must be applied to brakethe vehicle. In very hilly areas or when driving with a heavy load, engine braking in manual gear should beused to augment the brakes. Engine braking ismost effective if the same gear is used bothuphill and downhill. Use the Off Road drivemode to increase the engine braking effectwhen driving on steep downgrades at lowspeeds.
Anti-lock brakesThe vehicle is equipped with an Anti-lock Braking System (ABS 2
), which helps prevent
the wheels from locking and helps maintain steering control when braking. Vibrations maybe felt from the brake pedal when ABS isoperating, which is normal. After the vehicle is started, a brief test of the ABS system is automatically performed whenthe driver releases the brake pedal. An addi-tional automatic test of the system may beperformed when the vehicle is traveling at alow speed. During the test, the brake pedalmay feel as though it is pulsating.
Page 408 of 683
STARTING AND DRIVING
406
Parking brake
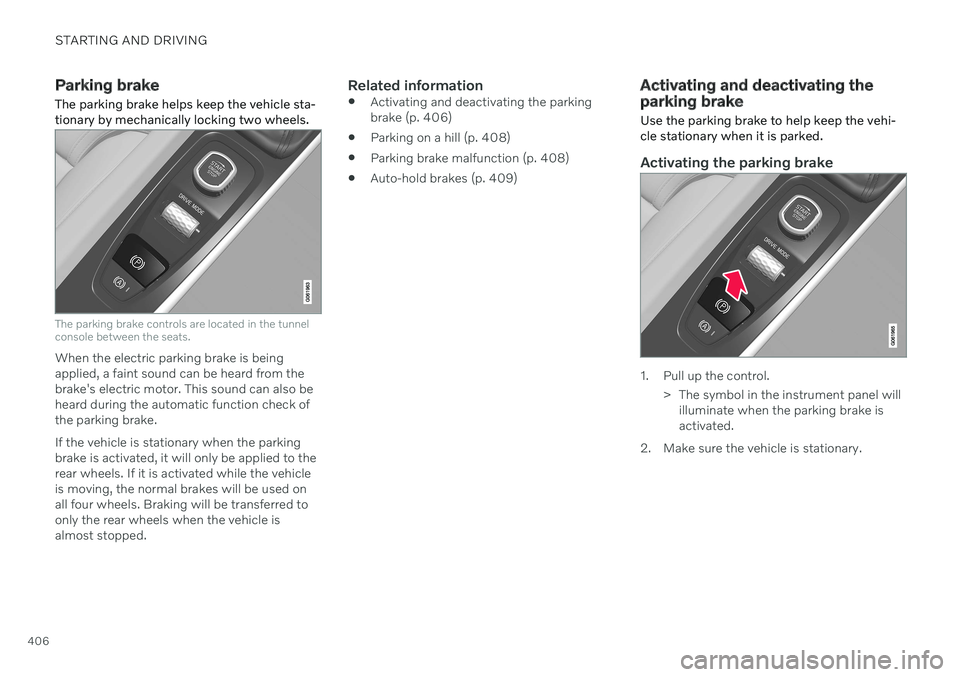
The parking brake helps keep the vehicle sta- tionary by mechanically locking two wheels.
The parking brake controls are located in the tunnel console between the seats.
When the electric parking brake is being applied, a faint sound can be heard from thebrake's electric motor. This sound can also beheard during the automatic function check ofthe parking brake. If the vehicle is stationary when the parking brake is activated, it will only be applied to therear wheels. If it is activated while the vehicleis moving, the normal brakes will be used onall four wheels. Braking will be transferred toonly the rear wheels when the vehicle isalmost stopped.
Related information
Activating and deactivating the parkingbrake (p. 406)
Parking on a hill (p. 408)
Parking brake malfunction (p. 408)
Auto-hold brakes (p. 409)
Activating and deactivating the parking brake
Use the parking brake to help keep the vehi- cle stationary when it is parked.
Activating the parking brake
1. Pull up the control.
> The symbol in the instrument panel willilluminate when the parking brake is activated.
2. Make sure the vehicle is stationary.
Page 410 of 683
STARTING AND DRIVING
408
Settings for automatically activating the parking brake Choose whether the parking brake should be activated automatically when the vehicle isswitched off.
To change this setting: 1.Tap
Settings in the center display's Top
view.
2. Tap
My CarParking Brake and
Suspension and select or deselect theAuto Activate Parking Brake function.
Related information
Activating and deactivating the parking brake (p. 406)
Parking brake (p. 406)
Parking on a hill
Always use the parking brake when parking on a hill.
WARNING
Always apply the parking brake when park- ing on an incline. Selecting a gear or put-ting the automatic transmission in P may
not be sufficient to keep the vehicle sta-tionary in all situations.
If the vehicle is pointing uphill:
Turn the front wheels so they are pointing away from
the curb.
If the vehicle is pointing downhill:
Turn the front wheels so they are pointingtoward
the curb.
Heavy load uphill
Heavy loads, such as a trailer, could cause the vehicle to roll backward when the parkingbrake is released automatically on steep uphillgradients. To help avoid this, pull the controlupward while you are driving away. Releasethe control when the vehicle gains traction.
Related information
Activating and deactivating the parkingbrake (p. 406)
Parking brake malfunction
If you are unable to deactivate or activate the parking brake after several attempts, contactan authorized Volvo workshop.
A audible warning signal will sound if the park- ing brake is activated while the vehicle isbeing driven. If the vehicle must be parked before the prob- lem is rectified, turn the wheels as when park-ing on an incline and put the gear selector inP .
Low battery charge levelIf the battery charge level is too low, it will notbe possible to activate or deactivate the park-ing brake. Connect an auxiliary battery to thevehicle if the battery is discharged.
Replacing brake padsDue to the design of the electric parkingbrake, the rear brake pads must be replacedby a workshop. An authorized Volvo workshopis recommended.
Page 414 of 683
STARTING AND DRIVING
* Option/accessory.
412
Transmission
The transmission is part of the vehicle's drive- line (power transmission) between the engineand the drive wheels. The function of thetransmission is to change gears dependingon speed and power needs.
The vehicle has an 8-speed automatic trans- mission. The number of gears allows theengine's torque and power band to be effec-tively utilized. Two of the gears are overdrive gears that save fuel when driving at a constant engine speed.Both the gear selector and the steering wheelpaddles can be used to shift up or down man-ually. The selected gear selector position willbe displayed in the instrument panel.
Related information
Automatic transmission (p. 412)
Automatic transmission
Gear position is selected automatically to make driving as energy efficient as possible.The transmission also has a manual mode.
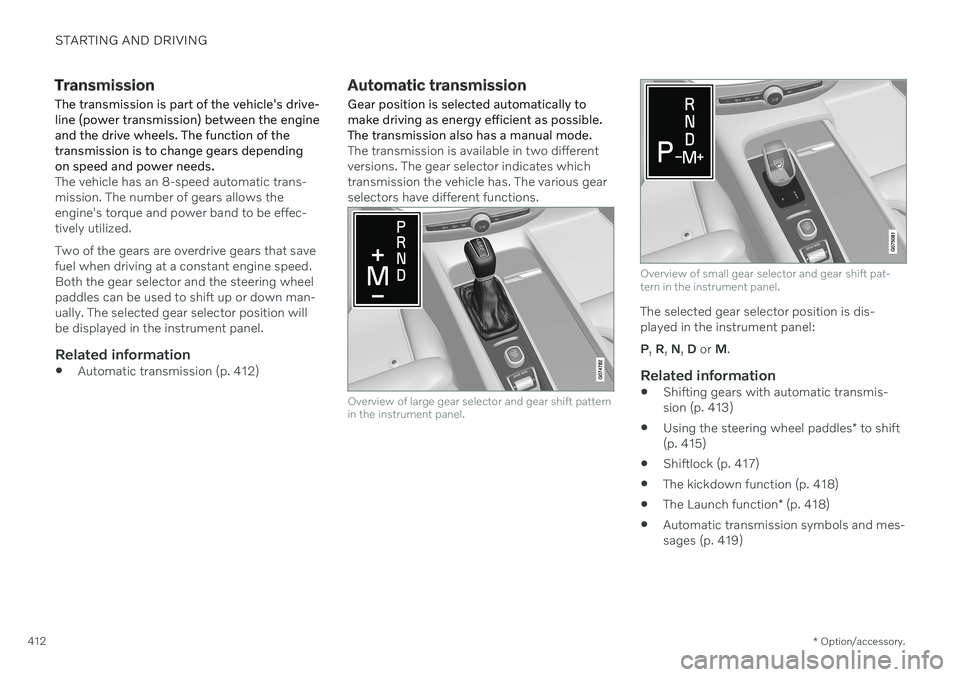
The transmission is available in two different versions. The gear selector indicates whichtransmission the vehicle has. The various gearselectors have different functions.
Overview of large gear selector and gear shift pattern in the instrument panel.
Overview of small gear selector and gear shift pat- tern in the instrument panel.
The selected gear selector position is dis- played in the instrument panel: P , R , N , D or M.
Related information
Shifting gears with automatic transmis- sion (p. 413)
Using the steering wheel paddles
* to shift
(p. 415)
Shiftlock (p. 417)
The kickdown function (p. 418)
The Launch function
* (p. 418)
Automatic transmission symbols and mes-sages (p. 419)
Page 417 of 683
STARTING AND DRIVING
}}
* Option/accessory.415
Push the gear selector to the right toward "
+ " (plus) and release to shift up one gear.
Push the gear selector to the left toward"
– " (minus) and release to shift down one
gear.
Push the gear selector rearward to returnto
D mode.
For smooth shifting and engine performance,the transmission will shift down automaticallyif the vehicle's speed becomes too low for theselected gear.
Related information
Automatic transmission (p. 412)
Shiftlock (p. 417)
Using the steering wheel paddles
* to shift
(p. 415)
The kickdown function (p. 418)
Using the steering wheel paddles
*
to shift
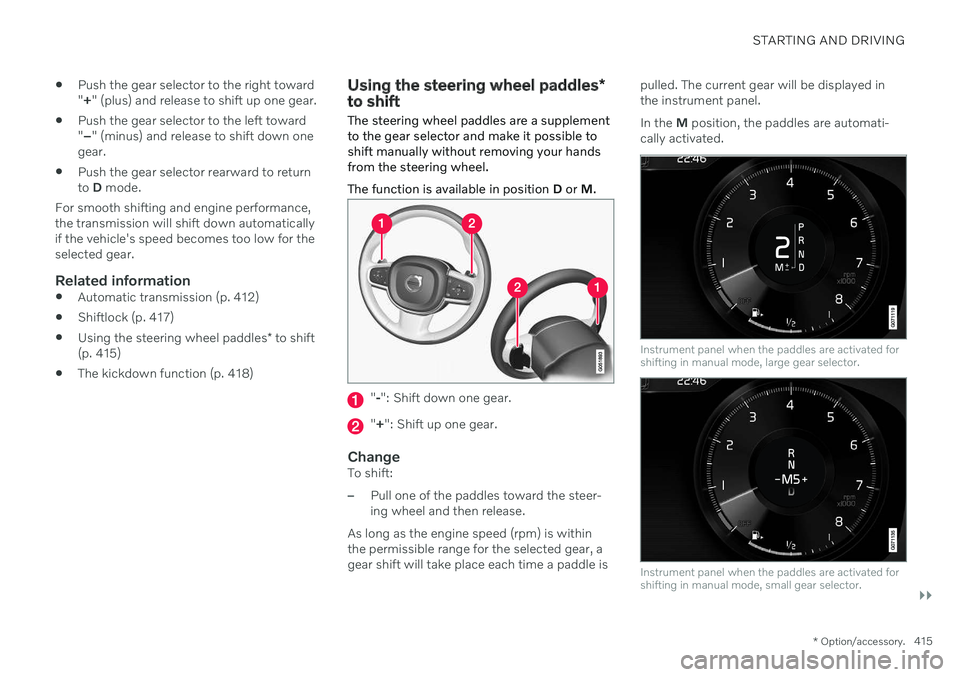
The steering wheel paddles are a supplement to the gear selector and make it possible toshift manually without removing your handsfrom the steering wheel. The function is available in position D or M.
"-": Shift down one gear.
" + ": Shift up one gear.
ChangeTo shift:
–Pull one of the paddles toward the steer- ing wheel and then release.
As long as the engine speed (rpm) is withinthe permissible range for the selected gear, agear shift will take place each time a paddle is pulled. The current gear will be displayed inthe instrument panel. In the
M position, the paddles are automati-
cally activated.
Instrument panel when the paddles are activated for shifting in manual mode, large gear selector.
Instrument panel when the paddles are activated for shifting in manual mode, small gear selector.