Page 145 of 502

Fault in wipers
The wipers do not wipe.
The indicator lamp lights up yellow.
Switch the ignition off and on.
If the problem persists, go to a qualified workshop.
Changes in the activation behaviour of the rain/light sensor
Possible causes for faults and misinterpretations relating to the sensitive surface of the rain/light
sensor ⇒ Vehicle overviews include:
Damaged wiper blades: a film of water or smears caused by damaged wiper blades can increase the
time the wipers are switched on, can shorten the length of the intervals between wipes or cause the
wipers to run quickly and continuously.
Insects: insects hitting the windscreen can cause the wipers to be activated.
Salt deposits: in winter, salt deposits can cause the wipers to continue to wipe the windscreen when
it is almost dry.
Dirt: dry dust, wax, windscreen coatings (lotus effect), or detergent deposits (from an automatic car
wash) can cause the rain/light sensor to become less sensitive and react too slowly, or prevent it
from reacting at all. Clean the sensitive surface of the rain/light sensor ⇒ Caring for and cleaning the
vehicle exterior at regular intervals and inspect the wiper blades for damage.
Crack in the windscreen: a wipe cycle will be triggered if the rain/light sensor is on when the
windscreen is impacted by a stone. The rain/light sensor will then register the impairment of the
sensitive surfaces and adjust accordingly. Depending on the size of the stone impact, the activation
behaviour of the rain/light sensor may be changed.
We recommend that you use an alcohol-based glass cleaner to remove wax and polish.
The wipers will try to wipe away any obstacles that are on the window. The wiper will stop moving if
the obstacle continues to block its path. Remove the obstacle and switch the wiper back on again.
Mirrors
Introduction
This chapter contains information on the followingsubjects:
⇒ Interior mirror
⇒ Exterior mirrors
You can use the exterior mirrors and the interior mirror to observe traffic behind you and adjust
your driving style accordingly.
Page 208 of 502

The steering assistance provided by the electromechanical steering system automatically adjusts to
the vehicle speed, steering wheel torque and steering wheel angle. The electromechanical steering
functions only when the engine is running.
You will need considerably more strength than normal to steer the vehicle if the power steering is
reduced or has failed completely.
Counter steering assistance
Counter steering assistance provides the driver with steering assistance in critical driving situations.
Additional steering forces assist the driver when counter steering ⇒ .
Progressive steering
Depending on the vehicle equipment level, progressive steering can adjust the steering response in a
driving situation. Progressive steering functions only when the engine is running.
In urban traffic, less steering input is required when parking, manoeuvring, or turning sharply.
When driving on country roads or on the motorway, the progressive steering provides a more
sporty, direct steering response, and a dynamic feel.
WARNING
If the power steering is not working, the steering wheel is difficult to turn, which makes it difficult to
steer the vehicle.
Depending on the vehicle equipment level, the power steering functions only when the engine is
running.
Never allow the vehicle to roll if the engine is switched off.
Never remove the vehicle key from the ignition if the vehicle is in motion. The steering column lock
may be activated and it will no longer be possible to steer the vehicle.
WARNING
In conjunction with the ESC, counter steering assistance provides the driver with assistance when
steering in critical driving situations. The driver must steer the vehicle at all times. Counter steering
assistance does not steer the vehicle.
NOTICE
When the vehicle is towed, the ignition must be switched on to prevent the steering wheel from
locking, and so that the turn signals, horn, wipers and window washer system can be used.
Troubleshooting
Steering requires increased force
Page 335 of 502

The content of the vehicle toolkit varies according to the vehicle equipment level ⇒ Fig. 162 . The
following describes the maximum scope.
Key to ⇒ Fig. 162 :
Screwdriver with hexagon socket in the handle for unscrewing or tightening slackened wheel
bolts. The screwdriver blade is reversible. The screwdriver may be stowed under the box spanner.
Adapter for the anti-theft wheel bolt. Volkswagen recommends that you carry the wheel bolt
adapter in the vehicle toolkit at all times. The code number of the anti-theft wheel bolt is engraved
on the front of the adapter. You will need this number to replace the adapter if lost. Make a note of
the code number for the anti-theft wheel bolt and keep it in a safe place – but not inside the vehicle.
Removable towing eye.
Wire hook for pulling off the centre wheel trims, wheel covers and the wheel bolt caps.
Vehicle jack. Before you repack the jack, you must fully wind in the claw.
Box spanner for wheel bolts.
Crank.
Vehicle jack: maintenance
There are no maintenance cycles for the vehicle jack. Grease it with universal lubricant when
necessary.
Wiper blades
Service position
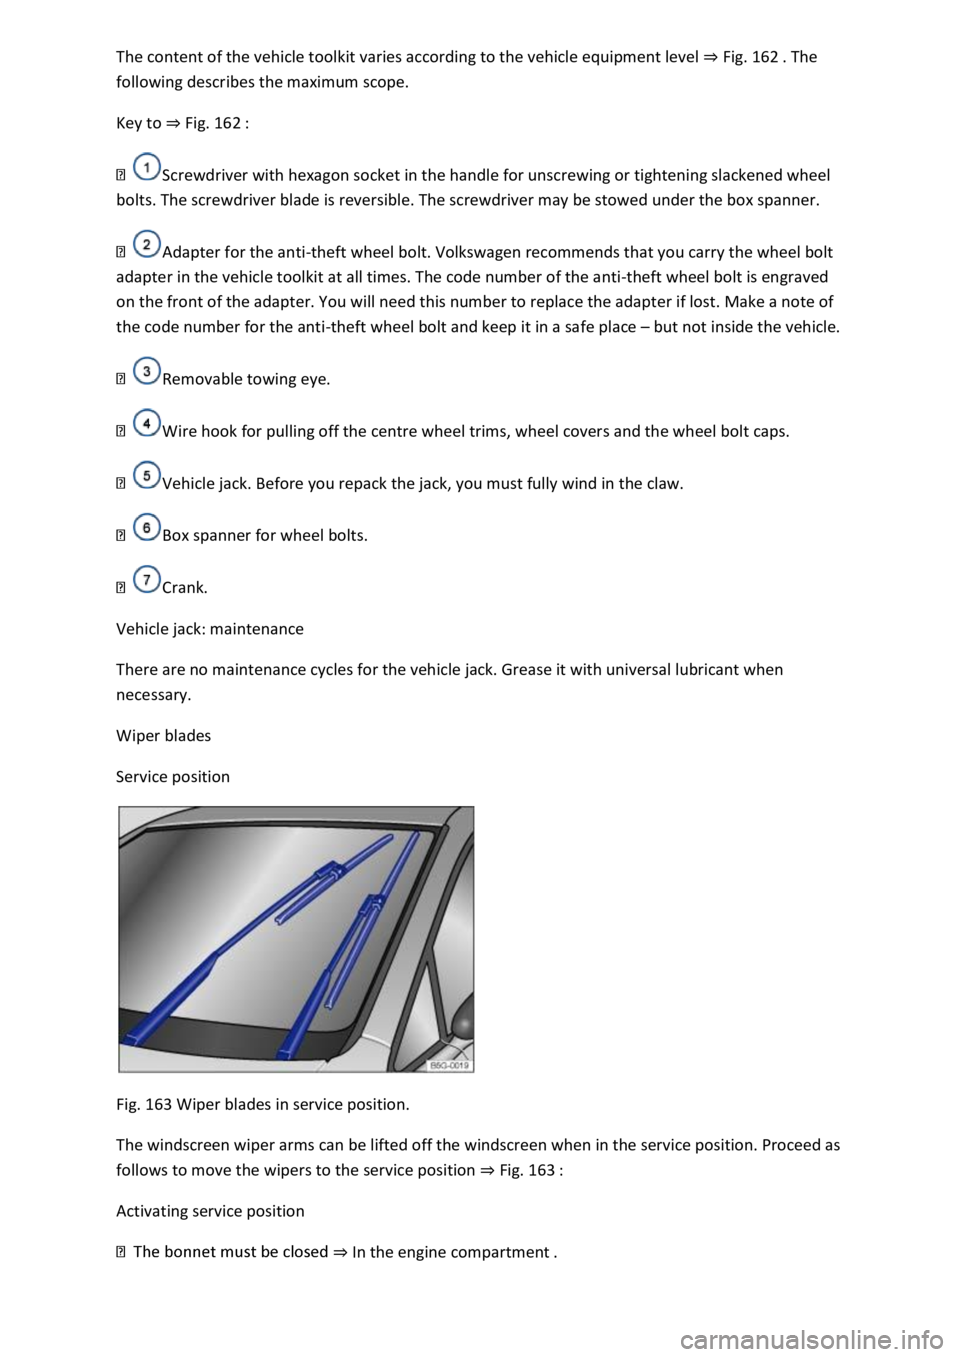
Fig. 163 Wiper blades in service position.
The windscreen wiper arms can be lifted off the windscreen when in the service position. Proceed as
follows to move the wipers to the service position ⇒ Fig. 163 :
Activating service position
⇒ In the engine compartment .
Page 337 of 502

Damaged wiper blades should be replaced immediately. Wiper blades are available from a qualified
workshop.
Cleaning wiper blades
Note for the front windscreen wipers: move the wiper arms to the service position before lifting
them ⇒ Service position .
only in the area of the wiper blade mounting.
⇒ .
Changing the windscreen wiper blades
fting ⇒ Service position .
⇒ Fig. 164 ① and simultaneously pull off the wiper blade in
the direction of the arrow.
r blade with the same length and design onto the wiper arm. Push it on until it
engages.
Changing the wiper blade for the rear window
iper blade mounting.
⇒ Fig. 165 ①.
⇒ Fig. 165 (arrow Ⓐ) and pull it off in the
direction of the arrow Ⓑ at the same time. You may need to use some force to do this.
direction of the arrow. Push it on until it engages ⇒ Fig. 165 Ⓑ. The wiper blade must be in the
folded back position ⇒ Fig. 165 (arrow Ⓐ).
WARNING
Worn or dirty wiper blades reduce visibility and increase the risk of accidents and serious injuries.
nd no longer clean the windows
properly.
Page 350 of 502

1) Note installation position. Factory-fitted fuse location as shown in illustration ⇒ Fig. 173 .
Fuse tables for fuses in the engine compartment
First read and observe the introductoryinformation and safety warnings⇒Introduction
The table shows the fuse locations of the electrical consumers relevant for the driver. The first
column in the table contains the location. The other columns contain the fuse type, the amp rating
and the consumer protected by the fuse.
Depending on the market and specification of your vehicle, the fuse numbers and positions may
differ to those given in the table. If necessary, ask your Volkswagen dealership for the exact fuse
assignment.
F65 amps, ATO®, brake light sensor.F1440 amps, JCASE®, windscreen heating.F1515 amps, ATO®,
horn.F1930 amps, ATO®, front wipers.F3720 amps, ATO®, auxiliary heater.
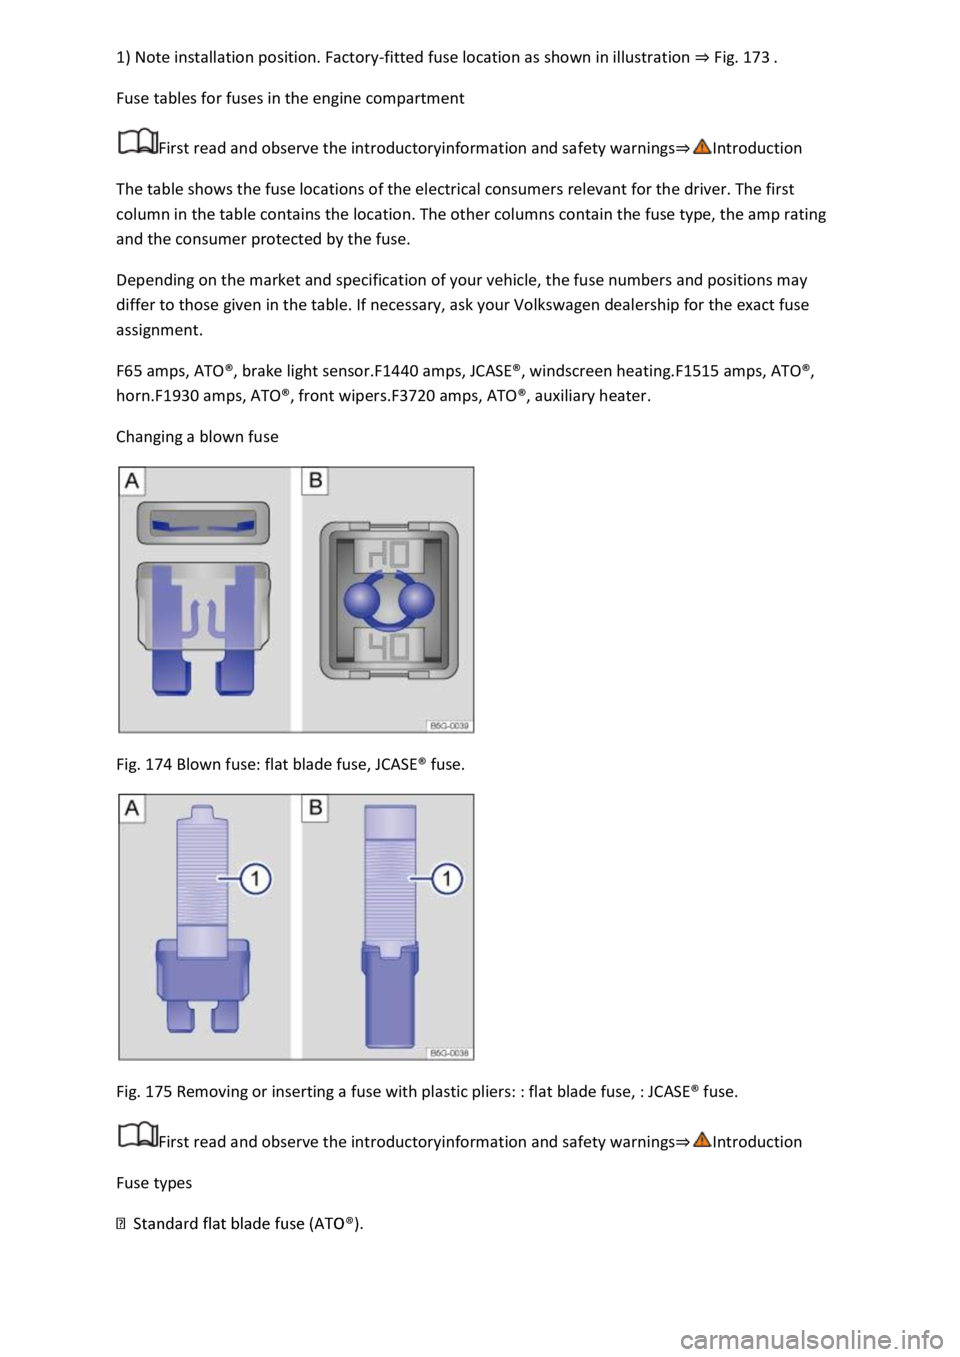
Changing a blown fuse
Fig. 174 Blown fuse: flat blade fuse, JCASE® fuse.
Fig. 175 Removing or inserting a fuse with plastic pliers: : flat blade fuse, : JCASE® fuse.
First read and observe the introductoryinformation and safety warnings⇒Introduction
Fuse types
Page 359 of 502
Vehicles with a manual gearbox:
Pulled vehicle (rear)
Ensure that the ignition is switched on so that the steering wheel is not locked and so that you can
indicate, sound the horn and operate the wipers if necessary.
the
ignition is switched on and the vehicle is rolling. Otherwise you must press the brake pedal with
significantly more force and also use more effort for steering.
-rope is always taut.
ox in neutral or select the selector lever position N.
Fitting the rear towing eye
Fig. 178 On the right-hand side of the rear bumper: removing the cover.
Fig. 179 On the right-hand side of the rear bumper: screwed-in towing eye.
First read and observe the introductoryinformation and safety warnings⇒Introduction
The towing eye must always be kept in the vehicle.
In vehicles with a factory-fitted towing bracket, there is no mounting for the screw-in towing eye
behind the cover. To tow, swivel out or fit and use the ball head ⇒ Trailer towing .