2021 TOYOTA PROACE CITY Rear door
[x] Cancel search: Rear doorPage 31 of 272
31
Access
2
► Insert the key in the door lock.► Turn the key towards the front/rear to unlock/lock the vehicle.► Turn the key rearwards again within 5 seconds to deadlock the vehicle.
NOTIC E
If the vehicle is fitted with an alarm, it will not be activated when locking with the key.
If the alarm is activated, the siren sounds when the door is opened; switch on the ignition to stop it.
Central locking not
functioning
Use these procedures in the following cases:– Central locking malfunction.– Battery disconnected or discharged.
WARNI NG
In the event of a malfunction of the central locking system, the battery must be disconnected to ensure that the vehicle is locked fully.
Locking part of the vehicle (front
passenger door/sliding side door/
side-hinged doors)
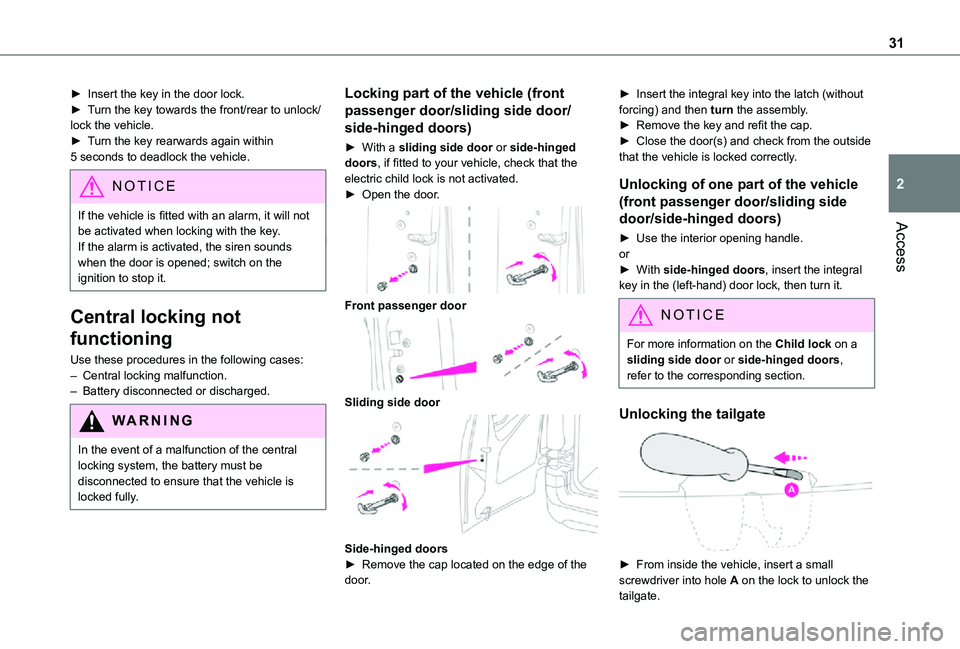
► With a sliding side door or side-hinged doors, if fitted to your vehicle, check that the electric child lock is not activated.► Open the door.
Front passenger door
Sliding side door
Side-hinged doors► Remove the cap located on the edge of the door.
► Insert the integral key into the latch (without forcing) and then turn the assembly.► Remove the key and refit the cap. ► Close the door(s) and check from the outside that the vehicle is locked correctly.
Unlocking of one part of the vehicle
(front passenger door/sliding side
door/side-hinged doors)
► Use the interior opening handle.or► With side-hinged doors, insert the integral key in the (left-hand) door lock, then turn it.
NOTIC E
For more information on the Child lock on a sliding side door or side-hinged doors, refer to the corresponding section.
Unlocking the tailgate
► From inside the vehicle, insert a small screwdriver into hole A on the lock to unlock the tailgate.
Page 36 of 272
36
General
recommendations for the
sliding side doors
WARNI NG
Doors must only be operated when the vehicle is stationary.For your safety and that of your passengers, as well as for correct operation of the doors, you are strongly advised not to drive with a door open.Always check that it is safe to operate the door and in particular, be sure not to leave children or animals near the door controls without supervision.An audible warning, "door open” warning lamp and onscreen message are there to remind you. Contact a TOYOTA dealer or a qualified workshop if you want to deactivate this warning.
Lock the vehicle when you use an automatic car wash.
WARNI NG
Before opening or closing and while moving doors, ensure that no person, animal or object is in the door frame or any other position that would block the desired movement, inside or outside the vehicle.If this advice is not followed, injuries or damage may occur if a person or an object is trapped or caught.
WARNI NG
Take care not to block the guide space on the floor, to allow the door to slide correctly.For safety and functional reasons, do not drive with the sliding side door open.
NOTIC E
To hold the sliding side door in the open position, open the door fully to engage the latch (located at the bottom of the door).
Doors and door clearances
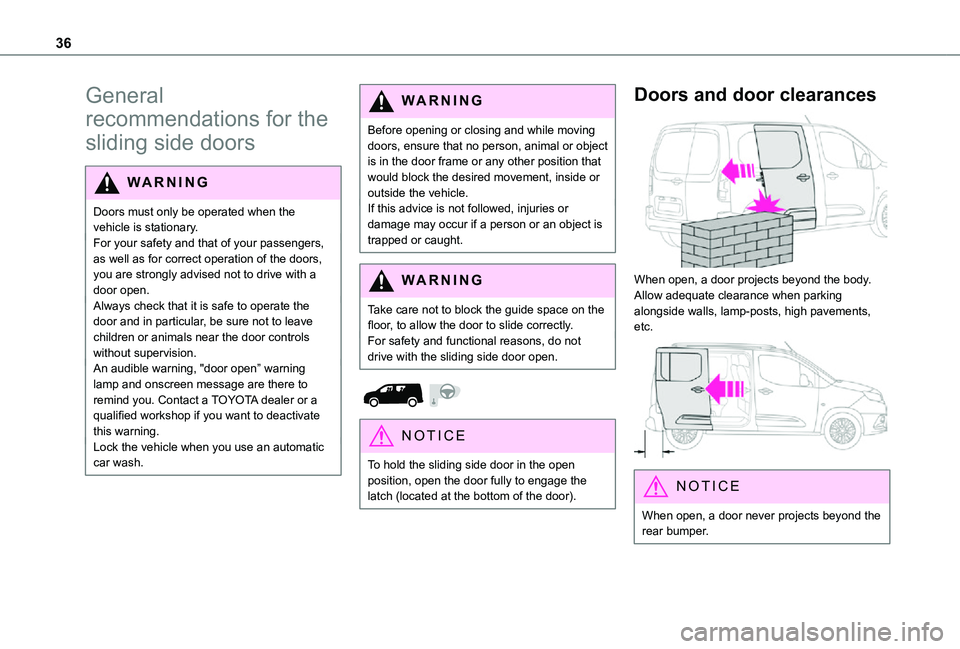
When open, a door projects beyond the body. Allow adequate clearance when parking alongside walls, lamp-posts, high pavements, etc.
NOTIC E
When open, a door never projects beyond the rear bumper.
Page 37 of 272
37
Access
2
On a steep slope
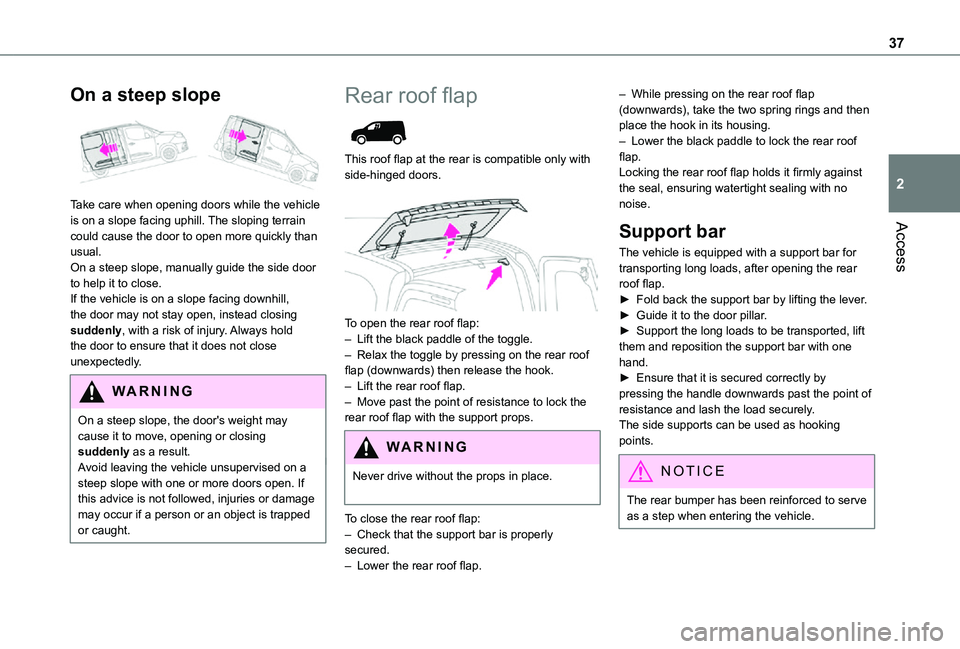
Take care when opening doors while the vehicle is on a slope facing uphill. The sloping terrain could cause the door to open more quickly than usual.On a steep slope, manually guide the side door to help it to close.If the vehicle is on a slope facing downhill, the door may not stay open, instead closing suddenly, with a risk of injury. Always hold the door to ensure that it does not close unexpectedly.
WARNI NG
On a steep slope, the door's weight may cause it to move, opening or closing suddenly as a result.Avoid leaving the vehicle unsupervised on a steep slope with one or more doors open. If this advice is not followed, injuries or damage may occur if a person or an object is trapped or caught.
Rear roof flap
This roof flap at the rear is compatible only with side-hinged doors.
To open the rear roof flap:– Lift the black paddle of the toggle.– Relax the toggle by pressing on the rear roof flap (downwards) then release the hook.– Lift the rear roof flap.– Move past the point of resistance to lock the rear roof flap with the support props.
WARNI NG
Never drive without the props in place.
To close the rear roof flap:– Check that the support bar is properly secured.– Lower the rear roof flap.
– While pressing on the rear roof flap (downwards), take the two spring rings and then place the hook in its housing.– Lower the black paddle to lock the rear roof flap.Locking the rear roof flap holds it firmly against the seal, ensuring watertight sealing with no noise.
Support bar
The vehicle is equipped with a support bar for transporting long loads, after opening the rear roof flap.► Fold back the support bar by lifting the lever.► Guide it to the door pillar.► Support the long loads to be transported, lift them and reposition the support bar with one hand.► Ensure that it is secured correctly by pressing the handle downwards past the point of resistance and lash the load securely.The side supports can be used as hooking points.
NOTIC E
The rear bumper has been reinforced to serve as a step when entering the vehicle.
Page 38 of 272
38
WARNI NG
Never fasten a load to the roof flap.
WARNI NG
Never drive without the support bar in place.The rear doors will only lock when the support
bar is installed.When the roof flap is open, take care when driving where height is restricted.Never rest loads directly on the rear doors.Comply with the usual indications for warning other drivers.Only use the roof flap on short trips.
Alarm
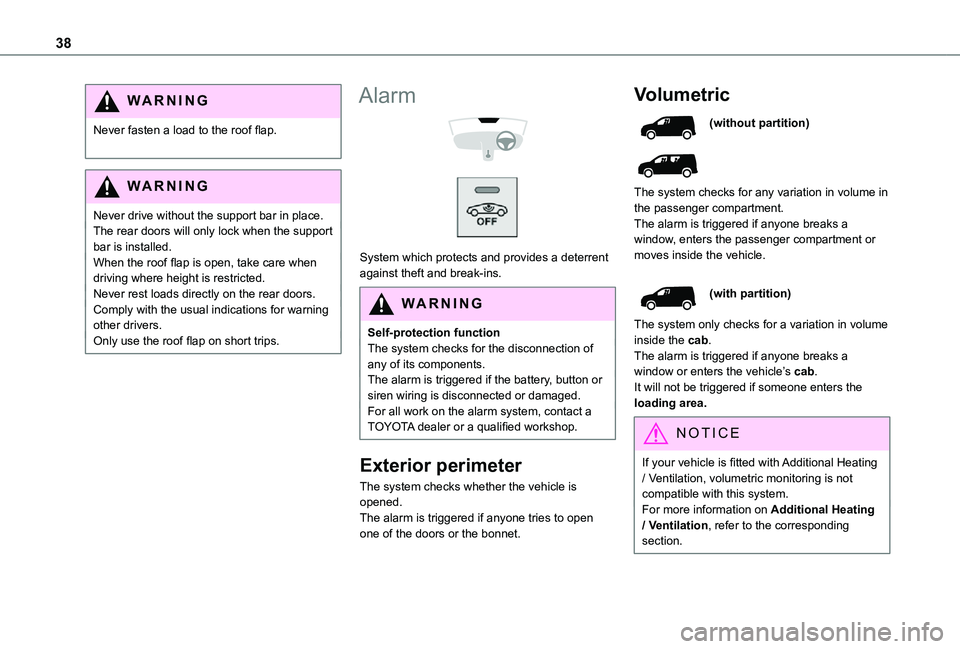
System which protects and provides a deterrent against theft and break-ins.
WARNI NG
Self-protection functionThe system checks for the disconnection of any of its components.The alarm is triggered if the battery, button or siren wiring is disconnected or damaged.For all work on the alarm system, contact a TOYOTA dealer or a qualified workshop.
Exterior perimeter
The system checks whether the vehicle is opened.The alarm is triggered if anyone tries to open one of the doors or the bonnet.
Volumetric
(without partition)
The system checks for any variation in volume in the passenger compartment.The alarm is triggered if anyone breaks a window, enters the passenger compartment or
moves inside the vehicle.
(with partition)
The system only checks for a variation in volume inside the cab.The alarm is triggered if anyone breaks a window or enters the vehicle’s cab.It will not be triggered if someone enters the loading area.
NOTIC E
If your vehicle is fitted with Additional Heating / Ventilation, volumetric monitoring is not compatible with this system.For more information on Additional Heating / Ventilation, refer to the corresponding section.
Page 41 of 272
41
Access
2
Anti-pinch
(Depending on version)If the window meets an obstacle while rising, it stops and immediately partially lowers again.
Reinitialisation
After reconnecting the battery, or in the event of an abnormal window movement, the anti-pinch function must be reinitialised.The anti-pinch function is disabled during the following sequence of operations.For each window:► Lower the window fully, then raise it; it will rise in steps of a few centimetres each time the control is pressed.► Repeat the operation until the window is fully closed.► Continue to pull the control upwards for at least one second after the window reaches the closed position.
WARNI NG
Always remove the key when leaving the vehicle, even for a short time.If an electric window meets an obstacle during operation, the movement of the window must be reversed. To do this, press the relevant switch. When the driver operates the passenger electric window switch, it is important to ensure that nothing can prevent the window from closing properly.Pay particular attention to children when operating windows.
Tilting rear door windows
Opening
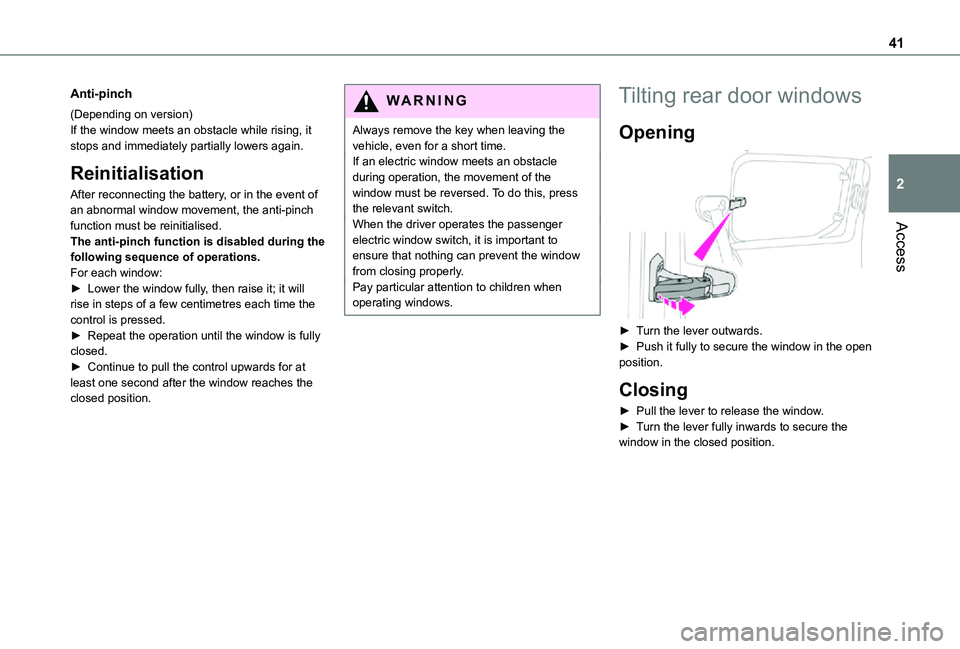
► Turn the lever outwards.► Push it fully to secure the window in the open position.
Closing
► Pull the lever to release the window.► Turn the lever fully inwards to secure the window in the closed position.
Page 42 of 272
42
General
recommendations for the
seats
WARNI NG
For safety reasons, seat adjustments must only be made when the vehicle is stationary.
WARNI NG
Folding or unfolding the seat backrests must only be done with the vehicle stationary.
WARNI NG
Before moving the seat backwards, ensure that there is no person or object that might prevent the full travel of the seat.There is a risk of trapping or pinching
passengers if present in the rear seats or of jamming the seat if large objects are placed on the floor behind the seat.
WARNI NG
Do not place hard or heavy objects on the backrests forming a table. They could become
dangerous projectiles in the event of sudden braking or a collision.– Do not remove a head restraint without stowing it; secure it to a support inside the vehicle.– Check that the seat belts remain accessible to the passenger and easy to fasten.– Passengers must never take their seat without adjusting and fastening their seat belt.
WARNI NG
Before carrying out the manoeuvres, check that nothing and no one is obstructing the moving elements and their locking.To avoid sudden folding, take care to hold the backrest and support it until it is horizontal.Never put your hand underneath the seat cushion to guide the seat downwards or upwards, you could get your fingers trapped. Place your hand on the grip/strap (depending on equipment) at the top of the seat cushion.
WARNI NG
Please note: an incorrectly latched backrest compromises the safety of passengers in the event of sudden braking or an impact.The contents of the boot may be thrown forward - risk of severe injury!
Front seats
Correct driving position
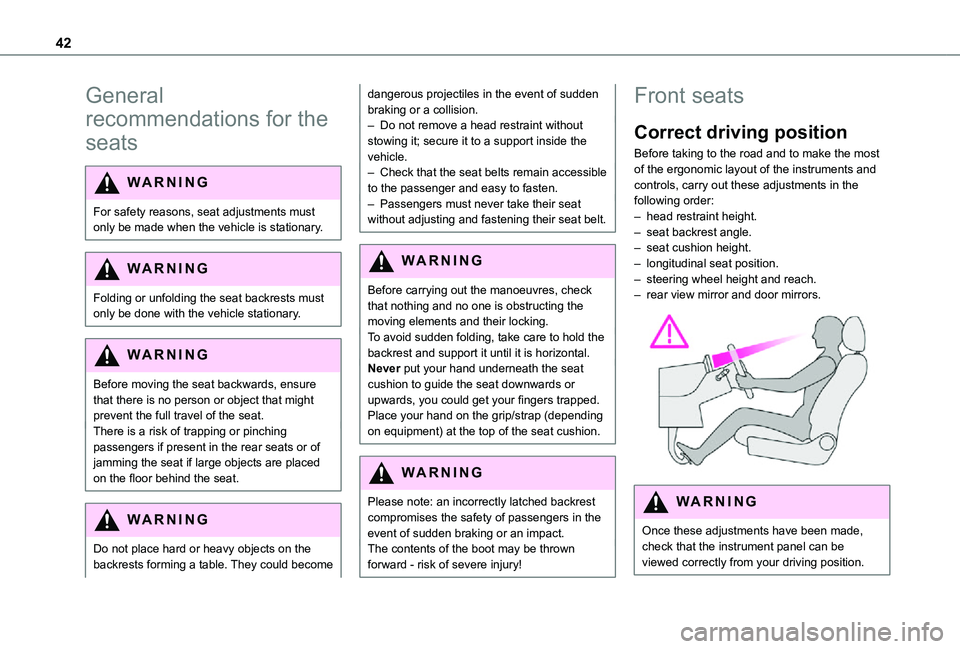
Before taking to the road and to make the most of the ergonomic layout of the instruments and controls, carry out these adjustments in the following order:– head restraint height.– seat backrest angle.– seat cushion height.– longitudinal seat position.– steering wheel height and reach.– rear view mirror and door mirrors.
WARNI NG
Once these adjustments have been made,
check that the instrument panel can be viewed correctly from your driving position.
Page 66 of 272
66
Rear screen and/or
door mirrors demisting
- defrosting
On/Off
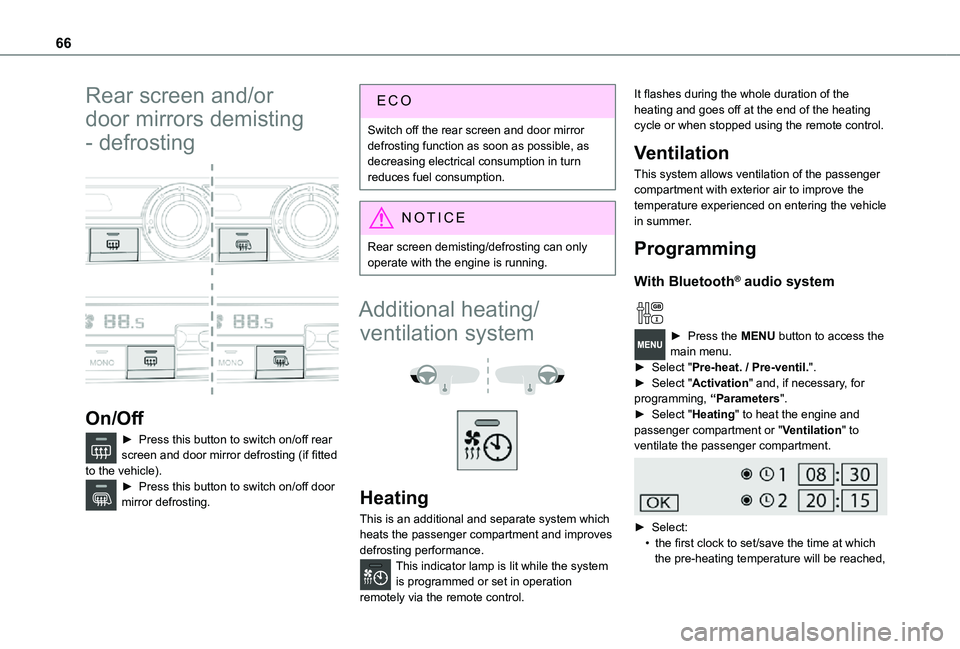
► Press this button to switch on/off rear screen and door mirror defrosting (if fitted to the vehicle).► Press this button to switch on/off door mirror defrosting.
Switch off the rear screen and door mirror defrosting function as soon as possible, as decreasing electrical consumption in turn reduces fuel consumption.
NOTIC E
Rear screen demisting/defrosting can only operate with the engine is running.
Additional heating/
ventilation system
Heating
This is an additional and separate system which heats the passenger compartment and improves defrosting performance.This indicator lamp is lit while the system is programmed or set in operation
remotely via the remote control.
It flashes during the whole duration of the heating and goes off at the end of the heating cycle or when stopped using the remote control.
Ventilation
This system allows ventilation of the passenger compartment with exterior air to improve the temperature experienced on entering the vehicle in summer.
Programming
With Bluetooth® audio system
► Press the MENU button to access the main menu. ► Select "Pre-heat. / Pre-ventil.".► Select "Activation" and, if necessary, for programming, “Parameters".► Select "Heating" to heat the engine and passenger compartment or "Ventilation" to
ventilate the passenger compartment.
► Select:• the first clock to set/save the time at which the pre-heating temperature will be reached,
Page 69 of 272
69
Ease of use and comfort
3
Courtesy lamp
Automatic switching on/off
The front courtesy lamp comes on when the key is removed from the ignition switch.All courtesy lamps come on when the vehicle is unlocked, when one of the corresponding doors is opened and when locating the vehicle using the remote control. They fade to off after the ignition is switched on and when the vehicle is locked.
WARNI NG
Take care not to allow objects to come into contact with the courtesy lamp.
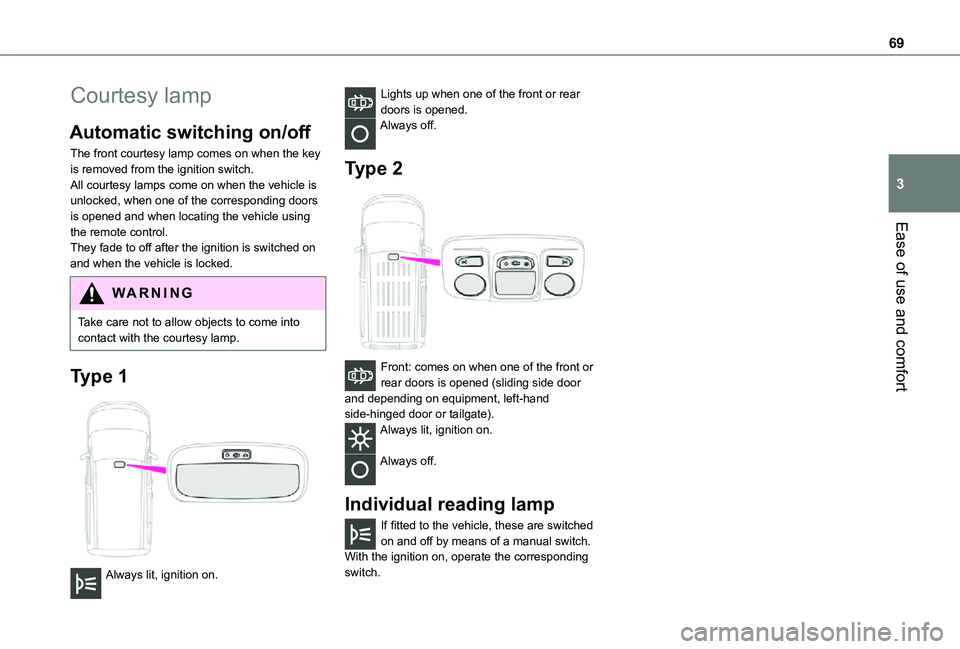
Type 1
Always lit, ignition on.
Lights up when one of the front or rear doors is opened.Always off.
Type 2
Front: comes on when one of the front or rear doors is opened (sliding side door and depending on equipment, left-hand side-hinged door or tailgate).Always lit, ignition on.
Always off.
Individual reading lamp
If fitted to the vehicle, these are switched on and off by means of a manual switch.With the ignition on, operate the corresponding switch.