2021 SUBARU CROSSTREK steering
[x] Cancel search: steeringPage 3 of 124

PURPOSE OF THIS GUIDE
WELCOME................. 4
IMPORTANT SAFETY
INFORMATION.............. 4
OWNER’S RESOURCES....... 4
IN CASE OF EMERGENCY..... 5
TOWING YOUR ALL-WHEEL
DRIVE SUBARU............. 6
ENTRY AND EXIT
KEYLESS ENTRY............ 7
KEYLESS ACCESS WITH PUSH
BUTTON START............. 8
INSTRUMENT PANEL........10
GETTING COMFORTABLE
SEATING...................12
TILT AND TELESCOPIC STEERING
COLUMN...................14
POWER EXTERIOR MIRRORS . . 14
REAR VIEW MIRROR.........15
POWER WINDOWS..........16
POWER MOONROOF........16
CLIMATE CONTROL..........17
ACCESSORY CONNECTIONS . . 20
CONTROLS
INSTRUMENT PANEL SWITCHES
(LOWER LEFT)..............21
AUDIO CONTROLS...........21CRUISE CONTROL...........22
ADVANCED ADAPTIVE CRUISE
CONTROL.................22
I/SET SWITCH...............23
INFO SWITCH...............23
LIGHT CONTROLS...........24
TURN SIGNALS.............25
WINDSHIELD WIPERS........25
REAR WINDOW WIPER.......26
OVERHEAD CONSOLE........26
GAUGES AND WARNING
LIGHTS
COMBINATION METER.......28
WARNING AND INDICATOR
LIGHTS....................29
OPERATING THE VEHICLE
IGNITION SWITCH...........30
PUSH-BUTTON IGNITION
SWITCH...................30
STARTING THE VEHICLE......30
DRIVING THE VEHICLE.......31
AUTO START–STOP.........33
X-MODE
®..................35
TURNING OFF THE VEHICLE...36
REFUELING
FUEL FILLER LID............37
FUEL......................37
FUEL CAPACITY.............37
TABLE OF CONTENTS
Page 4 of 124

PASSENGER/CARGO AREAS
FOLDING THE REAR SEATS...38
CHILD SAFETY LOCKS.......38
LATCH/ANCHOR............39
REAR SEAT REMINDER.......40
CARGO COVER.............40
SPARE TIRE AND JACK.......41
ENGINE COMPARTMENT
HOOD PROP................42
2.0L OR 2.5L ENGINE.........43
ADDITIONAL SPECIFICATIONS
NEW VEHICLE BREAK-IN......44
ENGINE OIL................44
ENGINE OIL CAPACITY.......44
ROOF RAIL CAPACITY........45
TRAILER TOWING CAPACITY . . 45
TIRE PRESSURE MONITORING
SYSTEM (TPMS).............46
STARLINK OVERVIEW
OVERVIEW OF YOUR MULTIMEDIA
SYSTEM...................47
BUTTONS..................48
TOUCHSCREEN.............50
STEERING WHEEL
CONTROLS.................51
VOICE RECOGNITION........52
STARLINK HOME
HOME SCREEN ICONS.......54
REARRANGING ICONS.......54
ADDING SHORTCUTS........55
DRIVER PROFILE
CREATING A DRIVER PROFILE . . 56
MULTIMEDIA
RADIO.....................58
MEDIA.....................59
PHONE
PAIRING A PHONE...........60
MAKING A CALL.............60
RECEIVING A CALL..........61
TEXT MESSAGES............62
APPS
SUBARU STARLINK®IN-VEHICLE
APPS......................63SUBARU STARLINK
®MOBILE
APP.......................65
MYSUBARU................67
MAPS (if equipped)
MAPS OVERVIEW............68
CREATING HOME AND WORK
PROFILES..................68
STARLINK SAFETY AND
SECURITY
SAFETY AND SECURITY
OVERVIEW.................69
ENROLLMENT..............70
MYSUBARU INTEGRATION....70
SUBARU STARLINK
®WI-FI
HOTSPOT..................71
SETTINGS AND UPDATES
SETTINGS AND UPDATES
OVERVIEW.................72
SOUND....................73
PHONE....................73
MAPS/NAVIGATION..........74
CLOCK....................76
EYESIGHT
EYESIGHT®OVERVIEW.......78
OPERATION................78
FUNCTIONS................79
STEERING WHEEL
CONTROLS.................85
LANE DEPARTURE WARNING AND
PRE-COLLISION BRAKING
SYSTEM OFF SWITCHES......86
DRIVER ASSIST
TECHNOLOGIES
REAR-VISION CAMERA.......87
BLIND-SPOT DETECTION (BSD)/
REAR CROSS-TRAFFIC ALERT
(RCTA)....................87
HIGH BEAM ASSIST (HBA)....88
STEERING RESPONSIVE
HEADLIGHTS (SRH)..........88
REVERSE AUTOMATIC BRAKING
(RAB).....................89
TABLE OF CONTENTS
2
Page 16 of 124

TILT AND TELESCOPIC STEERING COLUMN
You can adjust both the height
and lengthwise position of the
steering wheel. Pull the lever on
the side of the steering column
down firmly to unlock, then adjust
the position of the steering wheel.
Push the lever firmly back up to
lock the column in place.
POWER EXTERIOR MIRRORS
Turn the knob to “L” (left side) or “R” (right
side) to select a mirror. Push the knob in the
direction you want to move the mirror. Turn the
knob back to the center position when
finished.
Steering Column Unlock
Power Mirror Knob
GETTING COMFORTABLE
14
Page 22 of 124

ACCESSORY CONNECTIONS
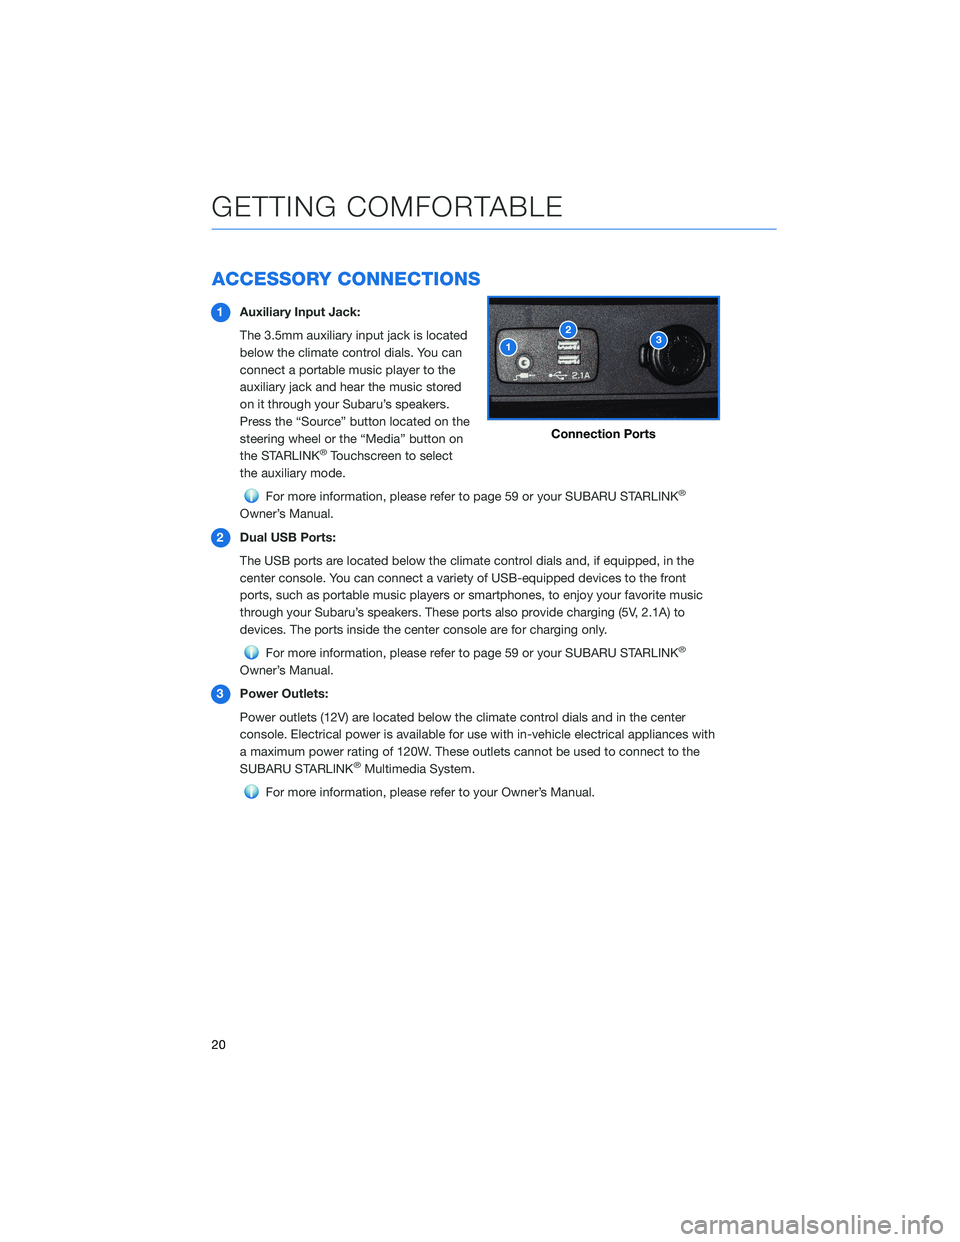
1Auxiliary Input Jack:
The 3.5mm auxiliary input jack is located
below the climate control dials. You can
connect a portable music player to the
auxiliary jack and hear the music stored
on it through your Subaru’s speakers.
Press the “Source” button located on the
steering wheel or the “Media” button on
the STARLINK
®Touchscreen to select
the auxiliary mode.
For more information, please refer to page 59 or your SUBARU STARLINK®
Owner’s Manual.
2Dual USB Ports:
The USB ports are located below the climate control dials and, if equipped, in the
center console. You can connect a variety of USB-equipped devices to the front
ports, such as portable music players or smartphones, to enjoy your favorite music
through your Subaru’s speakers. These ports also provide charging (5V, 2.1A) to
devices. The ports inside the center console are for charging only.
For more information, please refer to page 59 or your SUBARU STARLINK®
Owner’s Manual.
3Power Outlets:
Power outlets (12V) are located below the climate control dials and in the center
console. Electrical power is available for use with in-vehicle electrical appliances with
a maximum power rating of 120W. These outlets cannot be used to connect to the
SUBARU STARLINK
®Multimedia System.
For more information, please refer to your Owner’s Manual.
Connection Ports
GETTING COMFORTABLE
20
Page 23 of 124

INSTRUMENT PANEL SWITCHES (LOWER LEFT)
The switches in the lower left of the instrument panel allow you to control several
convenient and important features. Knowing their location and function will improve your
driving experience.
1Steering Responsive
Headlights OFF (if equipped)
(see p. 88)
2Illumination Brightness
(see p. 24)
3Vehicle Dynamics Control
OFF
4Auto Start-Stop OFF (if
equipped) (see p. 33)
5Blind Spot Detection/Rear
Cross Traffic Alert OFF (if
equipped) (see p. 87)
For more information, please refer to your EyeSight®and vehicle Owner’s Manuals.
AUDIO CONTROLS
1Presets/Skip
2Volume
3Source
4INFO
5Call/Voice Recognition
For more information about your audio
system and controls, please refer to page 51
or the SUBARU STARLINK
®Owner’s Manual.
CONTROLS
21
Page 33 of 124

DRIVING THE VEHICLE
6-Speed Manual Transmission
The manual transmission is a fully synchronised 6-forward and 1-reverse speed
transmission. To shift into reverse gear, raise and hold the slider ring, shift to the “R”
position, and release the slider ring. Only pull the slider ring up when shifting into reverse
gear.
Automatic Transmission Shift Mode
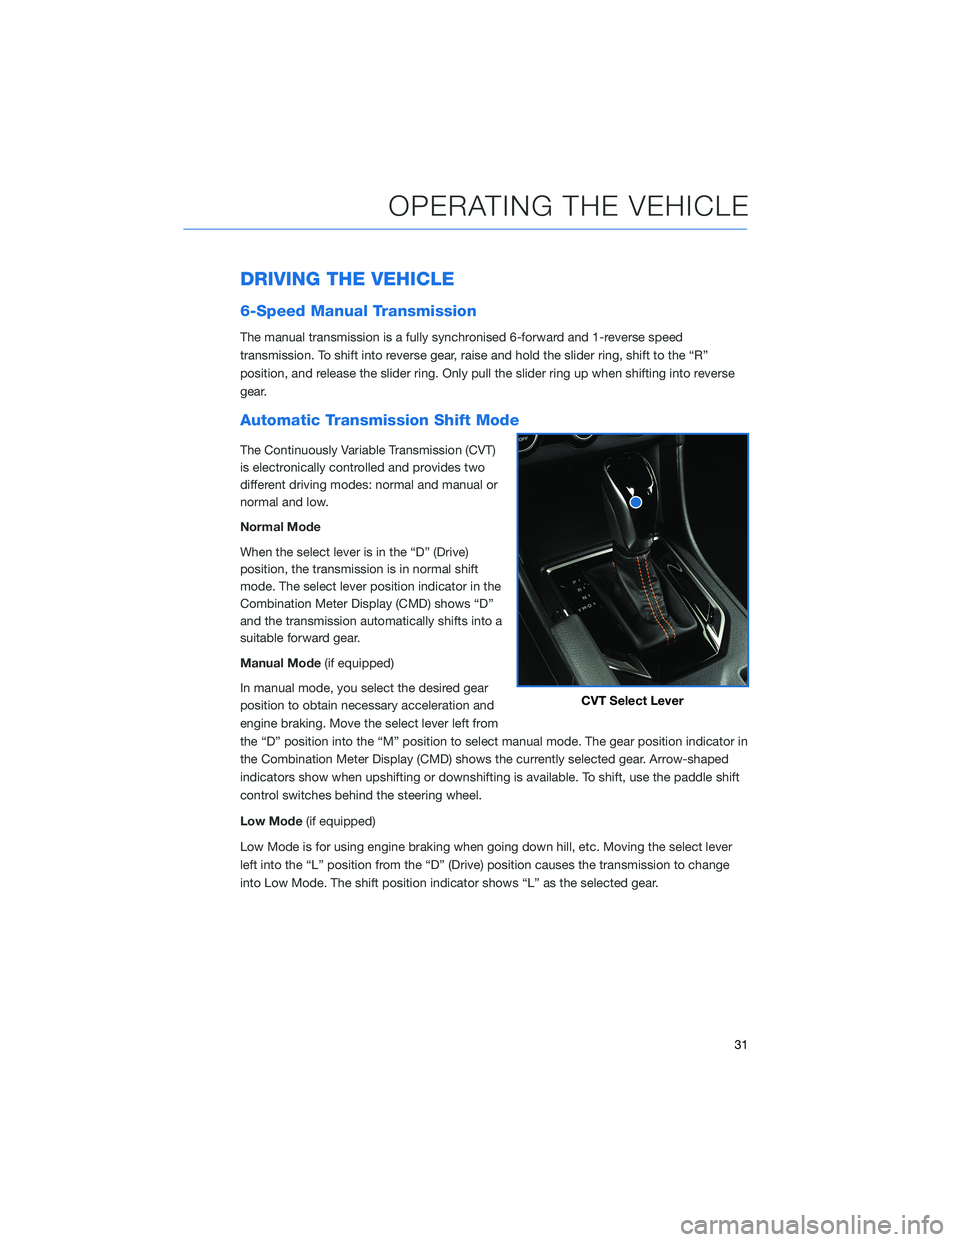
The Continuously Variable Transmission (CVT)
is electronically controlled and provides two
different driving modes: normal and manual or
normal and low.
Normal Mode
When the select lever is in the “D” (Drive)
position, the transmission is in normal shift
mode. The select lever position indicator in the
Combination Meter Display (CMD) shows “D”
and the transmission automatically shifts into a
suitable forward gear.
Manual Mode(if equipped)
In manual mode, you select the desired gear
position to obtain necessary acceleration and
engine braking. Move the select lever left from
the “D” position into the “M” position to select manual mode. The gear position indicator in
the Combination Meter Display (CMD) shows the currently selected gear. Arrow-shaped
indicators show when upshifting or downshifting is available. To shift, use the paddle shift
control switches behind the steering wheel.
Low Mode(if equipped)
Low Mode is for using engine braking when going down hill, etc. Moving the select lever
left into the “L” position from the “D” (Drive) position causes the transmission to change
into Low Mode. The shift position indicator shows “L” as the selected gear.
CVT Select Lever
OPERATING THE VEHICLE
31
Page 37 of 124

X-MODE®(if equipped)
X-MODE®is the integrated control system of the
engine, All Wheel Drive, and Vehicle Dynamics Control
(VDC) systems for driving with bad road conditions.
Using X-MODE
®, you can drive more comfortably
even in slippery road conditions,
such as mud or snow, including
uphill and downhill. You can
activate the system when the
vehicle speed is less than
12 mph. If the vehicle speed
reaches 25 mph, the X-MODE
®
system is canceled and can be
reactivated once the once the
vehicle speed is lower.
X-MODE®Standard System
To activate the X-MODE®system, press the X-MODE®switch. While the system is active, the
X-MODE®indicator appears, and the Multi-Function Display shows steering direction, vehicle
angle, and power distribution. To deactivate X-MODE®press the X-MODE®switch again.
In certain situations, such as navigating a vehicle stuck in mud or snow, it may be helpful
to allow more wheel spin by turning off the VDC system. To turn off the VDC system, push
the Vehicle Dynamics Control OFF switch located on the lower left console. Push the
Vehicle Dynamics Control OFF switch again to reactivate the VDC system.
X-MODE®Dual Mode System (Sport)
To activate the X-MODE®system, press the X-MODE®switch once to select SNOW/DIRT
and again to select D. SNOW/MUD. While the system is active, the X-MODE®indicator
appears, and the Multi-Function Display shows steering direction, vehicle angle, and
power distribution. To deactivate X-MODE
®, press the X-MODE®switch a third time.
• SNOW/DIRT is suitable for driving on slippery road surfaces such as snow or gravel,
where the points of contact between the tires and road surface are visible.
• D.SNOW/MUD provides maximum torque from the engine and the optimal amount of
slip in the driving wheels, enabling the vehicle to free itself more effectively. It is suitable
for driving on a roads where the tires can become buried, such as deep snow, dry sand,
or muddy roads.
MFD X-MODE Display
X-MODE Switch
OPERATING THE VEHICLE
35
Page 53 of 124

STEERING WHEEL CONTROLS
1Presets/Skip:Press to toggle through
your preset radio stations or change a
track/media file. Press and hold to scan
radio stations or fast-forward/rewind
media files.
2Volume:Push the switch up/down to
increase/decrease volume.
3Source:Press the source button to
change the audio sources between radio
modes and media modes.
4INFO:Press to operate the Multi Function
Display.
5Call/Voice Recognition:Press to
receive/end a call without taking your
hands off the steering wheel. Press the talk button to start voice recognition. If
connected to an iPhone, press and hold the talk button to initiate Siri.
Starlink Audio Controls
STARLINK OVERVIEW
51