2021 Peugeot Landtrek gearbox
[x] Cancel search: gearboxPage 74 of 176
72
Driving
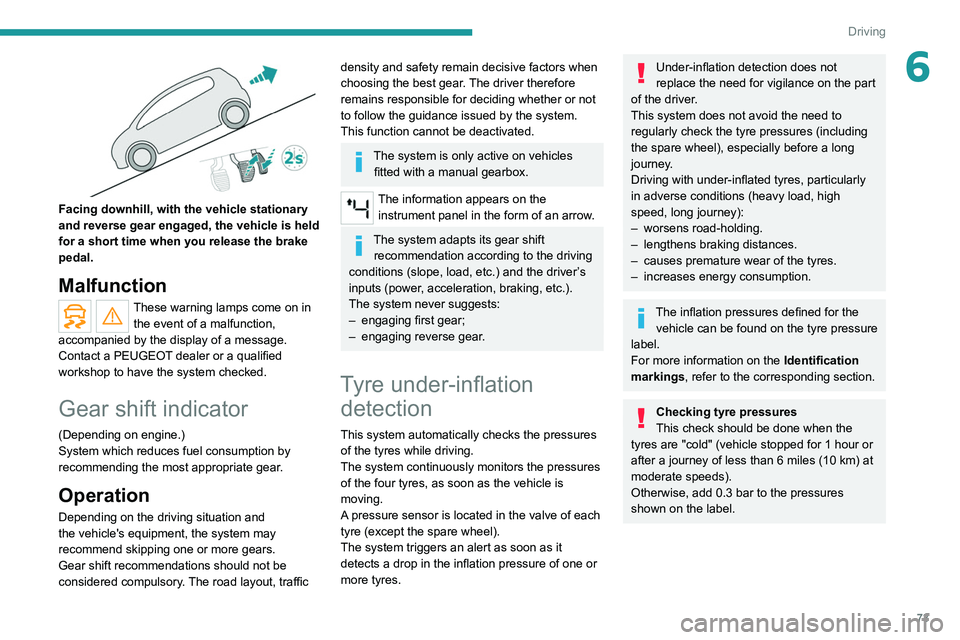
Facing downhill, with the vehicle stationary
and reverse gear engaged, the vehicle is held
for a short time when you release the brake
pedal.
Malfunction
These warning lamps come on in the event of a malfunction,
accompanied by the display of a message.
Contact a PEUGEOT dealer or a qualified
workshop to have the system checked.
Gear shift indicator
(Depending on engine.)
System which reduces fuel consumption by
recommending the most appropriate gear.
Operation
Depending on the driving situation and
the vehicle's equipment, the system may
recommend skipping one or more gears.
Gear shift recommendations should not be
considered compulsory. The road layout, traffic
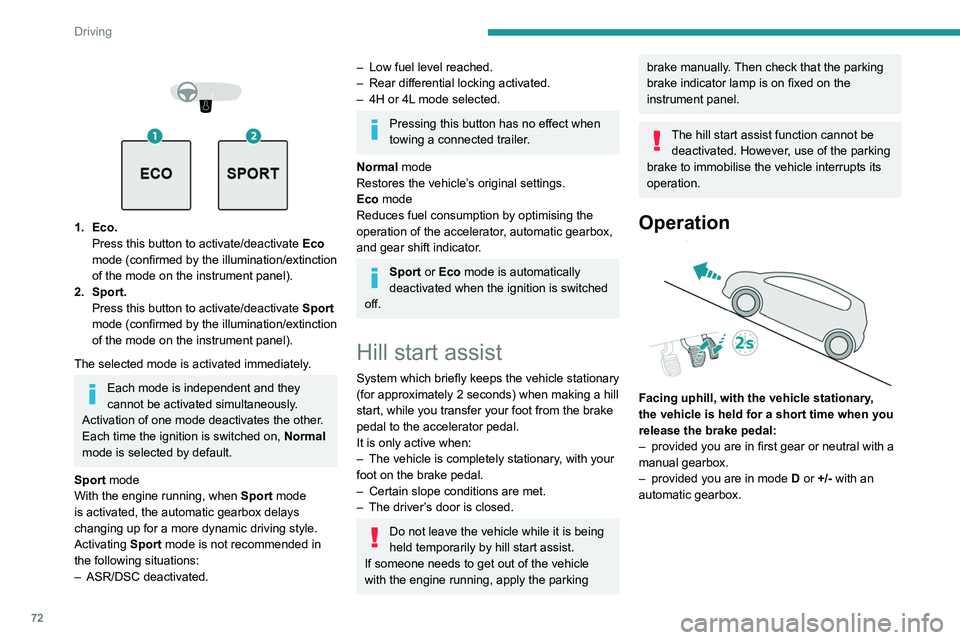
1. Eco. Press this button to activate/deactivate Eco
mode (confirmed by the illumination/extinction
of the mode on the instrument panel).
2. Sport. Press this button to activate/deactivate
Sport
mode (confirmed by the illumination/extinction
of the mode on
the instrument panel).
The selected mode is activated immediately.
Each mode is independent and they
cannot be activated simultaneously.
Activation of one mode deactivates the other.
Each time the ignition is switched on, Normal
mode is selected by default.
Sport mode
With the engine running, when
Sport
mode
is activated, the automatic gearbox delays
changing up for a more dynamic driving style.
Activating
Sport mode is not recommended in
the following situations:
–
ASR/DSC deactivated.
– Low fuel level reached.
– Rear differential locking activated.
–
4H or 4L
mode selected.
Pressing this button has no effect when
towing a connected trailer.
Normal mode
Restores the vehicle’s original settings.
Eco mode
Reduces fuel consumption by optimising the
operation of the accelerator, automatic gearbox,
and gear shift indicator.
Sport or Eco mode is automatically
deactivated when the ignition is switched
off.
Hill start assist
System which briefly keeps the vehicle stationary
(for approximately 2 seconds) when making a hill
start, while you transfer your foot from the brake
pedal to the accelerator pedal.
It is only active when:
–
The vehicle is completely stationary
, with your
foot on the brake pedal.
–
Certain slope conditions are met.
–
The driver
’s door is closed.
Do not leave the vehicle while it is being
held temporarily by hill start assist.
If someone needs to get out of the vehicle
with the engine running, apply the parking
brake manually. Then check that the parking
brake indicator lamp is on fixed on the
instrument panel.
The hill start assist function cannot be deactivated. However, use of the parking
brake to immobilise the vehicle interrupts its
operation.
Operation
Facing uphill, with the vehicle stationary,
the vehicle is held for a short time when you
release the brake pedal:
–
provided you are in first gear or neutral with a
manual gearbox.
–
provided you are in mode D
or +/- with an
automatic gearbox.
Page 75 of 176
73
Driving
6
Facing downhill, with the vehicle stationary
and reverse gear engaged, the vehicle is held
for a short time when you release the brake
pedal.
Malfunction
These warning lamps come on in the event of a malfunction,
accompanied by the display of a message.
Contact a PEUGEOT dealer or a qualified
workshop to have the system checked.
Gear shift indicator
(Depending on engine.)
System which reduces fuel consumption by
recommending the most appropriate gear.
Operation
Depending on the driving situation and
the vehicle's equipment, the system may
recommend skipping one or more gears.
Gear shift recommendations should not be
considered compulsory. The road layout, traffic
density and safety remain decisive factors when
choosing the best gear. The driver therefore
remains responsible for deciding whether or not
to follow the guidance issued by the system.
This function cannot be deactivated.
The system is only active on vehicles fitted with a manual gearbox.
The information appears on the instrument panel in the form of an arrow.
The system adapts its gear shift recommendation according to the driving
conditions (slope, load, etc.) and the driver’s
inputs (power, acceleration, braking, etc.).
The system never suggests:
–
engaging first gear;
–
engaging reverse gear
.
Tyre under-inflation detection
This system automatically checks the pressures
of the tyres while driving.
The system continuously monitors the pressures
of the four tyres, as soon as the vehicle is
moving.
A pressure sensor is located in the valve of each
tyre (except the spare wheel).
The system triggers an alert as soon as it
detects a drop in the inflation pressure of one or
more tyres.
Under-inflation detection does not
replace the need for vigilance on the part
of the driver.
This system does not avoid the need to
regularly check the tyre pressures (including
the spare wheel), especially before a long
journey.
Driving with under-inflated tyres, particularly
in adverse conditions (heavy load, high
speed, long journey):
–
worsens road-holding.
–
lengthens braking distances.
–
causes premature wear of the tyres.
–
increases energy consumption.
The inflation pressures defined for the vehicle can be found on the tyre pressure
label.
For more information on the Identification
markings, refer to the corresponding section.
Checking tyre pressures
This check should be done when the
tyres are "cold" (vehicle stopped for 1 hour or
after a journey of less than 6 miles (10
km) at
moderate speeds).
Otherwise, add 0.3 bar to the pressures
shown on the label.
Page 79 of 176
77
Driving
6To return to the speed setting, release the
accelerator pedal (when the set speed is
reached again, the displayed speed stops
flashing).
Operating limits
Never use the system in the following
situations:
–
In an urban area with the risk of
pedestrians crossing the road.
–
In heavy traffic.
–
On winding or steep roads.
–
On slippery or flooded roads.
–
In poor weather conditions.
–
Driving on a speed circuit.
–
Driving on a rolling road.
–
When using snow chains, non-slip covers
or studded tyres.
Cruise control
Refer to the General recommendations on the
use of driving and manoeuvring aids and to
Cruise control - particular recommendations.
This system automatically keeps the vehicle’s speed at the cruise value
programmed by the driver (speed setting),
without using the accelerator pedal.
Cruise control is switched on manually.
It requires a minimum vehicle speed of 25 mph
(40
km/h).
With a manual gearbox, third gear or higher must
be engaged.
With an automatic gearbox, mode
D
or second
gear or higher in manual mode must be
engaged.
Switching off the ignition cancels any
speed setting.
Steering-mounted control
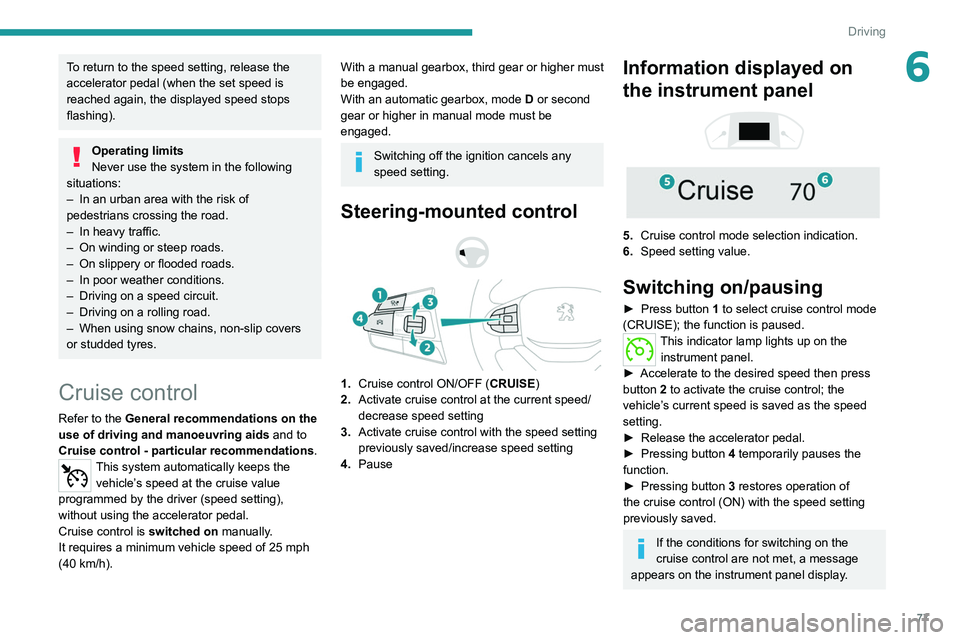
1. Cruise control ON/OFF (CRUISE)
2. Activate cruise control at the current speed/
decrease speed setting
3. Activate cruise control with the speed setting
previously saved/increase speed setting
4. Pause
Information displayed on
the instrument panel
5. Cruise control mode selection indication.
6. Speed setting value.
Switching on/pausing
► Press button 1 to select cruise control mode
(CRUISE); the function is paused.
This indicator lamp lights up on the instrument panel.
►
Accelerate to the desired speed then press
button
2 to activate the cruise control; the
vehicle’s current speed is saved as the speed
setting.
►
Release the accelerator pedal.
►
Pressing button 4
temporarily pauses the
function.
►
Pressing button 3
restores operation of
the cruise control (ON) with the speed setting
previously saved.
If the conditions for switching on the
cruise control are not met, a message
appears on the instrument panel display.
Page 80 of 176
78
Driving
Driving situations and related alerts
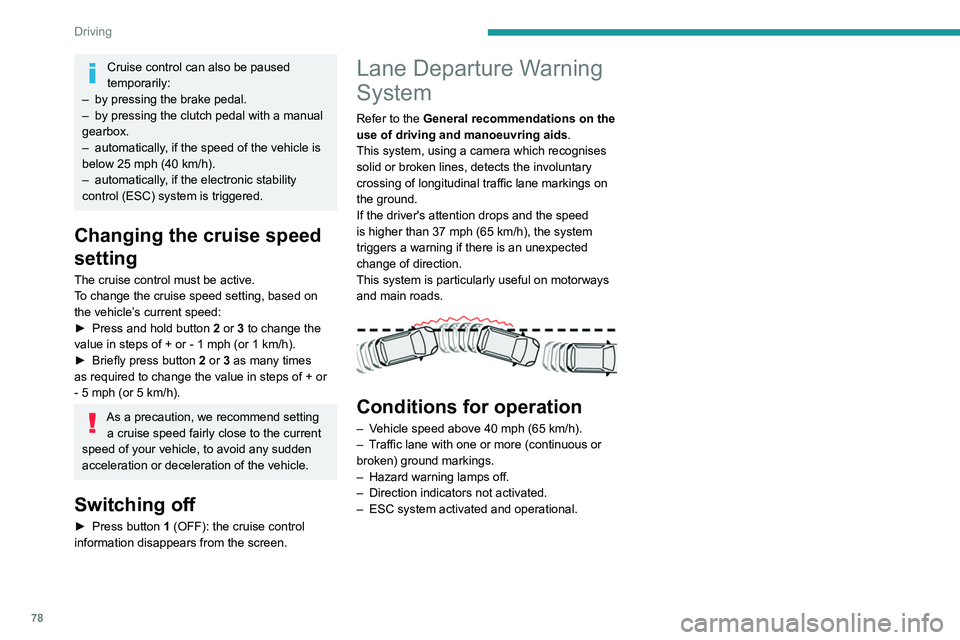
The table below describes the alerts displayed in different driving situations.
These alerts are not displayed sequentially.Function status SymbolDisplayComments
OFF
Function deactivated.
ON
(white)
System active, conditions not met:
– speed below 40 mph (65 km/h),
– no lane marking recognised,
– ASR/DSC systems deactivated or operation of ESC
system triggered,
– "sport" driving.
ON
(green)
(white) Lane marking detection.
Speed above 40 mph (65 km/h).
ON
(green)
(white)/(red)
Lane departure detection (broken red line and audible
alert).
Operating limits
The system goes into standby automatically in
the following cases:
–
ESC deactivated or operation triggered.
– Speed below 40 mph (65 km/h).
– Driving where there are no lane markings.
– Activation of the direction indicators.
Cruise control can also be paused
temporarily:
–
by pressing the brake pedal.
–
by pressing the clutch pedal with a manual
gearbox.
–
automatically
, if the speed of the vehicle is
below 25 mph (40
km/h).
–
automatically
, if the electronic stability
control (ESC) system is triggered.
Changing the cruise speed
setting
The cruise control must be active.
To change the cruise speed setting, based on
the vehicle’s current speed:
►
Press and hold button
2
or 3 to change the
value in steps of +
or - 1 mph (or 1 km/h).
►
Briefly press button
2 or 3 as many times
as required to change the value in steps of +
or
-
5 mph (or 5 km/h).
As a precaution, we recommend setting a cruise speed fairly close to the current
speed of your vehicle, to avoid any sudden
acceleration or deceleration of the vehicle.
Switching off
► Press button 1 (OFF): the cruise control
information disappears from the screen.
Lane Departure Warning
System
Refer to the General recommendations on the
use of driving and manoeuvring aids .
This system, using a camera which recognises
solid or broken lines, detects the involuntary
crossing of longitudinal traffic lane markings on
the ground.
If the driver's attention drops and the speed
is higher than 37 mph (65
km/h), the system
triggers a warning if there is an unexpected
change of direction.
This system is particularly useful on motorways
and main roads.
Conditions for operation
– Vehicle speed above 40 mph (65 km/h).
– T raffic lane with one or more (continuous or
broken) ground markings.
–
Hazard warning lamps off.
–
Direction indicators not activated.
–
ESC system activated and operational.
Page 85 of 176
83
Driving
6
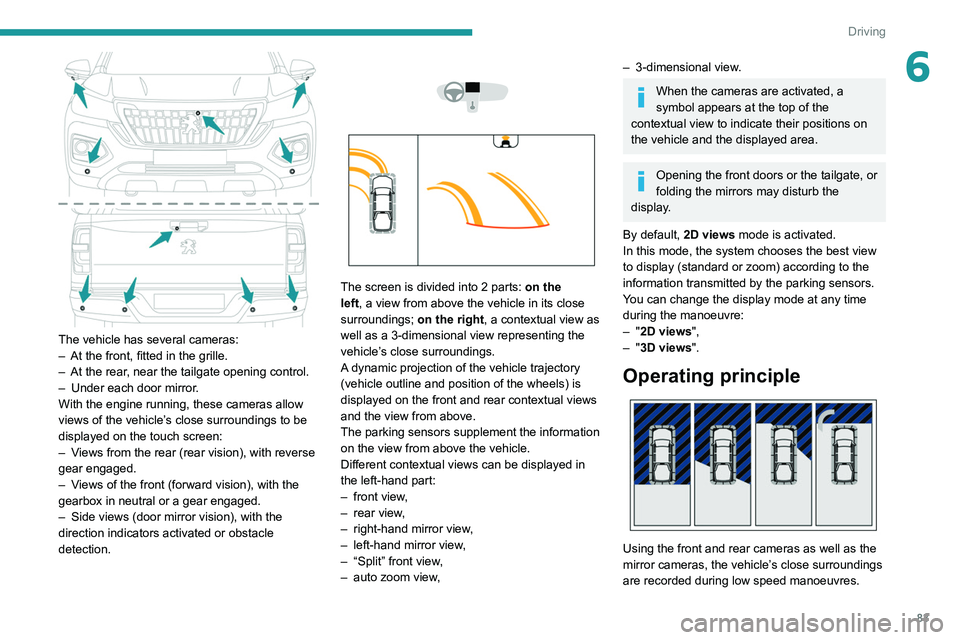
The vehicle has several cameras:
– At the front, fitted in the grille.
–
At the rear
, near the tailgate opening control.
–
Under each door mirror
.
With the engine running, these cameras allow
views of the vehicle’s close surroundings to be
displayed on the touch screen:
–
V
iews from the rear (rear vision), with reverse
gear engaged.
–
V
iews of the front (forward vision), with the
gearbox in neutral or a gear engaged.
–
Side views (door mirror vision), with the
direction indicators activated or obstacle
detection.
The screen is divided into 2 parts: on the
left, a view from above the vehicle in its close
surroundings; on the right, a contextual view as
well as a 3-dimensional view representing the
vehicle’s close surroundings.
A dynamic projection of the vehicle trajectory
(vehicle outline and position of the wheels) is
displayed on the front and rear contextual views
and the view from above.
The parking sensors supplement the information
on the view from above the vehicle.
Different contextual views can be displayed in
the left-hand part:
–
front view
,
–
rear view
,
–
right-hand mirror view
,
–
left-hand mirror view
,
–
“Split” front view
,
–
auto zoom view
,
– 3-dimensional view .
When the cameras are activated, a
symbol appears at the top of the
contextual view to indicate their positions on
the vehicle and the displayed area.
Opening the front doors or the tailgate, or
folding the mirrors may disturb the
display.
By default, 2D views mode is activated.
In this mode, the system chooses the best view
to display (standard or zoom) according to the
information transmitted by the parking sensors.
You can change the display mode at any time
during the manoeuvre:
–
"2D views",
–
"3D views".
Operating principle
Using the front and rear cameras as well as the
mirror cameras, the vehicle’s close surroundings
are recorded during low speed manoeuvres.
Page 86 of 176
84
Driving
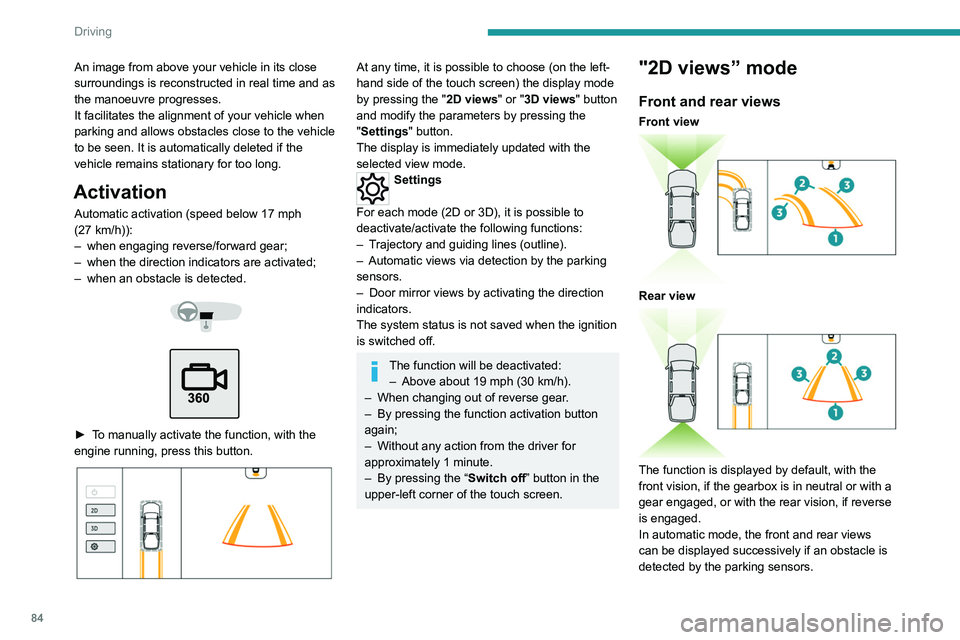
The guiding line 1 (in red) represents the end of
the bumper.
From the bumper, the thin orange guiding lines
2 represent the width of the vehicle, with
the mirrors unfolded and the wide orange
guiding lines 3 represent the trajectory of the
vehicle.
Lines 2 and 3 are oriented according to the
position of the steering wheel.
The system is deactivated:
– Automatically above about 19 mph (30 km/h)
(the image disappears temporarily from 12 mph
(20 km/h)).
– By pressing the function activation button
again.
Door mirror views
The door mirror views make it possible to
visualise the areas located under each mirror as
well as all of the front lateral sides of the vehicle
in order to manoeuvre the vehicle with the
surrounding obstacles.
An image from above your vehicle in its close
surroundings is reconstructed in real time and as
the manoeuvre progresses.
It facilitates the alignment of your vehicle when
parking and allows obstacles close to the vehicle
to be seen. It is automatically deleted if the
vehicle remains stationary for too long.
Activation
Automatic activation (speed below 17 mph
(27 km/h)):
–
when engaging reverse/forward gear;
–
when the direction indicators are activated;
–
when an obstacle is detected.
► To manually activate the function, with the
engine running, press this button.
At any time, it is possible to choose (on the left-
hand side of the touch screen) the display mode
by pressing the " 2D views" or "3D views" button
and modify the parameters by pressing the
"Settings" button.
The display is immediately updated with the
selected view mode.
Settings
For each mode (2D or 3D), it is possible to
deactivate/activate the following functions:
–
T
rajectory and guiding lines (outline).
–
Automatic views via detection by the parking
sensors.
–
Door mirror views by activating the direction
indicators.
The system status is not saved when the ignition
is switched off.
The function will be deactivated: – Above about 19 mph (30 km/h).
–
When changing out of reverse gear
.
–
By pressing the function activation button
again;
–
Without any action from the driver for
approximately 1 minute.
–
By pressing the “
Switch off” button in the
upper-left corner of the touch screen.
"2D views” mode
Front and rear views
Front view
Rear view
The function is displayed by default, with the
front vision, if the gearbox is in neutral or with a
gear engaged, or with the rear vision, if reverse
is engaged.
In automatic mode, the front and rear views
can be displayed successively if an obstacle is
detected by the parking sensors.
Page 96 of 176
94
Practical information
Particle filter (Diesel)
(Depending on version)The start of clogging of the particle filter is indicated by the temporary lighting of this
warning lamp, accompanied by an alert
message.
As soon as the traffic conditions permit,
regenerate the filter by driving at a speed of at
least 37 mph (60 km/h) until the warning lamp
goes off.
If the warning lamp stays on, this
indicates a low Diesel additive level.
For more information on Checking levels,
refer to the corresponding section.
Following prolonged operation of the
vehicle at very low speed or at idle, you
may, in exceptional circumstances, notice
water vapour coming from the exhaust while
accelerating. These emissions have no
impact on the vehicle’s behaviour and the
environment.
New vehicle
During the first few particle filter
regeneration operations, you may notice a
"burning" smell. This is perfectly normal.
Manual gearbox
The gearbox does not require any maintenance (no oil change).
Screenwash fluid
Top up to the required level when necessary.
Tank capacity: 3 litres.
Fluid specification
The fluid must be topped up with a pre-mixed
product.
In winter (temperatures below zero), a fluid
containing an anti-freeze agent which is
appropriate for the temperature conditions
must be used in order to protect the system's
components (pump, tank, ducts, jets).
Filling with pure water is prohibited in all
circumstances (risk of freezing,
limescale, etc.).
Checks
Unless otherwise indicated, check these
components in accordance with the
manufacturer's service schedule and according
to your engine.
Otherwise, have them checked by a PEUGEOT
dealer or a qualified workshop.
Only use products recommended by
PEUGEOT or products of equivalent
quality and specification.
In order to optimise the operation of
components as important as those in the
braking system, PEUGEOT selects and offers
very specific products.
12 V battery
The battery does not require any maintenance.
Check regularly that the terminals are correctly
tightened (versions without quick-release
terminals) and that the connections are clean.
For more information on the precautions
to take before any work on the 12 V
battery, refer to the corresponding section.
Passenger compartment
filter
Depending on the environment and the
use of the vehicle (e.g. dusty atmosphere,
city driving), change it twice as often, if
necessary .
A clogged passenger compartment filter
can adversely affect air conditioning
system performance and generate
undesirable odours.
Air filter
Depending on the environment and the
use of the vehicle (e.g. dusty atmosphere,
city driving), change it twice as often, if
necessary .
Oil filter
Change the oil filter each time the engine
oil is changed.
Diesel fuel filter
Change the Diesel fuel filter according to
the schedule of operations in the
manufacturer's service schedule.
A clogged Diesel fuel filter can reduce engine performance and damage the
injection system.
Bleeding water from the Diesel fuel
filter
If this warning lamp comes on, bleed the
filter. Otherwise, bleed regularly at each
engine oil change.
–
T
o drain the water, unscrew the bleed screw
located under the filter.
–
Operate it until all the water in the transparent
tube has drained, then tighten the bleed screw
again.
For more information on the Engine
compartment, in particular the location
of the Diesel fuel filter, refer to the
corresponding section.
Page 97 of 176
95
Practical information
7Particle filter (Diesel)
(Depending on version)The start of clogging of the particle filter is indicated by the temporary lighting of this
warning lamp, accompanied by an alert
message.
As soon as the traffic conditions permit,
regenerate the filter by driving at a speed of at
least 37
mph (60 km/h) until the warning lamp
goes off.
If the warning lamp stays on, this
indicates a low Diesel additive level.
For more information on Checking levels,
refer to the corresponding section.
Following prolonged operation of the
vehicle at very low speed or at idle, you
may, in exceptional circumstances, notice
water vapour coming from the exhaust while
accelerating. These emissions have no
impact on the vehicle’s behaviour and the
environment.
New vehicle
During the first few particle filter
regeneration operations, you may notice a
"burning" smell. This is perfectly normal.
Manual gearbox
The gearbox does not require any maintenance (no oil change).
Automatic gearbox
The gearbox does not require any maintenance (no oil change).
Brake pads
Brake wear depends on the style of
driving, particularly in the case of vehicles
used in town, over short distances. It may be
necessary to have the condition of the brakes
checked, even between vehicle services.
Unless there is a leak in the circuit, a drop in the
brake fluid level indicates that the brake pads
are worn.
After washing the vehicle, moisture, or in wintry conditions, ice can form on the
brake discs and pads: braking efficiency may
be reduced. Gently dab the brakes to dry and
defrost them.
Brake disc wear
For information on checking brake disc
wear, contact a PEUGEOT dealer or a
qualified workshop.
Manual parking brake
If you notice excessive brake lever travel
or decreased effectiveness, the parking
brake must be adjusted, even between two
services.
This system must be checked by a PEUGEOT
dealer or a qualified workshop.
Steering wheel
Play or a loss of precision in the steering
means that this system needs to be
checked.
This system must be checked by a PEUGEOT
dealer or a qualified workshop.
Wheels and tyres
The inflation pressure of all tyres, including the spare wheel, must be
checked on "cold” tyres at least once a month.
The pressures indicated on the tyre pressure
label are valid for "cold" tyres. If you have driven
for more than 10 minutes or more than 6 miles
(10 kilometres) at over 31 mph (50
km/h), add
0.3 bar (30 kPa) to the values indicated on the
label.
The pressure difference between the left-hand
side and right-hand side tyres must not exceed
0.05 bar (5 kPa).
Under-inflation increases energy
consumption. Non-compliant tyre
pressures cause tyres to wear prematurely
and have an adverse effect on the vehicle's
road holding - risk of accident!
Driving with worn or damaged tyres reduces the
braking and road holding performance of the
vehicle. Regularly check the condition of the
tyres (tread and sidewalls) and rims as well as
the presence of the valve caps.