2021 PEUGEOT EXPERT remove seats
[x] Cancel search: remove seatsPage 10 of 324
8
Eco-driving
Eco-driving
Eco-driving refers to a range of everyday
practices that allow the motorist to optimise
the vehicle's energy consumption (fuel and/or
electricity) and CO
2 emissions.
Optimise your use of the gearbox
With a manual gearbox, move off gently and
change up promptly. While accelerating, change
up early.
With an automatic gearbox, favour automatic
mode. Do not depress the accelerator pedal
heavily or suddenly.
The gear shift indicator prompts you to engage
the most suitable gear. Whenever this indication
is displayed on the instrument panel, follow it
straight away.
With an automatic gearbox, this indicator
appears only in manual mode.
Drive smoothly
Maintain a safe distance between vehicles, use
engine braking rather than the brake pedal and
press the accelerator gradually. These practices
help to save on energy consumption, reduce
CO
2 emissions and decrease general traffic
noise.
When the traffic is flowing smoothly, select the
cruise control.
Control the use of electrical equipment
Before moving off, if the passenger compartment
is too warm, ventilate it by opening the windows
and air vents before using the air conditioning.
At speeds above 31
mph (50 km/h), close the
windows and leave the air vents open.
Consider using equipment that can help keep
the temperature in the passenger compartment
down (e.g.
sunroof blind, window blinds).
Unless automatically regulated, switch off the air
conditioning as soon as the desired temperature
has been reached.
Switch off the demisting and defrosting functions,
if they are not managed automatically.
Switch off the heated seat as soon as possible.
Adapt the use of headlamps and/or foglamps
depending on visibility conditions.
Avoid running the engine before moving off,
particularly in winter (other than in severe wintry
conditions: temperature below -23°C). The
vehicle will warm up much faster while driving.
As a passenger, avoid connecting your
multimedia devices (e.g.
film, music, video
game) to help reduce the consumption of energy.
Disconnect all portable devices before leaving
the vehicle.
Limit the causes of excess consumption
Spread loads throughout the vehicle. Place the
heaviest items in the boot as close as possible to
the rear seats.
Limit the loads carried in the vehicle and
minimise wind resistance (e.g.
roof bars, roof rack, bicycle carrier, trailer). Preferably, use a
roof box.
Remove roof bars and roof racks after use.
At the end of winter, remove snow tyres and refit
summer tyres.
Comply with the servicing instructions
Check tyre pressures regularly, with the tyres
cold, referring to the label in the door aperture on
the driver's side.
Carry out this check in particular:
–
before a long journey
.
–
at each change of season.
–
after a long period out of use.
Do not forget the spare wheel and, where
applicable, the tyres on your trailer or caravan.
Have your vehicle serviced regularly (e.g.
engine
oil, oil filter, air filter, passenger compartment
filter, etc.). Observe the schedule of operations in
the manufacturer's service schedule.
With a BlueHDi Diesel engine, if the SCR system
is faulty, your vehicle will emit pollution. Visit
a PEUGEOT dealer or a qualified workshop
as soon as possible to restore your vehicle's
nitrogen oxide emissions to legal levels.
When filling the fuel tank, do not continue after
the third cut-out of the nozzle, to avoid overflow.
You will only see the fuel consumption of your
new vehicle settle down to a consistent average
after the first 1,900 miles (3,000 kilometres).
Optimising the driving range (Electric)
The vehicle’s electrical consumption depends
heavily on the route, the vehicle speed and your
driving style.
Try to remain in the "ECO" zone on the power
indicator, by driving smoothly and maintaining a
steady speed.
Anticipate the need to slow down, and brake
smoothly, whenever possible using engine
braking with the regenerative braking function,
which will move the power indicator into the
"CHARGE" zone.
Page 52 of 324
50
Ease of use and comfort
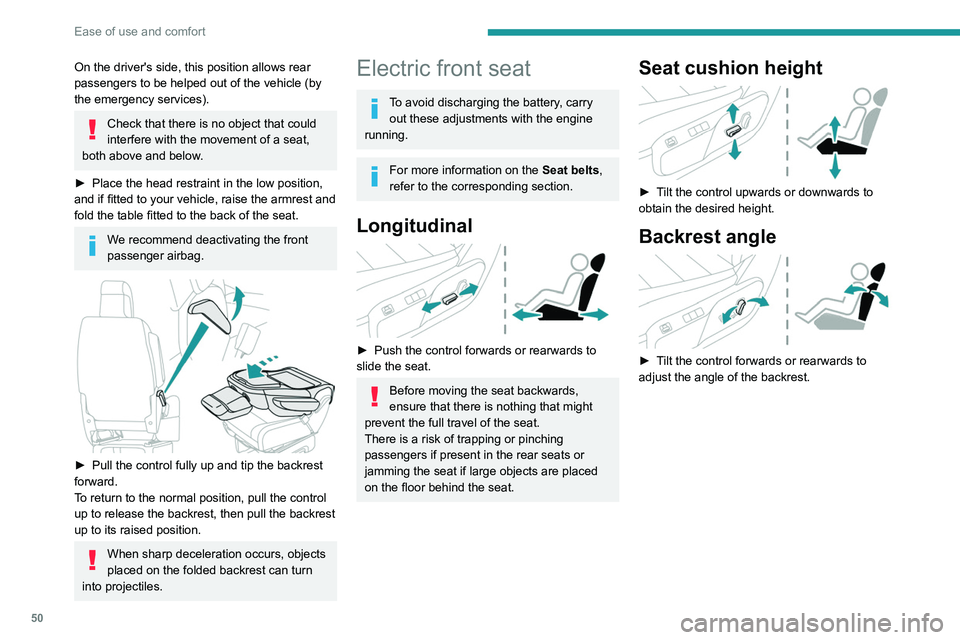
Head restraint height
adjustment
If fitted to your vehicle.
► To raise it, pull it upwards as far as possible
(notch).
► To remove it, press the lug A and pull it
upwards.
► To put it back in place, engage the head
restraint rods in the openings keeping them in
line with the seat backrest.
► To lower it, press the lug A and push down on
the head restraint at the same time.
The head restraint has a frame with notches which prevents it from lowering;
this is a safety device in case of impact.
The adjustment is correct when the upper
edge of the head restraint is level with the
top of the head.
On the driver's side, this position allows rear
passengers to be helped out of the vehicle (by
the emergency services).
Check that there is no object that could
interfere with the movement of a seat,
both above and below.
►
Place the head restraint in the low position,
and if fitted to your vehicle, raise the armrest and
fold the table fitted to the back of the seat.
We recommend deactivating the front
passenger airbag.
► Pull the control fully up and tip the backrest
forward.
T
o return to the normal position, pull the control
up to release the backrest, then pull the backrest
up to its raised position.
When sharp deceleration occurs, objects
placed on the folded backrest can turn
into projectiles.
Electric front seat
To avoid discharging the battery, carry out these adjustments with the engine
running.
For more information on the Seat belts,
refer to the corresponding section.
Longitudinal
► Push the control forwards or rearwards to
slide the seat.
Before moving the seat backwards,
ensure that there is nothing that might
prevent the full travel of the seat.
There is a risk of trapping or pinching
passengers if present in the rear seats or
jamming the seat if large objects are placed
on the floor behind the seat.
Seat cushion height
► Tilt the control upwards or downwards to
obtain the desired height.
Backrest angle
► Tilt the control forwards or rearwards to
adjust the angle of the backrest.
Page 53 of 324
51
Ease of use and comfort
3Head restraint height
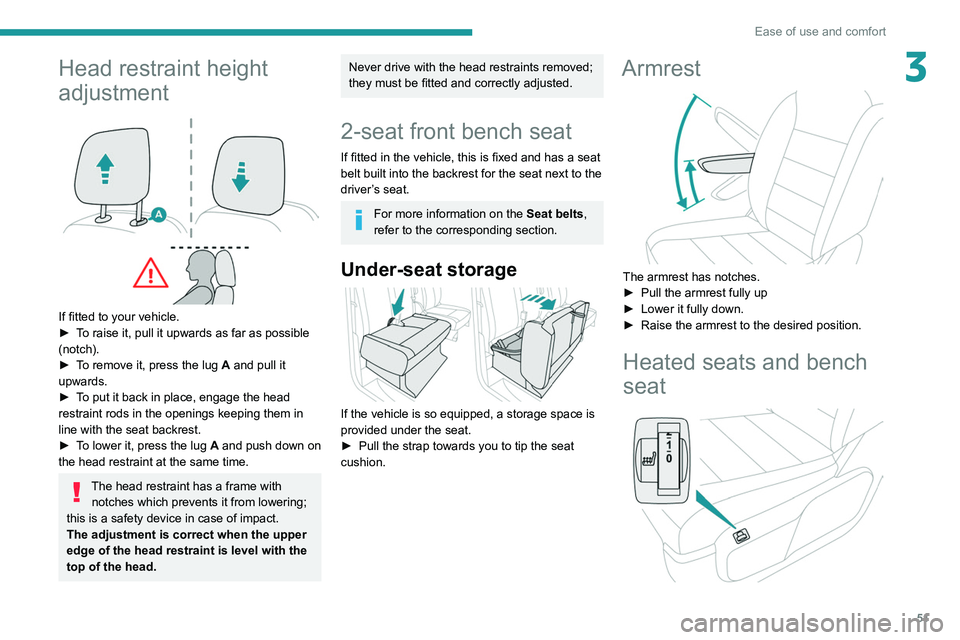
adjustment
If fitted to your vehicle.
► T o raise it, pull it upwards as far as possible
(notch).
►
T
o remove it, press the lug A and pull it
upwards.
►
T
o put it back in place, engage the head
restraint rods in the openings keeping them in
line with the seat backrest.
►
T
o lower it, press the lug A and push down on
the head restraint at the same time.
The head restraint has a frame with notches which prevents it from lowering;
this is a safety device in case of impact.
The adjustment is correct when the upper
edge of the head restraint is level with the
top of the head.
Never drive with the head restraints removed;
they must be fitted and correctly adjusted.
2-seat front bench seat
If fitted in the vehicle, this is fixed and has a seat
belt built into the backrest for the seat next to the
driver’s seat.
For more information on the Seat belts,
refer to the corresponding section.
Under-seat storage
If the vehicle is so equipped, a storage space is
provided under the seat.
►
Pull the strap towards you to tip the seat
cushion.
Armrest
The armrest has notches.
► Pull the armrest fully up
►
Lower it fully down.
►
Raise the armrest to the desired position.
Heated seats and bench
seat
Page 59 of 324

57
Ease of use and comfort
3Install the anti-slip net (supplied with the
vehicle) every time that the seat is raised and
the partition flap removed.
Never use the net for any other purposes.
Regularly check the condition of the anti-
slip net. As soon as signs of wear or tear
appear, contact a PEUGEOT dealer to have
it replaced by an anti-slip net that meets the
specifications required by PEUGEOT for the
vehicle.
Always fit the removable flap back into place
when you are not carrying any long loads.
"Rotating writing table"
If fitted to your vehicle, the central seat cushion
of the bench seat can be tilted to form a pivoting
writing table, thus creating a mobile desk (with
the vehicle stationary).
►
Pull the handle located at the top of the
backrest cushion.
Never use the table while the vehicle is
being driven.
In the event of sudden braking or impact, any
objects on the table might become dangerous
projectiles that could cause injury.
Central seat cushion
storage
Precautions for the seats
and bench seats
Do not remove a head restraint without storing it
and securing it to a support.
Ensure that the passengers can always access
the seat belts and fasten them easily.
A passenger must not take their seat without
adjusting the seat's head restraint correctly and
adjusting and fastening their seat belt.
Ensure that no object or passenger feet
could obstruct the anchorage points or
prevent the correct latching of the assembly.
If removing and storing seats and bench
seats out of the vehicle, ensure that they
are placed in a clean area, so as to avoid
Page 68 of 324
66
Ease of use and comfort
The two outer seats are fitted with ISOFIX
mountings.
For more information on the ISOFIX
mountings , refer to the corresponding
section.
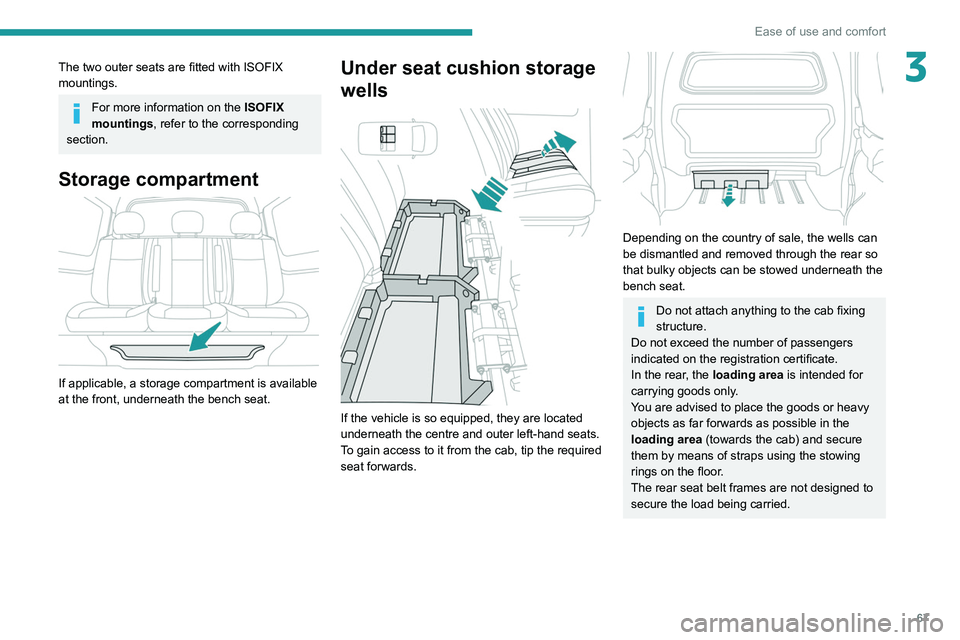
Storage compartment
If applicable, a storage compartment is available
at the front, underneath the bench seat.
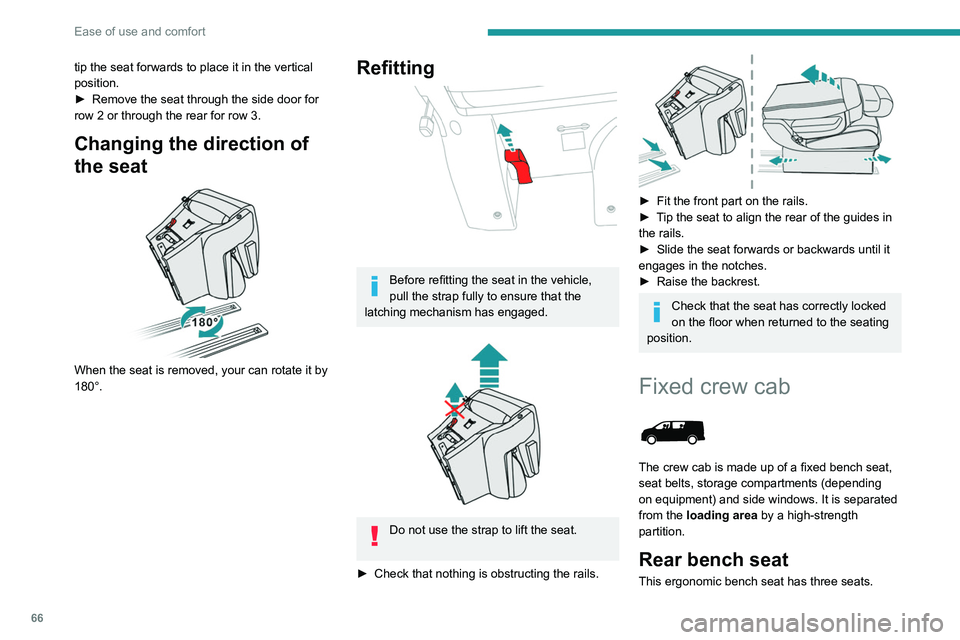
tip the seat forwards to place it in the vertical
position.
►
Remove the seat through the side door for
row 2 or through the rear for row 3.
Changing the direction of
the seat
When the seat is removed, your can rotate it by
180°.
Refitting
Before refitting the seat in the vehicle,
pull the strap fully to ensure that the
latching mechanism has engaged.
Do not use the strap to lift the seat.
►
Check that nothing is obstructing the rails.
► Fit the front part on the rails.
► T ip the seat to align the rear of the guides in
the rails.
►
Slide the seat forwards or backwards until it
engages in the notches.
►
Raise the backrest.
Check that the seat has correctly locked
on the floor when returned to the seating
position.
Fixed crew cab
The crew cab is made up of a fixed bench seat,
seat belts, storage compartments (depending
on equipment) and side windows. It is separated
from the loading area by a high-strength
partition.
Rear bench seat
This ergonomic bench seat has three seats.
Page 69 of 324
67
Ease of use and comfort
3The two outer seats are fitted with ISOFIX
mountings.
For more information on the ISOFIX
mountings , refer to the corresponding
section.
Storage compartment
If applicable, a storage compartment is available
at the front, underneath the bench seat.
Under seat cushion storage
wells
If the vehicle is so equipped, they are located
underneath the centre and outer left-hand seats.
To gain access to it from the cab, tip the required
seat forwards.
Depending on the country of sale, the wells can
be dismantled and removed through the rear so
that bulky objects can be stowed underneath the
bench seat.
Do not attach anything to the cab fixing
structure.
Do not exceed the number of passengers
indicated on the registration certificate.
In the rear, the loading area is intended for
carrying goods only.
You are advised to place the goods or heavy
objects as far forwards as possible in the
loading area (towards the cab) and secure
them by means of straps using the stowing
rings on the floor.
The rear seat belt frames are not designed to
secure the load being carried.
Page 74 of 324
72
Ease of use and comfort
On the floor, behind the front seats, a vertical
partition protects the driver and front passengers
against the risk of load movement.
Steel or glazed partitions separate the loading
area from the cab.
Recommendations on
loading
The weight of the load must comply with the Gross Train Weight (GTW).
For more information on Engine technical
data and towed loads , refer to the
corresponding section.
In the event of a malfunction, the
green indicator lamp flashes.
Have the system checked by a PEUGEOT
dealer or a qualified workshop.
Connect only one device to the socket at
a time (do not use an extension lead or
multi-socket) and only connect devices with
Class
II insulation (indicated on the device).
Do not use devices with metallic cases.
If the power consumption becomes too
high and when required by the vehicle's
electrical system (particular weather
conditions, electrical overload, etc.), the
power supply to the socket will be cut off; the
green indicator lamp goes off
Load space cover
► To remove it, lift it up.
► To install it, insert the guides into their
housings.
In the event of sudden deceleration,
objects placed on the load space cover
can turn into projectiles.
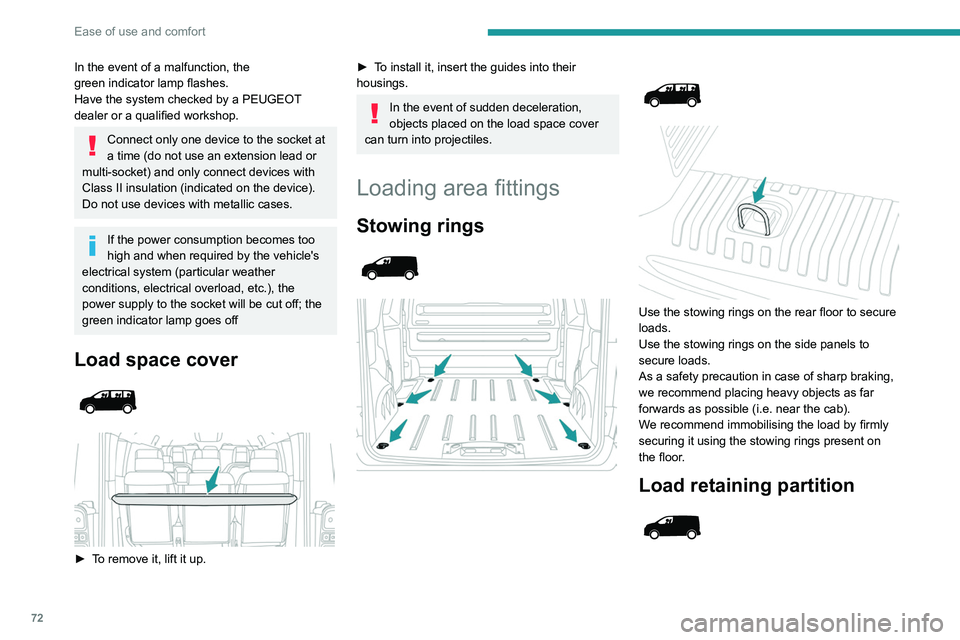
Loading area fittings
Stowing rings
Use the stowing rings on the rear floor to secure
loads.
Use the stowing rings on the side panels to
secure loads.
As a safety precaution in case of sharp braking,
we recommend placing heavy objects as far
forwards as possible (i.e. near the cab).
We recommend immobilising the load by firmly
securing it using the stowing rings present on
the floor.
Load retaining partition
Page 75 of 324
73
Ease of use and comfort
3
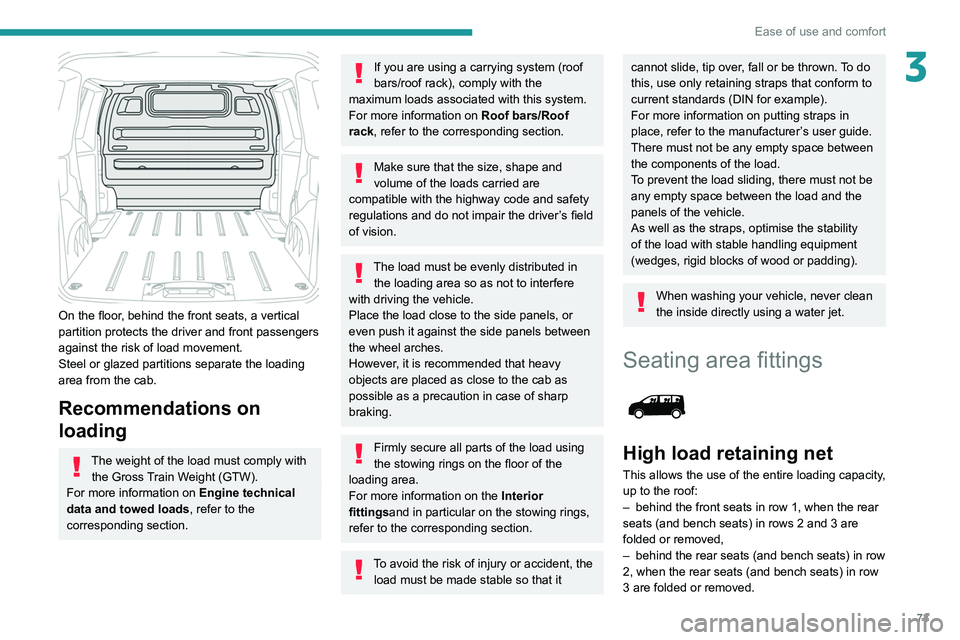
On the floor, behind the front seats, a vertical
partition protects the driver and front passengers
against the risk of load movement.
Steel or glazed partitions separate the loading
area from the cab.
Recommendations on
loading
The weight of the load must comply with the Gross Train Weight (GTW).
For more information on Engine technical
data and towed loads , refer to the
corresponding section.
If you are using a carrying system (roof
bars/roof rack), comply with the
maximum loads associated with this system.
For more information on Roof bars/Roof
rack , refer to the corresponding section.
Make sure that the size, shape and
volume of the loads carried are
compatible with the highway code and safety
regulations and do not impair the driver’s field
of vision.
The load must be evenly distributed in the loading area so as not to interfere
with driving the vehicle.
Place the load close to the side panels, or
even push it against the side panels between
the wheel arches.
However, it is recommended that heavy
objects are placed as close to the cab as
possible as a precaution in case of sharp
braking.
Firmly secure all parts of the load using
the stowing rings on the floor of the
loading area.
For more information on the Interior
fittingsand in particular on the stowing rings,
refer to the corresponding section.
To avoid the risk of injury or accident, the load must be made stable so that it
cannot slide, tip over, fall or be thrown. To do
this, use only retaining straps that conform to
current standards (DIN for example).
For more information on putting straps in
place, refer to the manufacturer’s user guide.
There must not be any empty space between
the components of the load.
To prevent the load sliding, there must not be
any empty space between the load and the
panels of the vehicle.
As well as the straps, optimise the stability
of the load with stable handling equipment
(wedges, rigid blocks of wood or padding).
When washing your vehicle, never clean
the inside directly using a water jet.
Seating area fittings
High load retaining net
This allows the use of the entire loading capacity,
up to the roof:
–
behind the front seats in row 1, when the rear
seats (and bench seats) in rows 2 and 3 are
folded or removed,
–
behind the rear seats (and bench seats) in row
2, when the rear seats (and bench seats) in row
3 are folded or removed.