2021 PEUGEOT BOXER traction control
[x] Cancel search: traction controlPage 89 of 212
87
Driving
6a qualified workshop for any replacement and
calibration of the camera.
Operation
The system starts automatically when moving
off.
A check of the operating conditions takes place: these two indicator
lamps come on in the instrument panel.
When these conditions are met, these two
indicator lamps go off. The system is activated.
If the operating conditions are not met, the
system is activated but is no longer effective.
This is signalled by the fixed illumination of these
two warning lamps in the instrument panel.
Operating conditions
Once engaged, the system is active only when
these operating conditions are met:
–
The vehicle is moving forwards.
–
No malfunction of the vehicle is detected.
–
The speed of the vehicle is equal to or greater
than approximately 37 mph (60 km/h).
–
The longitudinal marking of the traffic lanes is
clearly visible.
–
The visibility conditions are clear
.
–
The trajectory is in a straight line (or in the
case of bends, they are wide).
–
The field of vision is sufficiently clear (the
safety distance with the vehicle ahead is
respected). –
In the event of a lane departure, the direction
indicator corresponding to the direction (right or
left) of the departure has not been operated.
–
The trajectory of the vehicle is consistent with
the road layout.
Deactivation / Reactivation
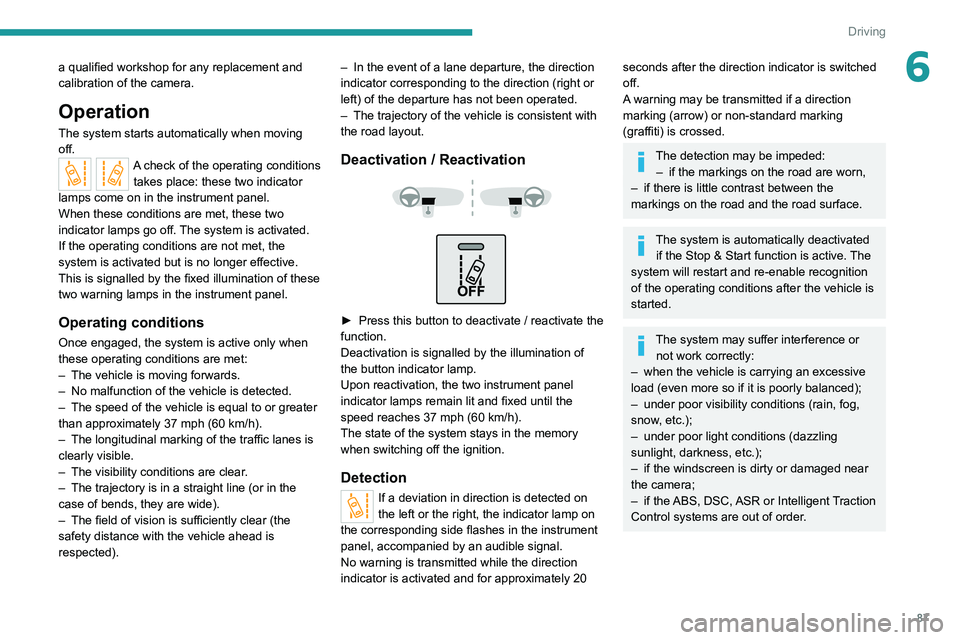
► Press this button to deactivate / reactivate the
function.
Deactivation is signalled by the illumination of
the button indicator lamp.
Upon reactivation, the two instrument panel
indicator lamps remain lit and fixed until the
speed reaches 37 mph (60 km/h).
The state of the system stays in the memory
when switching off the ignition.
Detection
If a deviation in direction is detected on
the left or the right, the indicator lamp on
the corresponding side flashes in the instrument
panel, accompanied by an audible signal.
No warning is transmitted while the direction
indicator is activated and for approximately 20
seconds after the direction indicator is switched
off.
A warning may be transmitted if a direction
marking (arrow) or non-standard marking
(graffiti) is crossed.
The detection may be impeded: – if the markings on the road are worn,
–
if there is little contrast between the
markings on the road and the road surface.
The system is automatically deactivated if the Stop & Start function is active. The
system will restart and re-enable recognition
of the operating conditions after the vehicle is
started.
The system may suffer interference or not work correctly:
–
when the vehicle is carrying an excessive
load (even more so if it is poorly balanced);
–
under poor visibility conditions (rain, fog,
snow
, etc.);
–
under poor light conditions (dazzling
sunlight, darkness, etc.);
–
if the windscreen is dirty or damaged near
the camera;
–
if the
ABS, DSC, ASR or Intelligent Traction
Control systems are out of order.
Page 103 of 212
101
Practical information
7Charging the traction
battery (Electric)
To charge, connect the vehicle to a domestic
charging unit or a fast public charger (superfast
charging).
For a full charge, follow the desired charging
procedure without interrupting it, until it ends
automatically.
To stop charging at any time, press the locking
button on the remote control for 5 seconds
and remove the charging nozzle. For superfast
charging, also refer to the fast public charger.
The display of information linked to the charging
is integrated into the rear view mirror. For more
information on the Display integrated into the
rear view mirror , refer to the corresponding
section.
As a safety measure, the engine will not start if the charging cable is plugged into
the vehicle's charging connector.
Cooling the traction battery
The cooling fan in the engine
compartment comes on during charging to
cool the on-board charger and the traction
battery.
Balancing the traction battery voltage
After carrying out a full charge (100%)
at least once per week, we recommend not
using the vehicle for about 4 hours.
This time allows the voltage to balance across
all of the traction battery's cells (ensuring a
level voltage across all of its cells).
This process helps keep the traction battery in
good condition and aids in the calculation of
its charging level.
Completely discharged traction
battery
T
o preserve the lifespan of the traction battery
and avoid damaging it, make sure that it is
never completely discharged (0%).
When the charge level drops to 15%, the
message "LOW POWER MODE" appears
on the display integrated into the rear view
mirror. If this message appears while driving,
avoid heavy acceleration and charge the
vehicle as soon as possible.
Long-term parking
Before parking the vehicle for an
extended period, carry out a full charge of the
traction battery.
Park the vehicle in a place where the
temperature will be between 0°C and 45°C
(parking in a place which will experience
extreme temperatures can damage the
traction battery).
Disconnect the cable from the (-) terminal of
the 12
V accessory battery.
Check the level of charge in the traction
battery periodically and charge it if necessary.
When parking the vehicle for more than one
month, keep the level of charge above 50%.
When parking the vehicle for a very long
period, charge the vehicle every 2 months.
Do not leave the charging cable connected.
Lack of use of the traction battery temporarily
affects its performance. At the end of the
parking period, carry out several charge/
discharge cycles to restore the normal
operation of the traction battery.
Precautions
Our electric vehicles have been developed in
accordance with the recommendations on the
maximum limits for electromagnetic fields, as
issued by the International Commission on Non-
Ionizing Radiation Protection
(ICNIRP - 1998
Guidelines).
Wearers of pacemakers or equivalent
devices
Ask your doctor about what precautions you should take, or ask the manufacturer
of your implanted electro-medical device about
whether its operation is guaranteed in an
environment which complies with the ICNIRP
recommendations.
If in doubt
Accelerated charging: do not remain
inside or near the vehicle, or near the
charging cable or charging unit, even for a
short time.
Page 105 of 212
103
Practical information
7
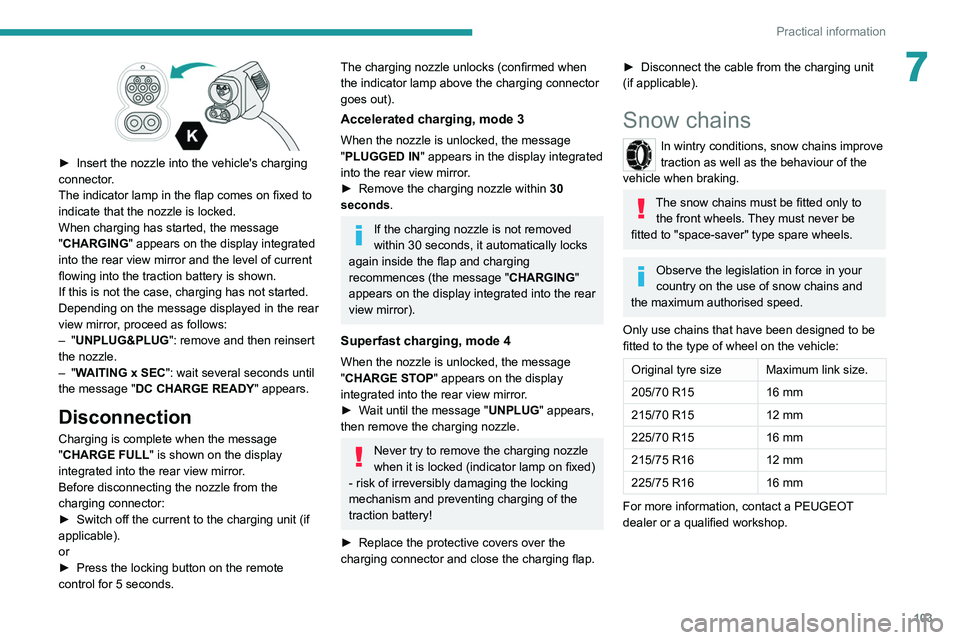
► Insert the nozzle into the vehicle's charging
connector .
The indicator lamp in the flap comes on fixed to
indicate that the nozzle is locked.
When charging has started, the message
"CHARGING" appears on the display integrated
into the rear view mirror and the level of current
flowing into the traction battery is shown.
If this is not the case, charging has not started.
Depending on the message displayed in the rear
view mirror, proceed as follows:
–
"UNPLUG&PLUG": remove and then reinsert
the nozzle.
–
"WAITING x SEC": wait several seconds until
the message "DC CHARGE READY " appears.
Disconnection
Charging is complete when the message
"CHARGE FULL" is shown on the display
integrated into the rear view mirror.
Before disconnecting the nozzle from the
charging connector:
►
Switch off the current to the charging unit (if
applicable).
or
►
Press the locking button on the remote
control for 5 seconds.
The charging nozzle unlocks (confirmed when
the indicator lamp above the charging connector
goes out).
Accelerated charging, mode 3
When the nozzle is unlocked, the message
"PLUGGED IN" appears in the display integrated
into the rear view mirror.
►
Remove the charging nozzle within 30
seconds
.
If the charging nozzle is not removed
within 30 seconds, it automatically locks
again inside the flap and charging
recommences (the message " CHARGING"
appears on the display integrated into the rear
view mirror).
Superfast charging, mode 4
When the nozzle is unlocked, the message
"CHARGE STOP" appears on the display
integrated into the rear view mirror.
►
W
ait until the message "UNPLUG" appears,
then remove the charging nozzle.
Never try to remove the charging nozzle
when it is locked (indicator lamp on fixed)
- risk of irreversibly damaging the locking
mechanism and preventing charging of the
traction battery!
►
Replace the protective covers over the
charging connector and close the charging flap.
► Disconnect the cable from the charging unit
(if applicable).
Snow chains
In wintry conditions, snow chains improve
traction as well as the behaviour of the
vehicle when braking.
The snow chains must be fitted only to the front wheels. They must never be
fitted to "space-saver" type spare wheels.
Observe the legislation in force in your
country on the use of snow chains and
the maximum authorised speed.
Only use chains that have been designed to be
fitted to the type of wheel on the vehicle:
Original tyre size Maximum link size.
205/70 R15 16 mm
215/70 R15 12 mm
225/70 R15 16 mm
215/75 R16 12 mm
225/75 R16 16 mm
For more information, contact a PEUGEOT
dealer or a qualified workshop.
Page 189 of 212

187
Event data recorders
14Recording event data
Electronic control units are installed in your
vehicle. These control units process data
received from the vehicle's sensors, for example,
or data they generate themselves or exchange
with each other. Some of these control units are
required for the correct operation of your vehicle,
some others assist you while driving (driving or
manoeuvring aids), while others provide comfort
or infotainment functions.
The following contains general information about
how data is processed within the vehicle.
You will find additional information about the
specific data which is downloaded, stored
and transmitted to third parties and what it is
used for in your vehicle under the keyword
"Data protection". This information is directly
associated with the references for the functions
in question contained in the corresponding
vehicle handbook, or in the general terms and
conditions of sale.
This information is also available online.
Vehicle operating data
The control units process the data used for the
operation of the vehicle.
This data includes, for example:
–
Information about the state of the vehicle
(e.g.
speed, travel time, lateral acceleration,
wheel rotation rate, fastened seat belts display).
–
Environmental conditions (e.g.
temperature,
rain sensor, distance sensor). As a general rule, this data is temporary, is
not stored for longer than one operating cycle
and is only used within the vehicle itself. The
control units often record this data (including the
vehicle's key). This function allows either the
temporary or permanent storage of information
about the state of the vehicle, stresses on
components, servicing requirements, as well as
events and technical errors.
Depending on the vehicle's equipment level, the
data stored is as follows:
–
Operating state of system components
(e.g.
filling level, tyre pressures, battery charge
status).
–
Faults and malfunctions in important system
components (e.g.
lamps, brakes).
–
System reactions in specific driving situations
(e.g.
deployment of an airbag, triggering of
stability control and braking systems).
–
Information about events which have
damaged the vehicle.
–
For electric and rechargeable hybrid vehicles,
the traction battery charge level and the
estimated driving range.
In particular circumstances (e.g.
if the vehicle
has detected a malfunction), it may be necessary
to record data which would otherwise simply not
be stored.
When taking your vehicle in for servicing
(e.g.
repairs, maintenance), the stored operating
data may be read along with the vehicle's
identification number and used if necessary.
The personnel working for the servicing network (e.g.
garages, manufacturers) or third parties
(e.g. roadside assistance agents) may read
the vehicle's data. This also applies to work
carried out under warranty and quality assurance
measures.
This data is generally read via the OBD
(On-Board Diagnostics) port fitted by law to
the vehicle. It is used to report on the technical
state of the vehicle or its components and
facilitates the diagnosis of malfunctions, in
compliance with warranty obligations and for
quality improvement. This data, in particular the
information relating to stress on components,
technical events, operator errors and other
malfunctions, is sent to the Manufacturer, if
necessary, along with the vehicle's identification
number. The Manufacturer's liability may also be
engaged. The Manufacturer may also use the
operating data taken from the vehicle for product
recalls. This data may also be used to check the
customer's warranty and any claims made under
warranty.
Any malfunctions stored in the vehicle may be
reset by an after-sales service company during
servicing or repair work, or at your request.
Comfort and infotainment
functions
Comfort settings and personalised settings
may be saved in the vehicle and modified or
reinitialised at any time.
Page 192 of 212

190
Alphabetical index
A
ABS 29
Accelerated charging unit (Wallbox)
71
Accessories
28
Active Safety Brake
90–92
AdBlue®
86
AdBlue® tank
87
Adjusting the date
21
Adjusting the seat angle
18
Adjusting the seat belt height
60–61
Adjusting the time
21
Advice on care and maintenance
70, 88
Advice on driving
6, 69–70
Airbags
35, 37
Airbags, curtain
35
Airbags, front
62–63
Airbags, lateral
35
Air conditioning
23, 39–40
Air conditioning, additional
39–40
Air conditioning, automatic
24
Air conditioning, manual
24
Air vents
23
Alarm
27–28
Anti-lock braking system (ABS)
29
Armrest, front
19
ASR
29
Assistance, emergency braking
29, 64
Audible warning
28
Audio streaming (Bluetooth)
173–174
Audio system
134
B
Battery 45
Battery, 12 V
111–112, 102
Battery, ancillaries
102
Blind spot sensors
61
BlueHDi
14, 83
Bluetooth (hands-free)
137, 177–178
Bluetooth (telephone)
137, 177–178
Bodywork
89
Bonnet
79
Brake discs
85
Brakes
85
Braking, automatic emergency
90–92
Brightness
8
Bulbs (changing)
97
Bulbs (changing, type)
97
C
Cable, audio 136, 145
Cable, Jack
136, 145
Capacity, fuel tank
68
Care of the bodywork
89
CCS (Combined Charging System)
74
CD
145
CD, MP3
145
Centre console
4
Changing a bulb
97
Changing a fuse
101
Changing to free-wheeling
105
Charging cable (Electric) 71
Charging connector (Electric)
70, 101–103
Charging flap (Electric)
70, 101–103
Charging system (Electric)
5, 6, 69
Charging the traction battery
(Electric)
69, 101–103
Checking the levels
109–111
Checks
111 – 11 3
Checks, routine
111 – 11 3
Children
33
Child seats
33, 63–65
Cigar lighter
35
Cleaning (advice)
70, 116–117
Collision Risk Alert
90–92
Configuration, vehicle
15, 21
Container, AdBlue®
87
Control, heated seats
19
Control stalk, lighting
23
Control stalk, wipers
26
Control unit
71
Courtesy lamp, front
43–46
Courtesy lamp, rear
36
Courtesy lamps
36
Cruise control
85–86
D
DAB (Digital Audio Broadcasting) -
Digital radio
144
Dashboard
4
Daytime running lamps, LED
23
Page 193 of 212

191
Alphabetical index
Deactivating the passenger airbag 34, 37
Dimensions
11 3
Dipstick
81
Direction indicators
23
Display screen, instrument panel
8, 47
Domestic charging (Electric)
102–103
Drive selector (Electric)
47
Driving
69–70
Driving aids camera (warnings)
53
Driving aids (recommendations)
52
Driving economically
6
DSC
29
Dynamic stability control (DSC)
57–58
E
EBA 29
EBFD
29
Eco-driving (advice)
6
Electric motor
5, 6, 8, 69, 76,
81, 102, 105, 109
Electric windows
18
Electronic brake force distribution (EBFD)
29
Emergency warning lamps
28
Emissions control system, SCR
86
Engine compartment
108–109
Engine, Diesel
69, 80, 108
Engines
135–136
Environment
6, 42
ESP/ASR
30
F
Filling the AdBlue® tank 83, 87
Filling the fuel tank
68
Filter, air
84
Filter, Diesel fuel
85
Filter, oil
84
Filter, particle
84
Filter, passenger compartment
23, 84
Fittings, front
43–46
Fittings, interior
43–46
Flap, fuel filler
68
Flashing indicators
23
Fluid, brake
110–111
Fluid, engine coolant
110–111
Fluid, power steering
110–111
Foglamps, front
23
Foglamps, rear
23
Front doors
16
Fuel
6, 69
Fuel consumption
6
Fuel tank
68
Fuses
101
G
Gauge, fuel 68
Gearbox, manual
47, 49, 85
Glove box
43–45
H
Hazard warning lamps 28
Headlamp flash
23
Headlamps, dipped beam
23
Headlamps, main beam
23
Head restraints, front
18
Heating
35–36
Heating, additional
39–40
High voltage
69
Hill Descent Control
31
Hill start assist
77–78
Horn
28
I
Immobiliser, electronic 43
Indicator, coolant temperature
14
Indicator, engine oil level
13
Indicators, direction
23
Inflating tyres
85
Information, vehicle
151, 159
Infrared camera
53
Instrument panel
53
Instruments and controls
4
Intelligent Traction Control
31
J
Jack 136, 145
Page 194 of 212
192
Alphabetical index
K
Key with remote control 43
Kit, hands-free
137, 177–178
L
Lane Departure Warning System
(LDWS)
87–88
Level, AdBlue®
83
Level, brake fluid
82
Level, engine coolant
14, 82
Level, engine oil
81
Level, heating system fluid
83
Level, power steering fluid
82
Levels
110–111
Levels and checks
109–111
Lighting dimmer
8
Low fuel level
68
Lumbar
18
M
Mains socket (domestic network) 71
Maintenance (advice)
70, 88
Maintenance, routine
53, 83
Manoeuvring aids (recommendations)
52
Mat
53
Menu
15, 171–172, 146, 149, 151
Menus (audio)
171–172
Mirror, rear view 8
Mirrors, door
22, 61
Motor, electric
81, 109
O
Oil change 81
Oil consumption
81
OIl, engine
109–111
On-board tools
119–124
Opening the bonnet
79
Overhead storage
43–46
P
Pads, brake 85
Paint
89
Parking brake
46, 85
Pedestrian horn (Electric)
29, 42
Player, USB
163–164, 172–173
Port, USB
163–164, 172–173
Power indicator (Electric)
6
Pressures, tyres
85
Pre-tensioning seat belts
33
Protecting children
62–65
Public fast charging station
71
R
Radar (warnings) 53
Radio
135, 143, 145
Radio, digital (Digital Audio
Broadcasting - DAB)
144
Range, AdBlue®
14–15, 83
Recharging the traction battery
(Electric)
69, 101–103
Recovery
104
Regeneration of the particle filter
84
Remote control
13
Replacing bulbs
97
Replacing fuses
101
Replacing the air filter
84
Replacing the oil filter
84
Replacing the passenger compartment filter
84
Resetting the service indicator
13
Reversing camera
53
S
Safety, children 62–65
Screen, colour
143
Screen menu map
171–172, 146, 149, 151
Screenwash fluid
110–111
SCR (Selective Catalytic Reduction)
86
Seat belts
60–61
Seat belts, rear
33
Seats, heated
19
Seats, rear
36
Page 195 of 212
193
Alphabetical index
Sensors (warnings) 53
Service indicator
13
Servicing
13, 83
Settings, equipment
15, 21
Sidelamps
23
Silent vehicle warning sound (Electric)
29, 42
Snow chains
103–104
Socket, auxiliary
136, 145
Socket, Jack
136, 145
Sockets, auxiliary
43–45
Speed limiter
83–84
Speed limit recognition
82–83
Speedometer
53
Stability control (ESC)
29
Stability control (ESP)
30
Starting a Diesel engine
69
Station, radio
135, 143
Steering mounted controls, audio
134, 142
Steering wheel adjustment
21
Stickers, customising ~ Stickers,
expressive
89
Stop & Start
23, 31, 26, 33, 76–77, 79, 84, 104
Storage
43–45
Sunshine sensor
23
Super-fast charging (Electric)
102–103, 109
T
Tables of engines 136–137
Table, writing
43–45
Tank, fuel
68
Technical data 136–137
Telephone
137, 177–178
Temperature, coolant
14
Tools
119–124
Topping-up AdBlue®
87
Touch screen
141, 156
Touch screen audio-telematic system
141, 156
Towball, quickly detachable
104–106
Towbar with quickly detachable
towball
104–106
Towed loads
107
Towing another vehicle
104
Traction battery (Electric)
97–98, 109
Traction control (ASR)
57–58
Traffic information (TA)
135
Trip computer
22
Type of bulbs
97
Tyres
85
Tyre under-inflation detection
78–79
U
Under-inflation (detection) 78–79
USB
163–164, 172–173
V
Vehicle data recording and privacy 159
Ventilation
35–36
Voice commands
166–168, 180–182
W
Wallbox (Electric) 71
Warning and indicator lamps
9
Warning lamps
9
Warning lamp, seat belts
60–61
Warnings and indicators
9
Washing
53
Washing (advice)
70, 116–117
Weights
107
Wheel, spare
85, 119–124
Window controls
18
Wipers
26
Wipers, automatic rain sensitive
26